Chapter 5. Installing Windows SharePoint Services and Microsoft Office SharePoint Server 2007
IN THIS CHAPTER
- Examining SharePoint Installation Prerequisites
- Installing the SharePoint Server Operating System
- Installing the SharePoint Database Platform
- Installing Microsoft Office SharePoint Server 2007
- Installing Windows SharePoint Services 3.0
- Best Practices
After a SharePoint architecture has been established, the actual SharePoint infrastructure must be installed and servers must be deployed. For the most part, installation of SharePoint 2007 is straightforward, particularly with the free Windows SharePoint Services (WSS) 3.0 version. The full Microsoft Office SharePoint Server (MOSS) 2007 product, on the other hand, requires more thought and involves the installation of more components.
This chapter covers the specifics of how SharePoint 2007 is installed, including information on installing both WSS 3.0 and the full MOSS 2007 client. The examples outlined in this chapter assume a standard, single-server deployment for each product, but the concepts can be extended to multiserver farm deployments. Installation of the operating system and SQL database components are also covered in step-by-step detail.
It is recommended to review the design chapters (Chapters 2, “Planning and Architecting a SharePoint 2007 Deployment,” and 4, “Planning the SharePoint 2007 User Environment") before beginning installation of a production environment. However, installation of a SharePoint server for testing can be easily performed with only this chapter as a guide.
Examining SharePoint Installation Prerequisites
SharePoint 2007 products and technologies have specific prerequisites that must be satisfied before installation can begin. These prerequisites apply to both WSS 3.0 and MOSS 2007. Prerequisites are generally divided into hardware and software as follows:
Defining Hardware Prerequisites for SharePoint 2007
A typical SharePoint 2007 Web server should have the following hardware levels:
- 2.5GHz processor minimum (dual 3GHz recommended)
- 1GB RAM minimum (2GB recommended)
- DVD drive
- 3GB of free space for installation files
The move towards virtualization of servers has been gaining strength in recent years, and SharePoint web servers (nondatabase servers) are ideal candidates for virtualization. Microsoft directly supports virtualization of SharePoint web, index, and application servers in Virtual Server 2005 R2 Edition and gives best effort support to VMWare Server editions. Virtualizing the SharePoint server that houses the SQL databases for the application is not recommended, however.
The server that holds the SharePoint database, whether on the same box (an “all-in-one” server) or on a dedicated server or existing SQL implementation, should generally be designed toward the high level of the hardware scale because some of the most intensive activity is centralized on that server role. In addition, servers that process search and index functions for SharePoint are generally the most processor heavy, and hardware functionality should be allocated with this in mind.
Examining Software Requirements for SharePoint 2007
SharePoint 2007 requires the Windows Server 2003 operating system (with a minimal Service Pack of SP1) to run any of the server roles. There are multiple editions of Windows Server 2003 that will run SharePoint as follows:
WSS 3.0 and MOSS 2007 will support installation on the next generation of the Windows Server operating system, currently referred to as Windows Longhorn. Organizations looking to deploy SharePoint can also use the equivalent Longhorn server editions when they are released.
- Windows Server 2003 SP1 x32, Standard Edition
- Windows Server 2003 SP1 x64, Standard Edition
- Windows Server 2003 R2 x32, Standard Edition
- Windows Server 2003 R2 x64, Standard Edition
- Windows Server 2003 SP1 x32, Enterprise Edition
- Windows Server 2003 SP1 x64, Enterprise Edition
- Windows Server 2003 R2 x32, Enterprise Edition
- Windows Server 2003 R2 x64, Enterprise Edition
- Windows Server 2003 SP1 x32, Web Edition (supports only basic installation)
In addition, the Datacenter Edition versions of the software are supported, but would typically not be used as the operating system for SharePoint web servers. In advanced deployment scenarios, they might be used as the operating system for the SQL 2005 database servers, however.
The 64-bit versions of Windows Server 2003 are supported with 64-bit SQL Server 2005 or when deploying 64-bit SharePoint web servers.
For more information on deciding which version of the operating system to use with SharePoint, refer to Chapter 2.
Outlining Additional Prerequisites
In addition to the base operating system, SharePoint also requires several base components to be installed, including the following:
- Windows .NET Framework 3.0
- ASP.NET service
- Internet Information Services with WWW service
And, finally, a database for SharePoint 2007 is required. The following database versions are supported:
- SQL Server 2005 Enterprise and Standard Editions
- SQL Server 2000 SP3a+ Enterprise and Standard Editions
- SQL Server 2005 Express Edition ("light” version of SQL, 4GB maximum database size)
Information on installing each of these components is illustrated in later sections of this chapter.
Installing the SharePoint Server Operating System
After the edition of the server operating system has been chosen, it must be installed on the SharePoint server itself. As mentioned before, this step-by-step process assumes that a single, “all-in-one” SharePoint server will be set up and deployed.
The Windows Server 2003 operating system encompasses a myriad of new technologies and functionality, more than can be covered in this book. If additional reading on the capabilities of the operating system is required, the recommended reference is Windows Server 2003 R2 Edition Unleashed, from Sams Publishing (ISBN: 0672326167).
It is highly recommended to install SharePoint 2007 on a clean, freshly built operating system on a reformatted hard drive. If the server that will be used for SharePoint was previously running in a different capacity, the most secure and robust solution is to completely reinstall the operating system using the procedure outlined in this section.
Installing Windows Server 2003 Base OS
Installation of Windows Server 2003 is straightforward, and takes approximately 30 minutes to an hour to complete. The following step-by-step installation procedure illustrates the procedure for installation of standard Windows Server 2003 media. Many hardware manufacturers include special installation instructions and procedures that vary from the procedure outlined here, but the concepts are roughly the same. To install Windows Server 2003 Standard Edition, perform the following steps:
1. Insert the Windows Server 2003 Standard CD into the CD drive.
2. Power up the server and let it boot to the CD-ROM drive. If there is currently no operating system on the hard drive, it automatically boots into CD-ROM-based setup, as shown in Figure 5.1.
Figure 5.1. Running the CD-ROM–based Windows Server 2003 setup.

3. When prompted, press Enter to start setting up Windows.
4. In the Licensing Agreement screen, read the license and then press F8 if you agree to the license agreement.
5. Select the physical disk on which Windows will be installed. Choose between the available disks shown by using the up and down arrow keys. When the disk is selected, press Enter to install Windows Server 2003.
6. In the next screen, choose Format the Partition Using the NTFS File System by selecting it and clicking Enter to continue.
Following this step, Windows Server 2003 Setup begins formatting the hard drive and copying files to it. After a reboot and more automatic installation routines, the setup process continues with the Regional and Language Options screen as follows:
1. Review the regional and language options and click Next to continue.
2. Enter a name and organization into the Personalization screen and click Next to continue.
3. Enter the product key for Windows. This is typically on the CD case or part of the license agreement purchased from Microsoft. Note that the R2 edition requires an R2 product key. Click Next after the key is entered.
4. Select which licensing mode will be used on the server, either Per Server or Per Device, and click Next to continue.
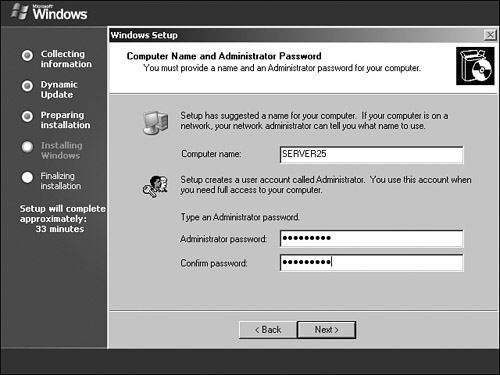
5. In the Computer Name and Administrator Password screen, enter a unique name for the server and type a cryptic password into the password fields, as shown in Figure 5.2. Click Next to continue.
Figure 5.2. Configuring the server name and administrator password.
6. Check the Date and Time Zone settings and click Next to continue.
The next screen to display is where networking settings can be configured. Setup allows for automatic configuration (Typical Settings) or manual configuration (Custom Settings) options. Selecting Custom Settings allows for each installed network interface card (NIC) to be configured with various options, such as static IP addresses and custom protocols. Selecting Typical Settings bypasses these steps, although they can easily be set later.
- To simplify the setup, select Typical Settings and click Next. Network settings should then be configured after the OS is installed.
- Select whether the server is to be a member of a domain or a workgroup member. For this demonstration, choose Workgroup.
- Click Next to continue.
Setup will then continue until the installation is complete and the login screen is displayed. Log in as the local administrator created during installation and patch the system with the latest service packs and critical updates.
Updating and Patching the Operating System
In addition to the patches that were installed as part of the Service Pack, security updates and patches are constantly being released by Microsoft. It is highly advantageous to install the critical updates made available by Microsoft for SharePoint, particularly when the server is first being built. These patches can be manually downloaded and installed, or they can be automatically applied by using the Microsoft Update service, as detailed in the following procedure:
1. While logged in as an account with local administrator privileges, click Start, All Programs, Microsoft Update.
If Microsoft Update has never been used, the Windows Update link will be available. After clicking it, it recommends clicking the link to install Microsoft Update instead. Using Microsoft Update to secure a SharePoint server is recommended because doing so identifies not only Windows patches but also SharePoint patches, SQL patches, and other Microsoft product patches. This step-by-step procedure assumes that Microsoft Update is used.
2. Depending on the Internet Explorer security settings, Internet Explorer might display an information notice that indicates that Enhanced Security is turned on. Check the box labeled In the Future, Do Not Show This Message and click OK to continue.
3. At this point, Windows Microsoft Update might attempt to download and install the Windows Update control and will display a notification to that effect. Click Install to allow the control to install.
4. Depending on the version of Windows Microsoft Update currently available, the Windows Microsoft Update site might prompt for installation of the latest version of Windows Update software. If this is the case, click Install Now when prompted. If not, proceed with the installation.
The subsequent screen, shown in Figure 5.3, offers the option of performing an Express Install, which automatically chooses the critical security patches necessary and installs them, or a Custom Install, where the option to choose which particular patches—critical and noncritical—is offered. If more control over the patching process is required, the Custom Install option is preferred. For a quick-and-easy update process, Express Install is the way to go. To continue with the installation, perform the following steps:
- Click Express Install to begin the patching process.
- Depending on Internet Explorer settings, a prompt might appear that warns about sending information to trusted sites. Check the box labeled In the Future, Do Not Show This Message and click Yes. If the prompt does not appear, go to the next step.
- If updates are available, they are listed under High Priority Updates. Click the Install button to install the patches.
- Microsoft Update then downloads and installs the updates automatically. After completion, click Close.
- Close the Internet Explorer window.
Figure 5.3. Running Windows Microsoft Update.

Running Microsoft Update on an ongoing basis as part of a maintenance plan is a wise idea for keeping the server up to date with the most recent patches and fixes. For production servers, however, it is advisable to initially test those patches in a lab environment when possible. In addition, although enabling Automatic Updates to perform this function might seem ideal, automatically installing any updates on a running server is not recommended, particularly a security-based server.
Installing the SharePoint Database Platform
The SharePoint databases need to reside in a SQL Server implementation. The version of SQL must be either SQL Server 2000 SP3a or higher, or SQL Server 2005. The SQL server component can either reside on a separate server, or it can be installed on the SharePoint server itself, for smaller, single-server deployments.
For Windows SharePoint Services–only deployments and for those organizations that will not use SharePoint for more than a small amount of data, the full SQL product is not necessary, and the lighter version of SQL Server, known as SQL Server Express and previously called MSDE, can be used instead. It is important to think through the decision of which database to use in advance of installation. For more information on the differences between database models and which ones to use, refer to Chapter 2.
This chapter assumes that the full SQL Server 2005 product will be installed on a single SharePoint all-in-one server. Installation steps are subsequently illustrated for this scenario. If choosing to install only Windows SharePoint Services 3.0, this section can be skipped and you can proceed directly to the section of this chapter titled “Installing Windows SharePoint Services 3.0.”
Installing the Prerequisite IIS Admin Tool
Before all the SQL Server 2005 management components can be installed, the IIS Admin tool must be installed on the server. To install the IIS Admin tool, perform the following steps:
1. Click Start, Control Panel, Add or Remove Programs.
2. From the Add or Remove Programs dialog box, click the Add/Remove Windows Components button.
3. Select Application Server by clicking the name (do not check the box) and then click the Details button.
4. Select Internet Information Services (IIS) by selecting the name (do not check the box) and click the Details button.
5. Check the box next to Internet Information Services Manager, as shown in Figure 5.4. Note that Common Files will be automatically selected as well.
Figure 5.4. Installing the IIS Admin tool.

6. Click OK, OK, and Next.
7. Enter the CD-ROM or specify the location of the i386 files if prompted. Click Finish.
After installation of the IIS Admin tool component, SQL Server 2005 setup can proceed.
Installing SQL Server 2005
1. Under Install, click the link for Server components, tools, Books Online, and samples.
2. In the Licensing Agreement screen, check the box and click Next to continue.
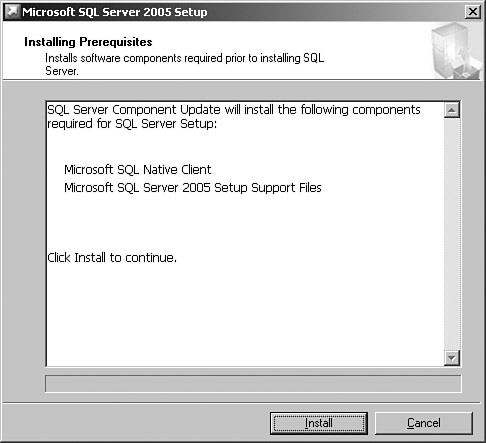
3. In the Prerequisite Installation screen, shown in Figure 5.5, click Install to install the necessary client and support files.
Figure 5.5. Installing SQL 2005 prerequisite files.
4. Click Next after the client piece has been installed.
5. Setup then invokes the Server Installation Wizard. Click Next at the welcome screen.
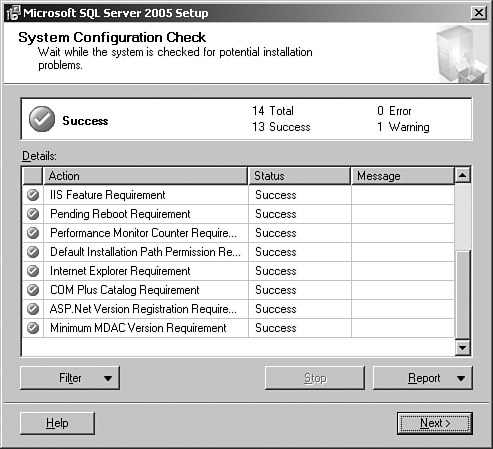
6. The Server Installation Wizard performs a configuration check in which necessary prerequisites are checked in advance. The results of that check will look similar to what is shown in Figure 5.6. Review the check and click Next to continue.
Figure 5.6. Completing the SQL 2005 prerequisite check.
7. Enter a valid name, company, and a product ID key into the subsequent dialog box. Click Next to continue.
8. Under the subsequent dialog box, shown in Figure 5.7, you have the option of choosing which SQL database components will be installed on the server. Taking in mind the previous discussion in this chapter about the various components of SQL and which ones are needed, check the boxes that will be installed. At a minimum, you will need to check SQL Server Database Services. Click Next to continue.
Figure 5.7. Installing SQL database components.

9. Provide a name for the SQL instance that will be installed. Normally, the default instance is chosen. Click Next to continue.
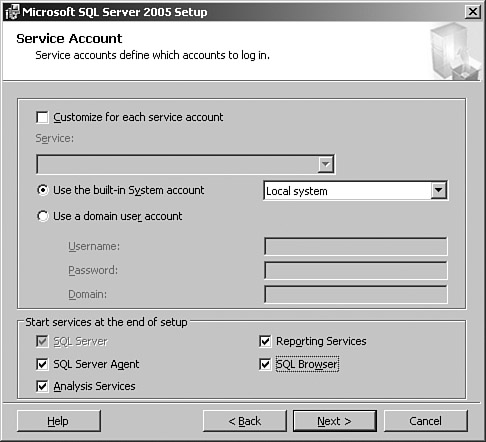
10. In the Service Account dialog box, shown in Figure 5.8, select to use the built-in System Account. In addition, select to start all the services. Click Next to continue.
Figure 5.8. Selecting service account settings.
11. Select the authentication mode to use; normally, this is Windows Authentication mode. Click Next to continue.
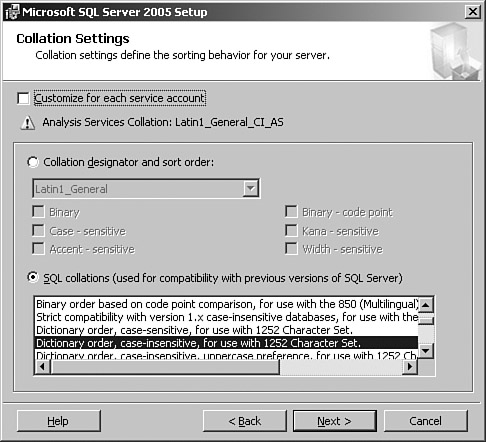
12. Under Collation Settings, shown in Figure 5.9, leave the default at SQL collations and click Next to continue.
Figure 5.9. Selecting collation settings.
13. If the Report Server component was chosen for installation in the earlier dialog box, you will be prompted with a dialog box specifying how to install the report server instance. Normally, choose to install using the default configuration and click Next.
14. Under Error and Usage Report settings, select whether to send usage data and error reports to Microsoft automatically. Click Next to continue.
15. In the Ready to Install dialog box, click Install after reviewing the settings to be installed.
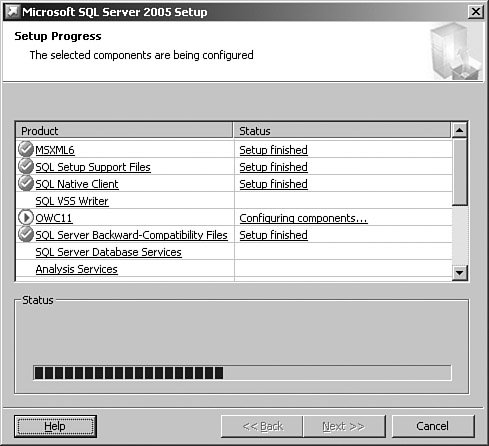
16. Setup progress can be viewed in the dialog box shown in Figure 5.10 while SQL is being installed. When all components show a status of Setup finished, click Next to continue.
Figure 5.10. Viewing SQL setup progress.
17. Review the setup log and click Finish.
Post-installation tasks should be conducted after SQL Server 2005 has been installed. Some post-installation tasks validate whether the installation was successful, whereas other tasks are required to ensure that the server is secure and operational. The post-installation tasks include the following:
- Review installation logs
- Review event logs
- Obtain and apply the latest SQL Server Service Packs and Critical Updates
- Verify server components installed
- Secure installation with SQL Server configuration tools, such as SQL Server Surface Area Configuration and SQL Server Configuration Manager
It is also critical to rerun Microsoft Update to apply any necessary SQL Server 2005 patches. This includes the highly recommended Service Pack 1 for SQL 2005. Running Microsoft Update will display the patches necessary for SQL.
Remember to use Microsoft Update not the default, Windows Update, because only Microsoft Update will detect the non-Windows patches, including SQL Server and SharePoint patches.
Installing Microsoft Office SharePoint Server 2007
The full Microsoft Office SharePoint Server 2007 product is a complex program that requires several operating system updates to install properly. This includes the 3.0 version of the .NET Framework, ASP.NET, and the WWW service. In addition, if incoming email will be directed to the server (for email-enabled distribution lists and discussion groups), the SMTP service is required for the server. Subsequently, to start the installation process for MOSS 2007, the prerequisite services must be installed.
If installing only the WSS 3.0 component, and not the full MOSS 2007 product, this section can be skipped and you can proceed directly to the section of this chapter entitled “Installing Windows SharePoint Services 3.0.”
Installing SharePoint 2007 IIS Prerequisites
As previously mentioned, SharePoint requires the use of Windows Server 2003’s Internet Information Services application, and specifically needs the WWW and ASP.NET services to be installed. After the .NET Framework 3.0 has been installed, these services can then be added via the following process:
1. Click Start, Control Panel, Add or Remove Programs.
2. In the Add or Remove Programs dialog box, click the Add/Remove Windows Components button.
3. Select Application Server by clicking the name (do not check the box) and then click the Details button.
4. Check the box next to ASP.NET, as shown in Figure 5.11. Selecting this box will automatically select the WWW service under the details of the IIS component. Click OK and Next.
Figure 5.11. Installing SharePoint prerequisites.

5. Click OK, OK, and Next.
6. Enter the CD-ROM or specify the location of the i386 files if prompted. Click Finish.
Installing .NET Framework 3.0
To satisfy SharePoint installation prerequisites, the 3.0 version of the .NET Framework must be downloaded and installed on the SharePoint web server. The download URL for the product is as follows:
Or simply go to http://www.microsoft.com/downloads and search for .NET Framework 3.0. To install the .NET Framework 3.0, do the following:
1. Run the downloaded setup program for .NET Framework 3.0.
2. In the License Agreement dialog box, shown in Figure 5.12, select that you accept the terms and click Install.
Figure 5.12. Installing the .NET Framework 3.0 package.

3. The .NET Framework will begin to install itself in the system tray; you can view the progress by clicking the system tray. Click Exit when the install process finishes.
4. Be sure to run Microsoft Update again after installation to check for any updates or security patches for the software.
It has been observed that if the .NET Framework 3.0 service is installed before the WWW and ASP.NET services are added to the server, an error might occur during MOSS/WSS Setup that states that ASP.NET v2.0 must be set to Allow in the list of IIS Web Server Extensions. If this happens, reinstalling the .NET Framework 3.0 package through the Add/Remove Programs applet in the control panel should fix the problem.
Installing the MOSS 2007 Package
After all prerequisites have been satisfied, the MOSS 2007 software can be installed via the following process:
1. Run the setup executable from the SharePoint 2007 Install media.
2. When prompted, enter a valid product ID key and click Continue.
3. Accept the terms of the license agreement and click Continue.
4. Click Advanced for the type of installation desired.
A Basic installation assumes that SharePoint will be set up with default options and will use a local SQL Server Express database instead of a full SQL Server 2000/2005 database instance.
5. In the Server Type dialog box, shown in Figure 5.13, select what type of installation will be performed. In this example, because we are installing a single SharePoint server and will attach to a SQL Server installation, we select Complete. Click Install Now.
Figure 5.13. Installing a complete SharePoint implementation.

The wizard then installs the SharePoint program files. After installing them, the wizard invokes the SharePoint Products and Technologies Configuration Wizard, which allows you to configure necessary content databases, web applications, and the specifics of the SharePoint environment. The Configuration Wizard can be used to complete a MOSS 2007 installation through the following process:
1. From the Wizard Completion screen, keep the check box checked to invoke the Configuration Wizard and click the Close button.
2. In the Welcome dialog box for the SharePoint Products and Technologies Configuration Wizard, click Next to continue.
3. Click Yes when prompted that services will be restarted during the process.
4. In the subsequent dialog box about connecting to an existing farm, select No, I Want to Create a New Server Farm and click Next to continue.
5. In the Specific Configuration Database Settings dialog box, shown in Figure 5.14, enter the name of the SQL database server (in this example, the same server where SharePoint is being installed). Leave the database name at the default. Enter an account with access to the database and a password. This account is often a dedicated service account created for this task. Click Next to continue.
Figure 5.14. Specifying configuration database settings.

6. In the subsequent dialog box, shown in Figure 5.15, you have the ability to configure which port the SharePoint Central Administration IIS website will use, as well as what type of security will be used for the IIS website. In this example, leave the security settings at NTLM. Click Next to continue.
Figure 5.15. Configuring SharePoint authentication.

Kerberos authentication is the preferred method of authentication security and should be used when possible. However, it does require a more complicated configuration, involving a service principal name (SPN) to be created and additional configuration to be performed in the Active Directory forest. For ease of installation, this chapter assumes that the down-level NTLM authentication is used instead, however.
7. At the Review dialog box, look over the settings and then click Next to apply them.
8. When the configuration is complete, click the Finish button.
After installation, the SharePoint Central Administration tool, shown in Figure 5.16, is invoked. This tool can be used for the final steps of a SharePoint server setup, such as adding server roles and deploying the first web applications.
Figure 5.16. Using the SharePoint Central Admin tool.

The Home tab of the SharePoint Central Admin tool contains a task list, which can be useful as a reminder of the steps that must be performed to complete configuration of the SharePoint environment. Some of those tasks are as follows:
- Deployment instructions—Clicking the Deployment Instructions link displays a list of tasks and instructions that must be done to the server. It is useful to review this list before configuration.
- Add servers to farm—The first task that should be performed after installation is to install and add all SharePoint servers that will be used as part of the farm. After all servers have been added, you can proceed to the next step.
- Assign services to servers—The second task, after all servers have been installed into the farm, is to assign the particular services that the servers will assume. For example, a specific server might run Excel services, and another may run the Search and Index services. For a single-server installation, all services can be assigned to the server.
- Configure server farm’s shared services—All installations of MOSS 2007 require a Shared Services Provider (SSP) to be created before content databases can be provisions. The SSP controls My Site hosting, search/indexing, user profiles, targeted content with audiences, usage reports, Excel services, and Business Data Catalog configuration. Even single server MOSS implementations require an SSP to be created.
From the SharePoint Central Admin tool, a sequence of tasks must be performed before SharePoint web functionality will be enabled. The following sections detail how to deploy a single server with a standard, single website for SharePoint. Using these same concepts, a more complex design can be provisioned as necessary.
Configuring Services on the Server
The first step from the SharePoint Central Admin tool is to configure the services that the server will perform. The following step-by-step sequence configures all services on a server:
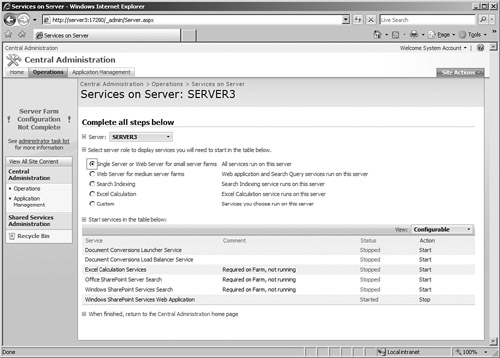
1. From the SharePoint Central Administration tool (Start, All Programs, Administrative Tools, SharePoint Central Administration), click the Operations tab.
2. In the Topology and Services section, click the link for Services on Server.
3. In the Services for Server dialog box, select that this server is a single server or web server for small server farms, as shown in Figure 5.17.
Figure 5.17. Installing services on the server.
4. Under the Action tab of the services, click Start for each one of the services. Perform the following actions for each one of the services listed here:
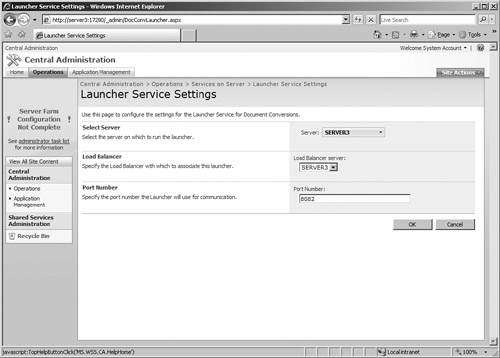
• Document Conversions Launcher service—After clicking Start and getting the Launcher Service Settings dialog box, shown in Figure 5.18, select the server to run the launcher and select the Load Balancer server from the drop-down box. Click OK.
Figure 5.18. Enabling the Document Conversions Launcher service on the server.
• Document Conversions Load Balancer service—This service provides for load balancing for the document conversion service. Simply clicking Start will start this service.
• Excel Calculation Services—This service runs the powerful Excel Calculation Services application. Simply clicking Start will start the service.
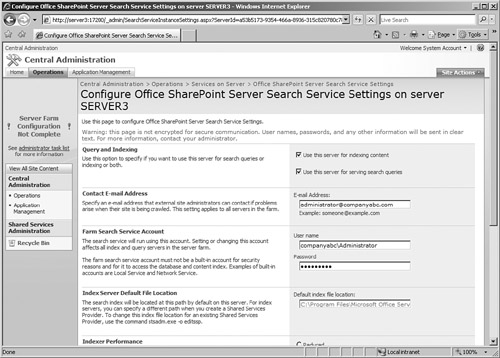
• Office SharePoint Server Search—This service controls search capabilities across all SharePoint Sites. After clicking Start and getting the page for configuring search shown in Figure 5.19, do the following: Check the boxes to use this server for indexing and to use this server for serving search queries. Enter an email address, username, and password for the contact info and service account info. Leave performance and crawling settings at the defaults and click Start.
Figure 5.19. Enabling MOSS search settings on the server.
- Windows SharePoint Services Search—This service controls search across WSS site collections. Clicking Start invokes the page shown in Figure 5.20. After clicking Start, enter a username and password for both the service account and content access account. Leave the database and indexing schedule at the defaults and click Start.
Figure 5.20. Enabling WSS search settings on the server.

- Windows SharePoint Services web application—This service simply allows SharePoint web applications to run on the server. It should already be started by default.
Create the First Web Application
After all services have been enabled on the server, the actual web application that will house SharePoint can be set up. A web application is an IIS construct that actually displays SharePoint data to clients. For example, a web application can be set up for sp.companyabc.com and another that points to a separate set of data within SharePoint can be set up for externalpartners.companyabc.com.
To set up the first web application on a SharePoint server, do the following:
1. From the SharePoint Central Admin tool, click the Application Management tab.
2. Click the link for Create or Extend Web Application on the SharePoint Web Application Management section of the page.
3. At the Create or Extend Web Application page, click the Create a New Web Application link.
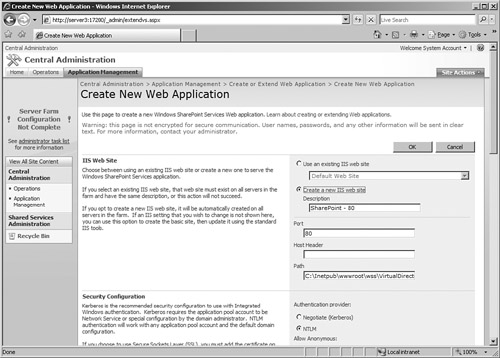
4. From the Create New Web Application page, shown in Figure 5.21, review the settings. Under Application pool, choose Specify under the security account and enter the SharePoint service account information. In this example, all other settings are left at their default values. Click OK to continue.
Figure 5.21. Creating a web application.
5. After the web application has been created, IIS must be restarted. You can restart it by typing iisreset /noforce at the command prompt.
Configuring Secure Sockets Layer (SSL) encryption for a web application can be incorporated into the deployment of SharePoint to secure the transmission of data across mediums like the Internet. Using SSL with SharePoint is described in more detail in Chapter 20, “Providing Secured Remote Access to SharePoint Using ISA Server 2006.”
Configuring Farm Shared Services
After creating the web application, a Shared Services Provider must be created. As mentioned previously, an SSP is required for all MOSS farms, regardless of size, because it is the mechanism that controls multiple services that are shared across farm members. To create an SSP, do the following:
1. From the Application Management tab of the SharePoint Central Admin tool, click the Create or Configure This Farm’s Shared Services link.
2. On the Manage this Farm’s Shared Services page, click New SSP.
3. On the New Shared Services Provider page, shown in Figure 5.22, enter a name for the SSP, and then select the web application from the drop-down box. The Web Application will be the same one that was created in the previous step, such as “SharePoint – 80.”
Figure 5.22. Setting up an SSP.

4. For the My Site Location field, select a web application. In this example, the same web application is chosen. Enter a relative URL, such as /mysites, for the My Sites location.
In most cases, it makes sense to install the My Sites location on a separate web application so it can be backed up independently of the SSP. In this example, a single web application is shown for simplicity, however.
5. Enter a username and password for the Shared Service Provider account. In this example, leave the rest of the items at the default setting and click OK.
6. Click OK at the success page.
Creating the First Site Collection
After the SSP is created, the first site collection can be generated. This will create the actual SharePoint web presence, where users can save documents, create wikis, blogs, and otherwise work within the SharePoint environment. To create a single site collection at the root of the web application, do the following:
1. From the SharePoint Central Admin tool, select the Application Management tab.
2. Click the link for Create Site Collection under SharePoint Site Management.
3. In the Create Site Collection page, shown in Figure 5.23, enter a title for the site and select a template to use. Multiple templates exist, from team sites, to enterprise portals. You must also enter the username of the primary site collection administrator. Click OK when complete.
Figure 5.23. Creating a Web Application.

4. Click OK when the site is completed.
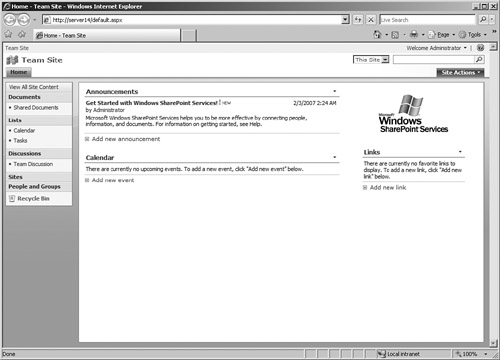
After completion, you can visit the site by going to the root of the server using a web browser, as shown in Figure 5.24. After these procedures, a single site collection will be set up and installed and you can begin the process of populating the site with data.
Figure 5.24. Visiting a newly created MOSS 2007 site.

Installing Windows SharePoint Services 3.0
Installation of Windows SharePoint Services 3.0 is made to be a much more straightforward process than MOSS 2007 installation because the feature set is not as rich and less customization is required. WSS 3.0 is meant to be a free add-on to those licensed with Windows Server 2003, and is subsequently very easily installed as a service. That said, the same prerequisite tasks that must be satisfied before WSS can be installed.
Performing WSS Prerequisite Tasks
WSS 3.0 requires the same application prerequisites as MOSS 2007, including the following components:
- Windows .NET Framework 3.0
- ASP.NET service
- Internet Information Services with WWW service
The WSS database is supported to use an existing full SQL Server database, but most WSS implementations will use the “light” version of SQL (SQL Server 2005 Express) that comes with the WSS binaries.
Installing WSS 3.0 on a Single Server
To install WSS 3.0 with the default, SQL Server 2005 Express database, perform the following steps on the server:
WSS 3.0 must be installed on a separate server from any other MOSS 2007 components. MOSS 2007 actually installs on top of WSS 3.0 components, so conflicts would arise if they were installed on the same system.
1. Double-click the downloaded executable to start the installation process.
2. At the License Terms dialog box, check the box to accept the agreement and click Continue.
3. Click Basic to install the default settings.
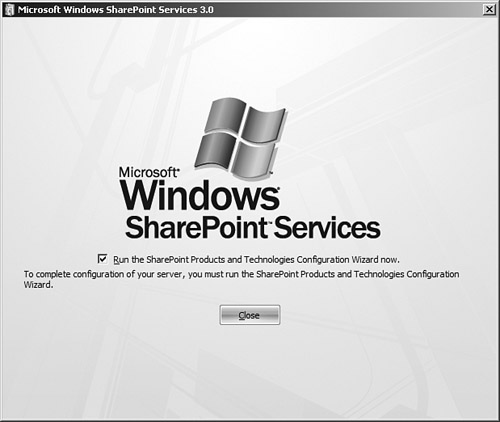
4. When the installation is complete, keep the box checked for invoking the Configuration Wizard, as shown in Figure 5.25, and click Close.
Figure 5.25. Installing WSS 3.0.
5. At the SharePoint Products and Technologies Configuration Wizard, click Next to start.
6. Click Yes when prompted that services might be restarted.
7. Unlike with the MOSS 2007 Configuration Wizard, nearly all portions of the WSS 3.0 Configuration Wizard are automated. The wizard will proceed with the installation, as shown in Figure 5.26. When complete, click Finish to close the wizard.
Figure 5.26. Watching the WSS 3.0 installation process.

8. When it completes, the wizard automatically invokes the default WSS team site, similar to what is shown in Figure 5.27. This completes the WSS installation process.
Figure 5.27. Examining the WSS 3.0 default team site.
Summary
Installation of SharePoint 2007 products and technologies has been streamlined and is fairly straightforward, as long as necessary prerequisites are met and attention to detail is observed. With the proper precautions in place and the scenarios in this chapter followed, administrators can quickly take advantage to the advanced feature set available in either Windows SharePoint Services 3.0 or the full SharePoint Server 2007 product.
Best Practices
- Review Chapters 2 and 4 of this book before installing SharePoint 2007 into a production environment.
- Use the 2005 version of SQL Server when possible.
- Examine virtualization options for SharePoint Servers with products such as Virtual Server 2005 or VMWare, but do not virtualize the SQL Database server role server.
- Examine the deployment instructions in the SharePoint Central Admin tool before finalizing installation.
- Patch the operating system with all critical updates before installing SharePoint.
- If getting an ASP.NET 2.0 extensions error on installation, reinstall the .NET Framework 3.0 package.
- When possible, install the My Sites location onto its own web application while creating the Shared Services Provider.