
![]()
User and Permission Management
On Linux, a difference is made between processes that run in kernel mode and processes that run without full permissions to the operating system. In the first case, the user needs to be running as root for most of these commands to work. In the latter case, user accounts are required. This chapter explains how to set up user and group accounts and how, after setting them up, they can be granted access to specific resources on the server, using permissions. The following topics are covered in this chapter:
- Creating and Managing User Accounts
- Creating and Managing Group Accounts
- Configuring Base Linux Permissions
- Configuring Special Permissions
- Working with Access Control Lists
- Working with Attributes
Creating and Managing User Accounts
In this chapter, you’ll learn how to create and manage user accounts. Before diving into the details of user management, you’ll read how users are used in a Linux environment.
Users on Linux
On Linux, there are two ways to look at system security. There are privileged users, and there are unprivileged users. The default privileged user is root. This user account has full access to everything on a Linux server and is allowed to work in system space without restrictions. The root user account is meant to perform system administration tasks and should only be used for that. For all other tasks, an unprivileged user account should be used.
On a typical Linux environment, two kinds of user accounts exist. There are user accounts for the people that need to work on a server and who need limited access to the resources on that server. These user accounts typically have a password that is used for authenticating the user to the system. There are also system accounts that are used by the services the server is offering. Both user accounts share common properties, which are kept in the files /etc/passwd and /etc/shadow. Listing 4-1 shows the contents of the /etc/passwd file. Note that the actual usernames depend upon users added and software installed.
Listing 4-1. Partial Contents of the /etc/passwd User Configuration File
linux:~ # tail -n 10 /etc/passwd
rtkit:x:492:491:RealtimeKit:/proc:/bin/false
rpc:x:491:65534:user for rpcbind:/var/lib/empty:/sbin/nologin
pulse:x:490:490:Pulse...:/var/lib/pulseaudio:/sbin/nologin
statd:x:489:65534:NFS statd daemon:/var/lib/nfs:/sbin/nologin
postfix:x:51:51:Postfix Daemon:/var/spool/postfix:/bin/false
scard:x:488:488:Smart Card...:/var/run/pcscd:/usr/sbin/nologin
gdm:x:487:487:Gnome Display ... daemon:/var/lib/gdm:/bin/false
hacluster:x:90:90:heartbeat processes:/var/lib/heartbeat/cores/hacluster:/bin/bash
lighttpd:x:486:486:user for ...:/var/lib/lighttpd:/bin/false
linda:x:1000:100::/home/linda:/bin/bash
As you can see, to define a user account, different fields are used in /etc/passwd. The fields are separated from one another by a colon. Below is a summary of these fields, followed by a short description of their purpose.
- Username: This is a unique name for the user. Usernames are important to match a user to his password, which is stored separately in /etc/shadow (see next).
- Password: In the old days, the second field of /etc/passwd was used to store the hashes password of the user. Because the /etc/passwd file is readable by all users, this poses a security threat, and for that reason, on current Linux systems, the hashes passwords are stored in /etc/shadow (discussed in the next section).
- UID: Each user has a unique User ID (UID). This is a numeric ID, and values from 0 to 65535 can be used. It is the UID that really determines what a user can do; when permissions are set for a user, the UID is stored in the file metadata (and not the username). UID 0 is reserved for root, the unrestricted user account. The lower UIDs (typically up to 499) are used for system accounts, and the higher UIDs (from 1000 on SUSE by default) are reserved for people who need a secure working environment on a server.
- GID: On Linux, each user is a member of at least one group. This group is referred to as the primary group, and this group plays a central role in permissions management, as will be discussed later in this chapter.
- Comment field: The comment field, as you can guess, is used to add comments for user accounts. This field is optional, but it can be used to describe what a user account is created for. Some utilities, such as the obsolete finger utility, can be used to get information from this field. The field is also referred to as the GECOS field, which stands for General Electric Comprehensive Operating System, and had a specific purpose for identifying jobs in the early 1970s when General Electric was still an important manufacturer of servers.
- Directory: This is the initial directory in which the user is placed after logging in, also referred to as the home directory. If the user account is used by a person, this is where the person would store his personal files and programs. For a system user account, this is the environment where the service can store files it needs while operating.
- Shell: This is the program that is started after the user has successfully connected to a server. For most users this will be /bin/bash, the default Linux shell. For system user accounts, it will typically be a shell such as /usr/bin/false or /sbin/nologin, to make sure that if by accident an intruder would be capable of starting a shell, he won’t get access to the system environment.
A part of the user properties is kept in /etc/passwd, which was just discussed. Another part of the configuration of user properties is in /etc/shadow. Parameters in this file mostly refer to the user password. Typical for /etc/shadow is that no one except the superuser root has permission to access it, which makes sense, as it contains all the information that is required for connecting to a system. Listing 4-2 gives an overview of /etc/shadow fields.
Listing 4-2. Example Contents from /etc/shadow
linux:~ # tail -n 5 /etc/shadow
scard:!:16165::::::
gdm:!:16165::::::
hacluster:!:16168::::::
lighttpd:!:16168::::::
linda:$6$5mItSouz$Jkg5qdROahuN3nWJuIqUO/hXSdIwi9zjwpW2OL
   X3cWOHN.XWCP09jXNhDwSHdHRsNiWnV85Yju.:16171:0:99999:7:::
The following fields are used in /etc/shadow:
- Login name: Notice that /etc/shadow doesn’t contain any UIDs, but usernames only. This opens a possibility for multiple users using the same UID but different passwords.
- Encrypted password: This field contains all that is needed to store the password in a secure way. The first part of it ($6$ in the example) indicates the encryption algorithm used. The second part contains the “salt” that is used to send an authentication token to a user wishing to authenticate. The last part has the encrypted password itself.
- Days since Jan 1st 1970 that the password was last changed: Many things on Linux refer to Jan 1st 1970, which on Linux is considered the beginning of days. It is also referred to as “epoch.”
- Days before password may be changed: This allows system administrators to use a more strict password policy, whereby it is not possible to change back to the original password immediately after a password has been changed. Typically, this field is set to the value 0.
- Days after which password must be changed: This field contains the maximal validity period of passwords. Notice that by default, it is set to 99,999 (about 273 years).
- Days before password is to expire that user is warned: This field is used to warn a user when a forced password change is upcoming. Notice that the default is set to 7 (even if the password validity is set to 99,999 days!).
- Days after password expires that account is disabled: Use this field to enforce a password change. After password expiry, users can log in no longer.
- Days since Jan 1st 1970 that account is disabled: An administrator can set this field to disable an account. This is typically a better approach than removing an account, as all associated properties of the account will be kept, but it can be used no longer to authenticate on your server. An alternative would be to use userdel, which removes the user account but by default will keep the files the user has created.
- A reserved field: This will probably never be used.
Most of the password properties can be managed with the passwd or chage command, which are discussed later in this chapter.
Creating Users
There are many solutions for creating users on a Linux server. To start with, you can edit the contents of the /etc/passwd and /etc/shadow files directly (with the risk of making an error that could make logging in impossible to anyone). There’s also useradd (called adduser on some distributions) and on some distributions, there are fancy graphical utilities available. What utility is used doesn’t really matter, as the result will be the same anyway: a user account is added to the appropriate configuration files.
Modifying the Configuration Files
To add user accounts, it suffices that one line is added to /etc/passwd and another line is added to /etc/shadow, in which the user account and all of its properties are defined. It is not recommended, though. By making an error, you might mess up the consistency of the file and make logging in completely impossible to anyone. Also, you might encounter locking problems, if one administrator is trying to modify the file contents directly, while another administrator wants to write a modification with some tool.
If you insist on modifying the configuration files directly, you should use vipw. This command opens an editor interface on your configuration files, and more important, it sets the appropriate locks on the configuration files to prevent corruption. It does not, however, check syntax, so make sure you know what you’re doing, because by making a typo, you might still severely mess up your server. If you want to use this tool to make modifications to the /etc/shadow file, use vipw -s.
Using useradd
The useradd utility is probably the most common tool on Linux for managing users. It allows you to add a user account from the command line by using many of its parameters. Use, for instance, the command useradd -m -u 1201 -G sales,ops linda to create a user, linda, who is a member of the groups sales and ops, with UID 1201, and add a home directory to the user account as well.
Using YaST2
On SUSE, users can also be created with the YaST2 management tool. Type yast2 users to access the user management tool directly. The interface offers easy access to all the options that can be used while creating users. Figure 4-1 shows the default interface that YaST2 uses to add user accounts.

Figure 4-1. Adding users with YaST
YaST offers the options that are needed to add user accounts on four different tabs.
- User Data: Generic options to create the user account and set a password
- Details: More details, such as the default location of the user home directory and group membership
- Password Settings: Password-related settings that are stored in /etc/shadow
- Plug-Ins: Here, you can select additional user management plug-ins and configure additional properties. It offers, for instance, the Quota Manager plug-in, which allows you to set restrictions to the amount of files that users can create (needs support for quota on the file system; see Chapter 3 for more details on that).
Home Directories
Typically, users will have a home directory. For service accounts, the home directory is very specific. As an administrator, you’ll normally not change home directory–related settings for system accounts, as they are created automatically from the RPM post installation scripts when installing the related software packages. If you have people that need a user account, you probably do want to manage home directory contents a bit.
If when creating user accounts you tell your server to add a home directory as well (for instance, by using useradd -m), the contents of the “skeleton” directory is copied to the user home directory. The skeleton directory is /etc/skel, and it contains files that are copied to the user home directory at the moment this directory is created. These files will also get the appropriate permissions to make sure the new user can use and access them.
By default, the skeleton directory contains mostly configuration files, which determine how the user environment is set up. If, in your environment, specific files need to be present in the home directories of all users, you’ll take care of that by adding the files to the skeleton directory.
Managing User Properties
For changing user properties, the same rules apply as for creating user accounts. You can either work directly in the configuration files using vipw; you can use yast users for getting easy access to user properties; and you can use the command line.
The ultimate command line utility for modifying user properties is usermod. It can be used to set all properties of users as stored in /etc/passwd and /etc/shadow, plus some additional tasks, such as managing group membership. There’s just one task it doesn’t do well: setting passwords. Although usermod has an option, -p, which tells you to “use encrypted password for the new password,” it expects you to do the password encryption before adding the user account. That doesn’t make it particularly useful. If, as root, you want to change the user password, you’d better use the passwd command.
Configuration Files for User Management Defaults
When working with such tools as useradd, some default values are assumed. These default values are set in two configuration files: /etc/login.defs and /etc/default/useradd. Listing 4-3 shows the contents of /etc/default/useradd.
Listing 4-3. useradd Defaults in /etc/default/useradd
linux:~ # cat /etc/default/useradd
# useradd defaults file
GROUP=100
HOME=/home
INACTIVE=-1
EXPIRE=
SHELL=/bin/bash
SKEL=/etc/skel
CREATE_MAIL_SPOOL=yes
As can be seen from Listing 4-3, the /etc/default/useradd file contains some default values that are applied when using useradd.
In the file /etc/login.defs, different login-related variables are set. login.defs is used by different commands, and it relates to setting up the appropriate environment for new users. Following is a list of some of the most significant properties that can be set from /etc/login.defs:
- MOTD_FILE: Defines the file that is used as “message of the day” file. In this file, you can include messages to be displayed after the user has successfully logged in to the server.
- ENV_PATH: Defines the $PATH variable, a list of directories that should be searched for executable files after logging in
- PASS_MAX_DAYS, PASS_MIN_DAYS, and PASS_WARN_AGE: Define the default password expiration properties when creating new users
- UID_MIN: The first UID to use when creating new users
- CREATE_HOME: Indicates whether or not to create a home directory for new users
- USERGROUPS_ENAB: Set to “yes” to create a private group for all new users. That means that a new user has a group with the same name as the user as its default group. If set to “no,” all users are made a member of the group “users.”
Managing Password Properties
You have read about the password properties that can be set in /etc/shadow. There are two commands that you can use to change these properties for users: chage and passwd. The commands are rather straightforward; for instance, the command passwd -n 30 -w 3 -x 90 linda would set the password for user linda to a minimal usage period of 30 days and an expiry after 90 days, where a warning is generated 3 days before expiry.
Many of the tasks that can be accomplished with passwd can be done with chage also. For instance, use chage -E 2015-12-31 bob to have the account for user bob expire on December 31st of 2015. To see current password management settings, you can use chage –l (see Listing 4-4 for an example).
Listing 4-4. Showing Password Expiry Information with chage -l
linux:~ # chage -l linda
Last password change                                     : Apr 11, 2014
Password expires                                         : Jul 10, 2014
Password inactive                                        : never
Account expires                                          : never
Minimum number of days between password change           : 30
Maximum number of days between password change           : 90
Number of days of warning before password expires        : 3
Creating a User Environment
When a user logs in, an environment is created. The environment consists of some variables that determine how the user environment is used. One such variable, for instance, is $PATH, which defines a list of directories that should be searched when a user types a command.
To construct the user environment, a few files play a role.
- /etc/profile: Used for default settings for all users when starting a login shell
- /etc/bash.bashrc: Used to define defaults for all users when starting a subshell
- ~/.profile: Specific settings for one user, applied when starting a login shell
- ~/.bashrc: Specific settings for one user, applied when starting a subshell
When logging in, the files are read in this order, and variables and other settings that are defined in these files are applied. If a variable or setting occurs in more than one file, the last one wins.
EXERCISE 4-1. CREATING USER ACCOUNTS
In this exercise, you will apply common solutions to create user accounts.
- Type vim /etc/login.defs to open the configuration file /etc/login.defs and change a few parameters before you start creating logging. Look for the parameter CREATE_HOME and make sure it is set to “yes.” Also, set the parameter USERGROUPS_ENAB to “no,” which means that a new user is added to a group with the same name as the user and nothing else.
- Use cd /etc/skel to go to the /etc/skel directory. Type mkdir Pictures and mkdir Documents to add two default directories to all user home directories. Also, change the contents of the file .bashrc to include the line export EDITOR=/usr/bin/vim, which sets the default editor for tools that have to modify text files.
- Type useradd linda to create an account for user linda. Next, type id linda to verify that linda is a member of a group with the name linda and nothing else. Also, verify that the directories Pictures and Documents have been created in linda’s home directory.
- Use passwd linda to set a password for the user you’ve just created. Use the password password.
- Type passwd -n 30 -w 3 -x 90 linda to change the password properties. This has the password expire after 90 days (-x 90). Three days before expiry, the user will get a warning (-w 3), and the password has to be used for at least 30 days before (-n 30) it can be changed.
- Create a few more users—lisa, lori, and bob—using for i in lisa lori bob; do useradd $i; done.
Creating and Managing Group Accounts
Every Linux user has to be a member of at least one group. In this section, you’ll learn how to manage settings for Linux group accounts.
Understanding Linux Groups
Linux users can be members of two different kinds of groups. First, there is the primary group. Every user must be a member of a primary group, and there is only one primary group. When creating files, the primary group becomes group owner of these files. (File ownership is discussed in detail in the section “Understanding File Ownership,” later in this chapter.) Users can also access all files their primary group has access to.
Besides the mandatory primary group, users can be members of one or more secondary groups as well. Secondary groups are important for getting access to files. If the group a user is member of has access to specific files, the user will get access to these files also. Working with secondary groups is important, in particular in environments where Linux is used as a file server to allow people working for different departments to share files with one another.
Creating Groups
As is the case for creating users, there are also different options for creating groups. The group configuration files can be modified directly using vigr; the command line utility groupadd can be used; and graphical utilities are available, such as SUSE YaST. vi.
Creating Groups with vigr
With the vigr command, you open an editor interface directly on the /etc/group configuration file. In this file, groups are defined in four fields, per group (see Listing 4-5).
Listing 4-5. Example /etc/group Content
maildrop:x:59:postfix
scard:x:488:
ntadmin:x:71:
gdm:x:487:
haclient:x:90:
lighttpd:x:486:
sales:x:1000:linda,lisa
The following fields are used:
- group name: As is suggested by the name of the field, this contains the name of the group.
- group password: A feature that is hardly used anymore. A group password can be used by users who want to join the group on a temporary basis, so that access is allowed to files the group has access to.
- group ID: This is a unique numeric group identification number.
- members: In here, you find the names of users who are members of this group as a secondary group. Note that it does not show users who are members of this group as their primary group.
Using groupadd to Create Groups
Another method to create new groups is by using the groupadd command. This command is easy to use, just use groupadd, followed by the name of the group you want to add. There are some advanced options, but you’ll hardly ever use them.
Creating Groups with YaST
SUSE YaST also provides an easy-to-use interface that is accessible from the yast2 users module, which you can see in Figure 4-2. It allows you to add a new group by entering its name and selecting its members directly, as well.
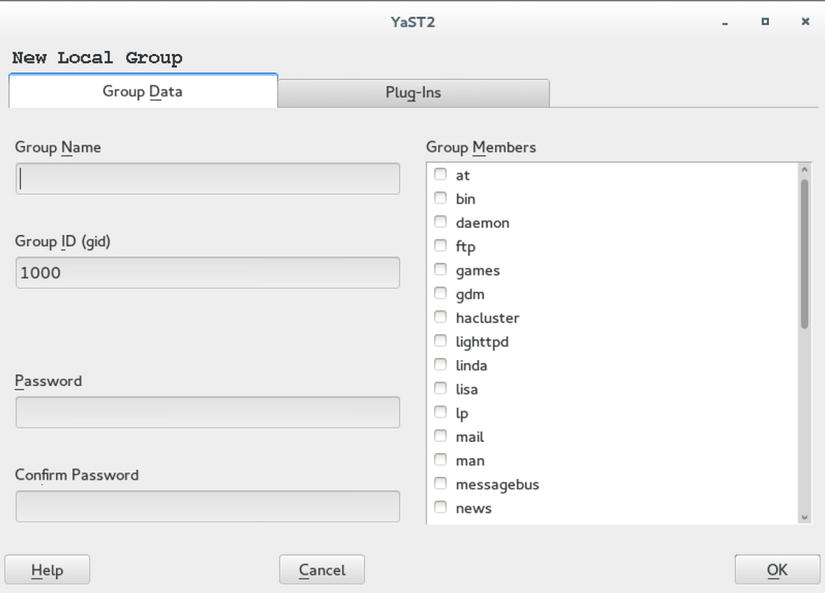
Figure 4-2. Adding groups from YaST
Managing Group Properties
To manage group properties, groupmod is available. You can use this command to change the name or Group ID of the group, but it doesn’t allow you to add group members. To do this, you’ll use usermod. As discussed before, usermod -aG will add users to new groups that will be used as their secondary group.
EXERCISE 4-2. WORKING WITH GROUPS
In this exercise, you’ll create two groups and add some users as members to these groups.
- Type groupadd sales, followed by groupadd account, to add groups with the names sales and account.
- Use usermod to add users linda and lisa to the group sales, and lori and bob to the group account, as follows:
usermod -aG sales linda
usermod -aG sales lisa
usermod -aG account lori
usermod -aG account bob - Type id linda to verify that user linda has correctly been added to the group sales. In the results of this command, you’ll see that linda is assigned to the group with gid=100(users). This is her primary group. With the groups parameter, all groups she is a member of as a secondary group are mentioned.
linux:~ # id linda
uid=1000(linda) gid=100(users) groups=1000(sales),100(users)
Configuring Base Linux Permissions
To determine which user can access which files, Linux uses permissions. Originally, a set of basic permissions was created, but over time, these didn’t suffice. Therefore, a set of special permissions was added. These didn’t seem to be enough either, and access control lists (ACLs) were added as well. Apart from these three solutions that relate to permissions, attributes can be used as well, to determine access to files and directories.
Understanding File Ownership
To understand file access security on Linux, you have to understand ownership. On Linux, each file has a user owner and a group owner. On each file, specific permissions are set for the user owner, the group owner, and “others,” which refers to all other users. You can display current ownership with the ls -l utility. Listing 4-6 shows ownership on the user home directories in /home. You can see the specific users set as owners of their directories, and the name of the group users that is set as group owner.
Listing 4-6. Showing File Ownership with ls -l
linux:/home # ls -l
total 0
drwxr-xr-x 1 bob   users 258 Apr 11 23:49 bob
drwxr-xr-x 1 linda users 224 Apr 11 10:50 linda
drwxr-xr-x 1 lisa  users 258 Apr 11 23:49 lisa
drwxr-xr-x 1 lori  users 258 Apr 11 23:49 lori
To determine which access a user has to a specific file or directory, Linux adheres to the following rules:
- If the user is owner of the file, apply related permissions and exit.
- If the user is member of the group that is group owner of the file, apply its permissions and exit.
- Apply the permissions assigned to “others.”
Note that in specific cases, this may lead to surprises. Imagine the unusual permission where user linda is owner as file and as owner has no permissions, but she’s also member of the group that is group owner, where the group owner has additional permissions to the file. In this case, she wouldn’t have any permissions, because only the first match applies. Linda is user owner and, therefore, group ownership becomes irrelevant.
Changing File Ownership
To change file ownership, an administrator can use the chown and chgrp commands. You can use chown to set user as well as group owners. With chgrp, only group ownership can be modified.
Setting user ownership with chown is easy, just type chown username filename. To set group ownership with chown, make sure the name of the group is preceded by a dot or colon: chown :sales myfile would make the group sales group owner of “myfile.” You can also use chown to set both user and group as group ownership to a file; chown linda:sales myfile would set user linda and group sales as the owners of myfile.
As an alternative to chown, you can use chgrp to change group ownership. The command chgrp sales myfile would do exactly the same as chown :sales myfile, which is setting the group sales as owner of myfile.
EXERCISE 4-3. CHANGING FILE OWNERSHIP
As a preparation for creating a directory structure that can be used in a shared group environment, this exercise shows you how to create the directories and set appropriate ownership.
- Type mkdir -p /data/sales /data/account to create two shared group directories. Note the use of the option -p, which makes sure the /data directory is created if it didn’t exist already.
- Set group ownership for both directories by typing chgrp sales /data/sales and chgrp account /data/account.
Note that because the names of the groups match the names of the directories, you could also use a simple bash scripting structure to set the appropriate owners. This works only if /data is the active directory: for i in *; do chgrp $i $i; done. You can read this as “for each element in *” (which is sales and account), put the name of this element in a variable with the name i, and use that variable in the chgrp command. Don’t worry if this looks too complicated at the moment, you’ll learn lots more about Bash shell scripting in Chapter 15.
Understanding Base Linux Permissions
Now that ownership is set, it’s time to take care of Linux permissions. There are three base Linux permissions, and they can be set on files as well as directories. Permissions can be changed by the user root and by the owner of the file. Table 4-1 gives an overview of these permissions.
Table 4-1. Base Permission Overview
Permission | Files | Directories |
|---|---|---|
read | open the contents of the file | list the contents of the directory |
write | modify the contents of an existing file | add files or remove files from a directory |
execute | execute a file if it contains executable code | use cd to make the directory the active directory |
Even if this overview looks rather straightforward, there are a few things that are often misunderstood. Try, for instance, to answer the following question:
- The “others” entity has read and execute on the /data directory. Does that mean that any given user can read contents of files in that directory?
- User root places a file in the home directory of user linda. User linda has read permissions only to that file. Can she remove it?
The answer to the first question is no. To determine if a user has read access to a file, the permissions on that file matter, and nothing else. Linux would first see if the user is owner and then if the user is a member of the group owner, and if neither is the case, Linux would apply the permissions assigned to “others.” The fact that the user as part of “others” has read rights on the directory doesn’t mean anything for what the user can do on the file.
The second question is answered wrongly by many. The important fact is that the file is in the home directory of user linda. Users normally have write permissions on their home directory, and this allows them to add and delete files in that directory. So, the fact that user linda cannot read the contents of the file doesn’t matter. It’s her home directory, so she will be allowed to remove it.
Applying Base Linux Permissions
Now that you understand a bit about permissions, let’s see how they are applied. To set permissions on a directory, the chmod command is used. chmod can be used in absolute mode and in relative mode. In absolute mode, numbers are used to specify which permissions have to be set: read = 4, write = 2, and execute = 1. You’ll specify for user, group, and others which permissions you want to assign. An example is chmod 764 myfile. In this command, user gets 7, group gets 6, and others get 4. To determine exactly what that means, you’ll now have to do some calculations: 7 = 4 + 2 + 1, so user gets read, write, and execute; 6 = 4 + 2, so group gets read and write; and 4 is just 4, so others get read.
Another way to apply permissions is by using the relative mode. This mode explains itself best by using two examples. Let’s start with chmod u=rwx,g-x,o+r myfile. In this command, you would set the user permissions to read, write, and execute; remove x from the current group permissions; and add read to the permissions for others. As you can see, this is not a particularly easy way to assign permissions. Relative mode is easy, though, if you just want to change file properties in general. Take, for instance, the command chmod +x myscript, which adds the execute permission to the myscript file to anyone. This is a fairly common way of assigning permissions in relative mode.
EXERCISE 4-4. ASSIGNING PERMISSIONS
In this exercise, we’ll build further on the directories and groups that were added in the previous exercises. You’ll make sure that the user and group owners have permissions to do anything in their relative group directories, while removing all permissions assigned to “others.”
- Use cd /data to make /data the current directory.
- Use chmod 770 * to set grant all permissions to user and group and none to others.
- Type ls -l to verify. The results should look as in Listing 4-7.
Listing 4-7. Directory Settings
linux:/data # ls -l
total 0
drwxr-xr-x 1 root account 0 Apr 12 00:03 account
drwxr-xr-x 1 root sales   0 Apr 12 00:03 sales
linux:/data # chmod 770 *
linux:/data # ls -l
total 0
drwxrwx--- 1 root account 0 Apr 12 00:03 account
drwxrwx--- 1 root sales   0 Apr 12 00:03 sales
Configuring Special Permissions
In some cases, the Linux base permissions cannot do all that is needed. That is why some special permissions have been added as well. They are called special permissions because they don’t make up part of your default permissions tool. On occasion, you will use them, though, in particular, the Set Group ID (SGID) permission on directories and Sticky bit on directories. Table 4-2 gives an overview of the special permissions and their use.
Table 4-2. Special Permissions Overview
Permission | Files | Directories |
|---|---|---|
SUID (4) | Execute with permissions of owner | - |
SGID (2) | Execute with permissions of group owner | Inherit group owner to newly created items below |
Sticky (1) | - | Allow deletion only for owner of the file or parent directory |
So, let’s discuss in some detail what these permissions are all about. The Set User ID (SUID) permission is a particularly dangerous but also very useful permission, in some cases. Normally, when a user executes a program, a subshell is started in which the program runs with the permissions of that user. If SUID is applied to a program file, the program runs with the permissions of the owner of the program file. This is useful in some cases, such as that of the passwd command that needs write access to /etc/shadow, which cannot even be read by ordinary users, but in most cases, it is a very dangerous permission. To be brief about it, even if you ever think about using it, just don’t. There are other options, in most cases. SUID has no use on directories.
![]() Tip As it opens good opportunities for potential evil-doers, the SUID permission is liked a lot by hackers. If a malicious program is installed that can access a shell environment with root permissions, the hacker would be able to take over your server completely. For that reason, it may be wise to periodically scan your server, to find out if any SUID permissions have been set that you don’t know about yet. To do this, run find / -perm /4000. If you do this on a regular basis, you’ll easily find files that have the SUID permission set but are not supposed to, by comparing with the output from when it was run previously.
Tip As it opens good opportunities for potential evil-doers, the SUID permission is liked a lot by hackers. If a malicious program is installed that can access a shell environment with root permissions, the hacker would be able to take over your server completely. For that reason, it may be wise to periodically scan your server, to find out if any SUID permissions have been set that you don’t know about yet. To do this, run find / -perm /4000. If you do this on a regular basis, you’ll easily find files that have the SUID permission set but are not supposed to, by comparing with the output from when it was run previously.
Applied to files, the same explanation goes for SGID as for SUID. Applied to directories, however, it is a very useful permission. If SGID is set on a directory, all items created in that directory will get the same group owner as the directory. This is very useful for shared group directories, because it allows for easy access to the files created in that directory.
The Sticky bit permission has no use on files. On directories, it ensures that items in that directory can only be deleted by the user who is owner, or the user who is owner of the parent directory. Sticky bit is also a useful permission on shared group directories, as it prevents users from deleting files that they haven’t created themselves.
To set the special permissions, you can use chmod. It works in either absolute or in relative mode. Absolute mode is a bit complicated, though; you’ll be adding a fourth digit, and you’ll have to make sure that permissions that were previously set are not overwritten by accident. Therefore, you’re probably better off using relative mode. Use the following commands to set these permissions:
- chmod u+s myfile: Set SUID on “myfile.”
- chmod g+s mydirectory: Set SGID on “mydirectory.”
- chmod +t mydirectory: Set Sticky bit on “mydirectory.”
If the special permissions are set to a file, you can see that using ls -l. In the original design of the output of ls -l, however, there is no place to show additional permissions. That is why the special permissions take the position where you can normally find the x for user, group, and others. If the special permission identifier is marked as an uppercase, it means that no execute permission is effective at that position. If it is marked as a lowercase, there is also an execute permission effective. The following examples show how it works:
- myfile has SUID but no execute: -rwSr--r-- myfile
- myfile has SUID and execute for user: -rwsr--r-- myfile
- myfile has SGID but not execute: -rw-r-Sr-- myfile
- myfile has SGID and execute for group: -rw-r-sr-- myfile
- myfile has Sticky bit but no execute: -rw-r--r-T myfile
- myfile has Sticky bit and execute for others: -rw-r--r-t myfile
EXERCISE 4-5. SETTING SPECIAL PERMISSONS
In this exercise, you’ll learn how to further define your shared group environment, by setting special permissions on the environment that you’ve created in previous exercises in this chapter.
- Use cd /data to go into the data directory.
- Type chmod -R g+s * to set the SGID permission on the current directories and all files and subdirectories that might exist in them.
- Type chmod -R +t * to apply Sticky bit as well.
- Use su - linda to take the identity of user linda.
- Use cd /data/sales, followed by touch linda, to create a file with the name “linda” in /data/sales.
- Type ls -l. It will show that group sales is group owner of the file.
- Type exit to go back to the root shell.
- Type su - lisa to take the identity of user lisa.
- From the /data/sales directory, type rm -f linda. You’ll get an access denied message, because the Sticky bit permission is set on the directory.
- Type touch lisa to create a file owned by lisa and type exit.
- Assuming that linda is the manager of the sales department, it makes sense to make her owner of the sales directory. Use chown linda /data/sales.
- Use su - linda to take the identity of user linda and type rm -f /data/sales/lisa. Because the owner of a directory may delete all files in that directory, there’s nothing preventing linda from removing the file that was created by lisa.
Working with Access Control Lists
Another extension to the original Linux permission scheme is made by access control lists. This section describes how to use them.
Understanding ACLs
By adding the special permissions, Linux permissions were already made a bit better. Some functionality was still missing, though, and that is why access control lists (ACLs) were added as a new option. Adding ACLs makes it possible to give permissions to more than one user or group on a file or directory, which is useful, if you want to give full control to a directory for one group, read-only access to another group, and no permissions at all to others.
ACLs also allow you to set permission inheritance, also known as “default ACLs.” That means that you can use them to create an environment in which permissions are set at the directory level, and these permissions will be applied automatically to all items that are created in that directory structure.
Imagine that you have a /data/sales directory, and you want all members of the group /data/account to be able to read all files that will ever be created in /data/sales. ACL permission inheritance will do that for you. When working with default ACLs, you should know that Linux will never, ever apply the execute permission to newly created files automatically. In ACLs, the mask takes care of that and filters out the execute permission on files. You’ll see that in the next section, in which a default ACL makes read, write, and execute to be inherited on items created below, but the mask will show on files that read and write are used as effective permissions.
Applying ACLs
When applying ACLs, you’ll normally apply them twice. The normal ACLs will take care of files that are already existing. To make sure permissions are set for newly created files also, you’ll have to add a default ACL as well. To set an ACL, you’ll use setfacl; to display current ACL settings, you’ll use getfacl.
Before you start working with ACLs, you should know that they always are used as an addition to the normal permissions that are already set for a file or directory. So before taking care of ACLs, you should make sure to set the normal permissions. Next, when you apply the first default ACL to set inheritance, the normal permissions that are already set on that file will be inherited as well.
Let’s have a look at how that works for the /data/sales directory that we’ve created previously. The current settings are that user linda is owner, and group sales is group owner and has all permissions to the directory. To add permissions by means of ACLs for the group account, you would use the following command:
setfacl -R -m g:account:rx /data/sales
This, however, just means that members of the group account can list files in the directory and its contents, but if new files are created, account would have no access at all. To take care of that, now type setfacl -m d:g:account:rx /data/sales. This makes sure that members of account can read the contents of all new files that will be created.
Now let’s see what this looks like from getfacl. The command getfacl /data/sales shows current settings (see Listing 4-8).
Listing 4-8. Showing Current ACL Assignments with getfacl
linux:/data # getfacl sales
# file: sales
# owner: root
# group: sales
user::rwx
group::rwx
group:account:r-x
mask::rwx
other::---
default:user::rwx
default:group::rwx
default:group:account:r-x
default:mask::rwx
default:other::---
As you can see, the output consists of two parts. The first part shows the permissions that apply to current users and groups (including groups that have gotten their permissions by means of ACLs). The second part shows the default permission settings.
Now let’s create a new file in the /data/sales directory: touch myfile. Now look at the permissions that were set for this file: getfacl myfile. It should look as in Listing 4-9:
Listing 4-9. Showing ACL Assignments as Applied by Inheritance
linux:/data/sales # getfacl myfile
# file: myfile
# owner: root
# group: root
user::rw-
group::rwx                      #effective:rw-
group:account:r-x               #effective:r--
mask::rw-
other::---
As you can see, the permissions have been inherited to the new file. There’s just one thing that isn’t nice. User root has created this file, so the file has root:root as owners. That is why on a shared group environment, you would always want to set the SGID permission. It would make sure that new files are group-owned by the group that owns the /data/sales directory, with the effect that all members of the sales group have the appropriate permissions on the file.
In Listing 4-9 you can also see that the mask has become effective. For new files, the mask is set to rw-, which means that the execute permission will never be inherited for files created in a directory.
File System ACL Support
To work with ACLs, your file systems must offer support for them. A modern file system such as Btrfs does this by default, but for older file systems, this is not the case. The easiest way to add ACL support to your file system is by adding the acl mount option into the /etc/fstab file. If while working with ACLs you get an “Operation not supported” error, you’ll have to do this. The following line shows an example of a file system that is mounted from /etc/fstab with ACL support.
/dev/sda3 /data ext4 acl 1 2
EXERCISE 4-6. APPLYING ACLs
In this exercise, you’ll apply ACLs to allow members from the group “sales” to read files that were created by members of the group “account,” and vice versa.
- Type the command setfacl -m g:account:rx /data/sales and setfacl -m g:sales:rx /data/account. This sets the ACL assignments on the directories but not their contents.
- Type setfacl -m d:g:account:rx /data/sales and setfacl -m d:g:account:rx /data/sales. This also sets the default ACL.
- Use getfacl /data/sales to verify the ACL has been set correctly.
- Use touch /data/sales/somefile to verify that the ACLs have been set correctly on the file as well.
Working with Attributes
A third system that can be used to manage what can be done with files are file system attributes. Attributes apply restrictions to files, no matter which user accesses the file. You can use chattr to set them and lsattr to list them.
Even if from the man page of chattr many attributes are listed, they don’t all work. Also, some attributes are used internally by the operating system, and it doesn’t make much sense switching them on or off manually. The e attribute, for instance, that is commonly applied on Ext4 file systems, stores files in extents instead of blocks, which makes for more efficient storage.
From a security perspective, there are a few restrictions that do matter and work well in general.
- immutable (i): makes it impossible to make any modification to the file
- append only (a): allows users to modify the file, but not to delete it
- undeletable (u): makes it impossible to delete files
So, if you would want to protect a configuration file in a user’s home directory, chattr +i file.conf would do the trick. Even user root would no longer be able to modify the contents of the file. To remove attributes, use chattr -i on the file that has them set.
Summary
In this chapter, you have learned how to create users and groups. You have also learned how to work with permissions to create a secure working environment on your server. In the next chapter, you will learn how to perform common administration tasks, such as setting up printers, scheduling jobs, and configuring logging.