
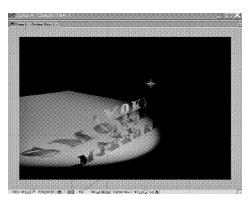
There are several ways to incorporate 3D into an AE Comp: you can cheat and use one of the perspective effects, like Basic 3D; you can use a plug-in with a built-in 3D engine, like Zaxwerlts 3D invigorator or Shatter; you can import data from a 3D application, like Maya or 3D Studio Max; or you can animate with After Effect’s built-in 3D engine, which is the focus of this chapter.
After Effect’s 3D engine is sometimes referred to as “2.5D:’ or “postcards in space,” because 3D layers have no depth (or extrusion). They are flat layers that can occupy and move around in 3D space, but if you turn them on their sides, you will see that they are flat like postcards.
Keeping this limitation in mind (or even using it to your advantage), you can use AE to generate beautiful, stylized effects, such as animations that look like popup books or text that flies off a printed page.
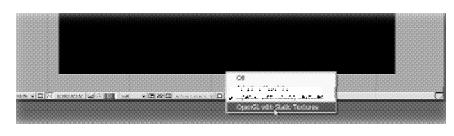
If your video card and AE play nice together (you’ll be able to tell if they don’t if this tip doesn’t work), you can use AE 6.0’s new OpenGL renderer to display animating 3D layers faster.
• Click the OpenGL button at the bottom of the Comp Window. Select OpenGL with Static Textures if you’re animating still images that are moving around in 3D space. Select OpenGL with Moving Textures if you’re animating videos moving around in 3D space. Actually, you may want to choose the Static option even if you’re animating videos, because the display will speed up even more, but video layers will freeze on their first frame.
• OpenGL speeds up display only while you’re working in the Timeline. It does not speed up the final render. And you can’t use it to RAM preview your animation. Still, it really speeds things up when you’re dragging 3D layers around in the Comp Window, scrubbing the Current Time Indicator or hitting the spacebar to Play.
• Most AE Effects won’t display while OpenGL is active. The effects will still render, but you won’t see them while you’re viewing your Comp using OpenGL.
• To check which video cards play nice with After Effects, see http://www.adobe.com/products/aftereffects/opengl.html.
If you try to move a layer closer or further away in Z space, you may fall asleep before you’re able to move the layer very far. By default, it moves in tiny increments, very slowly. But if you point to the Z-axis, start dragging, and then add in the Shift key. AE will swoosh your layer far away (or super close) very quickly.
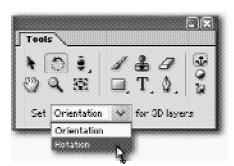
When you want to rotate a 3D layer in the Comp, type W to switch to the Rotation tool. (V will switch you back to the Black Arrow selection tool when you’re done.) Then choose Rotation or Orientation from the dropdown menu at the bottom of the Tools Palette.
Rotation is the best choice for animating. Orientation is better for posing. This is because when you keyframe Orientation, it always takes the shortest path between two angles. If you start with a layer rotated 0 degrees and orient it clockwise to 350 degrees, in the final animation, it will rotate counterclockwise from 0 to 350. On the other hand, Rotation remembers which direction you rotated the layer and how many times around you went.
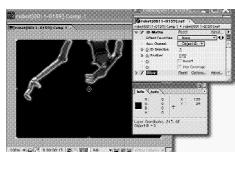
Do you ever wish your 3D layers could join groups? For instance, if you create a cube out of six 3D layers, using the 3D Assistants, how do you rotate the entire cube as a single object? Well, there are two ways.
• You could select one of the sides-maybe the front side-to be a parent to all of the other sides and then just rotate the parent. This solution works well when you want to move or rotate the entire cube as a single unit but also animate individual sides separately (maybe making the top of the box flip open). Children can always act independently from their parents (just like in read life!) So the layer that acts as the top of the box can flip up, no problem. But if you move, scale or rotate the parent, the children will go along for the ride.
• The other solution is to pre-compose all of the 3D layers you want to group together. Once they're flattened to a single layer, you must turn on both the Continually Rasterize switch (even if the layers are bitmaps), which is also called the Collapse Transformations switch, and the 3D switch
Generally, to make one layer orbit around another, you drag the orbiting layer’s Anchor Point onto the center of the layer it’s orbiting around and animate Rotation. Alas, you can’t do this with cameras, because they don’t have Anchor Points.
But you can fashion a fake Anchor Point for your camera by using a Null Object and a little parenting.
![]() To create the Null Object, choose Layer>New>Null Object. Null Objects are layers that don’t render.
To create the Null Object, choose Layer>New>Null Object. Null Objects are layers that don’t render.
![]() Turn on your Null’s 3D switch and place it at the point you want the camera to rotate around (i.e., in the center of your 3D scene).
Turn on your Null’s 3D switch and place it at the point you want the camera to rotate around (i.e., in the center of your 3D scene).
![]() Then animate the Null rotating in a complete circle (keyframe its X, Y or Z Rotation property).
Then animate the Null rotating in a complete circle (keyframe its X, Y or Z Rotation property).
![]() Finally, parent the camera to the Null and you’ll get a lovely orbiting camera.
Finally, parent the camera to the Null and you’ll get a lovely orbiting camera.
Optionally, you can animate the camera’s position to make it gradually move closer to the Null as it orbits. That will give you a spiraling camera.
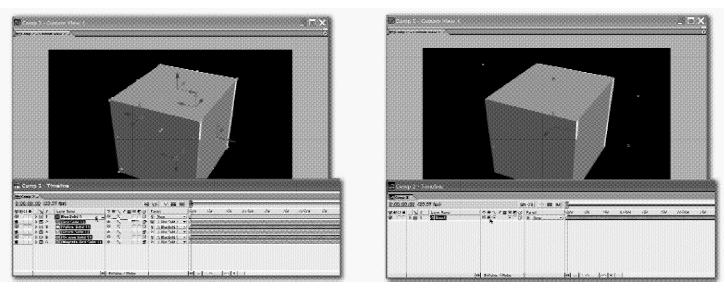
In full-fledged 3D programs like 3D Studio Max and Maya, you can see several views at once: top, left, front and perspective. You can do the same thing in After Effects!
![]() After adding some 3D layers to your Comp, choose View>New View.
After adding some 3D layers to your Comp, choose View>New View.
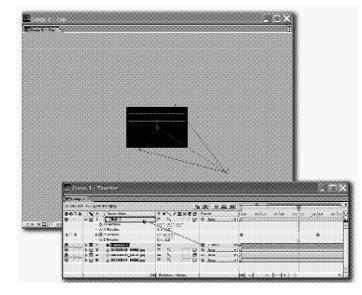
![]() A new tab will appear in the Comp window. Drag the tab away from the Comp window until it becomes a second, floating Comp window.
A new tab will appear in the Comp window. Drag the tab away from the Comp window until it becomes a second, floating Comp window.
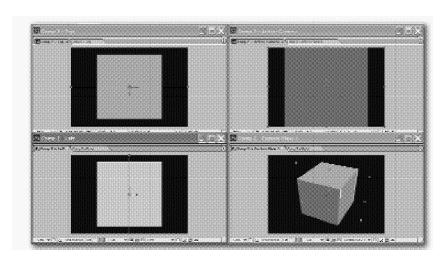
![]() Set the camera view in this window to Top, and arrange two comp views any way you like.
Set the camera view in this window to Top, and arrange two comp views any way you like.
![]() Go to View>New View two more times and create two more floating Comp windows with camera views Left and Front.
Go to View>New View two more times and create two more floating Comp windows with camera views Left and Front.
![]() Finally, choose Window>Workspace>Save Workspace. When AE prompts you for a name, type Four 3D Views. From now on, any time you want to bring up Maya-like interface, you can choose Window>Workspace>Four 3D Views.
Finally, choose Window>Workspace>Save Workspace. When AE prompts you for a name, type Four 3D Views. From now on, any time you want to bring up Maya-like interface, you can choose Window>Workspace>Four 3D Views.
2D layers act as impenetrable walls for 3D layers. If you want to create a bug (station identification) that always sits in the lower-right corner, and you don’t want anything to ever obscure it, make your bug a 2D layer at the top of your layer stack. That way, no matter how far forward you bring 3D layers in Z-space, they’ll never be able to get in front of the 2D layer.
Similarly, if you want a background that is guaranteed to always be the farthest layer back (maybe it’s a star field, and you want to make sure that none of the spaceships ever move behind it), keep it a 2D layer and move it to the bottom of the stack.
When you shine a light on a 3D layer, you can make the light pass through it just like sunlight passing through a stained-glass window. The light casts a shadow on any layers behind the stained-glass layer, and the shadow’s color and shape will be taken from the layer it passes through.
![]() Remember to enable shadows for the light layer.
Remember to enable shadows for the light layer.
![]() Then twirl open the stained-glass layer’s Material Options. Turn Cast Shadows on and set Pass Through to 100 percent.
Then twirl open the stained-glass layer’s Material Options. Turn Cast Shadows on and set Pass Through to 100 percent.
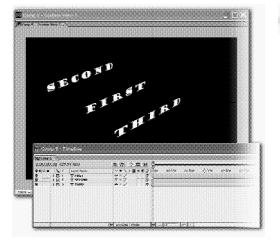
By adding a simple expression to a layer's Position property, you can turn a 2D motion path into a 3D motion path.
First create the path via keyframing, pasting a path from Illustrator, or using Motion Sketch. Then turn on the layer's 3D switch, and add the following expression to its Position property:
X = position[O];
Y = 200;
Z = position[l];
[X,Y,Z]
Command (Control). Scrub at a slower speed when adjusting values.
Shift. Change scrubbing at a higher value.
When the layer was 2D, the path moved it around the X and Y dimensions. This expression will change movement to the X and Z dimensions. Whenever it formerly moved up and down (Y), it will now move in and out (Z). Its up and down movement will be constrained to 200 pixels from the top of the Comp window. Change the number 200 if you want the Y position to be elsewhere. If you want the movement to occur in the Y and Z axes, change the expression to the following:
x = 200;
Y = position[l];
Z = position[O];
[X,Y,Z]
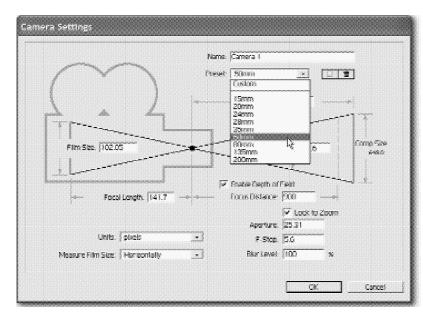
Perhaps the coolest feature of AE’s 3D cameras is the Depth of Field option. This makes objects out of a camera’s range (too close or too far) appear blurred, just as they would with a real camera.
![]() To try it out, press Cmd+Option+C (Ctrl+Alt+C), or, if you want to be ordinary, choose Layer>New>Camera from the menu.
To try it out, press Cmd+Option+C (Ctrl+Alt+C), or, if you want to be ordinary, choose Layer>New>Camera from the menu.
![]() In the New Camera dialogue, select a narrow angle preset, like 8Omm (the larger the mm number, the narrower the angle-small numbers are for wide-angle lenses).
In the New Camera dialogue, select a narrow angle preset, like 8Omm (the larger the mm number, the narrower the angle-small numbers are for wide-angle lenses).
![]() Also, make sure the Depth of Field option is enabled. In the Timeline, you can adjust the strength of the Depth of Field effect by twirling open the camera layer, then twirling open the Options and adjusting the Blur Level.
Also, make sure the Depth of Field option is enabled. In the Timeline, you can adjust the strength of the Depth of Field effect by twirling open the camera layer, then twirling open the Options and adjusting the Blur Level.
You can add multiple cameras to your 3D Comp, but only one of their views can render at a time. From the Comp window’s 3D view menu, you can select any camera you want to look through while you’re working, but only the Active Camera will render. So how do you make a specific camera the Active Camera?
By placing it on top of the layer stack. The highest up camera will always be the Active Camera. If you want to cut between two cameras, place the first camera on top, but make it end partway through the Comp’s duration. (Drag its out-point to the left, so that it doesn’t extend all the way to the end of the Comp). When the first camera-layer ends, it will no longer be the topmost camera; the next camera down in the stack will become the Active Camera.
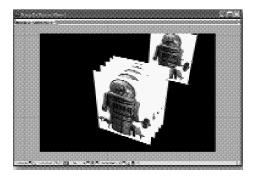
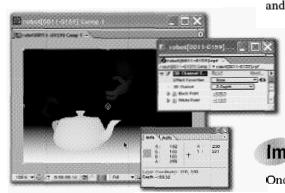
If you want to isolate one object in your 3D scene and apply an effect to it (i.e. placing a glow around the robot but not around the spaceship), apply the ID Matte effect (in the 3D Channel category).
![]() Click a pixel in the robot and note its ID number in the Info Palette.
Click a pixel in the robot and note its ID number in the Info Palette.
![]() Then change the ID Selection parameter (in the ID Matte effect) to match the ID number from the Info Palette.
Then change the ID Selection parameter (in the ID Matte effect) to match the ID number from the Info Palette.
![]() After Effect will display the robot and mask out everything else. You can then apply any effect to they layer and it will only affect the robot.
After Effect will display the robot and mask out everything else. You can then apply any effect to they layer and it will only affect the robot.
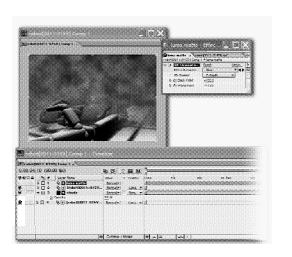
![]() To add back the rest of the scene, place a second copy of the original scene (spaceship and robot) below the robot layer.
To add back the rest of the scene, place a second copy of the original scene (spaceship and robot) below the robot layer.
We all know that when working in 2D, we all know that the highest layer in the Timeline is in front of all the other layers, and the lowest layer is behind them, but when you make the layers 3D, their order in the Timeline stack becomes much less important.
• 3D layers are stacked by their Z-position value (assuming the camera is pointing at their fronts). Therefore, So the layer closest to the Active camera is in front of all the other layers, even if that layer is way down low in the Timeline stacking order.
• There are a few exceptions to this rule: Track Matte layers must still be on top of the layer they are masking.
• Layer blend modes still respect the stacking order in the Timeline. However, only the Advanced 3D renderer will properly blend intersecting layers in the blended layer functions in 3D space.
• 2D layers also are also ordered by their place in the Timeline stack
• If several 3D layers share the exact same Z-position value, AE will use their Timeline stacking order to determine which one is on top.
If you shine a light on a 3D layer, you can affect how the light interacts with the layer by adjusting its Material Options.
![]() Twirl open the layer that is being hit by the light (not the light layer), and then twirl open the Material Options category. The key properties to adjust are Ambient, Diffuse, Specular, Shininess, and Metal.
Twirl open the layer that is being hit by the light (not the light layer), and then twirl open the Material Options category. The key properties to adjust are Ambient, Diffuse, Specular, Shininess, and Metal.
![]() To get a sense of how they work, drill them all down to zero, and then experiment by scrubbing each one up, one by one.
To get a sense of how they work, drill them all down to zero, and then experiment by scrubbing each one up, one by one.
![]() Start with Spectacular, which will add a hotspot to your layer. When you first raise this value, it may turn your whole layer into one big hotspot.)
Start with Spectacular, which will add a hotspot to your layer. When you first raise this value, it may turn your whole layer into one big hotspot.)
![]() Then raise Shininess, which makes your hotspot smaller and dims out the rest of the layer.
Then raise Shininess, which makes your hotspot smaller and dims out the rest of the layer.
![]() Next, raise the Diffuse property, which will fill in the darker areas (the areas not in the hotspot).
Next, raise the Diffuse property, which will fill in the darker areas (the areas not in the hotspot).
![]() Raising metal will lower the color distinction between the darker areas and the highlight, but the highlight will still be brighter.
Raising metal will lower the color distinction between the darker areas and the highlight, but the highlight will still be brighter.
![]() Raising the Ambient property makes the layer look slightly more reflective, but the difference is pretty subtle compared with the other Material Option properties
Raising the Ambient property makes the layer look slightly more reflective, but the difference is pretty subtle compared with the other Material Option properties
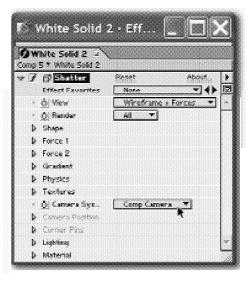
Many Effects, like Shatter, have their own built-in 3D systems, complete with cameras and lights, but if you’re comfortable using AE’s lights and camera (or if you want those effects to blend into an AE 3D scene), you can use them instead of the ones built into the effects. Just check the “Use Comp Camera” or “Use Comp Lights” option in the Effect’s property list. Don’t enable the 3D switch for the layer with the effect applied to it (i.e., the Shatter layer).
Effects that can use AE’s cameras and lights include Shatter, Wave World, Card Dance and Zaxwerks 3D Invigorator.

So you’ve added a light layer to your 3D Comp and checked the Cast Shadows option in the Light Settings dialogue. If you forgot to do this, select the light layer, choose Layer>Light Properties from the menu, and check the option).,
But still, you don’t see any shadows.
That’s because AE tries its darndest to stop you from using shadows, which are (they’re very cruel to your computer’s processor). It’s not enough to enable shadows on the light layer. All of the other layers also need Cast Shadows enabled before you’ll see any shadows. So select all of your 3D layers (except lights and cameras), and on any one of the selected layers, twirl open its Material Options. Click the word “off” by Cast Shadow to change it to “on.”
Don’t turn Cast Shadows on for any layers that won’t be casting shows. For instance, your background layer won’t cast shadows, because there isn’t another layer behind it to receive any shadows it might cast). Turning on Cast Shadows for these layers just needlessly increases render time, because AE will calculates the shadows even though it doesn’t display them.

So you’ve tried pointing an AE light directly at the active camera, hoping to see rays bursting out of it. But instead, you got darkness. What gives? Light that emits rays is called “volumetric light.” (Think of light that fills up a volume), and unfortunately AE’s lights aren’t volumetric. This is where third-party plug-ins come to the rescue. Three popular ones for creating rays of light are Trapcode’s Shine and Lux as well as Red Giant’s Knoll Light Factory.

When you turn on a layer’s 3D switch, the most noticeable change is the appearance of the “manipulators” at the center of the layer. Dragging these red, green and blue arrows allow you to Constrain-Drag (or Constrain-Rotate, if you’re using the Rotate tool) a layer in the X, Y or Z directions.
• The three Axis Mode buttons on the Tool Palette dictate which way is X, which way is Y and which way is Z . The default Axis mode is Local, which means that each layer has its own X, Y and Z. Rotate a layer around its Y axis (so that you’re staring at its edge, like a postcard), and its Z axis will no longer point straight at you. It will point to the right or to the left (like the X axis used to), depending on which way you rotated the layer. In Local Axis Mode, you can think of the manipulator as being attached to the layer, and rotating with it.
• Contrast that with World Axis Mode, which is the middle Axis Mode button on the Tool Palette: in World Axis Mode, no matter how you rotate the layer, the manipulators stay put. This is because World Axis Mode uses set X, Y and Z directions. This is similar to the real world, in which North is always North. If you change your view by moving the active camera or selecting one of the view options in the Comp Window (i.e., Top or Custom View l), the manipulators will change direction. But they will still point to “true” X, Y and Z. Similarly, if you were in a space ship, hovering over the North Pole, north would be below you.
• The final option, View Axis Mode, orients to your screen. So that no matter how you move the camera or layer, X always points left and right, Y always points up and down, and Z always points in and out.
Are you scared of cameras? In After Effects, when you add a camera layer, the most frightening dialogue window (except maybe the Particle Playground Effect Controls) appears.
The settings in this window are great, if you want to mimic a real-world camera (and if you know how a real-world camera works). But for us Average Toes who just want to make some 3D text fly around, the best way to simplify the dialogue is to choose a camera preset.
• Lower numbers, such as 15mm, will give you a wide-angle lenses (taking in more of the view, but somewhat distorted).
• Higher numbers, like SOmm, will give you a narrow angle lenses.
• 50mm is a good default for a “normal” camera look.
• After adding a camera, you can always mess with the angle (as in “wide” or “narrow”) by adjusting the Zoom property in the Timeline.

Have you ever tried to pan an AE camera from left to right? If so, you’ve probably animated its Position so that it moved across the X dimension (or Y, if you’re panning it up and down).
When you viewing your comp, you may be surprised to see that the camera move is a curvy path- not a straight left to right pan. Although the Position is changing, this is because , the Point of Interest is staying in the same place.
Cameras always point towards their Point of Interest, and as the camera moves, it turns to face its Point of Interest, which is what creates the curvy motion. To get a straightforward pan, turn the stopwatches on for both the Position and the Point of Interest properties before animating Position.
You don’t need to animate Point of Interest. Just turn on its stopwatch on. Then, as you move the camera (animating its position), AE will automatically keyframe Point of Interest for you.

Do Points of Interest (on camera and light layers) confuse you? They’re not that hard to understand. A camera or light’s Point of Interest is a spot in 3D space (with an X, Y and Z position) where the camera or light is pointing. On the other hand, the camera or light’s Position is where it’s pointing from.
Still, confused? Okay, well, then you might want to get rid of the Point of Interest altogether.
![]() Select your camera or light layer and then choose Layer>Transform>Auto-orient from the menu.
Select your camera or light layer and then choose Layer>Transform>Auto-orient from the menu.
![]() In the Auto Orientation dialogue, select the Off option. Now your camera or light will simply point at whatever it’s rotated towards (adjust the Orientation and Rotation properties to change what the camera or light is pointing at).
In the Auto Orientation dialogue, select the Off option. Now your camera or light will simply point at whatever it’s rotated towards (adjust the Orientation and Rotation properties to change what the camera or light is pointing at).
Although normally the camera’s Point Of Interest will move when you drag the camera around in the Comp Window, if you hold down the Command (Control) key after you start dragging the camera, you’ll adjust only the camera’s position while its Point of Interest remains where in place.

As an alternative to using AEs 3D layers (which, alas, have no depth), you can import data from most popular 3D modeling and animation programs, such as Maya, 3D Studio Max, Softimage, Lightwave, Electric Image and Cinema4D.
In the 3D software, you’ll have to export your scene as a PIC, RLA, RPF or EL When you do so, make sure you enable options to save additional pixel information besides just red, green, blue and alpha. For instance, if your 3D app saves information about how far each pixel is away from the camera in Z-space, After Effects will be able to interpret that data.
For most of these image formats, the extra data is saved directly in the image files. The exceptions are Softimage’s PIC files and Electric Image’s EI files, which store the 3D data in additional files, ZPIC files for Softimage and EIZ files for Electric Image.
After Effects can still read this data. Don’t import the ZPIC and EIZ files into After Effects. Instead place these files in the same folders as their associated PIC or EI files, and only import the PIC or EI into After Effects.
Once you’ve imported files from a 3D program and added them to your comp, you can access their 3D data by applying AEs 3D Channel Effects.
Before applying these effects, make sure you open the Info Palette (Window>Info).
Then, after applying a 3D Channel effect, click any pixel in the image to see its 3D data displayed in the Info Palette.
Most of the 3D channel effects create mattes, which are ( grayscale images in which black represents transparent pixels, gray represents partially transparent pixels, and white represents opaque pixels). You can then use these images as track mattes that hide parts of the 3D data and reveal other parts of it.
Say you import a 3D animation of a car moving towards the camera. You'd like to insert a 2D image of some smoke halfway through the car's journey, so that it starts behind the smoke, drives through it and ends in front of the smoke.
To achieve this effect, you'd apply a 3D channel effect like 3D Channel Extract to the car layer. Then you'd click with your mouse at the point where you want the smoke to appear (halfway back into the scene). After clicking, you can read the Z position of this point in the Info Palette.
Adjust the Black Point and White Point properties in the 3D Channel Extract effect properties, until you get a matte in which the white starts where you want the fire to begin and ends at the camera. Everything behind the fire line should be black.
Arrange your Timeline with the layers stacked from top to bottom as follows: matte layer, copy of original car layer, smoke layer, and another copy of the car layer. Notice that the matte layer was made with a copy of the car layer, so the car layer will appear three times in the comp). Use the matte layer as a luma matte for the layer immediately below it.
In the comp, it will appear as if the car is passing through the smoke.

After Effects ships with two 3D rendering plug-ins that controlling how 3D layers interact. You can access these by choosing CompositionXornposition Settings or pressing Cmd+I<(Ctrl+K). From the Composition Settings Window, click on the Advanced Tab and choose one of the following Rendering Plug-Ins.
Advanced 3D: By default, AE6 uses the Advanced 3D rendering plug-in. This plug-in accurately handles layer intersections (including blend modes and adjustment layers). It also uses shadow maps to give more control over shadow rendering.
Standard 3D: This was the original method that was introduced with AE5. You can use this if there are no intersecting layers. The benefit is that it’s faster for some compositions. If rotated layers appear jaggy, click the Options button and choose the More Accurate anti-aliasing option.
On your After Effects 6 Install CD, you will find an installer from Digital Anarchy for 3D Assistants Lite. These three Assistants are a taste of the larger package of 3D Assistants available at www.DigitalAnarchy.com. These light versions however are fully functional, in fact we’ve invited Jim Tierney, Lead Anarchist of Digital Anarchy to show us how to use them in the next few tips.
![]() Start off with an initial nine layers. These can be footage or solid layers.
Start off with an initial nine layers. These can be footage or solid layers.
![]() We need to set up some properties of layers so that when we duplicate them we don’t have to go back and try and change a property for 300 layers.
We need to set up some properties of layers so that when we duplicate them we don’t have to go back and try and change a property for 300 layers.
![]() Now that we have the parameters set up let’s duplicate the layers two times giving us 27 layers. Make sure that the layers are set up sequentially so that they repeat in a pattern in the Cylinder.
Now that we have the parameters set up let’s duplicate the layers two times giving us 27 layers. Make sure that the layers are set up sequentially so that they repeat in a pattern in the Cylinder.
![]() At this point we need to point the two duplicated ’top’ layers’ Light Transmission property at the original ’top’ layer’s Light Transmission property. So add expressions to the duplicated ’top’ layers Light Transmission properties and Pickwhip the one on the original top layer.
At this point we need to point the two duplicated ’top’ layers’ Light Transmission property at the original ’top’ layer’s Light Transmission property. So add expressions to the duplicated ’top’ layers Light Transmission properties and Pickwhip the one on the original top layer.
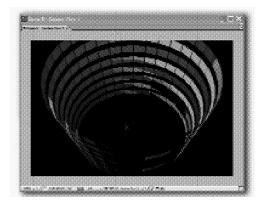
![]() Now we can start working on our Cylinder.
Now we can start working on our Cylinder.
Choose WindowXylinder Creator Lite and let’s enter the following values:
Y: 4000 4000
Radius Set By First: 36 First: 36
Distance Between Layers Vertically: 517 517
Repeat Layers: 10 10
Repeat Sequentially: checked
![]() Click the apply button at the bottom of the Cylinder Creater Lite dialogue w.
Click the apply button at the bottom of the Cylinder Creater Lite dialogue w.
![]() Now add a camera to the comp and zoom it back far enough so that you can see the who cylinder.
Now add a camera to the comp and zoom it back far enough so that you can see the who cylinder.
![]() Add a couple of lights to the comp. Try placing a point light inside the cylinder and a spotlight (pointing at the cylinder) outside it.
Add a couple of lights to the comp. Try placing a point light inside the cylinder and a spotlight (pointing at the cylinder) outside it.
![]() Adjust the top layer’s Light Transmission property until you like the effect.
Adjust the top layer’s Light Transmission property until you like the effect.

While Lights exist in 3D space, they aren’t technically 3D layers. This means you can’t use the 3D Assistants to setup or animate a large number of lights. However, you can attach lights to Null objects, which can be 3D Layers. That means you can use lights with the 3D assistants, provided that the lights are parented to null objects.
Note: this tip assumes you’ve assembled the cylinder from the previous tip.
Let’s try and pull this off.
![]() Create a light with the following settings:
Create a light with the following settings:
Type: Spot
Intensity: 80
Cone Angle: 90
Cone Feather: 70
![]() Now create a null object. Make the null object 1 pixel by 1 pixel in size and then turn on the 3D switch. This creates a 3D null object, which we can now attach the light to.
Now create a null object. Make the null object 1 pixel by 1 pixel in size and then turn on the 3D switch. This creates a 3D null object, which we can now attach the light to.
![]() Set the light position to match the null object position exactly. This will essentially put the light on top of the null object. Now parent the light to the null object.
Set the light position to match the null object position exactly. This will essentially put the light on top of the null object. Now parent the light to the null object.
![]() Duplicate the light and null object five times, and link each light with its associated null object.
Duplicate the light and null object five times, and link each light with its associated null object.
![]() That gives us six lights to orient around the Cylinder. We are going to orient them around the outside because the panels should be letting the light through and the lights will illuminate the panels.
That gives us six lights to orient around the Cylinder. We are going to orient them around the outside because the panels should be letting the light through and the lights will illuminate the panels.
![]() Select the 6 null objects and choose WindowXylinder Creator Lite. Set it up with the following settings and click Apply:
Select the 6 null objects and choose WindowXylinder Creator Lite. Set it up with the following settings and click Apply:
X: 3000
Y: 20
Z : 3000
Distance Between Layers Vertically: Doesn’t matter
Frequency of Layers Around Cylinder: 60 degrees
And just like that, we have used the 3D assistants to arrange our lights.
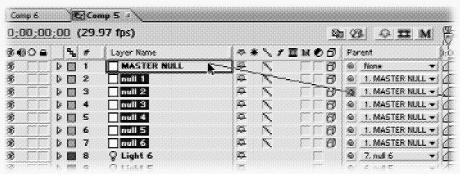
Nulls are incredibly versatile animation assistants. Not only can they be used to control other layers, but they can be used to control other nulls. If we want to use a null to animate our lights en mass, we need to attach the null to the nulls controlling the lights, not the lights themselves.
![]() Create a new null that is in a center of the comp, which should put it in the center of the circle of lights. Turn on the null’s 3D switch.
Create a new null that is in a center of the comp, which should put it in the center of the circle of lights. Turn on the null’s 3D switch.
![]() Now select all the nulls that control the lights, then parent them to the new null.
Now select all the nulls that control the lights, then parent them to the new null.
![]() We want the lights to slowly move down the Cylinder and rotate as they’re doing so. To do this, we will now just move the main null up to the top of the Cylinder. All lights will follow the main Cylinder up and we will set at a key frame for position and rotation of the main null.
We want the lights to slowly move down the Cylinder and rotate as they’re doing so. To do this, we will now just move the main null up to the top of the Cylinder. All lights will follow the main Cylinder up and we will set at a key frame for position and rotation of the main null.
![]() We now move the Current Time Indicator to the end of the time line and move the null down to the bottom of the Cylinder. This will automatically set another key frame for position, and then we can set a keyframe for Y rotation: 1x135.
We now move the Current Time Indicator to the end of the time line and move the null down to the bottom of the Cylinder. This will automatically set another key frame for position, and then we can set a keyframe for Y rotation: 1x135.
![]() If we play this back, you can see the lights animating around the Cylinder.
If we play this back, you can see the lights animating around the Cylinder.
![]() We can also make some adjustments here allowing some of the lights to cast shadows and vary the intensity and color of some of the lights.
We can also make some adjustments here allowing some of the lights to cast shadows and vary the intensity and color of some of the lights.
If you have close to 300 layers you may need some help animating all of them:
![]() Create another 1 pixel by 1 pixel null in the center of the Cylinder.
Create another 1 pixel by 1 pixel null in the center of the Cylinder.
![]() Turn on the Null's 3D switch.
Turn on the Null's 3D switch.
![]() Select all of the layers. Make sure you did not select any of the lights or nulls.
Select all of the layers. Make sure you did not select any of the lights or nulls.
![]() With all layers selected grab the parenting Pickwhip and select the Layer null. This will select the null object as the parent of all the layers selected. Making it very easy to attach a large number of layers to a single null.
With all layers selected grab the parenting Pickwhip and select the Layer null. This will select the null object as the parent of all the layers selected. Making it very easy to attach a large number of layers to a single null.
![]() After parenting all the layers to the null object, set a keyframe for the Y rotation parameter of the null object at the beginning of the time line.
After parenting all the layers to the null object, set a keyframe for the Y rotation parameter of the null object at the beginning of the time line.
![]() Move to the end of the time line and set the Rotation to -1 X 0.0.
Move to the end of the time line and set the Rotation to -1 X 0.0.
And that is it. We now have lights rotating around the Cylinder. And the Cylinder itself is rotating in the opposite direction. With everything controlled by null objects.


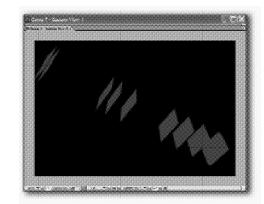
Using the Cubic Distribution assistants you can have a bunch of layers start off in a cluster and explode in random directions.
![]() Select some 3D layers and choose Window>Cubic Distribution Lite.
Select some 3D layers and choose Window>Cubic Distribution Lite.
![]() Set the Cube Dimensions to 1 pixel by 1 pixel by 1 pixel. When you click apply this will position all the layers in basically the same place, creating a compact cluster of the layers.
Set the Cube Dimensions to 1 pixel by 1 pixel by 1 pixel. When you click apply this will position all the layers in basically the same place, creating a compact cluster of the layers.
![]() Before you click apply, though, select Random under the Layer Orientation options and turn on Set Keys for Position and Orientation. You’ll want the Cubic Distribution assistant to set keyframes for all the layers so they animate when their positions and rotations change.
Before you click apply, though, select Random under the Layer Orientation options and turn on Set Keys for Position and Orientation. You’ll want the Cubic Distribution assistant to set keyframes for all the layers so they animate when their positions and rotations change.
![]() Click Apply. The layers are thrown together in a cluster.
Click Apply. The layers are thrown together in a cluster.
![]() Move forward in time some amount, say, maybe 3 seconds.
Move forward in time some amount, say, maybe 3 seconds.
![]() Change the Cube Dimensions to 2000 pixels by 2000 pixels by 2000 pixels. Reapply the assistant.
Change the Cube Dimensions to 2000 pixels by 2000 pixels by 2000 pixels. Reapply the assistant.
![]() This will cause the layers to be distributed over a much larger area, creating an explosion of layers when you play the animation back.
This will cause the layers to be distributed over a much larger area, creating an explosion of layers when you play the animation back.
If you want to line up all your layers in a straight line, you can use the Cubic Distribution assistant to do this easily.
![]() Set the Cubic Dimensions to be X = 1, Y= 1, and Z = 2000 (or however long you want). You now have created a very thin, very long cube that the layers will be distributed in. Of course, the only axis they can be distributed along is the Z-axis.
Set the Cubic Dimensions to be X = 1, Y= 1, and Z = 2000 (or however long you want). You now have created a very thin, very long cube that the layers will be distributed in. Of course, the only axis they can be distributed along is the Z-axis.
![]() When you click apply, this results in all the layers being lined up in a straight line. Since the Cubic Distribution assistant distributes the layers randomly, they won’t be evenly spaced, but they will be aligned evenly on the X and Y-axis.
When you click apply, this results in all the layers being lined up in a straight line. Since the Cubic Distribution assistant distributes the layers randomly, they won’t be evenly spaced, but they will be aligned evenly on the X and Y-axis.
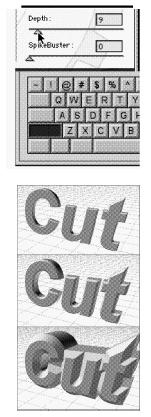
Here’s a real quick tip that helps when setting up the shapes of the models. By holding down the Shift key, sliders will give you real time feedback.
Say for instance, that you are adjusting the thickness of the objects. This is done with the Depth slider. Usually you drag the slider to a point then let go and the model rebuilds so you can see what the effect of the slider is. However, if you hold down the Shift key the model will rebuild while you are dragging the slider. This lets you home in on the look that you want much faster.
Shift-dragging is also a way to help get the creative juices flowing. You can try things that you might not think of doing, but because it is so easy you’ll just try it anyway to see what happens. So the next time you are working on a project try dragging the Depth slider so the objects are really fat, then try dragging the other way to make them really thin. You might find that there is a setting that takes your design in a different direction.
As mentioned in the tip on shift-dragging the Depth slider, you can sometimes bump into combinations of settings that help your design in ways that you might not expect. Here are some other settings to play with ...
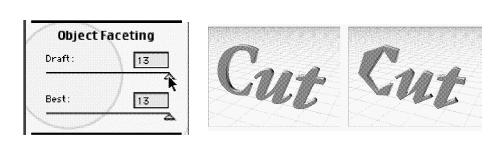
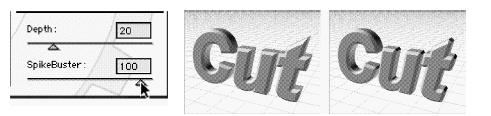
Object Faceting-By dragging this slider to the far right the objects will become very faceted, meaning that circles become square-ish and curves look like they’ve been rough-cut out of rock. The look is especially cool with italicized text.Spike Buster-By dragging this slider above the 90 degree mark, the corners of your objects will get clipped off as if you used a pair of scissors on them. This adds more angles to catch light and gives the objects a more detailed look.
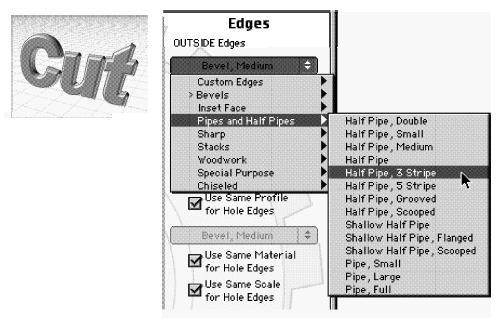
Edge Profiles-Try an Edge Profile that you’ve never tried before. Once you’ve picked a new profile you can use the keyboard’s arrow keys to step through the profile list trying variation after variation. Some profiles are made for thin objects and others are made for thick objects, so if suddenly the objects look too fat and bloated just Shift-drag the Depth slider and to reveal the coolness within.
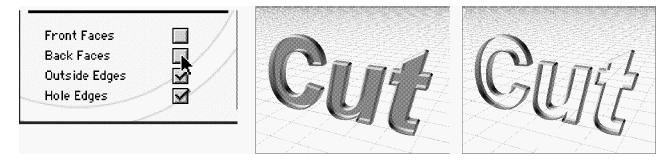
Turn Off The Faces-Turning off the front face of your objects will create “bowl” objects which look really cool when shadows from the sides fall onto the inside of the objects. Turning off the front and back faces will create hollow objects. Removing the faces creates an extra level of detail that can make a design say something new.
Fortunately it’s really easy to try. One click to turn them off and another to turn them back on if you don’t like the effect.
By far one of the best features in the Invigorator is the ability to link each 3D model to the original Illustrator file that it came from. Once this link is made, changes to the Illustrator vector art will update the 3D objects within the Invigorator. In other words this feature will let you change the shape of your 3D objects without having to re-import the file, reapply the surface settings, or even reanimate the objects once they’ve been changed. It is the perfect tool for responding to the changes that occur during the course of a project.
The “file-model’’ linking is accomplished by following these easy steps:
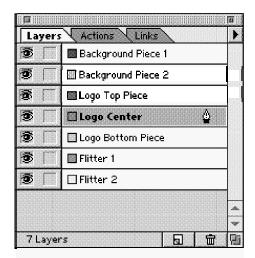
Build the Illustrator file so that each object is placed on its own layer in Illustrator. An object can be made of more than one path. For instance, the word “hello” is made of many paths, but if all the letters are placed on a single layer, then during the next step they will all become a single object.
Open the Illustrator file in the Invigorator with the "Open By Layers“ option turned ON. This will make each layer in the Illustrator file its own 3D object.

That sets up the magic. To make the magic happen do the following:
Make changes to the artwork in Illustrator, but don't move the artwork to a new layer. Keep the artwork on the same layer as it was when first brought into the Invigorator. Save the file.
Inside the Invigorator select the objects you want to update. Then click the Reload button on the Object tab. This will tell the Invigorator to find the original Illustrator file, look through it to find the layer that the object originally came from, and update the 3D model with the new vectors it finds in the edited file.
