
In this recipe, we will learn how to create the development provisioning profiles so that the application can be installed on an iOS device.
Following on from our previous recipe, we will learn the steps involved in creating our development provisioning profiles so that applications can be installed on an iOS device for testing prior to being deployed to the Apple App Store.
To begin, follow these simple steps as outlined:
- Log back into the Apple iOS Developer Center page.
- Next, click on the iOS Provisioning Portal link on the right-hand side of the page.
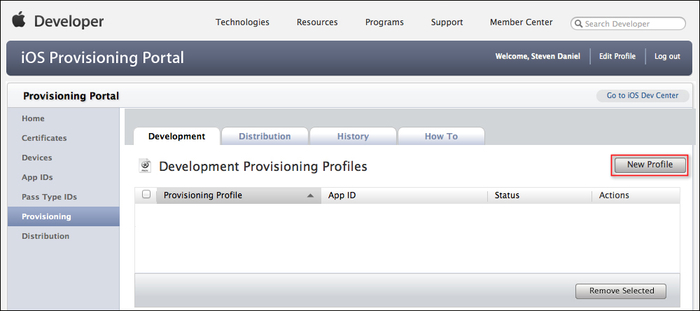
- Click on the Provisioning tab, and then click on the New Profile button as shown in the following screenshot:
- Next, enter in
Development_Profileas the value for Profile Name, ensuring that you select all the certificates that you would like to associate with this provisioning. - Select CoreLocation as the value for App ID and then check all the devices that you would like to provision, and then click on the Submit button once finished.

- At this point, the provisioning profile will be shown as a Pending approval status. After a few seconds, you should see that the status changes from Pending to Active. If this does not happen, you may need to refresh your browser. At this point, you will be able to download your mobile provisioning file.

- Click on the Download button to download your Provisioning Profile. You will notice that when you download the mobile provisioning file, the file will be named as
Development_Profile.mobileprovision. In the next recipe we will look at how to deploy an application to an iOS device using this certificate.
In this recipe we learned how to create the provisioning profile so that your applications can be installed onto a real iOS device. This gives you the ability to assign team members who are authorized to install and test an application on each of their devices.
Whenever you deploy an application onto the iOS device, this will contain the iOS development certificates for each team member, as well as the UDID and the App ID.