
In this recipe, we will learn how we can use the storyboard features to programmatically present view controllers within the storyboard.
In this recipe, we will look at how we can programmatically call another view controller within the storyboard by using its identifier.
In order to programmatically determine which view we are in, we will need to create a new UIViewController subclass for our second view controller. This can be achieved by performing the following simple steps:
- Select the
TwitterExamplefolder from the project navigator. - Select File | New | File… or press command + N.
- Select the Objective-C class template from the list of templates.
- Enter
SecondViewControlleras the name of the class to create. - Ensure that you have selected UIViewController as the type of subclass to create from the Subclass of drop-down list.
- Ensure that the Targeted for iPad checkbox has not been checked.
- Ensure that the With XIB for User Interface checkbox has not been checked.
- Click on Next to proceed to the next step in the wizard.
- Specify the location to save the class file, and then click on the Create button.
Once you have done this, we need to
update the class method of our second view controller to use our SecondViewController subclass:
- Open the
SecondViewController.hinterface file, located under theTwitterExamplefolder, from within the project navigator. - Modify the interface file by adding the highlighted code sections, as shown in the following code snippet:
// SecondViewController.h // TwitterExample // // Created by Steven F Daniel on 21/09/12. // Copyright (c) 2012 GenieSoft Studios. All rights reserved. #import <UIKit/UIKit.h> @interface SecondViewController : UIViewController <UIAlertViewDelegate> @end - Open the
SecondViewController.mimplementation file, located under theTwitterExamplefolder, from within the project navigator. - Create the
prepareForSegue:sendermethod, as shown in the following code snippet:-(void)prepareForSegue:(UIStoryboardSegue *)segue sender:(id)sender { // Ensure we are processing the correct segue // within the Storyboard if ([segue.identifier isEqualToString:@"firstViewController"]) { UIAlertView *alertView = [[UIAlertView alloc] initWithTitle:@"Twitter Example" message:@"Currently displaying View #1" delegate:self cancelButtonTitle:@"OK" otherButtonTitles:nil]; [alertView show]; } } - Select the second view controller and click on the Identity Inspector button.
- Next, change the Custom Class property to read
SecondViewController.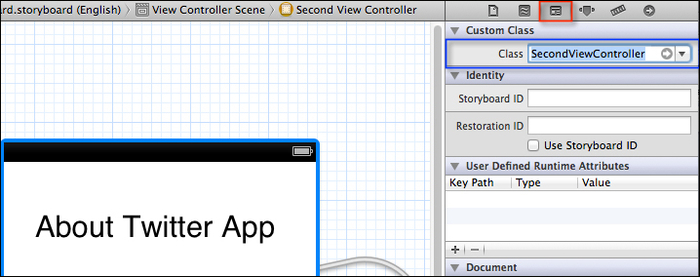
- Next, we need to apply the same storyboard segues for our first view controller.
- Select the Attributes Inspector section, and then under the StoryboardSegue section, enter F
irstViewControlleras the unique identifier to use. - Repeat the same steps as we did for the
SecondViewController. - Next, build and run the application by selecting Product | Run from the Product menu, or alternatively by pressing command + R.
When the compilation completes, the iOS Simulator will appear, showing the programmatic transitions between each of the view controllers that are defined within our storyboard.
When you click on the About App button, it transitions over to the second view controller and then displays the message based on the prepareForSegue:(UIStoryboardSegue*)segue method call, determining the identifier of the current view controller that is being displayed within the view.
Clicking on the Go Back button will transfer control over to the first view controller; a call is made to the prepareForSegue method to determine the current identifier of the current view.
Although the storyboard runtime usually handles transitions between view controllers, you can also trigger segues programmatically directly from within your code. You may choose to do this when setting up the segue from within the XIB editor in Xcode, or you may want to use the accelerometer events to trigger a transition and display a graphic animation.
If you take a look at the following code
snippet, it shows you how you can programmatically display any view controller within your storyboard, by using the instantiateViewControllerWithIdentifier: method of the UIStoryboard class. We then use the presentViewController: method to push the view controller onto the view controller navigation stack.
SecondViewController *mvc = [self.storyboard
     instantiateViewControllerWithIdentifier:@"secondViewController"];
Note
For information on how to implement the methods of the UIStoryboard class, refer to the Apple Developer documentation, located at https://developer.apple.com/library/ios/#documentation/UIKit/Reference/UIStoryboard_Class/Reference/Reference.html.