
In this recipe we will learn how to request a development certificate from Apple.
Following on from our previous recipe, now we will learn how to obtain the development certificate from Apple.
To begin, follow these simple steps as outlined:
- Launch your browser and log in to the iOS Developer portal on the following link https://developer.apple.com/devcenter/ios/index.action within the address bar field.
- Ensure that you have logged in using your Apple credentials.
- Next, click on iOS Provisioning Portal, located on the right-hand side of the page.

- Click on the Certificates tab, located on the left-hand side of the panel, then click on the Development tab as shown in the following screenshot:
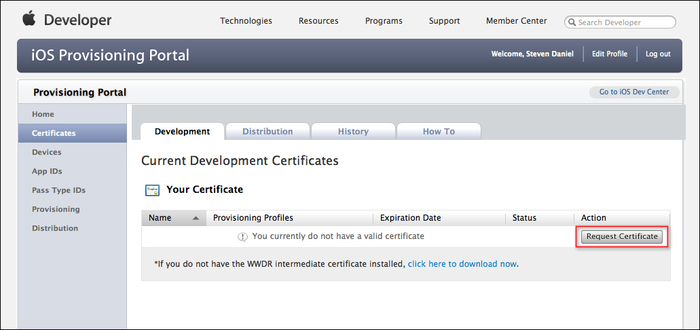
- Click on the Request Certificate button and then click on the Choose File button.
- Next, select the certificate request file that you created in the previous recipe and click on the Submit button once you are done.
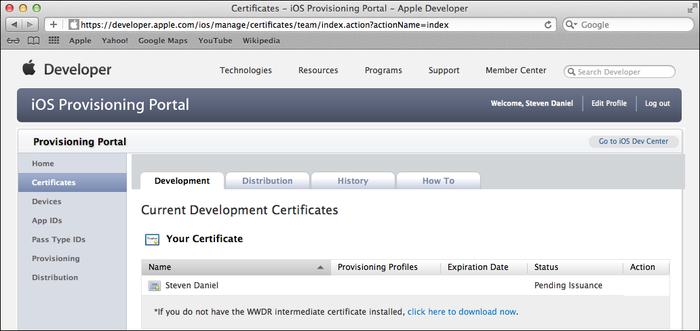
- At this point, you should see that the certificate would be showing a Pending Issuance status. This is shown in the following screenshot:
- After a few seconds, the page will refresh and the certificate will be ready and you will be able to download it.
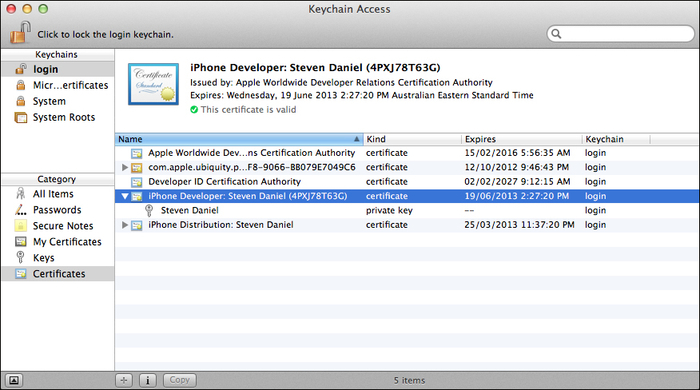
- Once it is downloaded, double-click on the file to install it within the Keychain Access application, as shown in the following screenshot:
In this recipe, we started by requesting a development certificate from Apple which will be used as it provides us the ability to code-sign our applications in order to deploy our apps onto an iOS device. Next, we looked at how to use the generated certificate request file that we created in the previous recipe to generate the development certificate at which point the certificate will be in the Pending Issuance state, and after a few seconds your certificate will be made available for download.
Finally, we looked at how to use the downloaded certificate and install it using the Keychain Access application. In our next recipe, we will take a look at how to register an iOS device to be used for development and testing.