
In this recipe we will learn how to detect and handle iOS device motion events.
To begin, follow these simple steps as outlined:
- Open the
ViewController.mimplementation file from the Project Navigator. - Next, modify the
viewDidLoadmethod as shown in the following code snippet:- (void)viewDidLoad{ [super viewDidLoad]; [self becomeFirstResponder]; self.view.backgroundColor =[UIColor greenColor]; } - Next, create the following code sections as specified in the code snippet:
- (void)motionBegan:(UIEventSubtype)motion withEvent:(UIEvent *)event { if (event.type == UIEventTypeMotion && event.subtype == UIEventSubtypeMotionShake) { self.view.backgroundColor =[UIColor yellowColor]; NSLog(@"Device has been shaken"); } } - (void)motionEnded:(UIEventSubtype)motion withEvent:(UIEvent *)event { if (event.type == UIEventTypeMotion && event.subtype == UIEventSubtypeMotionShake) { // Declare an instance of our Alert View dialog UIAlertView *dialog; // Initialize our Alert View Window with options dialog =[[UIAlertView alloc] initWithTitle:@"Device has been shaken" message:@"I'm all shook up" delegate:self cancelButtonTitle:nil otherButtonTitles:@"OK",nil]; // display our alert dialog [dialog show]; } } - (void)motionCancelled:(UIEventSubtype)motion withEvent:(UIEvent *)event { self.view.backgroundColor = [UIColor blackColor]; NSLog(@"Device shake has been cancelled"); } - (BOOL)canBecomeFirstResponder { return YES; } // Responds to the options within our Alert View Dialog -(void)alertView:(UIAlertView *)alertView clickedButtonAtIndex:(NSInteger)buttonIndex { NSString *buttonTitle =[alertView buttonTitleAtIndex:buttonIndex]; if ([buttonTitle isEqualToString:@"OK"]) { self.view.backgroundColor =[UIColor greenColor]; NSLog(@"Device has stopped shaking"); } } - Change the deployment target to your iOS device.
- Build and run the application by choosing Product | Run from the Product menu or alternatively by pressing Command + R.
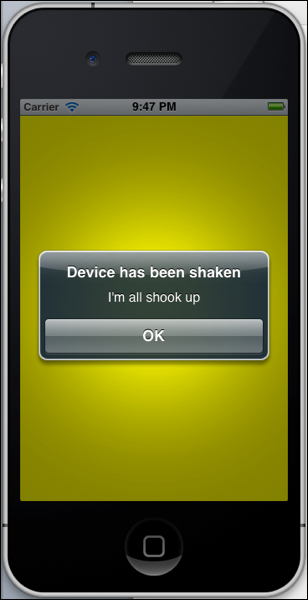
When the compilation completes, the application will be displayed onto your iOS device. Try shaking the device to see the alert messages as shown in the following screenshot:
What we covered in this recipe were the steps to create our example application. We initialized our view background color to green in the viewDidLoad method to indicate that no shake has occurred and set our view to become the first responder by setting the becomeFirstResponder method in order to support the motion events. If this method is not included, none of the
motion events will fire and the application will not behave as designed.
Next, we needed to make our view controller the first responder in the UIResponder responder chain by overriding the motionEnded:motion:withEvent method which will show an alert message when the shake gesture ends. Finally, we implemented the motionBegan method, which determines when a shake occurs and then sets the background color of our view to yellow. When the device determines that the motion has stopped, the motionEnded method is called and that is where we can detect what type of event happened. In this case, we declare and instantiate an instance of the UIAlertView class and display a message to the user alerting them that the shake has ended. The method motionCancelled is called if the system thinks that the motion is not a shake. A device shake is determined
to be approximately a second or so in length and then a call is made to the motionEnded method to set the background color of our view controller to black.
Note
If you would like to find out more information on the UIResponder class, you can refer to the Apple Developer documentation located on the link http://developer.apple.com/library/ios/#documentation/uikit/reference/UIResponder_Class/Reference/Reference.html.
When the iOS device is shaken, the system makes use of the accelerometer and then interprets the accelerometer data to see if it is a shake instruction.
If this has been determined to be a shake gesture, the system creates a UIEvent object which represents this gesture and then sends the object to the currently active application for processing. Using the shake gesture on the iPhone is a lot simpler to use than touch events. Events are still generated when a motion starts or stops and it is even possible for you to track individual motions, as you would do with touch events.
In order to make your applications incorporate and handle the iOS shake gesture, this can be easily accomplished by implementing the following three methods as shown in the following table:
- The Sensing movement and device orientation recipe
- The Using Xcode to create an iOS project recipe in Chapter 1, Getting and Installing the iOS SDK Development Tools