
In this recipe, we will learn how we can use Instruments to help gather important information about the performance of your application.
To begin, follow these simple steps as outlined below:
- Launch Xcode from the
/Developer/Applicationsfolder. - Choose Instruments from the Xcode menu, located under the Open Developer Tool submenu as shown in the following screenshot:

- Select the Activity Monitor option from the list of available templates.
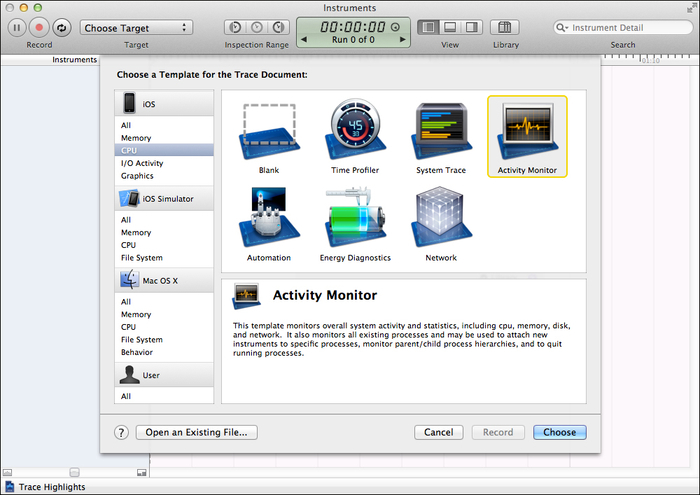
- Click on the Choose button to proceed to the next step in the wizard.
- Next, choose All Processes from the drop-down menu as highlighted by the rectangle in the following screenshot:

- Click on the Record button to begin profiling and monitoring system processes.
In this recipe, we learned how easy it is to launch the Instruments application to profile an application. We learned how to use the Activity Monitor option to show how we can use this Instrument to monitor the overall CPU, memory, disk, and network activity of the current computer system.
Through the use of the Instruments application, you can gather information based on a variety of different types of data and view these side by side at the same time. This enables you to spot trends, which would be hard to spot otherwise, and this can be used to see code running by your program along with the corresponding memory usage.
The following table provides a brief description of each feature within the Instruments application:
|
Instruments feature |
Description |
|---|---|
|
This pane lists all of the Instruments, which have been added for those that you want to profile against. New Instruments can be added by selecting and then dragging each one from the Instruments library into this pane. Items within this pane can also be deleted. | |
|
This pane displays a graphical summary of the data returned by the current Instruments. Each Instrument has its own track that provides a chart of the data that is collected by that Instrument. The information within this pane is read-only. | |
|
This pane shows the details of the data that has been collected by each of the Instruments. It displays the set of events gathered and used to create the graphical view within the track pane. Depending on the type of Instrument, information that is represented by this pane can be customized to represent the data differently. | |
|
This pane displays detailed information about the item that is currently selected in the detail pane. This pane displays the complete stack trace, timestamp, and other Instrument-specific data gathered for the given event. | |
|
This pane shows you where you currently are and the steps you took to get there. It includes two menus: the active Instrument menu and the detail view menu. You can click on the entries within the navigation bar to select the active Instrument, and the level and type of information in the detail view. |
The Instruments trace document toolbar allows you to add and control Instruments, open view, and configure the track pane as shown in the following screenshot:

The following table provides an explanation for each of the different controls on the toolbar:
The Instruments application is now located inside the Xcode bundle located within the /Developer/Applications folder and can be launched through the Xcode development IDE.
- The Tracing iOS applications recipe
- The Running and profiling a project recipe
- The Adding and customizing views recipe in Chapter 2, User Interfaces – Creating the App UI