
In this recipe we will take a look at how easy it is to draw and fill a series of shapes on to the screen.
Following on from our previous recipe, create a new Single View Application, and name it ShapesDrawExample. Create a custom view and name it ShapesView.
To begin, follow these simple steps as outlined in the following order:
- Open the
ShapesView.mimplementation file from the Project Navigator window. - Modify the
drawRect:method as shown in the following code snippet.- (void)drawRect:(CGRect)rect { // Set up and initialize our Graphics Context CGContextRef context = UIGraphicsGetCurrentContext(); CGContextClearRect(context, rect); // Draw our Circle to our view CGContextSetFillColorWithColor(context, [UIColor redColor].CGColor); CGContextAddEllipseInRect(context, CGRectMake(50,50,150,150)); CGContextFillPath(context); // Draw Square to the Screen CGContextSetFillColorWithColor(context, [UIColor yellowColor].CGColor); CGContextAddRect(context, CGRectMake(50,200,200,200)); CGContextFillPath(context); // Draw a Triangle to the Screen CGContextMoveToPoint (context, 150, 100); // Top left CGContextAddLineToPoint(context, 300, 100); // Middle right CGContextAddLineToPoint(context, 150, 300); // Bottom left CGContextSetFillColorWithColor(context, [UIColor greenColor].CGColor); CGContextFillPath(context); } - Our next step is to create the code functionality that will be responsible for adding our custom view as a subview to our existing view controller.
- Open the
ViewController.mimplementation file from the Project Navigator window. - Add a reference to our
ShapesView.hinterface file like we did previously. - Next, modify the
viewDidLoad:method as shown in the following code snippet:- (void)viewDidLoad { [super viewDidLoad]; // Declare and add our custom view as a subView // to the current view. ShapesView *shapesView = [[ShapesView alloc] initWithFrame:self.view.bounds]; [self.view addSubview:shapesView]; } - Then, Build and Run the application by choosing Product | Run from the Product menu, or alternatively pressing Command + R.
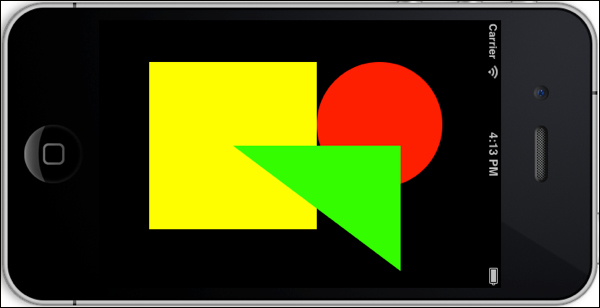
When the compilation completes, the iOS Simulator will appear. The following screenshot displays each of our colored shapes filled. I have rotated this image within the device.
In this recipe, we created a new custom
ShapesView class that inherits from the UIView class. We then modified the
drawRect: method and declared a variable context used to obtain the current graphics context using the UIGraphicsGetCurrentContext function just like we did in our previous example. In our next step, we proceed to set the fill color of our circle by using the
CGContextSetFillColorWithColor method and proceed to call the CGContextAddEllipseInRect method while passing the CGRectMake object. The
CGRectMake method defines the bounding rectangle of the circle. Next, we call the
CGContextFillPath method, which fills the object, and displays it to the screen.
Whenever you proceed to define a rectangle, you need to use the CGContextAddRect method and specify the dimensions using the
CGRectMake method as we did when defining our circle. Next, we define our triangle by specifying the first point of the triangle using the CGContextMoveToPoint method and then proceed to call the CGContextAddLineToPoint method for each vertex that makes up the triangle, before specifying the color for our triangle and use the CGContextFillPath method to display the triangle object to the screen.
Finally, we initialize our LinesCurvesView custom class and then add this as a subview using the same dimensions of our parent view controller.
- The Drawing lines and curves recipe
- The Adding and customizing views recipe in Chapter 2, User Interfaces — Creating the UI