
5
Testing Your Backend
In this chapter, we’ll implement tests to verify the task manager’s backend features we implemented in the previous chapters. We’ll start by learning about testing in Quarkus and its specific dependency to test JWT-secured endpoints. Then, we’ll implement and analyze the tests to cover each of the functionalities that we developed for the task manager and learn how to execute them.
By the end of this chapter, you should be able to implement unit and integration tests for your Quarkus applications. You should also have a basic understanding of the Quarkus testing framework. Providing tests for your applications will help you build solid and reliable software and minimize its maintenance effort.
We will be covering the following topics in this chapter:
- Testing in Quarkus
- Testing the task manager
Technical requirements
You will need the latest Java JDK LTS version (at the time of writing, Java 17). In this book, we will be using Fedora Linux, but you can use Windows or macOS as well.
You will need a working Docker environment to take advantage of Quarkus Dev Services. There are Docker packages available for most Linux distributions. If you are on a Windows or macOS machine, you can install Docker Desktop.
You can download the full source code for this chapter from https://github.com/PacktPublishing/Full-Stack-Quarkus-and-React/tree/main/chapter-05.
Testing in Quarkus
In the Continuous testing section in Chapter 1, Bootstrapping the Project, we introduced some of Quarkus’ testing capabilities. We specifically learned about continuous testing, one of the core testing features that was introduced in Quarkus 2.X. We also examined some of the test code that was bootstrapped from the code.quarkus.io wizard and even implemented a new endpoint and its test using test-driven development (TDD).
It’s clear that providing a good test framework is one of Quarkus’ priorities, including providing the best possible developer experience. In the Quarkus Dev Services section in Chapter 2, Adding Persistence, we learned about Dev Services and how we don’t need to deploy a database when running the application in development mode. Aligned with the goal of providing a great developer experience, Dev Services also works for tests. This means that when Quarkus executes your tests, it will automatically deploy a database for you.
In general, writing a Quarkus unit test is much like writing a regular JUnit 5 unit test. However, there are some nuances that we must be aware of. When you run a Quarkus test, Quarkus starts your application in the background. This makes it ideal to implement tests that integrate several layers of your application. Mocking is still possible via dependency injection, but you need to declare these mocked beans using Quarkus-specific instructions.
JUnit
JUnit is one of the most popular and widespread unit testing frameworks for Java. Developers use this framework to implement and execute automated tests for their Java applications. Its tight integration with almost all IDEs and build tools makes it a perfect candidate for this purpose, and most organizations have adopted it as their main testing framework.
Though most of the required test dependencies were added when we bootstrapped the project, we’ll need an additional dependency to be able to test our secured application.
Adding the missing test dependency to our project
We’ll start by adding the missing dependency for this chapter and then we’ll evaluate what this dependency provides. You can execute the following command in the project root and the Quarkus Maven Plugin will add the dependency for you:
./mvnw quarkus:add-extension -Dextensions=io.quarkus:quarkus-test-security-jwtOnce executed, you should see the following message:
Figure 5.1 – A screenshot of the execution result of the quarkus:add-extension command
Let us now see what this dependency provides.
Test security JWT
After executing the ./mvnw quarkus:add-extension command, the following dependency should be visible in our pom.xml file. However, we should fine-tune this dependency and set its scope to test:
<dependency>
  <groupId>io.quarkus</groupId>
  <artifactId>quarkus-test-security-jwt</artifactId>
  <scope>test</scope>
</dependency>
Test security JWT is the dependency provided by Quarkus to test applications that are implemented with a JWT security layer. It has a transitive dependency on the quarkus-test-security artifact, which provides the common test framework used for all of the Quarkus security providers.
Now that we’ve gone over the Quarkus testing framework and added the required dependencies, let us implement the tests for our task manager application.
Testing the task manager
We’ve already covered the complete implementation of the task manager backend. In Chapter 2, Adding Persistence, we created the persistence layer for the application. Then, in Chapter 3, Creating the HTTP API, we implemented the business and presentation layers. Finally, in Chapter 4, Securing the Application, we secured the HTTP endpoints of the task manager. We could implement unit tests to verify the application functionality for each layer individually. However, this approach would require mocking each layer’s dependencies and would require a complex test implementation, which would also mean that its maintenance would be expensive. Since our business logic is not too complex, we’ll treat each of the individual application features as a test unit and implement an integration test for each functionality covering the three layers. Let us start by configuring our application.
Configuring the application
Whenever we execute a Quarkus test, Quarkus will spin up a real application instance to perform the verifications. Considering this, it’s interesting to prepare the test environment and add some initial data to the database. For this purpose, we need to edit the application.properties file and add the following entry:
%test.quarkus.hibernate-orm.sql-load-script=import-dev.sqlIn the Configuring Quarkus section in Chapter 2, Adding Persistence, we configured the same property but for the dev profile instead. As we learned, this property defines a path to a file containing SQL statements that will be executed when the application starts. For the testing environment, these statements will be executed when the application starts and before the tests are run. Since our use case and features are quite simple we will reuse the same script that we used for the development environment. This script adds two users, assigns them some roles, and creates a project. If your application grows in complexity or you need to add specific test data, you can create a new file, import-test.sql, with your SQL statements and configure this property to point to the new file.
We have now configured the application and it’s ready to run in test mode. Let us now implement the tests for the authentication feature.
Testing authentication
In the Implementing the authentication service and login interface section in Chapter 4, Securing the Application, we developed an authentication service to allow users to log into the application and retrieve a valid JWT. We will now implement a test suite to verify that this feature works as expected.
We’ll start by creating a new test suite, AuthResourceTest, by opening the AuthResource class, right-clicking on its declaration, and clicking on the Go To submenu, followed by clicking on the Test menu entry:

Figure 5.2 – A screenshot of IntelliJ Go To, Test menu entry
We should now see a new pop-up menu where we’ll click on the Create New Test… entry:
Figure 5.3 – A screenshot of IntelliJ Choose Test pop-up menu
We should now see the following dialog:
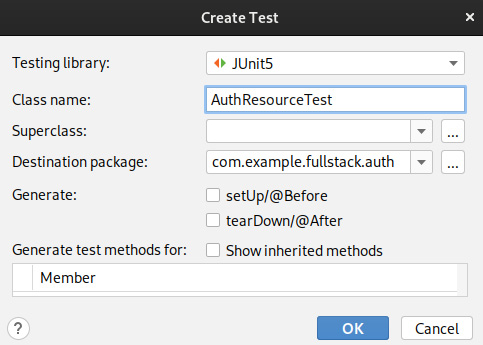
Figure 5.4 – A screenshot of IntelliJ Create Test dialog
The provided values should be fine; we just need to press OK and IntelliJ will create the test suite class for us.
In the following code snippet, you will find the relevant source code for the test:
@QuarkusTest
class AuthResourceTest {
  @Test
  void loginValidCredentials() {
    given()
      .body("{"name":"admin","password":"quarkus"}")
      .contentType(ContentType.JSON)
      .when().post("/api/v1/auth/login")
      .then()
      .statusCode(200)
      .body(not(emptyString()));
  }
  @Test
  void loginInvalidCredentials() {
    given()
      .body("{"name":"admin","password":
        "not-quarkus"}")
      .contentType(ContentType.JSON)
      .when().post("/api/v1/auth/login")
      .then()
      .statusCode(401);
  }
}
The first thing to notice is that the class is annotated with the @QuarkusTest annotation. This configures Quarkus to run the application in test mode so that we can then perform real HTTP requests to verify the application’s behavior. We will configure the rest of the test classes with this annotation too.
Let us now examine each of the two test cases defined in the suite:
- void loginValidCredentials()
This test verifies that a user providing valid credentials can authenticate and retrieve a valid JWT. The method is annotated with the standard JUnit 5 @Test annotation that instructs JUnit to execute this method as a test case. The implementation starts with the given() REST Assured domain-specific language (DSL) method to build the HTTP request. We’ll provide a body for the request with a JSON string, containing valid credentials using the REST Assured body() method. These credentials should match those that we added in the import-dev.sql script. We’ll also provide the Content-Type HTTP header for the request, in this case, application/json. These invocations have prepared the HTTP request. We can now perform the POST request using the when() and post() REST Assured DSL methods pointing to the login endpoint.
REST Assured provides DSL methods to perform assertions for the response of the executed HTTP request too. We start by calling the then() method and then verifying that the response has a 200 OK successful status code and contains a non-empty body.
Notice how the REST Assured DSL provides methods that help you organize your tests following the common Given-When-Then or Arrange-Act-Assert testing structure.
- void loginInvalidCredentials()
This test verifies that a user providing invalid credentials won’t be able to authenticate and retrieve a JWT. The test preparation is very similar to the valid credentials test suite. However, in this case, we’ll provide an invalid password for the user. The test assertion now verifies that a 401 Unauthorized client error status code is returned in the HTTP response.
REST Assured
REST Assured is a library to test and validate REST services in Java. Its support for easily building HTTP requests and its tight integration with Quarkus makes it a great tool to implement integration tests.
Now that we’ve implemented the test, we can execute it using IntelliJ or through the command line with Maven. To run the test suite in IntelliJ, we need to click on the play button near the class definition and click on the Run ‘AuthResourceTest’ menu entry:
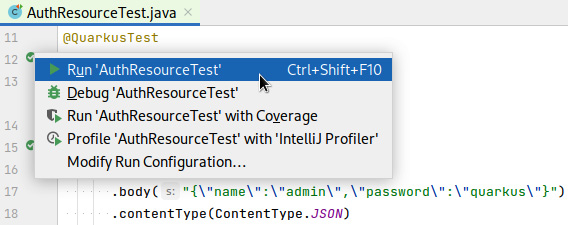
Figure 5.5 – A screenshot of the IntelliJ Run ‘AuthResourceTest’ menu entry
The tests should execute and pass, and we should be able to see the results in the Run tool window:

Figure 5.6 – A screenshot of IntelliJ ‘AuthResourceTest’ test execution results
You can also run the tests with Maven using the standard Maven testing goals:
./mvnw clean testOr if you just want to test the current test suite, run the following:
./mvnw clean test -Dtest=AuthResourceTestThe test should now execute and you should see the Maven build success message:
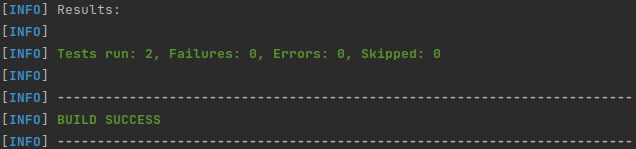
Figure 5.7 – A screenshot of the execution result of the mvnw clean test command for the AuthResourceTest class
Now that we’ve implemented tests to validate the user authentication features, let us continue by implementing tests for the user-related operations.
Testing the user-related features
In the UserService and UserResource sections in Chapter 3, Creating the HTTP API, we developed and exposed the user-related features. We added endpoints to list, create, update, and delete users, and also two specific endpoints to get the currently logged-in user information and to change the password. We will now implement tests that will verify that all of these features work.
Just like we did for AuthResource, we’ll open the UserResource class, right-click on its declaration, and click on the Go To submenu, and the Test menu entry. We’ll click on the Create New Test popup, and accept the default dialog settings. IntelliJ should now create and open a new UserResourceTest class.
You can find the full source code for the test suite at https://github.com/PacktPublishing/Full-Stack-Development-with-Quarkus-and-React/tree/main/chapter-05/src/test/java/com/example/fullstack/user/UserResourceTest.java.
Let us now analyze the most relevant test cases.
Testing the user list endpoint
This test verifies that a user with an administrative role can retrieve a list of all the users. The following snippet contains the test source code:
@Test
@TestSecurity(user = "admin", roles = "admin")
void list() {
  given()
    .when().get("/api/v1/users")
    .then()
    .statusCode(200)
    .body("$.size()", greaterThanOrEqualTo(1),
      "[0].name", is("admin"),
      "[0].password", nullValue());
}
If you recall, in Chapter 3, Creating the HTTP API, we annotated the UserResource class with the @RolesAllowed annotation and secured all of its declared endpoints so that only authenticated users with the admin role could perform requests. To test the user endpoints, we could retrieve a valid JWT and include it as an HTTP request header. However, Quarkus provides a very handy @TestSecurity annotation to control the application’s security context when the test is run. The annotation can be used to completely disable authorization so that secured endpoints can be accessed without being authenticated or to specify the identity and roles of the application’s context user for requests performed during the annotated test execution.
For the current test, we want to verify that a user with an admin role can retrieve the list of users, so we’ll annotate the method with @TestSecurity(user = "admin", roles = "admin").
The test implementation performs a simple HTTP GET request to the /api/v1/users endpoint and verifies that a 200 OK status code is returned. The test also verifies that the JSON response contains at least a user with the name admin and that the user’s password is not leaked. Notice how REST Assured allows you to perform JSONPath queries to the response body and validate them with expression matchers. Let us now see how to verify the user creation features.
Testing the user creation features
These tests verify that only users with the admin role can create new users and assign them roles. The following snippet contains the source code for a test that verifies the happy path for the user creation procedure:
@Test
@TestSecurity(user = "admin", roles = "admin")
void create() {
  given()
    .body("{"name":"test","password":"test",
      "roles":["user"]}")
    .contentType(ContentType.JSON)
    .when().post("/api/v1/users")
    .then()
    .statusCode(201)
    .body(
      "name", is("test"),
      "password", nullValue(),
      "created", not(emptyString())
    );
}
The test method is annotated with the @TestSecurity annotation configured with a user with the admin role since only administrators can create users. The implementation starts by building an HTTP request with a JSON body and content type. The body contains the minimum required fields to create a valid user, in this case, name, password, and roles. The HTTP request is sent with a POST method to the user’s resource endpoint. In the assertion phase, we validate that the HTTP response returns a 201 Created successful status code. Then, we verify that the response contains a JSON body with the new user’s information, including the automatically generated created field, and that the password is not leaked.
Happy path
The happy path, in the context of testing, is the scenario that showcases a feature’s workflow when no exception occurs and the action completes successfully.
In the happy path scenario, we have verified that a user with the admin role can create a user. Let us now test that a regular user can’t invoke the endpoint. The following code snippet contains the code that verifies this:
@Test
@TestSecurity(user = "user", roles = "user")
void createUnauthorized() {
  given()
    .body("{"name":"test-unauthorized","password"
      :"test","roles":["user"]}")
    .contentType(ContentType.JSON)
    .when().post("/api/v1/users")
    .then()
    .statusCode(403);
}
In this case, the test method is also annotated with the @TestSecurity annotation, but the configured user doesn’t have the admin role. The test method implementation starts just like the happy path alternative. However, in the assertion phase, we check that the HTTP response contains a 403 Forbidden client error status code.
Since the User entity has a unique constraint for the name field, we can also create a scenario to verify that the constraint is enforced. The following snippet contains the source code for a test to verify it:
@Test
@TestSecurity(user = "admin", roles = "admin")
void createDuplicate() {
  given()
    .body("{"name":"user","password":
      "test","roles":["user"]}")
    .contentType(ContentType.JSON)
    .when().post("/api/v1/users")
    .then()
    .statusCode(409);
}
In this case, both the method annotations and the HTTP request data are configured correctly. However, the requested user name is a duplicate of one of the users we create in the import-dev.sql file. In the verification phase, we assert that the response has a 409 Conflict client error status code. In this case, we’re not only verifying that the user-related features work OK, but that the RestExceptionHandler class we implemented in Chapter 3, Creating the HTTP API, is processing the exception correctly.
We have now tested all the scenarios for the user creation feature. Let us continue by implementing tests for the user update functionality.
Testing the user update feature
These tests verify that users with the admin role can update existing users. The following test asserts that a recently created user can be modified to change its name to a different value. The following snippet contains the source code for this test:
@Test
@TestSecurity(user = "admin", roles = "admin")
void update() {
  var user = given()
    .body("{"name":"to-update","password":
      "test","roles":["user"]}")
    .contentType(ContentType.JSON)
    .when().post("/api/v1/users")
    .as(User.class);
  user.name = "updated";
  given()
    .body(user)
    .contentType(ContentType.JSON)
    .when().put("/api/v1/users/" + user.id)
    .then()
    .statusCode(200)
    .body(
      "name", is("updated"),
      "version", is(user.version + 1)
    );
}
Only users with the admin role can interact with this endpoint, so we annotate the test method with a properly configured @TestSecurity annotation. The test implementation differs a little bit from the ones we’ve analyzed so far. You’ll notice that it contains two REST Assured invocations, one to prepare the test scenario and another one to perform the actual test and its assertions.
The first REST Assured invocation is used to create a new user with the name to-update. The code is very similar to the one we implemented when developing the user creation feature tests. However, in this case, instead of providing a then() DSL method assertion, the HTTP response body is deserialized into a User instance.
The next part contains the actual test, where the user with an updated name field value is sent to the application with a PUT HTTP request. The assertion part verifies that the server responds with a 200 OK status code and that the response body contains the updated user information with an incremented value in the version field.
In the Creating the task manager entities in Chapter 2, Adding Persistence, we learned that the version field was used by Hibernate to provide the optimistic locking features. We can also implement a test to verify that optimistic locking works and concurrent entity modifications are prevented by our application. The next code snippet contains the source code for this test:
@Test
@TestSecurity(user = "admin", roles = "admin")
void updateOptimisticLock() {
  given()
    .body("{"name":"updated","version":1337}")
    .contentType(ContentType.JSON)
    .when().put("/api/v1/users/0")
    .then()
    .statusCode(409);
}
The test implementation performs an HTTP request to update the value of the user with the 0 ID (admin). However, we are providing a fake version number that doesn’t match the one in the database. The assertion checks that the server responds with a 409 Conflict client error status code.
There’s an additional test case for the user update operation when the user doesn’t exist, which you can check out in the book’s source code repository.
Let us now analyze the test for the delete operation.
Testing the user delete feature
This test verifies that a user with an administrative role can delete an existing user from the database. In the following snippet, you can find the source code for this test:
@Test
@TestSecurity(user = "admin", roles = "admin")
void delete() {
  var toDelete = given()
    .body("{"name":"to-delete","password":"test"}")
    .contentType(ContentType.JSON)
    .post("/api/v1/users")
    .as(User.class);
  given()
    .when().delete("/api/v1/users/" + toDelete.id)
    .then()
    .statusCode(204);
  assertThat(User.findById
    (toDelete.id).await().indefinitely(), nullValue());
}
The test method is configured with the @TestSecurity annotation, so the test is executed in the context of a logged-in user with the admin role. Just like we did for the update scenarios in the Testing the user update feature section, the test implementation starts by creating a user using a REST Assured configured HTTP operation that we’ll subsequently delete. The next invocation is the actual test where we send a DELETE HTTP request and verify that the server responds with a 204 No Content successful status code. The test implementation contains an additional assertion that verifies that the user no longer exists in the database.
We have now implemented tests for most of the CRUD operation scenarios of the user resource. Let us now prepare a test for the password change operation.
Testing the password change feature
This test verifies that any application user can change their password using the provided endpoint. The following snippet contains the source code for this test:
@Test
@TestSecurity(user = "admin", roles = "user")
void changePassword() {
  given()
    .body("{"currentPassword": "quarkus",
      "newPassword": "changed"}")
    .contentType(ContentType.JSON)
    .when().put("/api/v1/users/self/password")
    .then()
    .statusCode(200);
  assertTrue(BcryptUtil.matches("changed",
    User.<User>findById(0L).await().indefinitely().password)
  );
}
When we implemented the UserResource class in Chapter 3, Creating the HTTP API, we declared the changePassword method with an @RolesAllowed("user") annotation, which allows any user with the user role to invoke this endpoint. For the test, we’ll annotate the test case method with an @TestSecurity annotation with the roles property set to user. The test implementation prepares an HTTP request with a JSON body that contains two fields: currentPassword and newPassword. Then, we send the request using an HTTP PUT method and verify that the server responds with a 200 OK successful status code. We’ll provide an additional assertion to check that the user’s password was changed in the database and set to the corresponding bcrypt encrypted value.
The test suite contains an additional test case, changePasswordDoesntMatch(), which contains a similar implementation but with an invalid currentPassword field value. The assertion checks that the invocation fails with a 409 Conflict client error HTTP status code.
Now that we’ve covered most of the user-related test cases, let us continue by implementing the tests for the project-related features.
Testing the project-related features
In the ProjectService and ProjectResource sections in Chapter 3, Creating the HTTP API, we developed and exposed the project-related features. We added endpoints to list, create, update, and delete projects for the currently logged-in user. We will now implement tests to verify that these features work as expected. Just like we did for the user and auth resource classes in the Testing the user-related features and Testing authentication sections, we’ll open the ProjectResource class, right-click on its declaration, click on the Go To submenu, and then the Test menu entry. We’ll click on the Create New Test popup, and accept the default dialog settings. IntelliJ should now create and open a new test ProjectResourceTest class.
You can find the full source code for the test suite at https://github.com/PacktPublishing/Full-Stack-Development-with-Quarkus-and-React/tree/main/chapter-05/src/test/java/com/example/fullstack/project/ProjectResourceTest.java. Most of the test cases are very similar to those that we implemented for the user-related features. However, the project delete operation is different from that of the user’s homologous delete operation; let us analyze this test case.
Testing the project delete feature
This test verifies that a user can delete one of their projects and that any task assigned to the project is reassigned so that it no longer references the deleted project. The following code snippet contains the source code for this test case:
@Test
@TestSecurity(user = "user", roles = "user")
void delete() {
  var toDelete = given().body("{"name":"to-delete"}").
    contentType(ContentType.JSON)
    .post("/api/v1/projects").as(Project.class);
  var dependentTask = given()
    .body("{"title":"dependent-task","project":
      {"id":" + toDelete.id + "}}").contentType
        (ContentType.JSON)
    .post("/api/v1/tasks").as(Task.class);
  given()
    .when().delete("/api/v1/projects/" + toDelete.id)
    .then()
    .statusCode(204);
  assertThat(Task.<Task>findById(dependentTask.id).await().
    indefinitely().project, nullValue());
}
The test method is annotated with the @TestSecurity annotation with the user and roles properties configured. For these tests, the user property must point to an existent user, since all of the project operations are performed within the scope of an owning user. The test implementation starts by creating a project and a dependent task using real HTTP requests performed with REST Assured. The third REST Assured instruction contains the actual test, where we send a DELETE HTTP request to the project’s resource endpoint: "/api/v1/projects/" + toDelete.id. We then verify that the server responds with a 204 No Content successful status code. We perform an additional assertion to verify that the dependent task stored in the database no longer references the deleted project.
We’ve now covered the test suites for the authentication, user, and project-related features. Let us now implement the tests for the task-related functionality.
Testing the task-related features
In the TaskService and TaskResource sections in Chapter 3, Creating the HTTP API, we developed and exposed the task-related features. We added endpoints to create, update, and delete tasks for the currently logged-in user, and also a specific endpoint to set the completion status of a task. We will now implement tests to verify that these features work as expected.
To create the test suite class, we’ll open the TaskResource class, right-click on its declaration, and click on the Go To submenu, and the Test menu entry. We’ll click on the Create New Test popup, and accept the default dialog settings. IntelliJ should now create and open a new TaskResourceTest class.
You can find the full source code for the test suite at https://github.com/PacktPublishing/Full-Stack-Quarkus-and-React/blob/main/chapter-05/src/test/java/com/example/fullstack/task/TaskResourceTest.java. Most of the test cases are very similar to those that we implemented for the other resources. However, the set task complete operation has a subtle difference, since it expects a subresource URL and a boolean body instead of a complete object. Let us analyze the test to verify the set task complete operation.
Testing the set task complete feature
This test verifies that a user can mark one of their tasks as complete. The following code snippet contains the source code for this test case:
@Test
@TestSecurity(user = "user", roles = "user")
void setComplete() {
  var toSetComplete = given()
    .body("{"title":"to-set-complete"}")
    .contentType(ContentType.JSON)
    .post("/api/v1/tasks").as(Task.class);
  given()
    .body(""true"")
    .contentType(ContentType.JSON)
    .when().put("/api/v1/tasks/" + toSetComplete.id + "/complete")
    .then()
    .statusCode(200);
  assertThat(Task.findById(toSetComplete.id).await().
    indefinitely(),
    allOf(
      hasProperty("complete", notNullValue()),
      hasProperty("version", is(toSetComplete.version + 1))
    ));
}
We start the test implementation by creating a task using REST Assured to perform an HTTP POST request. Next, we send a PUT request to the task complete resource endpoint ("/api/v1/tasks/" + toSetComplete.id + "/complete") and verify that the server responds with a 200 OK successful HTTP status code. We include an additional assertion to verify that the task in the database is updated and the complete field is set to a non-null value.
Now that we’ve provided full coverage for our backend, we can execute the tests using Maven by running the following command:
./mvnw clean testMaven should execute your tests and you should be able to see the following message:

Figure 5.8 – A screenshot of the execution result of the mvnw clean test command
We have now implemented integration tests for all of the application’s resources covering most of the usage scenarios. Our application is now much more reliable, and we should feel safe when we need to refactor or maintain the project in the future.
Summary
In this chapter, we learned how to implement tests in Quarkus using its test framework and REST Assured. We also provided complete test coverage for the task manager backend. We started by adding the missing dependency and configuring the project. Then, we added test suite classes for the auth, user, project, and task resources. We also learned how to run these tests using IntelliJ’s built-in features, and through Maven in the command line.
You should now be able to implement tests for your Quarkus applications using the Quarkus test framework and REST Assured. In the next chapter, we’ll learn how to compile the application to a native executable using GraalVM.
Questions
- What configuration property should you use to add data to your testing environment database?
- How do you bootstrap a test suite class in IntelliJ?
- How does an @QuarkusTest differ from a regular JUnit test?
- What’s the purpose of the @TestSecurity annotation?