6
Building a Native Image
In this chapter, we’ll study how to compile a native executable file for the task manager. We’ll start by learning the main advantages and benefits of Quarkus, GraalVM, and their native image compilation features. Then, we’ll learn how to set up GraalVM in our system. Next, we’ll configure our application for native compilation, build it, and run the resulting native executable. Finally, we’ll learn how to produce a Linux-compatible executable without having a local GraalVM installation.
By the end of this chapter, you should be able to compile your Quarkus applications into native executable images and have a good understanding of why and when you should choose this packaging method.
GraalVM Native Image
GraalVM is a high-performance Java Development Kit (JDK) and Java Virtual Machine (JVM) originally developed and maintained by Oracle. Some of its most notable features among many are a high-performance compiler, Ahead-Of-Time (AOT) native image compilation, and polyglot programming. GraalVM Native Image is an AOT compilation technology that generates standalone native executables. The executable packages all the necessary classes from your application and their dependencies, along with statically linked native code from the JDK. This means that it’s self-contained and can be executed without any additional requirements.
We will be covering the following topics in this chapter:
- Building a native executable in Quarkus
- Creating a native image for the task manager
Technical requirements
You will need the latest Java JDK LTS version (at the time of writing, Java 17). In this book, we will be using Fedora Linux, but you can use Windows or macOS as well.
You will need a working Docker environment to deploy a PostgreSQL database and to create a Linux native image using Docker. There are Docker packages available for most Linux distributions. If you are on a Windows or macOS machine, you can install Docker Desktop.
In case you’re not using IntelliJ IDEA Ultimate edition, you’ll need a tool such as cURL or Postman to interact with the implemented HTTP endpoints.
You can download the full source code for this chapter from https://github.com/PacktPublishing/Full-Stack-Quarkus-and-React/tree/main/chapter-06.
Building a native executable in Quarkus
In the What is Quarkus? section in Chapter 1, Bootstrapping the Project, we learned that Quarkus was built from the ground up to be cloud-native by considerably improving the application’s startup time and memory footprint. To improve the application’s boot time, Quarkus moves many of the tasks that classic Java applications perform at runtime to build time.
Every time a traditional Java application boots, it loads and analyzes configuration files, scans for annotations, builds a dependency tree, and so on, before even starting with the application’s execution logic. Quarkus, on the other hand, rethinks the problem and moves most of these tasks to build time where the results are recorded as part of the application’s bytecode. This way, Quarkus can start with the application’s execution logic right away from the moment the application boots, which considerably improves the overall startup time and memory consumption.
With this approach, Quarkus brings substantial performance improvements to Java runtimes executed in a traditional JVM. However, even faster startup times and smaller memory footprints can be achieved by using AOT compilation and creating a native executable. Quarkus leverages GraalVM Native Image AOT compilation to compile and package native binaries.
Combining GraalVM’s AOT compiler optimizations with the Quarkus build time approach delivers application runtimes with the smallest possible memory footprint and startup time. Low memory footprint applications are especially interesting when deploying them in cloud environments such as Amazon or Google since it will drastically reduce the costs associated with their deployment. Fast startup times are crucial for cloud-native applications that need to scale very quickly or that are delivered as serverless functions.
Note on performance
Packaging your application as a native executable brings the added benefits of faster boot time and reduced memory footprint. However, this comes with a trade-off concerning the overall application performance. When a Java application is run on a JVM, it takes advantage of runtime optimizations that the virtual machine performs by building profile information throughout its execution lifetime. When choosing a packaging strategy for your application, you need to compare and balance the benefits of each approach and choose the one that better suits your use case. For example, you’d usually prefer native executable packaging for smaller, short-lived applications.
GraalVM can be used to compile any Java application. However, it requires fine-tuning and tedious configuration to make it work. Even if you follow the instructions and provide careful configuration, you might still not be able to create a native image of your application. Following its developers’ joy paradigm we learned about in the What is Quarkus? section, in Chapter 1, Bootstrapping the Project, Quarkus and its extensions provide many of the necessary steps and configurations for native image compilation, so that developers can concentrate on the code and not on the build process. With Quarkus, you’ll still likely need to set some configuration options or annotate your code, but it’s nothing compared to what you’ll require with other frameworks or vanilla Java code.
Now that we’ve learned the Quarkus native image compilation advantages, let us see how to set up GraalVM in our systems.
Setting up GraalVM
Quarkus takes advantage of GraalVM to compile your applications into native image executables. To get started, you first need a valid GraalVM setup on your system. There are three distributions of GraalVM:
- Oracle GraalVM Community Edition (CE)
- Oracle GraalVM Enterprise Edition (EE)
- Mandrel: A GraalVM distribution, specifically designed to provide native image support for Quarkus
In this section, we’ll learn how to manually set up GraalVM CE in a Linux environment step by step:
- Download a Java 17 GraalVM CE package for your environment from the GitHub releases page: https://github.com/graalvm/graalvm-ce-builds/releases. In my case, it’s Linux (amd64).
- Extract the archive to its definitive location. I will be extracting it to the $HOME/lib/graalvm-ce directory.
- Set the GRAALVM_HOME environment. You can achieve this by typing the following command:
export GRAALVM_HOME=$HOME/lib/graalvm-ce
- Add the GraalVM bin subdirectory to your path:
export PATH=${GRAALVM_HOME}/bin:$PATH
Note that you should save these commands in your .bashrc file to make them persistent.
- Install GraalVM’s native-image tool:
gu install native-image
The native-image tool should be automatically downloaded and installed, and you should see a message like the following:

Figure 6.1 – A screenshot of the result of executing gu install native-image
We should now have a valid GraalVM CE setup on our Linux-compatible system. Let’s verify this by running the java -version command:

Figure 6.2 – A screenshot showing the GraalVM CE build of OpenJDK as the current Java version
You should now be able to set up GraalVM on Linux by yourself. The graalvm.org website also contains detailed documentation on how to install it on Windows and macOS platforms. In addition, there are also platform-specific packages (sdkman, homebrew, scoop, and so on) you can use to automatically install GraalVM on your system. Regardless of how you install GraalVM on your system, note that you will still need to install GraalVM’s native-image tool manually, as stated in step 5: gu install native-image.
A local GraalVM setup is required to build a native image for your platform. However, Quarkus also supports building a Linux-compatible native image in a Docker container without the need for a local GraalVM installation. In the Building the native image in a docker container section, we’ll use this technique to create a Linux executable for our task manager application.
We now have a good understanding of the advantages of compiling our Java application into a native image and a GraalVM setup. Let us continue by creating a native image for the task manager we are implementing across the book.
Creating a native image for the task manager
In general, building a native executable with GraalVM usually requires tedious configuration and tweaking. Instead, when building an executable for a Quarkus application, Quarkus does most of the heavy lifting for us. However, we’ll still need to tweak our application a little.
Let us start by configuring the application to account for additional application resources that might be missed by GraalVM.
Including application resources
GraalVM Native Image uses AOT compilation to generate the native executable. This means that GraalVM shifts most of the processes and analyzes that regular Java applications perform during the runtime/execution phase to the build/compilation phase. This is the main reason why GraalVM compiled native applications perform so much better than regular Java applications. To accomplish this, GraalVM needs to know at build time everything that will be required at runtime so that it gets included in the binary executable. The Native Image builder performs an aggressive static code analysis to find all of the methods that are reachable from the application’s entry point. Then, it compiles only these methods into the application’s executable.
Considering this, GraalVM will require extra help when dealing with dynamic class loading, reflection, serialization, and so on. As we learned in the Building a native executable in Quarkus section, Quarkus and its extensions take care of providing most of these settings. For the task manager, most of it is taken care of except for the JSON Web Token (JWT) keys we created in Chapter 4, Securing the Application. We need to add the following entry to the application.properties file to take care of these files:
quarkus.native.resources.includes=jwt/public-key.pem,
jwt/private-key.pem
The quarkus.native.resources.includes property can be configured with a comma-separated list of paths that will be added to the native image. In this case, we’re including the public key that is used by the task manager to verify the JWTs along with the private key that is used by the task manager to sign them. We’ll learn an additional method to include resources in the native image when we integrate the frontend with Quarkus in Chapter 11, Quarkus Integration. Our application should now be ready for packaging, so let us build the native image.
Building the native image
In the Maven project (pom.xml) section in Chapter 1, Bootstrapping the Project, we learned that the https://code.quarkus.io site bootstrapped a project with a configured native Maven profile for us. This profile contains all the required settings to package the application as a native image using a local GraalVM installation. We don’t need to provide further changes to this profile, so we can start building the native image right away.
The process to build a native image is very similar to the one used to package the standard JVM artifact. We’ll need to invoke the Maven package goal but with the native profile instead. Let’s try to compile the application by running the following command:
./mvnw clean package -PnativeThe process should complete successfully and we should be able to see a build result summary similar to the following:
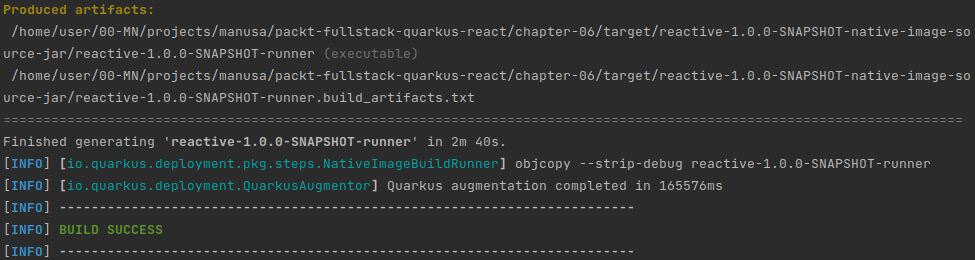
Figure 6.3 – A screenshot of the result of executing ./mvnw clean package –Pnative
A new executable file, reactive-1.0.0-SNAPSHOT-runner, with the compiled application should have been created in the target directory. Let us now see how to execute this file and verify that the application works.
Running the native image
So far we’ve been executing the application in development mode and have been taking advantage of Quarkus dev services to create and configure a PostgreSQL database for us. However, the native image executable contains the production code, so we need to have a database available and provide its configuration parameters to the application runtime.
If you don’t have a PostgreSQL instance in your local environment, you can create one in a Docker container. Let’s try this by running the following command:
docker run --rm --name postgresql -p 5432:5432 -e POSTGRES_PASSWORD=pgpass -d postgresThis command starts a Docker container named postgresql and maps the container 5432 port (PostgreSQL default port) to the local 5432 port. The --rm flag instructs Docker to remove this container as soon as we stop it. Once we complete the test, you can stop and automatically remove the container by running docker stop postgresql.
We can now execute the application by running the following command:
./target/reactive-1.0.0-SNAPSHOT-runner -Dquarkus.datasource.username=postgres -Dquarkus.datasource.password=pgpass -Dquarkus.datasource.reactive.url=postgresql://localhost:5432/postgres -Dquarkus.hibernate-orm.database.generation=createThis command starts the application and provides the required configuration options for the data source. The credentials and the URL should match those of your PostgreSQL database. In this case, we’re providing configuration options that match the ones of the postgresql container we just created. In addition, we’re instructing Hibernate to create the database for us in case it doesn’t exist by overriding the quarkus.hibernate-orm.database.generation property with a create value. The application should start and we should be able to see the following log message:

Figure 6.4 – A screenshot of the native application execution log
We can now test whether everything works OK by requesting a JWT for the admin user. Let’s try this by running the following command:
curl -X POST -d"{"name":"admin","password":"quarkus"}" -H "Content-Type: application/json" localhost:8080/api/v1/auth/loginIf everything goes well, a new token should be printed:

Figure 6.5 – A screenshot of the result of executing cURL to perform a valid login
Note
You need to manually stop the PostgreSQL Docker container we’ve created to test run the application (docker stop postgresql) when you’re finished. If this container is active while running or testing the application in dev mode, you’ll face port conflict errors.
We’ve now covered how to configure, compile, and run the task manager as a native executable. Let us now learn how to build a Linux executable from any platform using a Docker container.
Building the native image in a Docker container
In general, the main purpose of a native executable is to distribute it within a container image that can then be deployed into the cloud. For this scenario, you’ll need a Linux-compatible binary file that might not match your local development platform. In this case, Quarkus doesn’t even need you to have a valid GraalVM installation in your system, since it can perform the build leveraging a Docker container.
We can instruct Quarkus to perform a native image container build by setting the quarkus.native.container-build property to true. We should be able to do this in the command line when executing the Maven command like in the following example:
./mvnw clean package -Pnative -Dquarkus.native.container-build=trueHowever, in our case, whenever we build the native image, we want to create a Linux executable, so we’ll make this change permanent by adding the property to the native profile in our project’s pom.xml.
Note
At the time of writing, the default builder image Quarkus uses is based on Java 11, which is not compatible with our Java 17-based project. We’ll need to configure a valid builder image in pom.xml by setting the quarkus.native.builder-image property too.
The following code snippet shows the resulting native profile properties section with the persisted property in pom.xml (you can find the full source code for this file at https://github.com/PacktPublishing/Full-Stack-Development-with-Quarkus-and-React/tree/main/chapter-06/pom.xml):
<profile>
  <id>native</id>
  <activation>
    <property>
      <name>native</name>
    </property>
  </activation>
  <build>
    <!-- … -->
  </build>
  <properties>
    <quarkus.package.type>native</quarkus.package.type>
    <quarkus.native.container-build>true
      </quarkus.native.container-build>
    <quarkus.native.builder-image>quay.io/quarkus/ubi-
      quarkus-mandrel:21.3-java17</quarkus.native.
        builder-image>
  </properties>
</profile>
We’ve added the quarkus.native.container-build property to the native profile properties section. Whenever we run Maven with this native profile enabled, the property will be applied automatically, and we won’t need to provide it manually anymore.
Let’s try to compile our project again by executing the following Maven command:
./mvnw clean package -PnativeThe process should complete successfully and we should be able to see a build result summary similar to the following:

Figure 6.6 – A screenshot of the result of executing ./mvnw clean package –Pnative using a container build
Notice how the log shows two Docker invocations, one to perform the build and another to copy the resulting artifact from the Docker volume to the target directory. Regardless of your local development platform, a new reactive-1.0.0-SNAPSHOT-runner binary file should be available in the target directory.
Summary
In this chapter, we studied how to create a native image executable in Quarkus using GraalVM. We learned about the advantages of AOT compilation and native images. Then we learned how to set up GraalVM on a Linux platform and discovered other alternatives to set it up on Windows and macOS. Next, we configured, built, and ran our task manager application using native compilation and our local GraalVM installation. Finally, we analyzed how to perform the native image build using a Docker container and when you should choose this approach.
You should now be able to compile your Quarkus applications into native image executables by using a local GraalVM setup or a Docker container.
In the next chapter, we’ll start implementing the frontend of the task manager. We’ll bootstrap the project and give a basic introduction to React and the tools and libraries we’ll be using in the next part of the book.
Questions
- What is GraalVM Native Image?
- Why do Quarkus applications have shorter startup times?
- Does native image packaging always improve the application’s performance?
- What kind of applications benefit more from native image packaging?
- Which Quarkus property can we use to include additional resources in the application’s native image?
- Why are we building the native image using a Docker container?