
How can we customize our Watson experience? Well, Watson doesn't really offer customization as it is described in the previous section, but it does offer some opportunities to customize your experience. These include the following:
The first, and maybe the least obvious, way of customizing Watson is through your subscription. We will go over upgrading your subscription in detail in the next chapter, but for now, it's worth mentioning that by simply upgrading from the free version, you can adjust the storage space, licenses, and subscription features that you have access to (all for an additional cost). This customizes Watson to, perhaps, provide more space or functionality that you need for your analysis.
In Watson, you can customize the appearance of data in an exploration to better meet your requirements. You have the ability to change the type or format of a column of data (number, text, date, or time interval), how the data is aggregated, and the names of columns.
To change the type or format of a column of data in your file, you have to follow these steps:
- Select the column in the Watson data tray that you want to reformat by clicking on it. Then click on the Edit icon, as shown here:

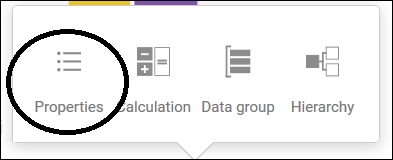
- Click on the Properties icon:

- From the Properties popup, click on Type:

- From the Type popup, click on the desired format for the column of data, as follows:

- Close the Properties popup.
Another way to customize data within Watson is by changing the aggregation level of your data. To accomplish this, you have to perform these steps:
- Select the column in Watson Data Tray that you want to reaggregate by clicking on it. Then click on the Edit icon:

- Click on the Properties icon:

- Click on Aggregation and choose the desired method of aggregation:

- Close the Properties box.
Perhaps, the most common way of customizing data in Watson is by changing field or column names. To do this, you have to do the following steps:

Customizations should persist. Once you have taken time to set how you want your data to look, you should be done. Unfortunately, it doesn't work that way in Watson. If you want your changes to apply to all explorations, you have to make those very changes to each new data file that you upload.
Another way you can customize your Watson experience is with views. You may recall from an earlier discussion that views are what contains Watson dashboards and stories, and you can customize your views in a variety of ways. Here is an example.
Once a view is created, you can customize the view by:
- Changing the view's theme or presentation style
- Changing its properties
- Changing the media (web pages, images, shapes, and so on) included in the view
In addition to this, you can add or duplicate tabs within your view, group or regroup objects, and even include data from other data files.
Every Watson theme has a predefined presentation style. You can easily change to a different theme, giving a view a totally new look and feel. To change the themes of an existing view, follow these steps:


At the time of writing this book, Watson's view properties are pretty limited. These properties include view fill color, border color, and opacity:


In an earlier chapter, we created a dashboard view and demonstrated how to add media such as a text banner, an image, or a web page (note that you can also embed a web page or other media, such as a video). You can use media to further customize your views by changing them to fit your needs, as follows:


In the preceding screenshot, you can see that I have selected the image object (the red hat) and then clicked on Properties.