Now that you've gone ahead and upgraded to professional, let's take a moment to examine some of the key differences between the free version and the professional version:
First, your maximum file upload size should have increased to 10 GB, and the maximum number of columns allowed in your dataset should now be 500. You can click on your name (in the top-right portion of the welcome page) and then click on My Account to verify this.
When upgrading to the Watson Professional version, you provided an authorized user count and (perhaps) additional storage. Now, when you click on your name, Administer, and then Account, you can view and edit your Subscription Options (check out the following screenshot):

From this page, you can see your current storage allocations and used space, the number of authorized licenses available and used, and a list of your purchases (from the cloud store). In addition, you can click on Edit options to visit the cloud store again and make more purchases.
From the cloud store, you can also access two related products, Cognos Business Intelligence (BI) and SPSS modeler:

Once you have upgraded the documentation (docs) available, now include information and helpful hints on the features relevant to the Watson Professional edition, for example, Adding BI Report data:

The Watson Conversations feature gives you the ability to act as a team by sharing commentary about data and visualizations—all directly inside of Watson. In addition, you have the ability to create polls—to collect users' responses to a specific question—and save all the responses with in the conversation.
To start a conversation, you must first have an existing (previously saved) asset open. Then click on the conversations icon (shown here):

After you click on this icon, the conversation panel (shown in the next screenshot) is displayed, where you can enter a new comment:

In the conversation panel, Watson displays all previously posted comments (along with the author's name, date, and a timestamp). Watson also gives a participant count at the bottom of the panel.
Once your conversation becomes lengthier, you may find it convenient to search and filter the comments. For example, you can locate all comments posted by a particular user by typing the @ symbol and then the first letter of their username.
For example, @J would return all comments that I posted using the username James Miller.
Keep in mind that the conversation you create for a particular asset is available only for that specific asset, and if you delete that asset, the entire conversation associated with it will also be deleted.
You can also create a poll to ask users a question about your data or visualization. To create a poll, click on the Edit icon (shown in the following screenshot) for a comment within your conversation:

After you've clicked on the Edit icon, the Create Poll icon will be visible:
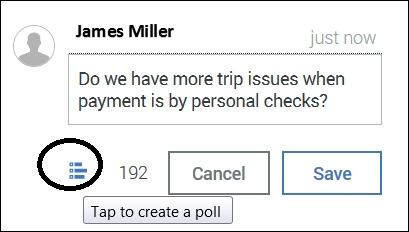
Once you click on the Create Poll icon, you can enter a poll question and any number of optional responses:

Finally, clicking on the Save button will create the poll:

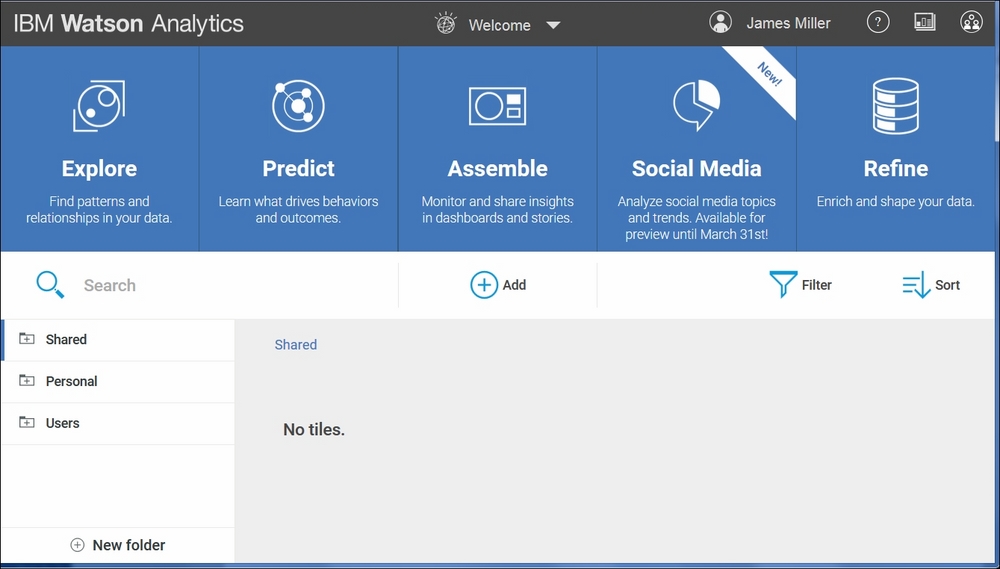
Once you upgrade to the Professional edition of Watson, you can begin utilizing folders to organize your assets. Unlike the free version, Professional offers three types of folders: Shared, Personal, and Users. You may not have access to each of the different Watson user folders. Only administrators can see individual user folders. By default, each authenticated user will have a user folder in their own name. In the middle of the main Watson page along the left-hand side, you'll see the folder structure shown in the following screenshot. Clicking on a folder will display any subfolders that you have access to as well as the content (or assets) saved in that folder:

Watson also allows you to create new folders to better organize your assets by clicking on New Folder, after which you can enter a name for the folder, as shown here:

You can then move or save assets in your new folder, depending on the permissions set on the assets. Permissions of Watson assets can be set to the following:
Folders offer a nice way to organize your Watson assets. In addition, they can be used to share your assets with other users within your Watson account. Sharing can be accomplished simply by selecting the asset to be shared and then selecting Move. From there, the Move asset dialog box allows you to select the folder to move the asset to, like this:
