Particularly if you are selling to consumers rather than other businesses, you can make use of social share buttons in your product pages to help customers share the products they love with their friends on social networks such as Facebook and Twitter. One of the most convenient ways to do this is to use a third-party service such as AddThis, which also allows you to track your most shared content. This is useful to learn which products are your most-shared products within your store!
Before you begin to integrate the share buttons, you can style your product page to provide a little more layout and distinction between the blocks of content. Open your theme's styles.css file and append the following CSS (located at /skin/frontend/default/m18/css/) to provide a column for the product image and a column for the introductory content of the product:
.product-img-box, .product-shop {
float: left;
margin: 1%;
padding: 1%;
width: 46%;
}
You can also add some additional CSS to style some of the elements that appear on the product view page in your Magento store:
.product-name {
margin-bottom: 10px;
}
.or {
color: #888;
display: block;
margin-top: 10px;
}
.add-to-box {
background: #f2f2f2;
border-radius: 10px;
margin-bottom: 10px;
padding: 10px;
}
.more-views ul {
list-style-type: none;
}
If you refresh a product page on your store, you will see the new layout take effect:

Now that you have styled the product page a little, you can integrate AddThis with your Magento store. You will need to get a code snippet from the AddThis website at http://www.addthis.com/get/sharing. Your snippet will look something similar to the following code:
<div class="addthis_toolboxaddthis_default_style ">
<a class="addthis_button_facebook_like" fb:like:layout="button_count"></a>
<a class="addthis_button_tweet"></a>
<a class="addthis_button_pinterest_pinit" pi:pinit:layout="horizontal"></a>
<a class="addthis_counteraddthis_pill_style"></a>
</div>
<script type="text/javascript">varaddthis_config = {"data_track_addressbar":true};</script>
<script type="text/javascript" src="//s7.addthis.com/js/300/addthis_widget.js#pubid=youraddthisusername"></script>
Once the preceding code is included in a page, this produces a social share tool that will look similar to the following screenshot:
Copy the product view template from the view.phtml file from /app/design/frontend/base/default/catalog/product/ to /app/design/frontend/default/m18/catalog/product/ and open your theme's view.phtml file for editing. You probably don't want the share buttons to obstruct the page name, add-to-cart area, or the brief description field. So, positioning the social share tool underneath those items is usually a good idea. Locate the snippet in your view.phtml file that has the following code:
<?php if ($_product->getShortDescription()):?>
<div class="short-description">
<h2><?php echo $this->__('Quick Overview') ?></h2>
<div class="std"><?php echo $_helper->productAttribute($_product, nl2br($_product->getShortDescription()), 'short_description') ?></div>
</div>
<?phpendif;?>
Below this block, you can insert your AddThis social share tool highlighted in the following code so that the code is similar to the following block of code (the youraddthisusername value on the last line becomes your AddThis account's username):
<?php if ($_product->getShortDescription()):?>
<div class="short-description">
<h2><?php echo $this->__('Quick Overview') ?></h2>
<div class="std"><?php echo $_helper->productAttribute($_product, nl2br($_product->getShortDescription()), 'short_description') ?></div>
</div>
<?phpendif;?>

<div class="addthis_toolboxaddthis_default_style ">
<a class="addthis_button_facebook_like" fb:like:layout="button_count"></a>
<a class="addthis_button_tweet"></a>
<a class="addthis_button_pinterest_pinit" pi:pinit:layout="horizontal"></a>
<a class="addthis_counteraddthis_pill_style"></a>
</div>
<script type="text/javascript">varaddthis_config = {"data_track_addressbar":true};</script>
<script type="text/javascript" src="//s7.addthis.com/js/300/addthis_widget.js#pubid=youraddthisusername"></script>
If you want to reuse this block in multiple places throughout your store, consider adding this to a static block in Magento and using Magento's XML layout to add the block as required. This is described in Chapter 4, Magento Layout.
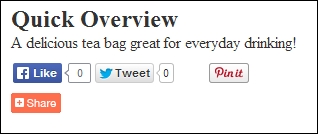
Once again, refresh the product page on your Magento store and you will see the AddThis toolbar appear as shown in the following screenshot. It allows your customers to begin sharing their favorite products on their preferred social networking sites.

If you want to provide some space between other elements and the AddThis toolbar, add the following CSS to your theme's styles.css file:
.addthis_toolbox {
margin: 10px 0;
}
The resulting product page will now look similar to the following screenshot. You have successfully integrated social sharing tools on your Magento store's product page: