
5
Testing with Spring Boot
In the previous chapter, we learned how to secure an application through various tactics, including path-based and method-based rules. We even learned how to delegate to an external system such as Google to offload risk for user management.
In this chapter, we’ll learn about testing in Spring Boot. Testing is a multi-faceted approach. It also isn’t something that you ever really finish. That’s because every time we add new features, we should add corresponding test cases to capture requirements and verify they are met. It’s always possible to uncover corner cases we didn’t think of. And as our application evolves, we have to update and upgrade our testing methods.
Testing is a philosophy that, when embraced, enables us to grow our confidence in the software we build. In turn, we can carry this confidence to our customers and clients, demonstrating quality.
The point of this chapter is to introduce a wide range of testing tactics and their various tradeoffs. Not so we can ensure this book’s sample code is well tested, but so that you can learn how to better test your projects and know what tactics to use and when!
In this chapter, we’ll cover the following topics:
- Adding JUnit and other test toolkits to our application
- Creating domain-based test cases
- Testing web controllers using MockMVC
- Testing data repositories with mocks
- Testing data repositories with embedded databases
- Testing data repositories using containerized databases
- Testing security policies with Spring Security Test
Where to find this chapter’s code
The source code for this chapter can be found at https://github.com/PacktPublishing/Learning-Spring-Boot-3.0/tree/main/ch5.
Adding JUnit 5 to the application
The first step in writing test cases is adding the necessary test components. The most widely accepted test tool is JUnit. JUnit 5 is the latest version with deep integrations with Spring Framework and Spring Boot. (See https://springbootlearning.com/junit-history for more history of the origins of JUnit.)
What does it take to add JUnit to our application?
Nothing at all.
That’s right. Remember how we used Spring Initialzr (start.spring.io) in previous chapters to roll out our new project (or augment an existing one)? One of the dependencies that was automatically added at the bottom is this:
<dependency>
        <groupId>org.springframework.boot</groupId>
        <artifactId>spring-boot-starter-test</artifactId>
        <scope>test</scope>
</dependency>
This test-scoped Spring Boot starter contains a fully loaded set of handy dependencies, including the following:
- Spring Boot Test: Spring Boot-oriented test utilities
- JSONPath: The query language for JSON documents
- AssertJ: Fluent API for asserting results
- Hamcrest: Library of matchers
- JUnit 5: Cornerstone library for writing test cases
- Mockito: Mocking framework for building test cases
- JSONassert: Library of assertions aimed at JSON documents
- Spring Test: Spring Framework’s test utilities
- XMLUnit: Toolkit for verifying XML documents
If you’ve never heard of it, mocking is a form of testing where instead of checking the results, we verify the methods invoked. We’ll see how to use this further in this chapter.
Simply put, ALL of these toolkits are already at our fingertips, ready to write tests. Why?
So that we don’t have to pick and choose and waste time. There’s no need to hunt down the right testing kit, and we don’t even have to choose to test. Spring Initialzr, the champion of building Spring Boot projects, adds all of them without even requiring that we remember to add them.
Testing is that important to the Spring team.
We aren’t going to necessarily use every single one of these toolkits in this chapter, but we’ll get a nice cross-section of functionality. And by the end of this chapter, you should have a better perspective on what these toolkits offer.
Creating tests for your domain objects
Earlier, we mentioned that testing is a multi-faceted approach. One of the most critical things in any system is its domain types. Testing them is vital. Essentially, anything publicly visible to users is a candidate for writing test cases.
So, let’s start by writing some test cases around the VideoEntity domain object we defined back in Chapter 3, Querying for Data with Spring Boot:
public class CoreDomainTest {
  @Test
  void newVideoEntityShouldHaveNullId() {
    VideoEntity entity = new VideoEntity("alice",
      "title", "description");
    assertThat(entity.getId()).isNull();
    assertThat(entity.getUsername()).isEqualTo("alice");
    assertThat(entity.getName()).isEqualTo("title");
    assertThat(entity.getDescription())
      .isEqualTo("description");
  }
}
This code can be described as follows:
- CoreDomainTest: This is the name of this test suite. By convention, test suite classes end with the word Test. It’s not uncommon for them to end with UnitTest for unit tests, IntegrationTest for integration tests, and any other qualifiers.
- @Test: This JUnit annotation signals that this method is a test case. Be sure to use the org.junit.jupiter.api version of @Test, and not the org.junit version. The former package is JUnit 5, while the latter package is JUnit 4 (both are on the classpath to support backward compatibility).
- newVideoEntityShouldHaveNullId: The name of the test method is important as it should convey the gist of what it verifies. This isn’t a technical requirement but instead an opportunity to capture information. This method verifies that when we create a new instance of VideoEntity, its id field should be null.
- The first line of the method creates an instance of VideoEntity.
- assertThat(): An AssertJ static helper method that takes a value and verifies it with a collection of clauses.
- isNull(): This verifies that the id field is null.
- isEqualTo(): This verifies that the various fields are equal to their expected values.
Inside our IDE, we can right-click the class and run it:

Figure 5.1 – Right-clicking on a test class and running it
Upon running the test suite, you will see the results:
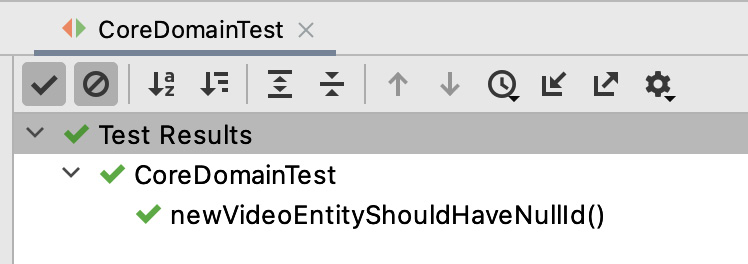
Figure 5.2 – Seeing the test results (green checkmark for passing)
Cut off from this output is the fact that this test case took about 49 milliseconds to run. Running tests with frequency is critical when it comes to adopting a test philosophy. Every time we edit some code, we should run our test suites – if possible, all of them.
Before we move on to more testing techniques, remember how we agreed that any public-facing method should be tested? This extends to things such as the toString() method of the domain class, shown as follows:
@Test
void toStringShouldAlsoBeTested() {
  VideoEntity entity = new VideoEntity("alice", "title",
    "description");
  assertThat(entity.toString())
    .isEqualTo("VideoEntity{id=null, username='alice',
      name='title', description='description'}");
}
This test method can be described as follows:
- @Test: Again, this annotation is used to indicate this is a test method.
- toStringShouldAlsoBeTested(): Always try to use test method names as a way to capture test intent. Tip: I always like using should somewhere in the method name to hone in on its purpose.
- Again, the first line creates an instance of VideoEntity with barebones information.
- assertThat(): This is used to verify whether the value of the toString() method has the expected value.
To combine assertions or not to combine assertions?
This test method’s assertion could arguably be added to the previous test method. After all, they both have the same VideoEntity. Why split it out into separate methods? To very clearly capture the intent of testing the entity’s toString() method. The previous test method focuses on populating an entity using its constructor and then checking out its getter methods. The toString() method is a separate method. By breaking assertions out into smaller test methods, there’s less chance of one failing test masking another.
To round things out, let’s verify our domain object’s setters:
@Test
void settersShouldMutateState() {
  VideoEntity entity = new VideoEntity("alice", "title",
    "description");
  entity.setId(99L);
  entity.setName("new name");
  entity.setDescription("new desc");
  entity.setUsername("bob");
  assertThat(entity.getId()).isEqualTo(99L);
  assertThat(entity.getUsername()).isEqualTo("bob");
  assertThat(entity.getName()).isEqualTo("new name");
  assertThat(entity.getDescription()) //
    .isEqualTo("new desc");
}
This code can be described as follows:
- settersShouldMutateState(): This test method is aimed at verifying the entity’s setter methods
- The first line creates the same entity instance as the other test cases
- The test method then proceeds to exercise all of the entity’s setter methods
- It uses the same AssertJ assertions as before, but with different values, verifying that the state was mutated properly
With this test class in place, we are in a position to engage in test coverage. IntelliJ (and most modern IDEs) offer the means to run the test cases with coverage utilities, as shown here:

Figure 5.3 – Running test class with coverage analysis
IntelliJ shows which lines have been tested with color highlights. It reveals that our VideoEntity entity class is fully covered except for the protected no-argument constructor. It’s left as an exercise for you to write another test case verifying that constructor.
This section has shown you how to write unit-level tests against a domain class. It’s easy to extend this concept into classes that contain functions, algorithms, and other functional features.
But another area we must take into consideration is the fact that the bulk number of applications out there are web applications. And the next section will show various tactics to verify Spring MVC web controllers.
Testing web controllers with MockMVC
With web pages being a key component of a web app, Spring comes loaded with tools to easily verify web functionality.
While we could instantiate a Spring MVC web controller and interrogate it using various assertions, this would get clunky. And part of what we seek is going through the machinery of Spring MVC. Essentially, we need to make a web call and wait for a controller to respond.
To test the HomeController class we built earlier in this book, we need to create a new test class, HomeControllerTest.java, underneath src/test/java in the same package as HomeController:
@WebMvcTest(controllers = HomeController.class)
public class HomeControllerTest {
  @Autowired MockMvc mvc;
  @MockBean VideoService videoService;
  @Test
  @WithMockUser
  void indexPageHasSeveralHtmlForms() throws Exception {
    String html = mvc.perform( //
      get("/")) //
      .andExpect(status().isOk()) //
      .andExpect( //
        content().string( //
          containsString("Username: user"))) //
      .andExpect( //
         content().string( //
          containsString("Authorities: [ROLE_USER]"))) //
      .andReturn() //
      .getResponse().getContentAsString();
    assertThat(html).contains( //
      "<form action="/logout"", //
      "<form action="/search"", //
      "<form action="/new-video"");
  }
}
This tiny test class can be explained as follows:
- @WebMvcTest: A Spring Boot test annotation that enables Spring MVC’s machinery. The controllers parameter constrains this test suite to only the HomeController class.
- @Autowired MockMvc mvc: @WebMvcTest adds an instance of Spring’s MockMvc utility to the application context. Then, we can autowire it into our test suite for all test methods to use.
- @MockBean VideoService videoService: This bean is a required component of HomeController. Using Spring Boot Test’s @MockBean annotation creates a mocked version of the bean and adds it into the application context.
- @Test: Denotes this method as a JUnit 5 test case.
- @WithMockUser: This annotation from Spring Security Test simulates a user logging in with a username of user and an authority of ROLE_USER (default values).
- The first line uses MockMvc to perform a get("/").
- The subsequent clauses perform a series of assertions, including verifying whether the result is an HTTP 200 (OK) response code and that the content contains a username of user and an authority of ROLE_USER. Then, it wraps up the MockMVC call by grabbing the entire response as a string.
- Following the MockMVC call is an AssertJ assertion, verifying bits of HTML output.
This test method essentially invokes the base URL of the HomeController class and checks various aspects of it, such as the response code as well as its content.
A key feature of our web app is the ability to create new videos. We are engaging with the HTML form we put on the web page earlier in this chapter through the method shown below:
@Test
@WithMockUser
void postNewVideoShouldWork() throws Exception {
  mvc.perform( //
    post("/new-video") //
       .param("name", "new video") //
       .param("description", "new desc") //
       .with(csrf())) //
    .andExpect(redirectedUrl("/"));
  verify(videoService).create( //
    new NewVideo( //
      "new video", //
      "new desc"), //
    "user");
}
This test method can be described as follows:
- @Test: A JUnit 5 annotation to signal this as a test method.
- @WithMockUser: Gets us past Spring Security’s checks by simulated authentication.
- This time, the test method uses MockMVC to perform post("/new-video") with two parameters (name and description). Since the web page uses Cross-Site Request Forgery (CSRF), we can use .with(csrf()) to automatically supply the proper CSRF token, further simulating this as a valid request and not an attack.
- redirectedUrl("/"): This verifies that the controller issues an HTTP redirect.
- verify(videoService): Mockito’s hook to verify that the create() method of the mocked VideoService bean was called with the same parameters fed by MockMVC and the username from @WithMockUser.
With all this created, we can easily run our test suite, as shown here:
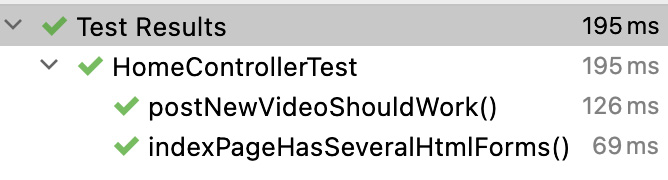
Figure 5.4 – Test results from HomeControllerTest
This screenshot of test results shows us successfully exercising a couple of the controller’s methods in sub-second time.
It’s left as an exercise for you to test out the other controller methods.
Being able to prove fundamental controller behavior this quickly is critical. It allows us to build up a regime of tests, verifying all our controllers. And as mentioned earlier in this chapter, the more tests we write, the more confidence we can instill in our system.
Something we briefly touched on in this section was using a mocked-out VideoService bean. There is a lot more we can do with mocking, as we’ll cover in the next section.
Testing data repositories with mocks
Having run our web controller through some automated testing, it’s time to switch our attention to another key piece of our system: the service layer that the web controller invokes.
Something that’s key is spotting any collaborators. Since the only service that’s injected into HomeController is VideoService, let’s take a closer look.
VideoService, as defined in Chapter 3, Querying for Data with Spring Boot, has one collaborator, VideoRepository. Essentially, to test out the VideoService bean in a unit-test fashion, we need to isolate it from any outside influences. This can be accomplished using mocking.
Unit testing versus integration testing
There are various test strategies we can leverage. A key one is unit versus integration testing. In principle, a unit test is meant to only test one class. Any external services should be mocked or stubbed out. The counterpart test strategy, integration testing, involves creating real or simulated variants of these various collaborators. Naturally, there are benefits and costs associated with both. Unit testing tends to be faster since all outside influences are swapped out with canned answers. But there is the risk that a given test case doesn’t test anything but the mock itself. Integration testing can increase confidence, since it tends to be more real, but it also tends to take more design and setup. And whether you’re using embedded databases or Docker containers to emulate production services, the services aren’t as fast. This is why any genuine application tends to have a mixture of both. Some amount of unit testing can verify core functionality. But we also need a sense that when our components are connected, they operate correctly together.
In the previous section, we leveraged Spring Boot Test’s slice-based @WebMvcTest annotation. In this section, we will use a different tactic to configure things:
@ExtendWith(MockitoExtension.class)
public class VideoServiceTest {
  VideoService service;
  @Mock VideoRepository repository;
  @BeforeEach
  void setUp() {
    this.service = new VideoService(repository);
  }
}
This test class can be described as follows:
- @ExtendWith(MockitoExtension.class): Mockito’s JUnit 5 hook to mock out any fields with the @Mock annotation
- VideoService: The class under test
- VideoRepository: A collaborator required for VideoService is marked for mocking
- @BeforeEach: JUnit 5’s annotation to make this setup method run before every test method
- The setUp() method shows VideoService being created with the mock VideoRepository injected through its constructor
Mockito has always had its static mock() method, which makes it possible to create mock objects. But using their @Mock annotation (and the MockitoExtension JUnit 5 extension) makes it very clear which component is under test.
With this machinery in place, we are ready to add our first test method:
@Test
void getVideosShouldReturnAll() {
  // given
  VideoEntity video1 = new VideoEntity("alice", "Spring
    Boot 3 Intro", "Learn the basics!");
  VideoEntity video2 = new VideoEntity("alice", "Spring
    Boot 3 Deep Dive", "Go deep!");
  when(repository.findAll()).thenReturn(List.of(video1,
    video2));
  // when
  List<VideoEntity> videos = service.getVideos();
  // then
  assertThat(videos).containsExactly(video1, video2);
}
This test method has some key parts, as follows:
- @Test : Once again, this is JUnit 5’s annotation that flags it as a test method.
- The first two lines are about creating some test data. The third line uses Mockito to define how the mock VideoRepository responds when its findAll() method is invoked.
- The next line is where the getVideos() method of VideoService is called.
- The last line uses AssertJ to verify the outcome.
These bullet points, while accurate, don’t capture the entire flow of this test method.
For starters, this method has three comments denoting three phases: given, when, and then. The given, when, and then concept is a staple behind behavior-driven design (BDD). The idea is that given a set of inputs, when you do an action X, then you can expect Y.
Test cases that flow this way tend to be easier to read. And not just by software developers, but also by business analysts and other teammates who aren’t as focused on writing code but instead focused on capturing customer intent.
Tip
There’s no requirement to include comments, but this convention makes it easier to read. And it’s not just the comments. Sometimes, we can write test cases that are all over the place. Making a test method follow given, when, and then can help make them more cogent and focused. For example, if a test case seems to have too many assertions and veers off in too many directions, it could be a sign that it should be broken up into multiple test methods.
We would be remiss if we didn’t mention that Mockito includes a series of matching operators. See the following test case, where we’re testing the ability to create new video entries:
@Test
void creatingANewVideoShouldReturnTheSameData() {
  // given
  given(repository.saveAndFlush(any(VideoEntity.class)))
    .willReturn(new VideoEntity("alice", "name", "des"));
  // when
  VideoEntity newVideo = service.create
    (new NewVideo("name", "des"), "alice");
  // then
  assertThat(newVideo.getName()).isEqualTo("name");
  assertThat(newVideo.getDescription()).isEqualTo("des");
  assertThat(newVideo.getUsername()).isEqualTo("alice");
}
The key parts to note are as follows:
- given(): This test method uses Mockito’s BDDMockito.given operator, a synonym for Mockito’s when() operator
- any(VideoEntity.class): Mockito’s operator to match when the repository’s saveAndFlush() operation is called
- The middle of the test method shows us invoking VideoService.create()
- The test method wraps up, asserting against the results
Mockito’s BDDMockito class also has a then() operator that we could have used instead of the assertions. This hinges on whether we’re testing data or behavior!
Testing data versus testing behavior
A given test case generally consists of either verifying against test data or verifying that the right methods were called. So far, we’ve used when(something).thenReturn(value), which is known as a stub. We are configuring a set of canned test data to be returned for a specific function call. And later, we can expect to assert these values. The alternative is to use Mockito’s verify() operator, which we’ll see in the next test case. This operator, instead of confirming by data, checks what method was called on the mock object. We don’t have to commit to one strategy or another. Sometimes, with the code we’re testing, it is easier to capture its intent through stubbing. Other times, it’s clearer to capture behavior with mocking. Either way, Mockito makes it easy to test.
While BDDMockito provides nice alternatives, it’s easier (at least to me) to simply use the same operators everywhere. Whether we are stubbing or mocking depends on the test case.
Check out the following final test case, where we are verifying our service’s delete operation:
@Test
void deletingAVideoShouldWork() {
  // given
  VideoEntity entity = new VideoEntity("alice", "name",
    "desc");
  entity.setId(1L);
  when(repository.findById(1L))
    .thenReturn(Optional.of(entity));
  // when
  service.delete(1L);
  // then
  verify(repository).findById(1L);
  verify(repository).delete(entity);
}
This test method has some key differences from the previous ones:
- when(): Since Mockito’s given() operator is just a synonym, it’s easier to use the same when() operator everywhere.
- This test invokes the delete() operation of VideoService.
- Verify(): Because the behavior of the service is more complex, canned data won’t work. Instead, we must switch to verifying the methods invoked inside the service.
It should be pointed out that entire books have been written about Mockito. My friend, Ken Kousen, recently wrote Mockito Made Clear (see https://springbootlearning.com/mockito-book), which I’d recommend for a deeper dive.
We are merely scratching the surface of the sophistication this toolkit affords us. Suffice it to say, we have captured an appreciable amount of the VideoService API through readable test scenarios.
However, one thing is key in all this: these test cases are unit-based. And that comes with certain limitations. To grow our confidence, we will expand our testing reach through the use of an in-memory database in the next section.
Testing data repositories with embedded databases
Testing against real databases has always been expensive in terms of both time and resources. That’s because it has traditionally required launching our application, grabbing a handwritten script of sorts, and clicking through various pages of the application to ensure it works.
There are companies with teams of test engineers whose sole job is to write these test documents, update them as changes are rolled out, and run them against applications in carved-out test labs.
Imagine waiting a week for your new feature to get checked out by this regimen.
Automated testing brought a new wave of empowerment to developers. They can capture test cases describing the scenario they were aiming for. Yet developers still ran into the issue of talking to a real database (because let’s face it – tests aren’t real unless you’re talking to a physical database) until people started developing databases that could speak SQL yet run locally and in-memory.
Don’t all databases run in memory?
Production-grade database systems run in memory. Servers are specced out with giant memory and disk space amounts to support a database server. But this isn’t what we are talking about. An in-memory database concerning your application is a database that runs in the same memory space as your application.
There are a handful of choices. For this section, we’ll use HyperSQL Database (HSQLDB). We can choose this from Spring Initializr at https://start.spring.io and add it to our build project with the following Maven coordinates:
<dependency>
     <groupId>org.hsqldb</groupId>
     <artifactId>hsqldb</artifactId>
     <scope>runtime</scope>
</dependency>
This dependency has one key aspect: it’s a runtime one, meaning that nothing in our code has to compile against it. It’s only needed when the application runs.
Now, to test against VideoRepository, which we built back in Chapter 3, Querying for Data with Spring Boot, create the VideoRepositoryHsqlTest class below src/test/java, in the related package:
@DataJpaTest
public class VideoRepositoryHsqlTest {
  @Autowired VideoRepository repository;
  @BeforeEach
  void setUp() {
    repository.saveAll( //
      List.of( //
        new VideoEntity( //
           "alice", //
           "Need HELP with your SPRING BOOT 3 App?", //
           "SPRING BOOT 3 will only speed things up."),
        new VideoEntity("alice", //
          "Don't do THIS to your own CODE!", //
          "As a pro developer, never ever EVER do this to
             your code."),
        new VideoEntity("bob", //
          "SECRETS to fix BROKEN CODE!", //
          "Discover ways to not only debug your code")));
  }
}
This test class can be described as follows:
- @DataJpaTest: This is Spring Boot’s test annotation and indicates that we want it to perform all of its automated scanning of entity class definitions and Spring Data JPA repositories.
- @Autowired VideoRepository: Automatically injects an instance of our VideoRepository object to test against.
- @BeforeEach: This is JUnit 5’s annotation and ensures that this method runs before each test method.
- repository.saveAll(): Using VideoRepository, it saves a batch of test data.
With this set up, we can start drafting test methods to exercise our various repository methods. Now, it’s important to understand that we aren’t focused on confirming whether or not Spring Data JPA works. That would imply we are verifying the framework, a task outside our scope.
No – we need to verify that we have written the correct queries, whether that’s using custom finders, query by example, or whatever other strategies we wish to leverage.
So, let’s write the first test:
@Test
void findAllShouldProduceAllVideos() {
  List<VideoEntity> videos = repository.findAll();
  assertThat(videos).hasSize(3);
}
This test method does the following:
- Exercises the findAll() method.
- Using AssertJ, it checks the size of the results. We could dig a little deeper into the assertions (we’ll do this later in this section!).
It’s left as an exercise for you to expand this test method (after reading further down) to comprehensively verify the data.
Part of our search feature was to do a case-insensitive check for one video. Write a test for that like this:
@Test
void findByNameShouldRetrieveOneEntry() {
  List<VideoEntity> videos = repository //
    .findByNameContainsIgnoreCase("SpRinG bOOt 3");
  assertThat(videos).hasSize(1);
  assertThat(videos).extracting(VideoEntity::getName) //
    .containsExactlyInAnyOrder( //
      "Need HELP with your SPRING BOOT 3 App?");
}
This test method is more extensive and can be explained as follows:
- Notice how the name of the test method gives us a sense of what it does?
- It uses findByNameContainsIgnoreCase() and plugs in a jumbled-up sub-string.
- Using AssertJ, it verifies the size of the results as 1.
- Using AssertJ’s extracting() operator and a Java 8 method reference, we can extract the name field of each entry.
- The last portion of this assertion is containsExactlyInAnyOrder(). If the order doesn’t matter, but the specific contents do, then this is a perfect operator for confirming results.
A question you may have is: why aren’t we asserting against VideoEntity objects? After all, Java 17 records make it super simple to instantiate instances of them.
The reason to dodge this in a test case, especially one that talks to a real database, is that the id field is populated by the saveAll() operation in the setUp() method. While we could brainstorm ways to dynamically deal with this between setUp() and a given test method, it’s not critical that we work to confirm primary keys.
Instead, focus on trying to verify things from the application’s perspective. In this situation, we want to know that our mixed-cased partial input yields the correct video and verify that the name field fits the bill perfectly.
Another test we can write is confirming that searching by name or description works. So, add the following test method:
@Test
void findByNameOrDescriptionShouldFindTwo() {
  List<VideoEntity> videos = repository //
    .findByNameContainsOrDescriptionContainsAllIgnoreCase(
      "CoDe", "YOUR CODE");
  assertThat(videos).hasSize(2);
  assertThat(videos) //
    .extracting(VideoEntity::getDescription) //
    .contains("As a pro developer, never ever EVER do this
      to your code.", //
      "Discover ways to not only debug your code");
}
This test method can be described as follows:
- Here, we are exercising the repository’s findByNameContainsOrDescription ContainsAllIgnoreCase(). The inputs are indeed partial strings, and the case is altered from what was stored in the setUp() method.
- Again, asserting the size of the results is an easy test to verify we are on the right path.
- This time, we are using the extracting() operator to fetch the description field.
- We simply check that the extracting operator contains a couple of descriptions without worrying about the order. It’s important to remember that, without an ORDER BY clause, databases are not obligated to return the results in the same order as they were stored.
One thing should be pointed out: this test class used field injection to autowire VideoRepository. In modern Spring apps, it’s usually recommended to use constructor injection. We saw this in more detail in Chapter 2, Creating a Web Application with Spring Boot, in the Injecting dependencies through constructor calls section.
While field injection is usually seen as a risk that might lead to null pointer exceptions, when it comes to test classes, it’s alright. That’s because the life cycle for creating and destroying test classes is handled by JUnit and neither us nor Spring Framework.
Now, there is still one repository method we have yet to test, and that’s the delete() operation. We’ll cover that later in this chapter when we explore Testing security policies with Spring Security Test.
In the meantime, we must visit a critical issue lingering right before us: what if our target database isn’t embedded?
If we were to use something more mainstream in production such as PostgreSQL, MySQL, MariaDB, Oracle, or some other relational database, we have to deal with the fact that they are not available as embedded, co-located processes.
We could continue using HSQL as a basis for writing test cases. And even though we’re using JPA as a standard, we still run the risk of our SQL operations not working properly when we get to production.
Even though SQL is a standard (or rather, multiple standards), there are gaps not covered by the specs. And every database engine fills those gaps with its solutions as well as offers features outside the specs.
This leads us to a need to write test cases against, say, PostgreSQL, but not be able to use what we’ve seen so far. And this leads us to the next section.
Adding Testcontainers to the application
We have seen that, with mocking, we can replace a real service with a fake one. But what happens when you need to verify a real service, which involves talking to a real database?
The fact that each database engine has slight variations in implementations of SQL demands that we test our database operations against the same version we intend to use in production!
With the emergence of Docker in 2013 and the rise of putting various tools and applications inside containers, it has become possible to find a container for the database we seek.
Further cultivated by open source, just about every database we can find has a containerized version.
While this makes it possible for us to spin up an instance on our local workstation, the task of manually launching a local database every time we want to run our tests doesn’t quite cut it.
Enter Testcontainers. With their first release coming out in 2015, Testcontainers provides a mechanism to start up a database container, invoke a series of test cases, and then shut down the container. All with no manual action from you or me.
To add Testcontainers to any Spring Boot application, again, we only need to visit Spring Initializr at start.spring.io. From there, we can select Testcontainers, as well as PostgreSQL Driver.
The changes to add to our pom.xml build file are shown here:
<testcontainers.version>1.17.6</testcontainers.version>testcontainers.version specifies the version of Testcontainers to use. This property setting should be placed inside the <properties/> element, the same place where you can find the already existing java.version property.
With that in place, the following dependencies must also be added:
<dependency>
        <groupId>org.postgresql</groupId>
        <artifactId>postgresql</artifactId>
        <scope>runtime</scope>
</dependency>
<dependency>
        <groupId>org.testcontainers</groupId>
        <artifactId>postgresql</artifactId>
        <scope>test</scope>
</dependency>
<dependency>
        <groupId>org.testcontainers</groupId>
        <artifactId>junit-jupiter</artifactId>
        <scope>test</scope>
</dependency>
These additional dependencies can be described as follows:
- org.postgresql:postgresql: A third-party library managed by Spring Boot. This is the driver to connect to a PostgreSQL database; hence, it only needs to be runtime scoped. There is nothing in our code base that must compile against it.
- org.testcontainers:postgresql: The Testcontainers library that brings in first-class support for PostgreSQL containers (which we’ll explore further in this section).
- org.testcontainers:junit-jupiter: The Testcontainers library that brings deep integration with JUnit 5 – that is, JUnit Jupiter.
It’s important to understand that Testcontainers involves a fleet of various modules, all managed under the umbrella of GitHub repositories. They do this by releasing a Maven Bill of Materials (BOM), a central artifact that contains all the versions.
The testcontainers.version property specifies what version of Testcontainers BOM we wish to use, which is added to the pom.xml file in a separate section below <dependencies/>, as shown here:
<dependencyManagement>
    <dependencies>
          <dependency>
               <groupId>org.testcontainers</groupId>
               <artifactId>testcontainers-bom</artifactId>
               <version>${testcontainers.version}</version>
               <type>pom</type>
               <scope>import</scope>
          </dependency>
    </dependencies>
</dependencyManagement>
This BOM entry can be described as follows:
- org.testcontainers:testcontainers-bom: This Testcontainers BOM contains all the key information about each supported module. By specifying the version here, all other Testcontainers dependencies can skip setting a version.
- pom: A dependency type that indicates this artifact has no code, only Maven build information.
- import: A scope indicating that this dependency shall be replaced effectively by whatever this BOM contains. It’s a shortcut for adding a stack of declared versions.
With all this set up, we can write some test cases in the next section!
Testing data repositories with Testcontainers
The first step when it comes to using Testcontainers is configuring the test case. To talk to a Postgres database, do this:
@Testcontainers
@DataJpaTest
@AutoConfigureTestDatabase(replace = Replace.NONE)
public class VideoRepositoryTestcontainersTest {
  @Autowired VideoRepository repository;
  @Container //
  static final PostgreSQLContainer<?> database = //
    new PostgreSQLContainer<>("postgres:9.6.12") //
      .withUsername("postgres");
}
This framework for test cases can be described as follows:
- @Testcontainers: The annotation from the Testcontainers junit-jupiter module that hooks into the life cycle of a JUnit 5 test case.
- @DataJpaTest: Spring Boot Test’s annotation we used in the previous section, indicating that all entity classes and Spring Data JPA repositories should be scanned.
- @AutoConfigureTestDatabase: This Spring Boot Test annotation tells Spring Boot that instead of swapping out the DataSource bean like it normally does, to instead NOT replace it like it normally does when there’s an embedded database on the classpath (more on why this is needed shortly).
- @Autowired VideoRepository: Injects the application’s Spring Data repository. We want the real thing and not some mock because this is what we’re testing!
- @Container: Testcontainer’s annotation to flag this as the container to control through the JUnit life cycle.
- PostgreSQLContainer: Creates a Postgres instance through Docker. The constructor string specifies the Docker Hub coordinates of the exact image we want. Note that this makes it easy to have multiple test classes, each focused on different versions of Postgres!
All of this allows us to spin up a real instance of Postgres and leverage it from a test class. The extra annotations unite the start and stop actions of Docker with the start and stop actions of our test scenario.
However, we aren’t quite there.
Spring Boot, with its autoconfiguration magic, either creates a real DataSource bean or an embedded one. If it spots H2 or HSQL on the testing classpath, it pivots toward using the embedded database. Otherwise, it has some autoconfiguration default settings based on which JDBC driver it sees.
And neither situation is what we want. We want it to switch away from H2 and HSQL and instead use Postgres. But the hostname and port will be wrong since this isn’t standalone Postgres but instead Docker-based Postgres.
Never fear, ApplicationContextInitializer comes to the rescue. This is the Spring Framework class that grants us access to the startup life cycle of the application, as shown here:
static class DataSourceInitializer //
  implements ApplicationContextInitializer
    <ConfigurableApplicationContext> {
  @Override
  public void initialize(ConfigurableApplicationContext
    applicationContext) {
    TestPropertySourceUtils.
      addInlinedPropertiesToEnvironment(applicationContext,
      "spring.datasource.url=" + database.getJdbcUrl(),
      "spring.datasource.username="+database.getUsername(),
      "spring.datasource.password="+database.getPassword(),
      "spring.jpa.hibernate.ddl-auto=create-drop");
  }
}
This code can be explained as follows:
- ApplicationContextInitializer<ConfigurableApplicationContext>: This class is what gives us a handle on the application context.
- initialize(): This method is the callback Spring will invoke while the application context is getting created.
- TestPropertySourceUtils.addInlinedPropertiesToEnvironment: This static method from Spring Test allows us to add additional property settings to the application context. The properties provided here are from the PostgreSQLContainer instance created in the previous section. We’ll be tapping into a container already started by Testcontainers so that we can harness its JDBC URL, username, and password.
- spring.jpa.hibernate.ddl-auto=create-drop: When talking to an embedded database, Spring Boot autoconfigures things with JPA’s create-drop policy, where the database schema is created from scratch. Because we are using a real connection to talk to a PostgreSQL database, it switches to none, where none of Spring Boot’s embedded behavior happens. Instead, Spring Boot will attempt to make no changes to the database regarding schema and data. Since this is a test environment, we need to override this and switch back to create-drop.
To apply this set of properties by hooking the Testcontainers-managed database into Spring Boot’s autoconfigured DataSource, we simply need to add the following to the test class:
@ContextConfiguration(initializers = DataSourceInitializer.
  class)
public class VideoRepositoryTestcontainersTest {
        …
}
The @ContextConfiguration annotation adds our DataSourceInitializer class to the application context. And due to it registering an ApplicationContextInitializer, it will be invoked at precisely the right moment after Testcontainers has launched a Postgres container and before Spring Data JPA autoconfiguration is applied.
The only thing left to do is write some actual tests!
Since each test method starts with a clean database, we need to pre-load some content, as shown here:
@BeforeEach
void setUp() {
  repository.saveAll( //
    List.of( //
      new VideoEntity( //
        "alice", //
        "Need HELP with your SPRING BOOT 3 App?", //
        "SPRING BOOT 3 will only speed things up."),
      new VideoEntity("alice", //
        "Don't do THIS to your own CODE!", //
        "As a pro developer, never ever EVER do this to
          your code."),
      new VideoEntity("bob", //
        "SECRETS to fix BROKEN CODE!", //
        "Discover ways to not only debug your code")));
}
This method can be described as follows:
- @BeforeEach: The JUnit annotation that runs this code before each test method.
- repository.saveAll(): This stores a whole list of VideoEntity objects in the database.
- List.of(): A Java 17 operator to quickly and easily assemble a list.
- Each VideoEntity instance has a user, a name, and a description.
What if we need to test different sets of data? Different data-driven scenarios? Write another test class! You can use Testcontainers easily between different test classes. By tightly integrating with JUnit, there is no need to sweat some static instance floating around from one test class, wrecking this test class.
Now, with all this set up, we can finally write some tests, as shown here:
@Test
void findAllShouldProduceAllVideos() {
  List<VideoEntity> videos = repository.findAll();
  assertThat(videos).hasSize(3);
}
This test method verifies that the findAll() method returns all three entities stored in the database. Considering findAll() is provided by Spring Data JPA, this is bordering on testing Spring Data JPA and not our code. But sometimes, we need this type of test to simply verify we’ve set everything up correctly.
This is also sometimes called a smoke test, a test case that verifies things are up and operational.
A more in-depth test case involves proving that our custom finder that supports our search feature is working, as shown here:
@Test
void findByName() {
  List<VideoEntity> videos = repository.
    findByNameContainsIgnoreCase("SPRING BOOT 3");
  assertThat(videos).hasSize(1);
}
This test method has the same annotations and AssertJ annotations, but it focuses on that same findByNameContainsIgnoreCase, using data stored in a database.
To wrap things up, let’s verify our uber-long custom finder with a test case, as shown here:
@Test
void findByNameOrDescription() {
  List<VideoEntity> videos = repository.
    findByNameContainsOrDescriptionContainsAllIgnoreCase
    ("CODE", "your code");
  assertThat(videos).hasSize(2);
}
Yikes! That method name is so long it wrecks the formatting in this book. This could be a sign that this scenario is hankering for Query by Example. Time to go back to Chapter 3, Querying for Data with Spring Boot, and consider replacing this query, perhaps?
With all this in place, we can run our test suite and confidently know that our data repository properly interacts with the database. Not only do we know that our repository is doing things right, but our test methods are also meant to ensure our system is doing the right thing.
These tests verify that our design of case-insensitive queries against various fields supports the preceding service layer:
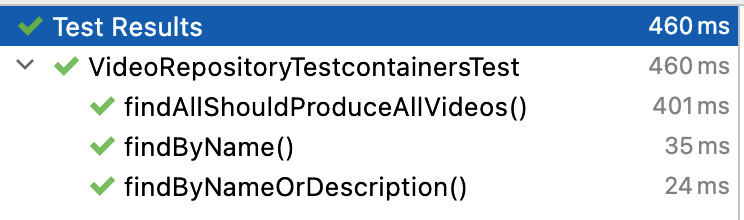
Figure 5.5 – Testcontainers-based tests
And while this section focused on a repository connecting to a database, this tactic works in many other places – RabbitMQ, Apache Kafka, Redis, Hazelcast, anything. If you can find a Docker Hub image, you can hook it into your code via Testcontainers. Sometimes, there are shortcut annotations. Other times, you just need to create the container yourself like we just did.
Having verified our web controller, our service layer, and now our repository layer, there is just one thing to tackle: verifying our security policy.
Testing security policies with Spring Security Test
Has something crossed your mind? Didn’t we check out security stuff when we wrote that HomeControllerTest class earlier in this chapter?
Yes… and no.
We used the @WithMockUser annotation from Spring Security Test earlier in this chapter. But that’s because any @WebMvcTest-annotated test class will, by default, have our Spring Security policies in effect.
But we didn’t cover all the necessary security paths. And in security, there are often many paths to cover. And as we dig, we’ll discover exactly what this means.
For starters, we need a new test class, as shown here:
@WebMvcTest (controllers = HomeController.class)
public class SecurityBasedTest {
  @Autowired MockMvc mvc;
  @MockBean VideoService videoService;
}
Hopefully, things are starting to look familiar:
- @WebMvcTest: This Spring Boot Test annotation indicates this is a web-based test class focused on HomeController. It’s important to understand that Spring Security policies will be in effect.
- @Autowired MockMvc: Automatically injects a Spring MockMVC instance for us to craft test cases.
- @MockBean VideoService: HomeController’s collaborator is to be replaced by a Mockito mock.
With this in place, we can start by verifying access to the home page. In this context, it makes sense to inspect our SecurityConfig:
http.authorizeHttpRequests() //
  .requestMatchers("/login").permitAll() //
  .requestMatchers("/", "/search").authenticated() //
  .requestMatchers(HttpMethod.GET, "/api/**").
    authenticated()
  .requestMatchers(HttpMethod.POST, "/delete/**",
    "/new-video").authenticated() //
  .anyRequest().denyAll() //
  .and() //
  .formLogin() //
  .and() //
  .httpBasic();
This list of security rules has one bold-faced rule toward the top. It indicates that access to / requires authenticated access and nothing more.
To verify that unauthenticated users are denied access, write the following test case:
@Test
void unauthUserShouldNotAccessHomePage() throws Exception {
  mvc //
    .perform(get("/")) //
    .andExpect(status().isUnauthorized());
}
This test method has some key aspects:
- It does NOT have one of those @WithMockUser annotations. This means no authentication credentials are stored in the servlet context, thus simulating an unauthorized user.
- mvc.perform(get("/")): Use MockMVC to perform a GET / call.
- status().isUnauthorized(): This asserts that the result is an HTTP 401 Unauthorized error code.
Also, note the method name of the test: unauthUserShouldNotAccessHomePage. It very clearly states the expectation. That way, if it ever breaks, we’ll know exactly what the point of the test was. Hopefully, this puts us on the path toward fixing things faster.
status().isUnauthorized() for an unauthenticated user?
In security, proving who you are is called authentication. What you are allowed to do is known as authorization. However, the HTTP status code for an unauthenticated user is 401 Unauthorized. When someone is authenticated but attempts to access something they aren’t authorized for, the HTTP status code is 403 Forbidden. A rather quirky mixture of terminology, but something to be aware of.
We just wrote a bad path test case, a critical requirement when testing security policies. We need to also write a good path test case, as shown here:
@Test
@WithMockUser(username = "alice", roles = "USER")
void authUserShouldAccessHomePage() throws Exception {
  mvc //
    .perform(get("/")) //
    .andExpect(status().isOk());
}
This test method is very similar except for the following:
- @WithMockUser: This annotation inserts an authentication token into the MockMVC servlet context with a username of alice and an authority of ROLE_USER.
- It does the same get("/") call the previous test method did but expects a different outcome. With status().isOk(), we are looking for an HTTP 200 Ok result code.
We have now rounded out our test regime to verify that the home page is properly locked down. However, unauthenticated users and ROLE_USER users aren’t the only users our system has. We also have administrators with ROLE_ADMIN. And for each role, we really should have a separate test to ensure our security policy is properly configured.
The following code is almost the same as the preceding code:
@Test
@WithMockUser(username = "alice", roles = "ADMIN")
void adminShouldAccessHomePage() throws Exception {
  mvc //
    .perform(get("/")) //
    .andExpect(status().isOk());
}
The only difference is that @WithMockUser has alice and ROLE_ADMIN stored in the servlet context.
These three tests should properly verify access to the home page.
Considering our HomeController also affords us the ability to add new video objects, we should also write some test methods to ensure things are handled properly, as shown here:
@Test
void newVideoFromUnauthUserShouldFail() throws Exception {
  mvc.perform( //
    post("/new-video") //
      .param("name", "new video") //
      .param("description", "new desc") //
      .with(csrf())) //
      .andExpect(status().isUnauthorized());
}
This test method can be described as follows:
- The method name clearly describes that it’s to verify that an unauthorized user does NOT create a new video. Again, this method has no @WithMockUser annotation.
- mvc.perform(post("/new-video")): Uses MockMVC to perform a POST /new-video action. The param("key", "value") arguments let us provide the fields normally entered through an HTML form.
- with(csrf()): We have CSRF protections enabled. This additional setting lets us hook in the CSRF value, simulating a legitimate access attempt.
- status().isUnauthorized(): Ensures that we get an HTTP 401 Unauthorized response.
If you supply all the expected values, including a valid CSRF token, it will fail, as expected.
CSRF
In Chapter 4, Securing an Application with Spring Boot, we found out that Spring Security automatically enables CSRF token checking on forms and other actions to avoid CSRF attacks. For test cases where we don’t have CSRF tokens rendered in HTML pages, we must still present this value to avoid shutting off CSRF.
Now, let’s write a test where the user has the right permissions to create a new video:
@Test
@WithMockUser(username = "alice", roles = "USER")
void newVideoFromUserShouldWork() throws Exception {
  mvc.perform( //
    post("/new-video") //
      .param("name", "new video") //
      .param("description", "new desc") //
      .with(csrf())) //
      .andExpect(status().is3xxRedirection()) //
      .andExpect(redirectedUrl("/"));
}
This code can be summarized as follows:
- @WithMockUser: This user has ROLE_USER.
- It performs the same POST /new-video with the same values and CSRF tokens, yet we get a different set of response codes.
- status().is3xxRedirection(): Verifies that we get something in the 300 series of HTTP response signals. This makes our test case less brittle if, say, someone switches from soft redirects to hard redirects in the future.
- redirectedUrl("/"): Lets us verify that the redirected path is /.
This test method machinery is identical to the previous test method. The only difference is the setup (alice/ROLE_USER) and the outcomes (redirect to /).
And this is what makes these test methods security-focused. The point here is to see that accessing the same endpoints but with different credentials (or none at all) yields proper results.
Thanks to MockMVC and Spring Security Test, it’s easy to exercise the Spring MVC machinery and assert against it. And thanks to Spring Boot Test, it’s super easy to activate actual parts of our application, again building confidence.
Summary
Throughout this chapter, we have explored multiple ways to write test cases. We have seen simple tests, midgrade tests, and complex ones. All of these give us ways to test different aspects of our application.
And each tactic has various tradeoffs. We can get our hands on real database engines if we’re willing to spend the extra runtime. We can also ensure our security policies are properly shaken out with both unauthorized and fully authorized users.
Hopefully, this has whet your appetite to fully embrace testing in your applications.
In the next chapter, Configuring an Application with Spring Boot, we’ll learn how to parameterize, configure, and override settings for our application.