
9
Writing Reactive Web Controllers
In the previous eight chapters, we gathered up all the key components needed to build a Spring Boot application. We bundled it inside a Docker container and even tweaked it to run in native mode on GraalVM instead of the standard JVM.
But what if, after doing all this, our application still suffered from a lot of idle time? What if our application was burning up our cloud bill due to having to host a huge number of instances just to meet our present needs?
In other words, is there another way to squeeze a lot more efficiency out of the whole thing, without letting go of Spring Boot?
Welcome to Spring Boot and reactive programming!
In this chapter, we’ll cover the following topics:
- Discovering exactly what reactive programming is and why we should care
- Creating a reactive Spring Boot application
- Serving data with a reactive GET method
- Consuming incoming data with a reactive POST method
- Serving a reactive template
- Creating hypermedia reactively
Where to find this chapter’s code
The code for this chapter can be found at https://github.com/PacktPublishing/Learning-Spring-Boot-3.0/tree/main/ch9.
What is reactive and why do we care?
For literally decades, we’ve seen various constructs meant to help scale applications. This has included thread pools, synchronized code blocks, and other context-switching mechanisms meant to help us run more copies of our code safely.
And, in general, they have all failed.
Don’t get me wrong. People run huge systems with some sense of power. But the promises of multithreaded constructs have been tall, their implementation is tricky and frankly hard to get right, and the results have been meager.
People still end up running 10,000 instances of a highly needed service, which can result in a gargantuan monthly bill should we host our application on Azure or AWS.
But what if there were another way? What if the concept of lots of threads and lots of switching were a will-o’-wisp?
Introduction to Reactive
The evidence is in. Reactive JavaScript toolkits in the browser, an environment where there is only one thread, have shown incredible ability. That’s right – a single-threaded environment can scale and perform with power if approached properly.
We keep using this term, reactive. What does it mean?
In this context, we’re talking about Reactive Streams. This is from the official documentation:
A key characteristic that has been observed is that fast data streams cannot be allowed to overrun the stream’s destination. Reactive Streams addresses this concern by introducing a concept known as backpressure.
Backpressure replaces the traditional publish-subscribe paradigm with a pull-based system. Downstream consumers reach back to publishers and have the power to ask for 1, 10, or however many units to process that it is ready to handle. The mechanism of communication in reactive streams is called signals.
Backpressure signals are also baked into the standard in a way that chaining together multiple Reactive Streams components results in backpressure across the entire application.
There is even RSocket, a layer 7 network protocol. It is analogous to HTTP in that it runs on top of TCP (or WebSockets/Aeron), and is language agnostic, yet it comes with backpressure built in. Reactive Streams components can communicate over the network in a purely reactive way, with proper control.
What does backpressure allow?
It’s not uncommon in traditional systems to be forced to find the breaking point. Somewhere in the system is the point where some component is getting overwhelmed. Once this is resolved, the problem simply shifts to the next point, which usually isn’t obvious until the primary issue is resolved.
Reactive Stream details
Reactive Streams is a very simple spec, so simple it only has four interfaces: Publisher, Subscriber, Subscription, and Processor:
- Publisher: A component that is producing output, whether that’s one output or an infinite amount
- Subscriber: A component that is receiving from a Publisher
- Subscription: Captures the details needed for Subscribers to start consuming content from Publishers
- Processor: A component that implements both Subscriber and Publisher
While this is simple, it’s frankly too simple. It’s recommended to find a toolkit that implements the spec and provides more structures and support to build applications.
The other core thing to understand about Reactive Streams is that it comes with signals. Every time data is handled or actions are taken, they are associated with a signal. Even if there is no data exchange, signals are still handled. This means that there are fundamentally no void methods in reactive programming. That’s because even with no data results, there is still the need to send and receive signals.
For the rest of this book, we will use the Spring team’s implementation of Reactive Streams, known as Project Reactor. It’s important to understand that while Project Reactor is produced by the Spring team, Reactor itself doesn’t have any Spring dependencies. Reactor is a core dependency picked up by Spring Framework, Spring Boot, and the rest of the Spring portfolio. But it’s a toolkit in and of itself.
That means we won’t be using Reactive Streams directly but instead Project Reactor’s implementation of it. But it’s good to understand where it comes from and how it’s possible to integrate with other implementations of the spec, such as RxJava 3.
Project Reactor is a toolkit that's heavily built on Java 8’s functional programming features combined with lambda functions.
Check out the following snippet of code:
Flux<String> sample = Flux.just("learning", "spring",
  "boot") //
  .filter(s -> s.contains("spring")) //
  .map(s -> {
    System.out.println(s);
    return s.toUpperCase();
  });
This code fragment of Reactor code has some key aspects, as shown here:
- Flux: This is Reactor’s reactive data flow type of 0 or more data units, each coming at some point in the future.
- just(): Reactor’s way to create an initial collection of Flux’d elements.
- filter(): Similar to Java 8 Stream’s filter() method, it only allows data elements from the earlier Flux through if they satisfy the predicate clause. In this case, does it contain the "spring" string?
- map(): Similar to Java 8 Stream’s map() method, it allows you to transform each data element into something else, even a different type. In this scenario, it converts the string into uppercase.
This chunk of code can be described as a flow or a reactive recipe. Each line is captured as a command object in a process known as assembly. Something that isn’t as obvious is that assembly isn’t the same as running things.
When it comes to Reactive Streams, it’s important to understand that nothing happens until you subscribe.
onSubscribe is the first and most important signal in Reactive Streams. It’s the indication that a downstream component is ready to start consuming these upstream events.
Once a Subscription has been established, Subscriber can issue a request(n), asking for n items.
Publisher can then start publishing the items through the Subscriber’s onNext signal. This Publisher is free and clear to publish up to (but not exceeding) n invocations of the onNext method.
Subscriber can continue to invoke the Subscription’s request method, asking for more. Alternatively, Subscriber can cancel its Subscription.
Publisher can continue sending content, or it can signal there is no more through the onComplete signal.
Now, this all is quite simple and yet… a bit tedious. The recommendation is to let the framework handle this. Application developers are encouraged to write their applications at a higher level, allowing the framework to do all the reactive ceremonies.
And so, in the next section, we’ll see how Spring WebFlux and Project Reactor make it super simple to build a web controller reactively.
Creating a reactive Spring Boot application
To start writing reactive web apps, we need a completely new application. And to do that, let’s revisit our old friend, https://start.spring.io.
We’ll pick the following settings:
- Project: Maven
- Language: Java
- Spring Boot: 3.0.0
- Group: com.springbootlearning.learningspringboot3
- Artifact: ch9
- Name: Chapter 9
- Description: Writing Reactive Web Controllers
- Package name: com.springbootlearning.learningspringboot3
- Packaging: Jar
- Java: 17
With this project metadata selected, we can now start picking our dependencies. Now, instead of adding new things, as we’ve done in previous chapters, we are starting fresh with the following choices:
- Spring Reactive Web (Spring WebFlux)
That’s it! That’s all we need to get off the ground with building a reactive web application. Later in this chapter and into the next chapter, we’ll revisit this to add new modules.
Click GENERATE and download the ZIP file; we’ll have a tasty little web application with the following key things in the pom.xml build file:
- Spring-boot-starter-webflux: Spring Boot’s starter that pulls in Spring WebFlux, Jackson for JSON serialization/deserialization, and Reactor Netty as our reactive web server
- spring-boot-starter-test: Spring Boot’s starter for testing, including unconditionally for all projects
- reactor-test: Project Reactor’s test module with additional tools to help test reactive apps, automatically included with any reactive app
We haven’t delved into all the intricacies of reactive programming, but one thing that’s required is a web container that isn’t stuck on blocking APIs. That’s why we have Reactor Netty, a Project Reactor library that wraps non-blocking Netty with Reactor hooks.
And be aware that testing is vital. That’s why the two test modules are also included. And we’ll certainly be taking advantage of Reactor’s test module later in this chapter and the next one.
But before we can do all that, we need to get familiar with writing a reactive web method, as shown in the next section.
Serving data with a reactive GET method
Web controllers typically do one of two things: serve up data or serve up HTML. To grok the reactive way, let’s pick the first since it’s much simpler.
In the previous section, we saw a simple usage of Reactor’s Flux type. Flux is Reactor’s implementation of Publisher and provides a fistful of reactive operators.
We can use it in a web controller like this:
@RestController
public class ApiController {
  @GetMapping("/api/employees")
  Flux<Employee> employees() {
    return Flux.just( //
      new Employee("alice", "management"), //
      new Employee("bob", "payroll"));
  }
}
This RESTful web controller can be described as follows:
- @RestController: Spring Web’s annotation to indicate that this controller involves data, not templates
- @GetMapping: Spring Web’s annotation to map HTTP GET /api/employees web calls onto this method
- Flux<Employee>: The return type is a Flux of Employee records
Flux is sort of like combining a classic Java List with a Future. But not really.
Lists can contain multiple items, but a Flux doesn’t have them all at once. And Flux’s aren’t consumed through classic iteration or for loops. Instead, they come packed with lots of stream-oriented operations, such as map, filter, flatMap, and more.
As for being similar to a Future, that’s true only in the sense that when a Flux is formed, its contained elements usually don’t exist yet, but will instead arrive in the future. But Java’s Future type, predating Java 8, only has a get operation. As mentioned in the previous paragraph, Flux has a rich set of operators.
On top of all that, Flux has different ways to merge multiple Flux instances into a single one, as shown here:
Flux<String> a = Flux.just("alpha", "bravo");
Flux<String> b = Flux.just("charlie", "delta");
a.concatWith(b);
a.mergeWith(b);
This code can be described as follows:
- a and b: Two pre-loaded Flux instances
- concatWith: A Flux operator that combines a and b into a single Flux where all elements of a are emitted before the elements of b
- mergeWith: A Flux operator that combines a and b into a single Flux where the elements are emitted as they come in real time, allowing interleaving between a and b
Didn’t you pre-load that Flux in the web method with hard-coded data?
Yes, this example kind of defies the futuristic nature of Flux in real-world applications since we don’t pre-load a Flux using the just method. Instead, we’re more likely to connect a source of data such as a reactive database or a remote network service. Using Flux’s more sophisticated APIs, it’s possible to emit entries as they become available into Flux for downstream consumption.
In the web method we first defined, the Flux of data gets handed over to Spring WebFlux, which will then serialize the contents and serve up a JSON output.
It’s important to note that all the handling of Reactive Streams signals, including subscription, request, the onNext calls, and finally the onComplete invocation, are handled by the framework!
It’s vital to understand that, in reactive programming, nothing happens until we subscribe. Web calls aren’t made and database connections aren’t opened. Resources aren’t allocated until someone subscribes. The whole system is designed from the ground up to be lazy.
But for web methods, we let the framework do the subscribing for us.
Now, let’s learn how to craft a web method that consumes data reactively.
Consuming incoming data with a reactive POST method
Any website that will serve up employee records must surely have a way to enter new ones, right? So, let’s create a web method that does just that by adding to the ApiController class we started in the previous section:
@PostMapping("/api/employees")
Mono<Employee> add(@RequestBody Mono<Employee> newEmployee)
  {
    return newEmployee //
      .map(employee -> {
        DATABASE.put(employee.name(), employee);
        return employee;
      });
}
This Spring WebFlux controller has the following details:
- @PostMapping: Spring Web’s annotation to map HTTP POST /api/employees web calls to this method
- @RequestBody: This annotation tells Spring Web to deserialize the incoming HTTP request body into an Employee data type
- Mono<Employee>: Reactor’s alternative to Flux for a single item
- DATABASE: A temporary data store (a Java Map)
The incoming data is wrapped inside a Reactor Mono. This is the single-item counterpart to a Reactor Flux. By mapping over it, we can access its contents. Reactor Mono also supports many operators, as Flux does.
While we can transform the contents, in this situation, we are simply storing the content in our DATABASE and then returning it with no change.
map versus flatMap
We’ve now seen map used twice in the initial chunk of code at the start of this chapter and also in this latest method. Mapping is a one-to-one operation. If we were to map over a Flux with 10 items, the new Flux would also have 10 items. What if a single item, such as a string, were mapped into a list of its letters? The transformed type would be a list of lists. In many such situations, we’d like to collapse the nesting and simply have a new Flux with all the letters. This is flattening! flatMap is the same thing, just done in one step!
Scaling applications with Project Reactor
So, how exactly does Project Reactor scale our application? So far, we’ve seen how Project Reactor gives us a functional programming style. But it may not be clear exactly where scalability comes into play.
That’s because Project Reactor handles two key things seamlessly under the covers. The first is that every step in these little flows or recipes isn’t directly carried out. Instead, every time we write a map, a filter, or some other Reactor operator, we are assembling things. This isn’t when execution happens.
Each of these operations assembles a tiny command object with all the details needed to carry out our actions. For example, the statement in the previous code block where we store the value in DATABASE and then return the value is all wrapped inside a Java 8 lambda function. There is no requirement that when the controller method is invoked, this inner lambda function is called at the same time.
Project Reactor gathers all these command objects representing our actions and stacks them on internal work queues. It then delegates execution to its built-in Scheduler. This makes it possible for Reactor to decide exactly how to carry things out. There are various Schedulers to choose from, including a single thread to a thread pool, to a Java ExecutorService to a sophisticated bounded elastic scheduler.
Your Scheduler of choice works through its backlog of work as system resources become available. By having every single step of a Reactor flow act in a lazy, non-blocking way, anytime there is an I/O-bound delay, the current thread isn’t held up waiting for a response. Instead, Scheduler goes back to this internal queue of work and picks a different task to carry out. This is known as work stealing and makes it possible for traditional latency issues to turn into opportunities to complete other work, resulting in better overall throughput.
As Spring Data team leader Mark Paluch once said, “Reactive programming is based on reacting to resource availability.”
Earlier, we mentioned that Reactor does two things. The second thing is that instead of having a giant thread pool with 200 threads, it defaults to a Scheduler using a pool with one thread per core.
Quick history on Java concurrent programming
In the early days of Java concurrent programming, people would create giant pools of threads. But we learned that when you have more threads than cores, context switching becomes expensive.
On top of that, Java has many breaking APIs baked into its core. While we were given tools since the early days such as synchronized methods and blocks, along with locks and semaphores, it’s really hard to do this both effectively and correctly.
It was easy to either A) do it right but not increase throughput, B) improve throughput yet introduce deadlocks, or C) introduce deadlocks and not improve throughput. And these tactics often require rewriting the application in a non-intuitive way.
One thread per core when combined with lazy, non-blocking work stealing can be MUCH more efficient. Of course, coding with Project Reactor isn’t invisible. There is a programming style to incorporate, but since it’s heavily tilted toward the same style of programming as Java 8 Streams, which has been widely adopted, it’s not the big ask that early-days Java concurrent programming was.
This is also the reason that absolutely every part of the application needs to be written this way. Imagine a 4-core machine that has only 4 Reactor threads. If one of these threads ran into blocking code and were forced to wait, it would clobber 25% of the total throughput.
This is the reason that blocking APIs found in places such as JDBC, JPA, JMS, and servlets is a profound issue for reactive programming.
All these specifications were built on top of blocking paradigms, so they aren’t suitable for reactive applications, which we’ll explore in more detail in the next chapter, Working with Data Reactively.
In the meantime, let’s learn how to implement a reactive template.
Serving a reactive template
So far, we’ve built a reactive controller that serves up some serialized JSON. But most websites need to render HTML. And this leads us to templates.
Since we’re talking about reactive programming, it makes sense to pick a templating engine that doesn’t block. So, for this chapter, we’ll be using Thymeleaf.
To get going, first, we need to update the application we started building at the beginning of this chapter. To do that, let’s revisit https://start.spring.io.
We’ve done this dance in previous chapters. Instead of making an entirely new project and starting over (ugh!), instead, we will enter all the same project metadata shown earlier in this chapter in the Creating a reactive Spring Boot application section.
This time, enter the following dependencies:
- Spring Reactive Web
- Thymeleaf
Now, instead of using GENERATE like we did last time, hit the EXPLORE button. This will cause the web page to serve up an online preview of this barebones project, showing us the pom.xml build file.
Everything should be the same as the pom.xml file we downloaded earlier with one difference: that new dependency for spring-boot-starter-thymeleaf. All we need to do is this:
- Highlight that Maven dependency.
- Copy it to the clipboard.
- Paste it into our IDE’s pom.xml file.
This extra Spring Boot starter will download Thymeleaf, a templating engine that not only integrates nicely with Spring Boot but also comes loaded with reactive support. This sets us up to write a reactive web controller for templates, as shown in the next section.
Creating a reactive web controller
The next step is to create a web controller focused on serving templates. To do that, create a new file called HomeController.java and add the following code:
@Controller
public class HomeController {
  @GetMapping("/")
  public Mono<Rendering> index() {
    return Flux.fromIterable(DATABASE.values()) //
      .collectList() //
      .map(employees -> Rendering //
         .view("index") //
         .modelAttribute("employees", employees) //
         .build());
  }
}
There’s a lot in this controller method, so let’s take it apart:
- @Controller: Spring Web’s annotation to indicate this class contains web methods that render templates.
- @GetMapping: Spring Web’s annotation to map GET / web calls onto this method.
- Mono<Rendering>: Mono is Reactor’s single-valued reactive type. Rendering is Spring WebFlux’s value type that allows us to pass both the name of the view to render along with model attributes.
- Flux.fromIterable(): This static helper method lets us wrap any Java Iterable and then use our reactive APIs.
- DATABASE.values(): This is a temporary data source until we get to Chapter 10, Working with Data Reactively.
- collectList(): This Flux method lets us gather a stream of items into Mono<List<Employee>>.
- map(): This operation lets us access the list inside that Mono where we then transform it into a Rendering. The name of the view we wish to render is "index". We also load up the model "employees" attribute with the values found inside this Mono.
- build(): Rendering is a builder construct, so this is the step that transforms all the pieces into a final, immutable instance. It’s important to understand that when inside the map() operation, the output is a Mono<Rendering>.
There are some other aspects of this web method that are important to understand.
First of all, the map() operation at the end of the chain is meant to transform the type that’s inside Mono. In this case, it converts List<Employee> into a Rendering, while keeping everything inside this Mono. It does this by unpacking the original Mono<List<Employee>> and using the results to create a brand new Mono<Rendering>.
Functional programming 101
It’s basic functional programming to have some container such as a Flux or a Mono and you map over what’s inside, all the time, keeping it inside the functional Flux or Mono. You don’t have to worry about making new Mono instances. The Reactor APIs are designed to handle that for you. You focus on transforming the data along the way. So long as things remain smoothly encased in these reactive container types, the framework will properly unpack them at the right time and render them properly.
The other thing that is important to recognize is that we aren’t using a real data source. This is canned data stored in a basic Java Map. That’s why it may seem a bit strange to have wrapped a Java list of Employee objects into a Flux using fromIterable, only to extract them back out using collectList.
This is to illustrate the real-world situation we often face of being handed an Iterable collection. The proper course of action is what’s shown in the code: wrap it into a Flux and then execute our various transformations and filters, until we hand it off to the web handlers of Spring WebFlux to be rendered with Thymeleaf.
The one thing remaining is to code that template using Thymeleaf!
Crafting a Thymeleaf template
The final step in building a template-based solution is to create a new file, index.html, underneath src/main/resources/templates, as shown here:
<html xmlns:th="http://www.thymeleaf.org">
<head>
  <title>Writing a Reactive Web Controller</title>
</head>
<body>
<h2>Employees</h2>
<ul>
  <li th:each="employee : ${employees}">
    <div th:text=
      "${employee.name + ' (' + employee.role + ')'}">
    </div>
  </li>
</ul>
</body>
</html>
This template can be described as follows:
- xmlns:th=http://www.thymeleaf.org: This XML namespace allows us to use Thymeleaf’s HTML processing directives.
- th:each: Thymeleaf’s for-each operator, giving us a <li> node for every entry in the employees model attribute. In each node, employee is the stand-in variable.
- th:text: Thymeleaf’s directive to insert text into the node. In this situation, we are concatenating two attributes from the employee record with strings.
Something else probably not visible is that ALL of the HTML tags in this template are closed. That is, no tag can be left open due to Thymeleaf’s DOM-based parser. Most HTML tags have an opening and closing tag, but some do not, such as <IMG>. When using such tags in Thymeleaf, we must close them, either with a corresponding </IMG> tag or by using the <IMG/> shortcut.
Thymeleaf’s pros and cons
If it’s any consolation, anytime I use Thymeleaf, I must have their reference page open for me to look at. If I coded Thymeleaf every day, perhaps I wouldn’t need this. Despite this aspect, Thymeleaf is quite powerful. There are extensions such as support for Spring Security and the ability to write security checks into your templates, allowing certain elements to be rendered (or not) based on the user’s credentials and authorizations. Thymeleaf on the whole can probably do anything you need when it comes to crafting HTML at the expense of having to take on its notation.
If you fire up our reactive application and navigate to http://localhost:8080, you’ll see a nice little rendered web page:

Figure 9.1 – Reactive template rendered with Thymeleaf
This wouldn’t be much of a website if we didn’t include the ability to add to our employee database. To do that, we need to enter the world of form-binding.
In general, to POST a new object, we must first provide an empty object during the GET part of the operation, so we need to update our index method, as shown here:
@GetMapping("/")
Mono<Rendering> index() {
  return Flux.fromIterable(DATABASE.values()) //
    .collectList() //
    .map(employees -> Rendering //
       .view("index") //
       .modelAttribute("employees", employees) //
       .modelAttribute("newEmployee", new Employee("", ""))
       .build());
}
This code is the same as the previous version except for the highlighted line. It introduces a new model attribute, newEmployee, containing an empty Employee object. This is all that’s needed to start crafting an HTML form with Thymeleaf.
In the index.html template we created in the previous section, we need to add the following:
<form th:action="@{/new-employee}" th:object=
  "${newEmployee}" method="post">
    <input type="text" th:field="*{name}" />
    <input type="text" th:field="*{role}" />
    <input type="submit" />
</form>
This Thymeleaf template can be described as follows:
- th:action: Thymeleaf’s directive to form a URL to a route that we’ll code further down to process new Employee records
- th:object: Thymeleaf’s directive to bind this HTML form to the newEmployee record that was provided as a model attribute in our updated index method
- th:field="*{name}": Thymeleaf’s directive to connect the first <input> to the Employee record’s name
- th:field="*{role}": Thymeleaf’s directive to connect the second <input> to the Employee record’s role
The rest is standard HTML 5 <form>, which we won’t go into. The parts expounded upon are the glue needed to hook HTML form processing into Spring WebFlux.
The last step is to code a POST handler in our HomeController, as shown here:
@PostMapping("/new-employee")
Mono<String> newEmployee(@ModelAttribute Mono<Employee>
  newEmployee) {
    return newEmployee //
      .map(employee -> {
        DATABASE.put(employee.name(), employee);
        return "redirect:/";
      });
}
This operation can be described as follows:
- @PostMapping: Spring Web’s annotation to map POST /new-employee web calls to this method.
- @ModelAttribute: Spring Web’s annotation to signal that this method is meant to consume HTML forms (versus something such as an application/json request body).
- Mono<Employee>: This is the inbound data from the HTML form, wrapped in a Reactor type.
- map(): By mapping over the incoming results, we can extract the data, store it in DATABASE, and transform it into an HTTP redirect operation back to /. This results in a Mono<String> method return type.
Once again, the entire action taken in this method is a Reactor flow that starts with the incoming data and results in a transformation to an outgoing action. Reactor-based programming often has this style compared to classic, imperative programming where we fiddle with intermediate variables.
If we run everything again, we will see this:

Figure 9.2 – Entering a new employee into the form
On this page, the user is entering a new employee record. Once they hit Submit, the POST processor kicks in, stores the user, then directs the web page back to the home page.
This causes an updated version of DATABASE to be retrieved, as shown here:
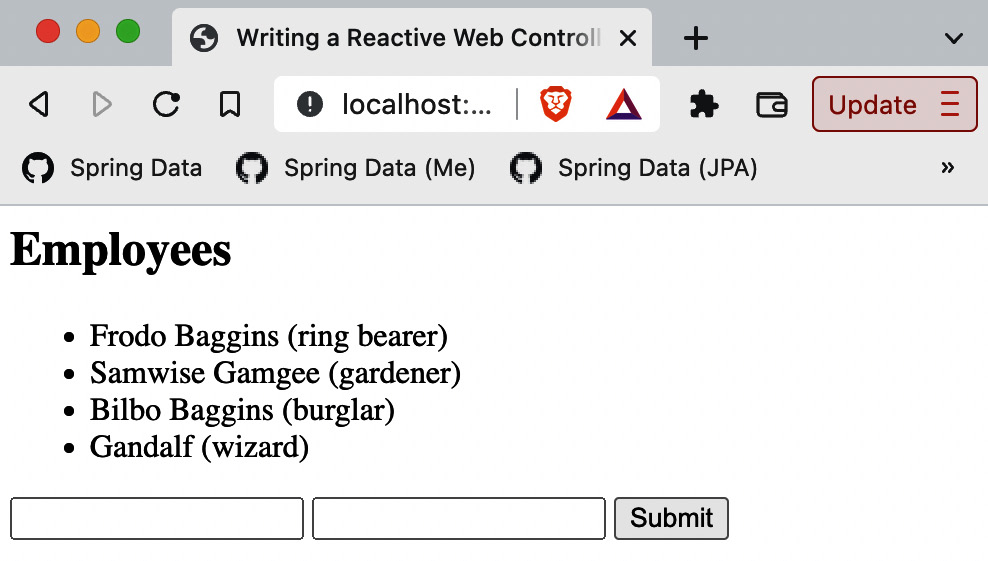
Figure 9.3 – After hitting Submit, the page redirects back to home
The newly entered employee now shows up on the web page.
Is Spring WebFlux worth it?
This type of flow can indeed feel a little daunting, even challenging at first. But over time, it becomes a consistent style that often forces us into thinking about every step. For a standard web app, you can question whether or not this is worth it. But if you have an app that is requiring you to run hundreds if not thousands of copies, and your cloud bill is going through the roof, then there may be a valid, economical reason to consider using Spring WebFlux. Check out my article, Why Reactive Streams are the SECRET to CUTTING your monthly cloud bill, at https://springbootlearning.com/cloud-bill.
We could delve further into all the various ways to mix Spring WebFlux and Thymeleaf, but this is Learning Spring Boot 3.0, not Learning Thymeleaf 3.1. And with that, let’s look into one other valuable ability… crafting hypermedia-powered APIs.
Creating hypermedia reactively
At the beginning of this chapter, we crafted a very simple API. It served some pretty basic JSON content. One thing that was missing from such a bare API was any controls.
Hypermedia is the term used to refer to both content and metadata being served by an API; this content and metadata indicate what can be done with the data or how to find other related data.
Hypermedia is something we see every day. At least on web pages. This includes the navigation links to other pages, links to CSS stylesheets, and links to effect change. This is quite common. When we order some product from Amazon, we aren’t required to provide the link to make it happen. The web page gives it to us.
Hypermedia in JSON is simply the same concept but applied to APIs instead of visual web pages.
And this is easy if we add Spring HATEOAS to our application!
Spring Boot Starter HATEOAS versus Spring HATEOAS
If you go to start.spring.io and ask for Spring HATEOAS, you will have spring-boot-starter-hateoas added to your application. But this version is wrong when using Spring WebFlux. For the longest time, Spring HATEOAS only supported Spring MVC, but about 4 years ago, yours truly added WebFlux support. Unfortunately, the Spring Boot Starter HATEOAS module pulls in Spring MVC and Apache Tomcat support, which is the opposite of what we want for a Spring WebFlux application running on top of Reactor Netty. The simplest approach is to just add Spring HATEOAS directly, as shown here.
To add Spring HATEOAS to a reactive application, just add the following dependency:
<dependency>
    <groupId>org.springframework.hateoas</groupId>
    <artifactId>spring-hateoas</artifactId>
</dependency>
And once again, thanks to Spring Boot’s dependency management, there is no need to specify the version number.
With that in place, we can start building a hypermedia-powered API. First, create a class named HypermediaController.java, like this:
@RestController
@EnableHypermediaSupport(type = HAL)
public class HypermediaController {
}
This barebones controller class can be described as follows:
- @RestController: Spring Web’s annotation to mark this controller as focused on JSON serializing instead of template rendering
- @EnableHypermediaSupport: Spring HATEOAS’s annotation to activate hypermedia support – in this case, HAL support
If we had used Spring Boot Starter HATEOAS, the HAL support would have been activated automatically. But since we’re manually plugging in Spring HATEOAS, we must activate it ourselves.
Important
The @EnableHypermediaSupport annotation only has to be used once. We happen to be putting on our hypermedia controller for brevity in this book. In a real application, it may be preferable to put it in the same class that has the @SpringBootApplication annotation.
With all this in place, let’s start by building a hypermedia endpoint for a single-item resource, one employee, as shown here:
@GetMapping("/hypermedia/employees/{key}")
Mono<EntityModel<Employee>> employee(@PathVariable String
  key) {
        Mono<Link> selfLink = linkTo( //
            methodOn(HypermediaController.class) //
              .employee(key)) //
                .withSelfRel() //
                .toMono();
Mono<Link> aggregateRoot = linkTo( //
  methodOn(HypermediaController.class) //
    .employees()) //
       .withRel(LinkRelation.of("employees"))//
       .toMono();
Mono<Tuple2<Link, Link>> links = Mono.zip(selfLink,
  aggregateRoot);
return links.map(objects ->
  EntityModel.of(DATABASE.get(key), objects.getT1(),
    objects.getT2()));
}
This implementation for the single-item Employee is loaded with content, so let’s take it apart:
- @GetMapping: Spring Web’s annotation to indicate that this will serve HTTP GET /hypermedia/employee/{key} methods.
- The return type is Mono<EntityModel<Employee>>. EntityModel is Spring HATEOAS’s container for an object that includes links. And we’ve already seen how Mono is Reactor’s wrapper for reactive programming.
- linkTo(): Spring HATEOAS’s static helper function to extract a link from a Spring WebFlux method invocation.
- methodOn(): Spring HATEOAS’s static helper function to perform a dummy invocation of a controller’s web method to gather information for building links. In the first usage, we are pointing at the employee(String key) method of HypermediaController. In the second usage, we are pointing at the employees() method of HypermediaController (not yet written).
- withSelfRel(): Spring HATEOAS’s method to label selfLink with a self hypermedia relation (which we’ll see shortly).
- withRel(LinkRelation.of("employees")): Spring HATEOAS’s method to apply an arbitrary employees hypermedia relation.
- toMono(): Spring HATEOAS’s method to take all the link-building settings and turn them into a Mono<Link>.
- Mono.zip(): Reactor’s operator to combine two Mono operations and process the results when both are complete. There are other utilities for bigger sets, but waiting for two is so common that zip() is kind of a shortcut.
- links.map(): We map over Tuple2 of the Mono<Link> object, extracting the links and bundling them with the fetched employee into a Spring HATEOAS EntityModel object.
So what does Spring HATEOAS do?
It combines data (which we’ve been using all along) with hyperlinks. Hyperlinks are represented using Spring HATEOAS’s Link type. The toolkit is filled with operations to ease the creation of Link objects and merge them with data. The previous block of code showed how to extract links from a Spring WebFlux method.
For Spring HATEOAS to render this merging of data and links, we need to have any hypermedia-powered endpoint return a Spring HATEOAS RepresentationModel object or one of its subtypes. The list isn’t long and is shown here:
- RepresentationModel: The core type for data and links. One option for a single-item hypermedia type is to extend this class and merge our business values with it.
- EntityModel<T>: The generic extension of RepresentationModel. Another option is to inject our business object into its static constructor methods. This lets us keep links and business logic separated from each other.
- CollectionModel<T>: The generic extension of RepresentationModel. It represents a collection of T objects instead of just one.
- PagedModel<T>: The extension of CollectionModel that represents a page of hypermedia-aware objects.
It’s important to understand that a single-item hypermedia-aware object can have one set of links while a collection of hypermedia-aware objects can have a different set of links. To properly represent a rich collection of hypermedia-aware objects, it can be captured as a CollectionModel<EntityModel<T>>.
This would imply that the entire collection may have one set of links, such as a link to the aggregate root. And each entry of the collection may have a custom link pointing to its single-item resource method while they all have a link back to the aggregate root.
To better see this, let’s implement that aggregate root – the hypermedia-aware end mentioned in the previous code block:
@GetMapping("/hypermedia/employees")
Mono<CollectionModel<EntityModel<Employee>>> employees() {
Mono<Link> selfLink = linkTo( //
  methodOn(HypermediaController.class) //
    .employees()) //
       .withSelfRel() //
       .toMono();
return selfLink //
  .flatMap(self -> Flux.fromIterable(DATABASE.keySet()) //
    .flatMap(key -> employee(key)) //
    .collectList() //
    .map(entityModels -> CollectionModel.of(entityModels,
      self)));
}
Part of this method should look very similar to the previous code block. Let’s focus on the differences:
- @GetMapping: This method maps GET /hypermedia/employees to this method, the aggregate root.
- selfLink in this method points to this method, which is a fixed endpoint.
- We flatMap() over selfLink, and then extract every entry from DATABASE, leveraging the employee(String key) method to convert each entry into an EntityModel<Employee> with single-item links.
- We use collectList() to bundle all this into a Mono<List<EntityModel<Employee>>>.
- Finally, we map over it, converting it into Mono<CollectionModel<EntityModel <Employee>>> with the aggregate root’s selfLink wired in.
If this appears a lot more complex than previous methods in this chapter (or previous chapters), that’s because it is. But hooking web controller methods directly into the rendering of the hypermedia output ensures that future tweaks and adjustments to our methods will adjust properly.
If we run the application, we will easily see where this leads us:
% curl -v localhost:8080/hypermedia/employees | jq
{
    "_embedded": {
      "employeeList": [
        {
          "name": "Frodo Baggins",
          "role": "ring bearer",
          "_links": {
            "self": {
              "href": "http://localhost:8080/hypermedia/
                        employees/Frodo%20Baggins"
            },
            "employees": {
              "href": "http://localhost:8080/hypermedia/
                        employees"
            }
          }
      },
      {
          "name": "Samwise Gamgee",
          "role": "gardener",
          "_links": {
            "self": {
              "href": "http://localhost:8080/hypermedia/
                        employees/Samwise%20Gamgee"
            },
            "employees": {
              "href": "http://localhost:8080/hypermedia/
                        employees"
            }
          }
          },
     {
          "name": "Bilbo Baggins",
          "role": "burglar",
          "_links": {
            "self": {
              "href": "http://localhost:8080/hypermedia/
                        employees/Bilbo%20Baggis"
            },
            "employees": {
              "href": "http://localhost:8080/hypermedia/
                        employees"
            }
          }
          }
      ]
    },
    "_links": {
      "self": {
        "href": "http://localhost:8080/hypermedia/
                  employees"
      }
    }
}
That’s a lot of information. Let’s highlight some key parts:
- _link: HAL’s format for showing a hypermedia link. It contains a link relation (for example, self) and an href (for example, http://localhost:8080/hypermedia/employees)
- The collection’s self-link is at the bottom, while the two single-item Employee objects each have a self pointed at itself as well as an employees link pointed to the aggregate root
It’s left as an exercise for you to explore the single-item HAL output.
What’s a “self” link?
In hypermedia, just about any representation will include what’s called a “self” link. It’s the this concept. Essentially, it’s a pointer to the current record. It’s important to understand the context. For example, the HAL output shown previously has three different self links. Only the last one is this document’s self. The others are the canonical links to look up that individual record. And because links are essentially opaque, you can use these links to navigate to those records.
What is the point of doing all this?
Imagine a system where not only do we have employee-based data, but also other various operations. For example, we could build up a whole host of functions such as takePTO, fileExpenseReport, and contactManager. Anything, really.
Building up a collection of links that cross various systems and appear and disappear based on when they’re valid makes it possible to show/hide buttons on web applications based on whether they are relevant.
To hypermedia or not to hypermedia, that is the question
Hypermedia makes it possible to dynamically connect users with related operations and relevant data. Since there’s not enough room in this chapter to delve into all the pros and cons of hypermedia, check out Spring Data REST: Data meets Hypermedia at https://springbootlearning.com/hypermedia, where you can watch me and my teammate Roy Clarkson go into the details of hypermedia and Spring.
Summary
In this chapter, we learned several key skills, including creating a reactive application using Project Reactor, rolling out a reactive web method to both serve and consume JSON, and how to leverage Thymeleaf to reactively generate HTML and consume an HTML form. We even used Spring HATEOAS to reactively generate a hypermedia-aware API.
All these features are the building blocks of web applications. While we used a Java 8 functional style to chain things together, we were able to reuse the same Spring Web annotations we’ve used throughout this book.
And by using Reactor’s style, a paradigm quite similar to Java 8 Streams, we can potentially have a much more efficient application.
That concludes this chapter! In the next chapter, we will wrap things up by showing you how to reactively work with real data.