
This makes it incredibly easy for us to start customizing Magento ourselves. There are just a few steps that we need to take in order to create our own basic Magento theme. The steps are:
To change the store's color scheme to match our original design for the Cheesy Cheese Store, we need to edit the styles.css file in the skin/frontend/default/blank/css/ directory again.
The next thing we can do is change the background color and background image of the header, by editing the style associated with.header:
.header {
padding:10px; border:1px solid #ddd;
}
We can change the background color and image by adding the following code to the CSS:
.header {
background: #333 url("../images/body_bg.png") top left no-repeat;
padding:10px; border:1px solid #ddd;
}
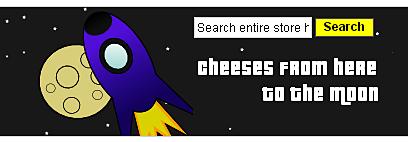
The background of our store should now be dark gray, but the image won't appear until we upload it to the right directory,skin/frontend/default/blank/images/. Our store's header should now look like this:

The search form in the header is our next element to style. We'll keep it centred, according to our design for Cheesy Cheese Store. The HTML for the form is quite straight forward, and allows us to identify what we need to style in the CSS:
<form id="search_mini_form" action="http://www.yourstore.com/magento/index.php/catalogsearch/ result/" method="get">
<fieldset class="form-search">
<legend>Search Site</legend>
<label for="search">Search:</label>
<input id="search" type="text" class="input-text" name="q" value="" />
<button type="submit" class="button"><span>Search</span></button>
<div id="search_autocomplete" class="search-autocomplete"></div>
<script type="text/javascript">
//<!
[CDATA[
var searchForm = new Varien.searchForm('search_mini_form', 'search', 'Search entire store here...'),
searchForm.initAutocomplete('http://www.yourstore.com /magento/index.php/catalogsearch/ajax/suggest/', 'search_autocomplete'),
//]]>
</script>
</fieldset>
</form>
We'll hide the label for the search form and restyle the submit button .button, by adding a new style to the styles.css template:
.header label {display: none}
.header .button {background: #FFFF00}
Our search form should now look more integrated with the header.
The next elements that we can style are the user links in the header, which are grouped in an unordered list of class.links.
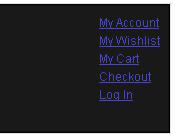
They're currently not very clear, but we can solve this with a little CSS.
header .links a {color: #FFF}
As you can see, they're now easier to read for our store's visitors.

We can style the main page content quite simply, by looking for the following CSS:
/* Base Columns */
col-left { float:left; width:230px; border:1px solid #ddd; padding:5px 5px 0; }
col-main { float:left; width:736px; border:1px solid #ddd; padding:5px; }
col-right { float:right; width:230px; border:1px solid #ddd; padding:5px 5px 0; }
We'll remove the border from each of these, and give them our newer background color (dark gray), and make sure that all of the content can be seen, by making the fore-color white.
/* Base Columns */
col-left, .col-main, .col-right
{background: #333;color: #FFF}
col-left {float:left; width:230px; padding:5px 5px 0; }
col-main {float:left; width:736px; padding:5px; }
col-right {float:right; width:230px; padding:5px 5px 0; }
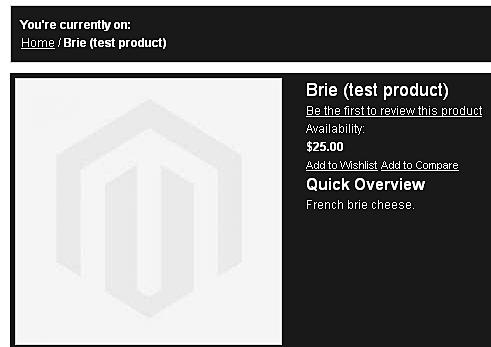
Our store's primary content area now looks like this:

Note that we need to style links too, which we can do with the following CSS:
col-left a, .col-main a, .col-right a {color: #FFF}
We'll also hide theout of stock message that appears, since we're not using Magento to track Cheesy Cheese Store's stock at the moment. To do this, we simply add this CSS to thestyles.css file:
span.out-of-stock {display: none}
Lastly, change the Add to Wishlist and Add to Compare links to tidy things up a little, making them smaller and less obvious, because the product itself should be more of a focus.
ul.add-to-links li {display: inline}
ul.add-to-links li a {color: #DDD;font-size: 90%}
Our page content now looks a lot smarter:

The footer is relatively easy to style, though the HTML is a bit verbose:
<div class="footer"> <ul> <li> <a href="http://www.yourdomain.com/magento/index.php/ about-magento-demo-store">About Us</a></li> <li class="last"> <a href="http://www.yourdomain.com/magento/index.php/ customer-service">Customer Service</a></li> </ul> <ul class="links"> <li class="first"> <a href="http://www.yourdomain.com/magento/index.php/catalog/ seo_sitemap/category/" title="Site Map" >Site Map</a> </li> <li> <a href="http://www.yourdomain.com/magento/index.php/ atalogsearch/term/popular/" title="Search Terms" > Search Terms</a> </li> <li> <a href="http://www.yourdomain.com/magento/index.php/ catalogsearch/advanced/" title="Advanced Search" > Advanced Search</a> </li> <li class="last"> <a href="http://www.yourdomain.com/magento/index.php/ contacts/" title="Contact Us" >Contact Us</a> </li> </ul> <p>Help Us to Keep Magento Healthy <a href="http://www.magentocommerce.com/bug-tracking" onclick="this.target='_blank'"> <strong>Report All Bugs</strong></a> (ver. 1.1.8) </p> <address>© Richard Carter</address> </div>
We don't want links to the customer service or about pages in the Cheesy Cheese Store, so we'll remove these. To do this, we need to log in to our Magento store's administration panel, and select the Static Blocks option under the CMS navigation option. Select the footer_links static block, set its status to disabled, and select the Save Block option.

Now, these links will not be displayed in the footer. As for the other links, we can style these with CSS and apply it to the.footer .list, but first we'll style the.footer div itself. Currently it reads:
.footer { border:1px solid #ddd; padding:10px; }
To style it like the rest of our store, we'll remove the border and add a background color again:
.footer {
background: #333;
color: #FFF;
padding:10px;
}
We'll also style the links in the footer to ensure that they're visible:
.footer a {color: #FFF}
Our store's footer is now styled.

Now that the homepage is styled, there are just a few changes left that we need to make to style the product pages in the same way, and to create a consistent look across our Magento store. The first is the breadcrumbs div tag,.breadcrumbs, which currently appears white.

This is quickly fixed by adding the breadcrumbs class to our existing CSS:
.breadcrumbs,
.col-left, .col-main, .col-right
{background: #333;color: #FFF}
The link color in the breadcrumb is also in need of some CSS:
.breadcrumbs a,
.col-left a, .col-main a, .col-right a {color: #FFF}
The breadcrumb is now styled like the rest of the store.
One of the most obvious things that we can do to customize our Magento store is to change the logo to our own. To change the store's logo, in the Magento admin panel, go to the Design section under the Configuration option in the System menu.
Once you're on the page, select the Header section.

From here, you can change your logo file and the text used if the logo isn't displayed. It's useful to search engines if you set this to be the name of your store (in our case, Cheesy Cheese Store).
The logo itself is stored in the /skin/frontend/default/blank/images/ directory, which is where you'll need to upload your new logo file. For Cheesy Cheese Store our logo file looks like this:

We'll save the logo file as logo2.gif, and set the transparency color to the gray in the background, so that eventually the stars will be able to shine through the logo. We now need to save the new value for the logo's name (that is, replace logo.gif with logo2.gif, or whatever name you have given your new logo).

If we refresh our Magento store, then we should now be able to see the new logo.

As our new logo is larger than the old Magento store logo, we need to edit some CSS, which we can find in the skin/frontend/default/blank/css/ directory of our Magento installation. Locate the CSS in the styles.css file that reads:
.logo {
float:left; width:200px; height:63px; overflow:hidden;
}
We need to remove the overflow: hidden declaration, and change the height and width values to the height and width of our new logo:
.logo {
float:left; width:122px; height:109px;
}
We also need to change the dimensions of the logo's link so that our store's visitors can still click on the logo to return to the store's home page. The CSS for this is a few lines under the declaration of .logo:
.header .logo a {
display:block; width:175px; height:200px;
}
These values need changing to those below for our new logo, which is 122 pixels wide and 109 pixels high:
.header .logo a {
display:block; width:122px; height:109px;
}
The full logo should now be visible (though it'll look a little odd since it's aliased for a darker background color).

One touch many designers forget about is the store's favicon: The little icon usually displayed next to your browser's address bar, and stored in your browser's bookmarked web site. The default favicon in Magento is the Magento logo, scaled to a smaller size:
A good favicon is usually:
- Recognisable at a small size: A favicon is 16 by 16 pixels in size
- Related to your logo or store's products
Of course, these are just suggestions. Rules are there to be broken, but it's worthwhile keeping the theme of your favicon close to the theme of your store's products. On this basis, we'll change Cheesy Cheese Store's favicon from the default Magento icon to this cheese-related favicon.

The favicon file for our theme is located in the /skin/frontend/default/default/ directory of your Magento installation, and is called favicon.ico.
Tip
Creating a favicon file
There are a number of online tools that allow you to create favicon files, including Dynamic Drive's Favicon Generator (http://tools.dynamicdrive.com/favicon/).
Callouts are graphic advertisments embedded in most Magento themes by default to allow you to promote certain products on your store. For example, in our blank theme, a callout is displayed below the shopping cart and compare features, in the righthand column.

Of course, you can customize these graphics in the way that you want, but as the Cheesy Cheese Store is in need of a simple theme, we'll remove them.
To remove the callout graphics from our store's theme, we need to edit a layout file called catalog.xml, which is located in app/design/frontend/default/blank/layout/.
To remove the callouts in the righthand columns of the Magento theme, you'll need to find the following code in the catalog.xml file, and comment out or remove the highlighted code below:
<reference name="right">
<block type="core/template" before="cart_sidebar" name="catalog.compare.sidebar" template="catalog/product/compare/sidebar.phtml"/>
<block type="core/template" name="right.permanent.callout" template="callouts/right_col.phtml"/>
</reference>
The code should now be:
<reference name="right">
<block type="core/template" before="cart_sidebar" name="catalog.compare.sidebar" template="catalog/product/compare/sidebar.phtml"/>
<!--
<block type="core/template" name="right.permanent.callout" template="callouts/right_col.phtml"/>
-->
</reference>
Locate the following block of code:
<block type="core/template" name="left.permanent.callout" template="callouts/left_col.phtml">
<action method="setImgSrc">
<src>images/media/col_left_callout.jpg</src>
</action>
<action method="setImgAlt" translate="alt" module="catalog">
<alt>Our customer service is available 24/7. Call us at (800) DEMO-NUMBER.</alt>
</action>
<action method="setLinkUrl">
<url>checkout/cart</url>
</action>
</block>
To remove the callouts, you can either remove the code above or comment it out, in the same way you would comment HTML out:
<!--
<block type="core/template" name="left.permanent.callout" template="callouts/left_col.phtml">
<action method="setImgSrc"><src>images/media/col_left_callout.jpg
</src></action>
<action method="setImgAlt" translate="alt" module="catalog"><alt>Our customer service is available 24/7 . Call us at (800) DEMO-NUMBER.</alt></action>
<action method="setLinkUrl"><url>checkout/cart</url></action>
</block>
-->
Now, if you save and upload the file to your server, you should see then that the callouts displayed on the right and lefthand columns have gone.