If you want to make your Magento theme available for others in the Magento community, then you'll need to package it and make it accessible through Magento Connect.
There are three types of contribution that you can make to Magento, though only two will be of use to (most) Magento themes. They are:
The other type of contribution, known as a Magento Core Extension, is created by the Magento Core team. These are licensed under an Open Software License (OSL).
Magento Commercial Extensions allow commercial entities to release themes for Magento under a license of their own choosing. There tend to be more restrictions on what you can or can't do with Commercial Extensions as compared to Community Extensions, so bear this in mind!
Releasing your theme as a Magento Community Extension allows others in the Magento community to use your theme as they wish. Themes released under this category can be licensed by any open source license.
As we're releasing our Magento theme to the Magento community, we can make use of the Magento Community Extensions option.
There are a few things that your packaged Magento theme will need to include, such as:
- The skin files, such as images, any theme-specific JavaScript, and related CSS files, in the
skin/frontend/default/cheese2directory - The PHTML template files for your theme, located in the
app/design/frontend/default/cheese2/templatedirectory - Your theme's layout (XML) files in the
app/design/frontend/default/cheese2/layoutdirectory
You may also need to package your theme's locale files, if applicable.
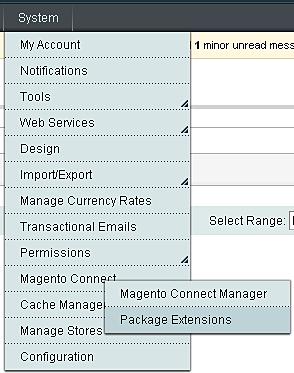
You can create your package through the Package Extensions option, available under Magento Connect under System in your store's administration panel, as seen in the following screenshot:
You'll now be presented with the option to create a new extension and to give the package - your theme - a name, a summary, and a description.
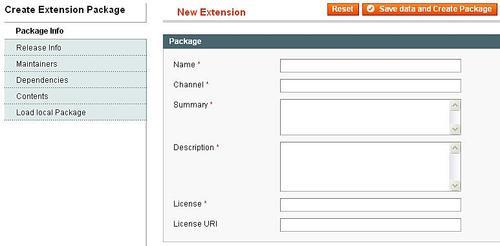
To start packaging our extension, we can fill in the fields required in the Package Info tab, as seen in the following screenshot
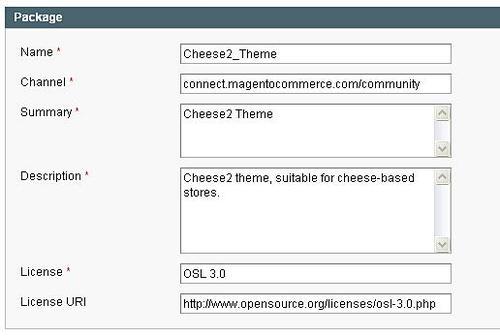
The Channel for our package is the Magento Community, as this is where we chose to release our theme. If you wish to release your theme for commercial use, then the value you need to use for the Channel value is connect.magentocommerce.com/commercial.
The Summary and Description of our extension should briefly explain what the theme is and what it is suitable for.
The License field allows you to specify what license your theme is available under. Some of your options include:
- Using an Open Source License—http://www.opensource.org/licenses/
- Using a Creative Commons License—http://creativecommons.org
As Magento itself is licensed under the OSL, the cheese2 theme can also be released under this license. The next tab to the left, Release Info, allows us to specify the release information, as seen in the following screenshot:
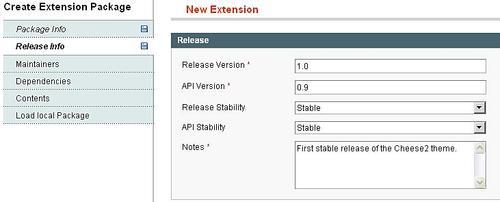
The release version is what you deem suitable for your theme. As we're releasing the cheese2 theme as a first stable release, we can set the Release Version to 1.0. Similarly, the Release Stability can be set to Stable, which indicates it is suitable for a "live" Magento store. If your theme is still in development, then select a relevant stability as this is helpful to Magento store owners looking to find a stable extension to use for their store.
Finally, use the Notes field to include any additional information about this particular release of the extension.
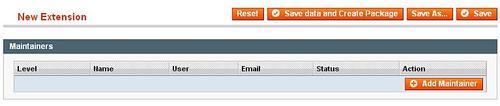
The next step is to add Maintainers to the extension. This gives you the chance to specify those who worked on the theme. Firstly, you'll need to click Add Maintainer as shown in the following screenshot:
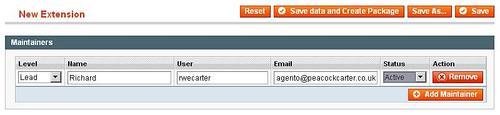
After selecting this, you're provided with the opportunity to fill in your Name, and your Magento Commerce login as shown in the following screenshot:
Note
You can get a Magento username at http://www.magentocommerce.com.
The Lead developer of the extension is required as a point of contact.
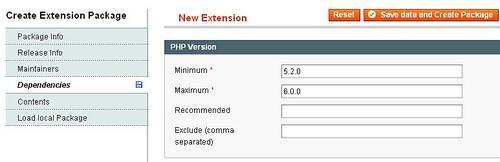
The next tab is for the Dependencies of our extension. As our extension is a theme, this doesn't concern us. However, we can safely put 5.2.0 as a value for Minimum under PHP Version, as this is the lowest version of PHP that Magento will run on. As our Maximum value, we'll use 6.0.0.
After selecting this, you're provided with the opportunity to fill in your Name and your Magento Commerce log in.
Next, we need to add the content associated with our extension under the Contents tab:
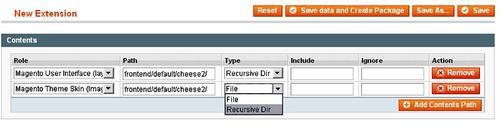
We need to create two contents for the theme. The first Role needs to be set to Magento User Interface, and the Path value needs to point to our layout and template files—frontend/default/cheese directory. The second Role needs to be for the theme's skin—Magento Theme Skin directory. The path needs to be the same as in the user interface—the frontend/default/cheese
directory. Lastly, the Type values need to be set to Recursive Dir—this makes sure that every directory within the directories specified in the Path field are included.
We can now click on Save data and Create Package, after which our output extension will be accessible in the /var/pear directory of our Magento installation.
If you want to share your extension with other Magento store owners, then you'll need to provide the files exported here on the Magento web site (http://www.magentocommerce.com). Create an account (or log in to your existing account), and you'll find an option in the My Account section called Magento Connect, where there are two options:
- Commercial extensions
- Community extensions
Pick the relevant category for your new theme, and follow the instructions on the Magento Connect web site. You'll be asked to provide details for your theme, including a name and a description, as well as a screenshot.