Once you have written your presentation and pulled together all the text and graphics that will go into the presentation you should review the show, and if needed, reorganize your slides the way you like them. Then you can add motion and visual appeal to your slideshow with slide transitions and animations.
Slide transitions are animated effects that occur when you switch from one slide to another. Transitions between slides can enhance the effect of your presentation and help your audience by clearly marking when you’re done with a slide (and also, presumably letting them know that you’re moving from one topic to the next). An animation effect is the generic name for an animation that occurs within the body of the slide, and PowerPoint 2007 makes it easier to add animation to your slides. Some animations involve one or more elements of an object, and you can control how objects animate onto the slide and how they leave the slide. For example, you can have the parts of a graph appear on the screen one at a time (called a chart animation), or make text boxes or graphics fly onto (or off of) the screen. Text animations are used for animating the way that different lines of bulleted text appear on the slide.
In this chapter, you’ll learn how to use PowerPoint’s Slide Sorter; apply slide transitions; and create the different types of object animations.
As you’ve been developing your presentation, especially during the writing phase, you’ve seen how the topic of one slide flows into the next, and perhaps that flow is perfect for your show. But maybe the presentation would be a bit better, a touch tighter, if you moved that slide there, and moved that other slide over here. PowerPoint’s Slide Sorter View shows you many slides at once, and allows you to drag one or more slides to other places in the presentation. Slide Sorter View also offers a convenient way to apply slide transitions to multiple slides in one operation (you’ll see how to do that later in this chapter).
Procedure 10.1. To rearrange slides in Slide Sorter View:
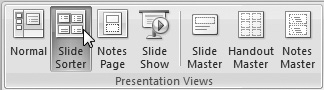
Choose View > Presentation Views > Slide Sorter (Figure 10.1).
or
Click the Slide Sorter View button at the bottom of the PowerPoint window (Figure 10.2).
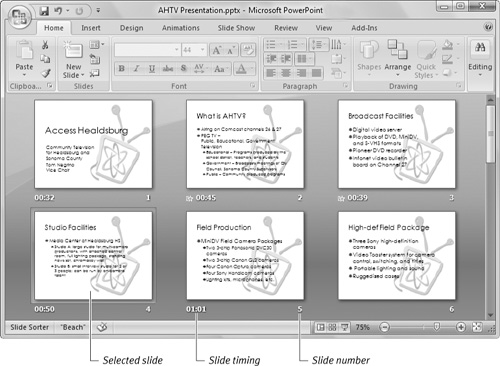
The PowerPoint window switches to Slide Sorter View (Figure 10.3).
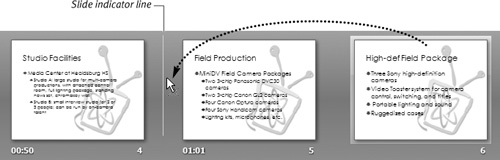
Click the slide you want to move, then drag it to the new location.
As you drag, the slide indicator line shows you where the slide will go when you release the mouse button (Figure 10.4).
Slide transitions are a good way to add visual interest when you change slides. They also serve as a cue to the audience, reinforcing the fact that you are changing slides; if someone isn’t paying particularly close attention, that flash of motion often helps them refocus on your slideshow.
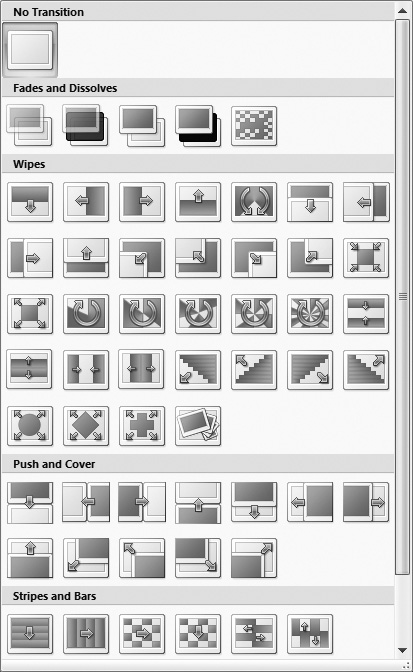
All slide transitions involve an animated effect where the first, old slide (which I will refer to in this chapter as Slide A) is replaced by the second, new slide (you guessed it, Slide B). PowerPoint provides 58 built-in transition styles, plus No Transition. These are 2-D transitions, where one slide replaces another in the same plane. For example, Slide A can dissolve into Slide B. The transitions are split into five groups: Fades and Dissolves, Wipes, Push and Cover, Stripes and Bars, and Random.
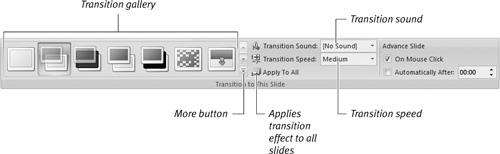
You apply transitions using the Animations > Transition to This Slide group (Figure 10.5). You can set a transition between any two or more slides (they must be contiguous in the Normal View pane or the Slide Sorter, of course). You can control (to a point) the speed of a transition, and you can choose to have a sound accompany the transition.
With slide transitions, as with any animation and PowerPoint, you should live by the principle “less is more” when choosing transitions, because the flashier they are, the more quickly your audience will become tired of them. The most common transition, Fade Smoothly, is often the most effective.
Procedure 10.2. To apply a slide transition:
Switch to Slide Sorter View by clicking the Slide Show View button at the bottom of the PowerPoint window, or choose View > Presentation Views > Slide Sorter.
The PowerPoint window changes to Slide Sorter View.
Select the slide or slides to which you want to apply the transition.
To select multiple slides, click the first slide, hold down the Shift key, and click the last slide.
Those slides and all slides in between are selected.
or
To select all the slides easily, press
 .
.Choose Animations > Transition to This Slide, then choose a transition effect from the Transition gallery.
The effect is applied to the selected slides. As usual with galleries, you’ll see a preview of the effect on the slide as you hover your mouse over effect thumbnails in the gallery.
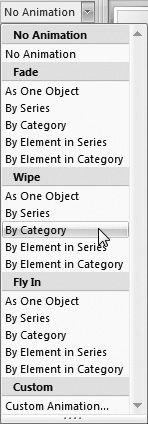
(Optional) To expand the gallery and see more effects, click the gallery’s More button.
The gallery expands (Figure 10.6).
Choose the speed of the transition by selecting it from the Transition Speed pop-up menu. Your choices are Slow, Medium, and Fast. The default speed is Fast.
(Optional) Choose a sound from the Transition Sound pop-up menu.
This sound will play between each of the selected slides. Use it sparingly, if at all; many audiences hate sound effects in presentations.
In the Advance Slide section, choose On Mouse Click if you want to trigger the transition manually while running the presentation (this is what you usually will want).
or
Choose Automatically After if you want the transition to occur by itself. You must also set the delay in minutes and seconds; this specifies how long the slide will stay on the screen before triggering the transition.
(Optional) By default, the transition you chose is applied only to the slide you selected in Step 2. Click the Apply To All button to add the transition to the entire presentation.
✓ Tips
You can use slide transitions to communicate different types of information or to denote sections in your presentation. For example, you can use a transition to signify that you’re moving to an entirely different topic in your presentation. Let’s say that you have a presentation with three distinct sections. You can use no transitions between the slides in each section, and use transitions only between slides at the end of one section and the beginning of the next.
PowerPoint lets you set almost any length for automatic transitions (I don’t know just what the upper limit is, but it accepted 100 hours between automatic slide changes, which would make for a pretty languid slideshow).
PowerPoint doesn’t allow you to create your own transition styles. You are limited to the ones that come with the program. You can also purchase additional transitions (as well as other PowerPoint add-ins) from software developers, such as CrystalGraphics (www.crystalgraphics.com).
You’re not limited to the transition sounds shown in the pop-up menu in Step 6. If you want to use one of your own sounds, choose Other Sound from that pop-up menu, which opens the Add Sound dialog box. Navigate to and select the sound you want to use, and click OK.
You’ve seen animation effects in most presentations; these are the effects that are responsible for titles, bulleted text, charts, or diagrams that fade, wipe, or animate onto the screen when the presenter clicks the mouse button. PowerPoint has two ways to apply animations to objects on your slides. The first way is to use the preset animation effects. These are basic animation schemes with common effects for the different sorts of slide objects. For example, the basic animation effects for bulleted text allow you to wipe or fade text onto the screen one line at a time, or in groups by first-level paragraphs. Similarly, the effects for charts include the ability to animate each of the elements on the chart.
Probably the most common sort of animation you will be doing is with bulleted text, to make each bullet and its associated text appear when you click the mouse button during the presentation. These text animations can be set up with a number of options so that you can control how the text appears on the slide. To set these options, you use the Custom Animation task pane.
Procedure 10.3. To apply animation to a slide object:
Switch to a slide with the object you want to animate.
Click the bulleted text placeholder or other object to select it (Figure 10.7).
Choose Animations > Animations > Animate. From the pop-up menu, choose the animation preset you want (Figure 10.8). This pop-up menu may have a different appearance from the one shown here, depending on what object you have selected on the slide.
As you roll over the different choices in the menu, PowerPoint shows you a live preview of the effect in the slide area. To play the preview again, just move the mouse to another menu choice, then back to your original one.
The effect is applied to the slide.


Procedure 10.4. To customize animation effect options:
Make sure the object (in this example, a bulleted text box) is selected.
Click Animations > Animations > Custom Animation (Figure 10.9).
The Custom Animation task pane opens (Figure 10.10).
In the list, the different bullet points are collapsed, because they all share the same effect.
To see all the bullet points, click the down arrow under the displayed bullet point.
The individual bullet points appear (Figure 10.11).
You might want to show all the bullet points so you can apply different effects to some of them.
By default, “On Click” is selected from the Start pop-up menu. This means that you need to click the mouse while giving your presentation in order for the animation to start. If you want the animation to begin automatically as soon as you switch to the slide, choose “After Previous” from the pop-up menu.
After you make any change in the Custom Animation task pane, PowerPoint shows you a preview of the effect in the slide area.
From the Direction pop-up menu, choose the direction from which you want bulleted text to move onto the slide.
Use the Speed pop-up menu to select the duration of the effect. Your choices are Very Slow, Slow, Medium, Fast, and Very Fast.
(Optional) For more effect customizations, click the down arrow next to an item in the Custom Animation list, then choose Effect Options (Figure 10.12).
The Effect Options dialog appears (Figure 10.13). It will have the same name as the effect that you are customizing.
(Optional) Make any changes you want, then click OK to dismiss the Effect Options dialog.
✓ Tips
The effect speeds in seconds are as follows: Very Slow (5 seconds); Slow (3 seconds); Medium (2 seconds); Fast (1 second); and Very Fast (half a second).
A common text effect you might want is to dim one line of bulleted text when you move onto the next line. You do that in the Effect tab of the Effect Options dialog. In the Enhancements section, choose the color you want the line of text to turn to from the After animation pop-up menu (Figure 10.14).

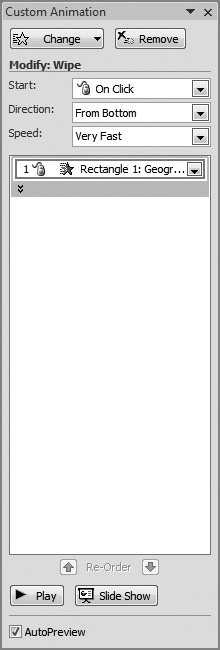


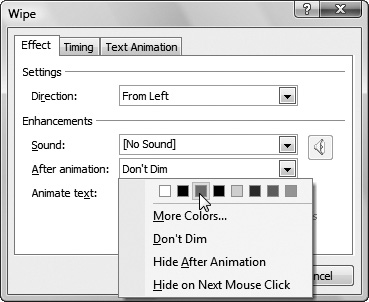
Chart animations rank just behind bulleted text animations in usefulness. You can get some dramatic effects when you make the parts of a chart appear sequentially on the screen.
Procedure 10.5. To animate a chart:
Switch to a slide with the chart you want to animate.
On your slide, select the chart.
Choose Animations > Animations > Animate. From the pop-up menu, choose the animation preset you want (Figure 10.15).
Your choices are (under Fade, Wipe, or Fly In):
As One Object animates the entire contents of the chart onto or off of the slide.
By Series builds each data series onto or off of the slide, one at a time.
By Category builds each data set onto the chart, one at a time.
By Element in Series builds each element in a data series, one at a time. For example, in a chart like the one in Figure 10.16, the columns marked “Need requested” appear first, followed by the columns marked “Aid available.”
By Element in Category builds each element in a data set, one at a time.
As you roll over the different choices in the menu, PowerPoint shows you a live preview of the effect in the slide area. When you find an effect you like, choose it from the menu.
The effect is applied to the slide.
(Optional) Customize the effect as described in “To customize animation effect options” earlier in this chapter.

General object animations work much the same way as the previous animations in this chapter. The only difference is that you will be working with any element that you can place on the slide, including text boxes, charts, tables, SmartArt, or graphics.
When you are animating multiple objects, you can control the order in which those objects appear, and each object can have its own animation effect, direction, and speed. So you can, for example, have a slide with bulleted text that moves in from the right side, a graphic that pinwheels in on the left side, and a title box that drops in from the top. Using the list in the Custom Animation task pane, you can set the order in which objects appear on the screen. For each object, you can choose to have it appear after you click the mouse, with the prior object, or after the prior object.
Custom animations created in older versions of PowerPoint must be converted to SmartArt for them to work in PowerPoint 2007. PowerPoint offers to convert the old animation, but the conversion isn’t always perfect. Chances are you’ll have to tweak the converted animation to make it work the way it did in the older presentation.
Procedure 10.6. To animate several objects:
Place the objects that you want to animate on your slide.
Select the first object you want to animate.
Click Animations > Animations > Custom Animation.
The Custom Animation task pane opens.
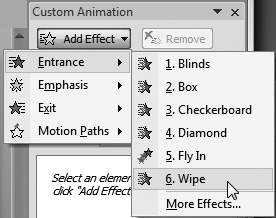
Click the Add Effect button, which displays a pop-up menu of possible effects (Figure 10.17). Choose an effect from the following categories:
Entrance determines how the object enters the slide, including commonly used effects like Wipe and Fly In.
Emphasis adds emphasis to the object. For text, that includes Change Font and Change Font Size, and for other objects, includes effects such as Grow/Shrink and Spin.
Exit determines how the object leaves the slide. This includes most of the same effects as Entrance.
Motion Paths creates a path the object follows. For example, you can have an object move in a line, or along a curve that you draw, or other paths. For more information, see “Animating objects along a path” later in this chapter.
After you choose an effect from the Add Effect pop-up menu, the effect appears in the Custom Animation list.
(Optional) To see more effects, choose More Effects from each category in the Add Effect pop-up menu.
An effects dialog appears, named according to the effects category you chose (Figure 10.18). For example, if you chose an entrance effect the dialog will be named Add Entrance Effect.
Choose an effect and click OK.
The effects dialog groups effects by style, from least obtrusive to most in-your-face (or most tasteless, depending on your point of view). The groups are Basic, Subtle, Moderate, and Exciting.
From the Start pop-up menu at the top of the Custom Animation task pane (Figure 10.11), choose when you want the animation to start.
From the Direction pop-up menu, choose the direction from which you want the object to move onto the slide.
Use the Speed pop-up menu to select the duration of the effect.
Select the next object on the slide that you want to animate, and repeat steps 5 through 9.
Every animation that you add appears in the Custom Animation list, in the order in which it will appear on the slide. When you have multiple animations, each animation in the list is numbered and the numbers also appear on your slide showing where the animations are located (Figure 10.19).
Animation sequence numbers don’t appear during the presentation or in print.
To preview your animation masterpiece, click the Play button at the bottom of the Custom Animation task pane.
The animation plays in the slide area.
✓ Tips
You can reorder the animation of objects by clicking on an object in the Custom Animation list and dragging it up or down in the list.
To change an animation, select it in the list and click the Change button in the Custom Animation task pane. Then make your modifications as you would when creating an effect.
To remove an animation, select it in the list and click the Remove button in the Custom Animation task pane.
Of course, you can (and probably should) also preview your animations full-screen by playing the presentation in Slide Show mode.


You can move objects on the slide in simple or complex paths. PowerPoint provides many preset paths, or you can draw your own. You can also customize the paths, moving the endpoints on the slide as needed.
Procedure 10.7. To move an object along a path:
Select the object you want to animate.
Click Animations > Animations > Custom Animation.
The Custom Animation task pane opens.
Click the Add Effect button, then choose Motion Paths from the pop-up menu of possible effects.
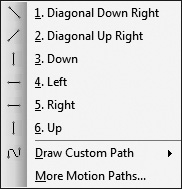
Choose one of the standard paths (Figure 10.20).
or
Choose Draw Custom Path, then choose Line, Curve, Freeform, or Scribble from the submenu. The cursor turns into a crosshair, allowing you to draw the path on the slide.
or
Choose More Motion Paths, which opens the Add Motion Path dialog (Figure 10.21). Choose a path, then click OK.
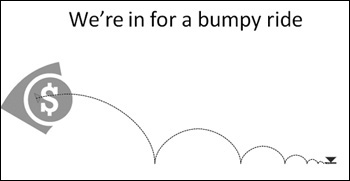
The path appears on your slide, with a green triangle showing the start of the path, and a red triangle indicating its end (Figure 10.22). The path doesn’t appear when you print or present.
(Optional) You can click the endpoints of a path and drag them to adjust the path. Similarly, on some paths, clicking the path displays a selection box with handles, allowing you to change the path’s dimensions.

SmartArt graphics animate in mostly the same way as other objects, but there are a few special settings to help you animate individual parts of the graphic. If you need more information about SmartArt, see Chapter 6.
Procedure 10.8. To animate a SmartArt graphic:
Select the SmartArt graphic you want to animate.
Click Animations > Animations > Custom Animation.
The Custom Animation task pane opens.
Use the Add Effect button and menus to add the effect as usual.
Click the entry for the SmartArt in the Custom Animation list, then click its down arrow and choose Effect Options from the menu.
The Effect Options dialog appears.
Click the SmartArt Animation tab (Figure 10.23).
This tab offers different options, depending on the kind of SmartArt graphic.
Make the changes you want in the dialog, then click OK.

Animation is movement of one or more objects over time, and so far in this chapter we’ve paid a lot of attention to the movement side of the equation. But the amount of time an object is moving can be crucial to make an animation look good. It should come as no surprise that PowerPoint gives you the tools to make detailed changes to the length of an animation.
Of course, PowerPoint provides some basic time settings for each animation effect with the Speed pop-up menu in the Custom Animation task pane. But you’ll often want finer control. Here’s how to do it.
Procedure 10.9. To set an animation’s time properties:
Select the animation effect you want to change in the Custom Animation list.
Click the effect’s down arrow, then choose Timing from the pop-up menu.
A dialog appears with the Timing tab selected (Figure 10.24). The name of this dialog will be the same as that of the selected effect.
Choose one or more of the following:
Start specifies when you want the animation to begin. Your choices are On Click, With Previous, or After Previous.
Delay sets the length of time in seconds that should pass before the animation begins.
Speed lets you choose from the standard PowerPoint animation speeds, from Very Slow to Very Fast.
Repeat lets you choose the number of times you want the animation to repeat. The first option, none, makes the animation play just once. Other choices are 2, 3, 4, 5, or 10 times; until the next mouse click; or until you advance to the next slide.
Click OK.

Procedure 10.10. To set exact animation timings:
Select the animation effect you want to change in the Custom Animation list.
Click the effect’s down arrow, then choose Show Advanced Timeline from the pop-up menu.
The Custom Animation list changes to show an orange bar next to each effect, and an overall timeline at the bottom of the list (Figure 10.25). The orange bar or bars in the list show the length of the animation for that element.
To change the length of the element’s animation, point at the orange bar. The cursor changes to a double-headed arrow. Click and drag the bar to the desired length.
A tool tip appears showing you the start and end times of the element’s animation (Figure 10.26).

Action settings let you attach an action to a PowerPoint object. You can use an action setting to go to another slide, open a Web page, or even start another program when you click an on-screen object, or when you pass the mouse cursor over the object.
Procedure 10.11. To add an action setting to an object:
Select the object to which you want to add an action.
Choose Insert > Links > Action.
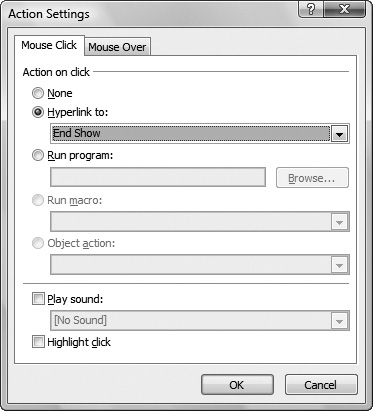
The Action Settings dialog appears (Figure 10.27).
Choose either the Mouse Click or Mouse Over tabs.
Choose an action from the dialog. Your choices are:
None. Use this setting to remove an action setting previously applied to an object.
Hyperlink to provides a pop-up menu that links to other slides in the presentation, ends the show, opens a Web page, opens another PowerPoint presentation, or opens a file on your computer.
Run program opens any program on your computer.
Run macro lets you choose from a list of PowerPoint macros. You must already have created a macro for this option to be active.
Object action lets you open or play an embedded object, such as a media clip.
Play sound lets you play a sound that you select from the pop-up menu.
Highlight click highlights the selected object when you click it.
Click OK.
The action setting is attached to the object.
Action buttons are very similar to action settings; in fact, they also use the Action Settings dialog. The difference is that an action button is a pre-drawn shape with an icon that indicates its action. PowerPoint has 12 action buttons, covering the following actions: Back or Previous, Forward or Next, Beginning, End, Home, Information, Return, Movie, Document, Sound, Help, and Custom.
Procedure 10.12. To insert an action button:
Display the slide where you want to put the action button.
Choose Insert > Illustrations > Shapes, then choose an action button from the gallery (Figure 10.28).
The cursor changes into a crosshair.
Click and drag on the slide to create the button.
The button appears on the slide (Figure 10.29).
Click anywhere else on the slide.
The Action Settings dialog appears.
Make a choice from the dialog, then click OK to apply the action to the button you just drew.
(Optional) If necessary, resize and reposition the new action button on the slide.
