Rich media is the omnibus term for sounds, music, animations, and video files that you can add to your slides to enhance your presentation. You might want to include an animation on a slide to show a dynamic process, or insert a video clip to illustrate one of your points.
Background music, sound effects, and narration can add interest to your presentation, especially if you plan to export the presentation as a movie for use on the Web. Sounds and music are less useful when you’re giving the presentation live, because people generally want to hear you, not a fancy production.
You’re familiar with hyperlinks from browsing the Web. In PowerPoint, you can add a hyperlink to either text or graphics, and the link can go to another slide in the presentation, to a Web page, and more.
In this chapter, you’ll learn how to add music and sounds to slides; use movies in your presentation; and add hyperlinks.
With PowerPoint, you can easily add sounds or music to any slide or to an entire presentation. This allows you to lay down a soundtrack for the presentation. But be wary of adding sounds, because usually there’s no quicker way to annoy your audience than by adding superfluous sounds to your slides. However, there are certainly valid reasons for using sound in your presentations. For example, a presentation about music might use brief clips, or anthropologists could include snippets of a language they are studying.
To use a sound, you’ll need the sound files to be on your hard disk in a format that your computer can play; those formats are listed in Table 7.1.
Table 7.1. Supported Audio File Formats
FORMAT | EXTENSION | COMMENTS |
|---|---|---|
AIFF | .aiff or .aif | Widely used format originated by Apple for use on the Mac. Uncompressed audio, so large file size. |
AU | .au | UNIX audio file format. |
MIDI | .midi or .mid | Musical Instruments Digital Interface. Standard interchange format for musical instruments and synthesizers. |
MP3 | .mp3 | Popular compressed music and sound format; used by iTunes and most other jukebox software. |
WAV | .wav | Windows audio format, with variable compression. File sizes can be large. |
WMA | .wma | Windows Media Audio file. Compressed audio, so small file sizes. |
On most people’s systems, the most convenient repository of music will be their music library, which will often be in Apple’s iTunes.
Procedure 7.1. To add sound or music to a slide:
Go to the slide where you want to add music.
Choose Insert > Media Clips > Sound.
The Insert Sound dialog appears (Figure 7.1).
Navigate to the sound you want, select it, and click Open.
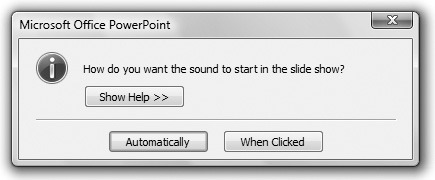
PowerPoint asks if you want the sound to start automatically when you switch to the slide, or if it plays only when you click a button on the slide (Figure 7.2).
Click the button for the sound behavior you want.
An icon for the sound appears on the slide (Figure 7.3). The Sound Tools tab also appears in the Ribbon, containing two groups with sound settings (Figure 7.4).
(Optional) If you want to preview the sound, double-click the sound icon on the slide, or choose Sound Tools > Options > Play > Preview.
(Optional) In Sound Tools > Sound Options, pick one or more of the choices:
Hide During Show hides the sound icon; otherwise, the icon will appear when you are giving the presentation.
Loop Until Stopped repeats the sound until you click the slide or move to the next slide.
Play Sound is a pop-up menu with three choices: Automatically, When Clicked, or Play Across Slides. The first option triggers the sound as soon as you move to the slide. The second option requires that you click on the sound icon during the show for the sound to play. And the third option starts the sound, and continues playing it for the length of the sound, even if you move to subsequent slides.
Max Sound File Size governs the maximum size audio file PowerPoint will embed in the presentation file. Files larger than this will be linked to the PowerPoint presentation file. If you copy the file to another location, you must also copy the linked files to the same folder for the presentation to play correctly.
Slide Show Volume lets you choose between Low, Medium, High, or Mute volume for the sound.


✓ Tips
The Play Across Slides option in the Play Sound pop-up menu doesn’t allow you to specify the length of the sound; it just plays the whole sound regardless of what else is happening on screen. For better control, use the procedure under “To play a sound for a specified number of slides.”
You can also hide sound icons by moving them off the slide into the area that surrounds the slide in Normal View. Of course, you can’t click the sound icon during the show in that case, so you should set the sound to play automatically.
Procedure 7.2. To play a sound for a specified number of slides:
Insert a sound as discussed in the previous procedure.
Click the sound icon on the slide to select it.
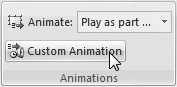
Choose Animations > Animations > Custom Animation (Figure 7.5).
The Custom Animation task pane opens, with the sound file selected (Figure 7.6).
Click the arrow to the right of the sound file, and from the pop-up menu, choose Effect Options (Figure 7.7).
The Play Sound dialog appears (Figure 7.8).
In the Stop playing section, click the After radio button, then choose the number of slides you want in the box next to the button.
Click OK to dismiss the Play Sound dialog.
Click the close button in the Custom Animation task pane to close it.


✓ Tip
The most popular audio formats are MP3 and WMA. If you’re going to be sharing your presentation with colleagues who will want to open it up with PowerPoint on the Mac, I recommend you avoid the use of WMA files and use MP3 or AIFF files instead. That’s because there are many different kinds of WMA files, and not all of them will play on the Mac, since Microsoft no longer makes Windows Media Player available for the Mac.
You can add slide narration to any individual slide, or you can create one narration track that plays throughout the entire slideshow. I recommend individual files for presentations where the user will be controlling the advance of the slides.
You can add a narration file that you record with other software to the slide, or you can record sound into PowerPoint. Recording isn’t especially difficult, but it does take some preparation. You’ll need a number of pieces of hardware and software to record narration, including:
A PC running Windows
A microphone, sound card, and speakers
Audio recording software (if you don’t want to record directly into PowerPoint)
Windows has the ability to accept sound input from a variety of audio devices. Some PCs, such as notebooks, have microphones built-in, although these are not very good quality and you will probably not want to use them for narration, except in a pinch. If your PC has a line in or microphone port, you can plug a microphone into it. Some PCs do not have line in ports, and you will have to purchase a USB headset that contains headphones and a microphone (I like those by Plantronics (www.plantronics.com), but there are many other manufacturers), or purchase a USB audio adapter, such as Griffin Technology’s iMic (www.griffintechnology.com). Despite the name, the iMic works on either Windows or Mac.
Microphones vary in price and quality. There are a wide variety of headset microphones that will serve nicely for recording narration, at prices well under $100.
For many purposes, recording narration into PowerPoint will work just fine. But there are circumstances where you might need more control. For example, if your presentation will appear on the Web or be played without you present, you might want to record narration to a separate sound program, then use that program to edit the file, perhaps cutting out any mistakes or audio blemishes. You could even use a sound editing program to mix music or sound effects into your narration track. There are many audio editing and recording programs available; perhaps the best known is the free, open-source Audacity (audacity.sourceforge.net).
✓ Tips
When you’re searching for audio hardware or software, look at the products that are recommended for recording podcasts. They are just as appropriate for recording narration.
Another possibility for audio recording and editing, if you have access to a Mac, is to use Apple’s GarageBand software.
Procedure 7.3. To record narration into PowerPoint:
Plug your microphone into your PC.
Launch PowerPoint.
It’s better to have the microphone available before you start PowerPoint; sometimes the mic won’t be recognized if you attach it while PowerPoint is already running.
Open the presentation.
In the Normal View Pane, click to select the slide where you want to start the narration.
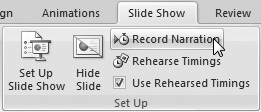
Choose Slide Show > Set Up > Record Narration (Figure 7.9).
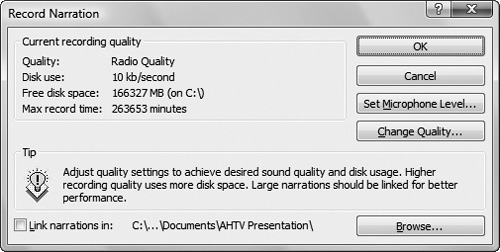
The Record Narration dialog appears (Figure 7.10).
(Optional, but recommended) To adjust the recording quality and file size, click Change Quality.
The Sound Selection dialog appears (Figure 7.11).
By default, PowerPoint records at a low quality setting, which has the benefit of small file size. I prefer the setting Radio Quality, which has a decent compromise between file size and higher quality. If you agree, choose Radio Quality from the Name pop-up menu, then click OK to return to the Record Narration dialog.
In the Record Narration dialog, click OK.
If you started recording on the first slide, PowerPoint begins Slide Show mode and the recording begins. Speak your narration.
or
If you were not on the first slide, PowerPoint asks if you want to start on the first slide or the current slide. Make your choice. PowerPoint begins Slide Show mode and starts recording. Speak your narration.
Click the slide to advance the presentation, as usual.
At the end of the presentation, PowerPoint shows the black Exit screen. Click anywhere on the screen to halt the recording and exit Slide Show mode.
While you were recording, PowerPoint also recorded slide timings, which tells you the amount of time spent on each slide, and the total presentation time.
PowerPoint presents a dialog asking if you want to keep the slide timings.
If you click Save, PowerPoint drops into Slide Sorter mode, where you can review the timing for each slide. If you click Don’t Save, you’re returned to Normal View.

✓ Tip
You can use this narration recording procedure either before the presentation, or during it, allowing you to record the audience’s comments, too.
Procedure 7.4. To add separate narration files to your presentation:
In PowerPoint, go to the slide where you want to add narration.
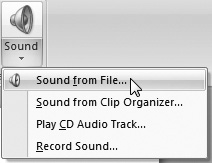
Choose Insert > Media Clips > Sound, then click the arrow below the Sound button to bring up the pop-up menu and choose Sound from File (Figure 7.12).
The Insert Sound dialog appears.
Navigate to the narration file you want, then choose Open.
A sound icon appears on the slide.
✓ Tip
When you are recording audio narration, speak and enunciate clearly, using a measured pace. On the other hand, don’t use a plodding pace. You want to shoot for a pace that is slightly slower than normal conversation, but that isn’t interpreted as you speaking deliberately slowly. Think back to the narration that you’ve heard in TV programs, and try to use that sort of pace.
Adding video files to your presentation can be a powerful tool that enhances your talk. Or it can be a needless bit of fluff that doesn’t really help your presentation. Which is to say that you should give some serious thought before you put video in your slideshow.
Video clips must be on your computer in a format that PowerPoint can accept, as shown in Table 7.2.
Table 7.2. Supported Video File Formats
FORMAT | EXTENSION | COMMENTS |
|---|---|---|
WMF | .asf | Windows Media File in Advanced Streaming Format. Optimized for streaming media over a network. |
Windows Video | .avi | Most popular Windows video format; wide range of compression schemes. |
Movie | .mpg or .mpeg | Standard video format, widely used on UNIX machines. |
Windows Media Video | .wmv | Windows Media Video; another popular Microsoft-developed video format. |
Procedure 7.6. To add movies to your presentation:
In PowerPoint, go to the slide where you want to add a movie.
If the slide contains a content box, click the Media icon (Figure 7.13).
or
If the slide doesn’t have a content box, choose Insert > Media Clips > Movie.
The Insert Media dialog appears.
Navigate to the movie file you want, then click Open.
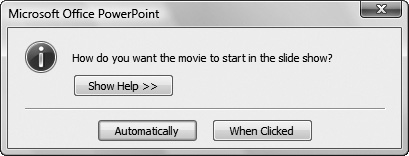
The movie appears on the slide, and PowerPoint asks if you want the movie to play automatically or only when clicked (Figure 7.14).
Make your choice of playback options.
If needed, drag the movie to position it where you want it on the slide.

When you select a movie on a slide, the Movie Tool tab appears in the Ribbon, allowing you to set some of the movie’s playback options.
Procedure 7.7. To preview a movie:
Double-click the movie on the slide.
or
With the movie selected, choose Movie Tools > Play > Preview (Figure 7.15).

Procedure 7.8. To set a movie’s playback properties:
Select the movie.
In Movie Tools > Movie Options, set one or more of the options:
Play Movie is a pop-up menu with three choices: Automatically, When Clicked, or Play Across Slides. The first option triggers the movie as soon as you move to the slide. The second option requires that you click on the movie during the show for the video to play. And the third option starts the movie, and continues playing it for the length of the video, even if you move to subsequent slides.
Hide During Show hides the movie; otherwise, the video will appear when you are giving the presentation. This option seems to be buggy and not work; I recommend you avoid it.
Play Full Screen makes the movie take up the entire screen on playback, hiding the slide.
Loop Until Stopped repeats the movie until you click the slide or move to the next slide.
Rewind Movie After Playing makes the video play once, then return to the first frame.
Slide Show Volume lets you choose between Low, Medium, High, or Mute volume for the sound.
✓ Tips
Movie files can be resized. Just click the movie on the slide to select it, and drag the resize handles that appear. Be aware that if you scale the movie up more than a little bit, the video quality will degrade.
Slower machines sometimes have problems playing full-screen movies within PowerPoint (that is, movies that take up the entire area of the slide). Video tends to stutter and not run smoothly. You should, as always, be sure to play your presentation through before you give your talk.
If you double-click a movie on the slide, it will start playing; click it again to pause it.
You can add more than one movie to a slide.
Media files tend to be big. A movie can easily take up tens or even hundreds of megabytes of disk space. By default, PowerPoint doesn’t save media files, such as sounds or movies, in the presentation file. Instead, it stores links to the media files. If you copy your presentation file to another computer without also copying the external media files, the media files will be lost to the presentation. To avoid this, make sure that you keep the external media files in the same folder as the presentation file.
You’re already familiar with the concept of hyperlinks from using a Web browser. In PowerPoint, you can use a hyperlink to connect either text or a graphic to another PowerPoint slide, a Web page, another PowerPoint presentation, or to create an email message. You can also use a hyperlink to exit the presentation.
When you click a link that opens a Web page during your presentation, your PC leaves PowerPoint, switches to your default Web browser, brings it to the front, and loads the page specified by the link in a window. When you are done with the browser and wish to return to the presentation, simply click on the visible portion of the slide behind the browser window. You’ll go right back into your presentation, picking up where you left off.
To link to a Web page:
You can create a text link on a slide by typing the link’s URL, and PowerPoint will automatically make the link clickable. But if you want to make regular text on the slide or a graphic into a link, follow these steps:
Select the object you want to use as the hyperlink.
This can be either text or a graphic.
Choose Insert > Links > Hyperlink, or press
 .
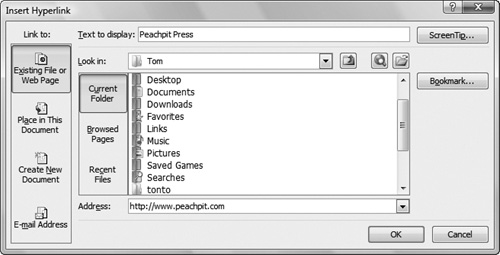
.The Insert Hyperlink dialog appears (Figure 7.16).
In the Address field, type the full Web address for the hyperlink. If the address starts with
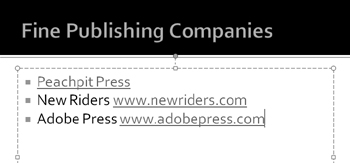
www., PowerPoint will automatically add thehttp://before the address. If it does not, as in office.microsoft.com, you must add thehttp://manually.If you selected text, the text becomes underlined (Figure 7.17). Graphic objects appear the same as before.
Click OK.
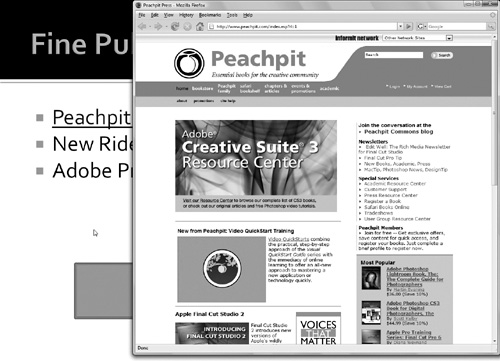
When you run the presentation, clicking a link on the slide brings up your default Web browser (Figure 7.18).
✓ Tip
Any text you type on a slide that begins with “www”, “ftp”, or “http” will automatically become a hyperlink.
Procedure 7.9. To link to another slide in the same presentation:
Select the object you want to use as the hyperlink.
This can be either text or a graphic.
Choose Insert > Links > Hyperlink, or press
.The Insert Hyperlink dialog appears.
In the Link to section of the Insert Hyperlink dialog, click Place in This Document.
The dialog changes to reflect your choice (Figure 7.19).
In the scrolling list, choose the slide that you want to jump to.
A preview appears on the right side of the dialog.
Click OK.

✓ Tip
There are other choices under Place in This Document, including First Slide, Last Slide, Next Slide, and Previous Slide. These give you additional navigation choices.
Procedure 7.10. To link to a slide in another PowerPoint presentation:
Select the text or graphic you want to use as the hyperlink.
Choose Insert > Links > Hyperlink, or press
.The Insert Hyperlink dialog appears.
In the Link to column, click Existing File or Web Page.
Navigate to and click to select the PowerPoint file you want to link to.
Click Bookmark.
The Select Place in Document dialog appears (Figure 7.20).
Click to select the slide you want to link to, then click OK.

Procedure 7.11. To link to a new email message:
Select the text or graphic you want to use as the hyperlink.
Choose Insert > Links > Hyperlink, or press
.The Insert Hyperlink dialog appears.
In the Link to column, click E-mail address.
The dialog changes to reflect your choice (Figure 7.21).
Enter the destination email address in the E-mail address field and the email’s subject line in the Subject field.
Click OK.

✓ Tips
You probably wouldn’t be using email hyperlinks in a presentation you are projecting for an audience, because it’s hard to imagine you would want to compose an email in the middle of your show. Email links are more likely to be used in a self-running presentation.
The new email will be created in your default email program.