
Chapter 8: Getting Social with Chats and Forums
At the heart of Moodle is the theory of learning that people learn best when they learn from each other, through meaningful interaction. Some of this interaction occurs in collaborative activities. However, the bulk of this interaction will occur in social settings, in synchronous or live chats or in asynchronous discussion board areas, called forums in Moodle.
Social course activities encourage student-to-student interaction. Peer interaction is one of the most powerful learning tools that Moodle offers. It not only encourages learning but also encourages exploration. This tool also makes courses more interesting, because students can share their knowledge, which increases student participation and satisfaction. Peer sharing is part of the social constructionist approach to learning and forms the foundation of Moodle. This chapter will teach you how to add communication activities to a course and how to make the best use of them. This includes chats, forums, and other forms of social media. Moodle 4.0 takes a social approach and allows notifications and communications in the same way as social media apps. It also uses redesigned, attractive navigation icons. In addition to enhancing engagement and ease of navigation, Moodle 4.0 also provides more ways for the teacher or manager to keep the student on track and not allow them to move ahead before they're ready.
In this chapter, you will learn how to create learning activities that allow people to learn from each other. We will cover the following topics:
- Designing an instructional strategy that incorporates active discussion boards (forums)
- Incorporating synchronous communication using Chat, and then keeping a record of it
- Designing the right kinds of forums for your learning objectives
- Providing evidence of achievement (as it would in a face-to-face classroom)
- Boosting functionality by incorporating collaboration platforms
After completing this chapter, you'll feel confident in being able to engage your students and keep them motivated as they feel excited about sharing their perceptions and learning with each other.
An interaction-based instructional strategy
In Moodle, a Forum is an activity that enables participants to have asynchronous discussions over an extended period. It can also promote more inclusive learning in the case of a learner who may be reticent in a face-to-face classroom setting. They can also encourage engagement and collaboration and are a place where the instructor can be very creative. In Moodle, a Chat is an activity that allows real-time, synchronous text-based interactions. Both focus on communication among students and instructors, and they allow digital materials and direct conversations to be shared. In Moodle 4.0, the icons have been updated:

Figure 8.1 – Updated icons in Moodle 4.0
Let's consider the most effective uses of the Forum and Chat activities. As you review your learning objectives and seek to map the course materials with the course activities, think about how you can make your course structured around forums and chats so that the focus stays on student engagement. This sets up a sense of wonder and discovery as students dig into the content, and then share their ideas and impressions. If you create a forum around solving a problem together or exploring aspects of something mysterious, you will create an unforgettable learning experience.
It may seem hard to envision at first, but in practice, it's quite simple. As you set up your course, ensure that you include a forum in each of your units. Then, you can use the forum for the following purposes:
- Set up a problem for individuals or teams to tackle and share. Create a sense of mystery, or tackle something that is an actual problem in the world today, which could include roleplay. It can be local or global. For example, you could ask students to tackle the problem of stray dogs and cats that owners just simply abandon. Or you could pose a question that requires some digging and some imagination: Imagine that you time-traveled to a time and place where you had to become a pirate to survive. Where would you be? When? What would your daily life look like? What would you wear? How would you do your pirating?
- Make relevant instructional materials available. The advantage of having them in the forum is that you can let the instructors comment and add more materials, commentary, and so on.
- Demonstrate achievement of learning objectives by tying the questions to learning objectives.
- Assure comprehension of the unit content by asking instructional materials-focused discussion questions. The students can read the materials and immediately comment and share their impressions.
- Post drafts and peer reviews. This is a great place to post drafts of papers or comments and include rubrics, both for peer reviews and final grading. Moodle makes incorporating rubrics easy. This could tie to a workshop peer review activity.
- Post current controversies, links to articles, and multimedia links.
- Set up projects that require collaboration and encourage the use of collaboration platforms such as Google Docs in Google Drive.
The advantage of thinking about what you'd like to have students do helps you consider how they will interact with each other and demonstrate that they are achieving the unit learning objectives. In doing so, they will be learning from each other.
In the next section, we will put learning from each other into practice by setting up engaging forum and chat modules that include positive reinforcement and motivating content.
Learning from one another
You can set up the forum and chat modules so that students have the optimal conditions to learn from one another:
- First, you can ensure that the prompts are engaging and do not result in yes or no answers. Be creative and inspire a sense of wonder and discovery.
- Second, you can ask students to share their work and comment in a positive, constructive way. For example, you can ask students to post drafts of presentations. You'll be setting up positive reinforcement, which is very motivating.
- Third, you can encourage students to share experiences and things from current events. All of these activities and prompts will be very engaging, and they will serve as excellent motivation as well. If they are tackling a current local problem, such as the problem of stray cats and dogs, they may even decide to organize a pet adoption day for the strays that have been captured, cleaned up, vaccinated, and ready for their new, happy "forever" homes.
- Finally, you can remind students of deadlines and include checklists of things to do. This will help students organize their work and manage their time effectively.
In the next section, we'll learn how to bring forums and chat together so that there is an integration of both synchronous and asynchronous communication.
Setting up Chat
Chat is great when you need quick, immediate feedback. In Moodle 4.0, Chat can be set so that messages can be received, even if you do not have Moodle open in your browser. Keep in mind that Chat is a feature that has been in Moodle since its early versions, and it is not as up-to-date as other activities in Moodle. Nevertheless, it is integrated into Moodle and thus can be convenient, especially if you don't want to go outside of Moodle (into Teams and so on) for a chat or messaging feature. Chats are automatically saved, so they can help an instructor make sure they have responded to the student's questions. So, let's get started:

Figure 8.2 – Adding a new Chat
Sometimes, it is helpful to have synchronous or real-time communication. We often use our smartphones for texting when we need a quick answer or want to ask a rather informal question. Now that many institutions use Teams, Google products, or Zoom for chat and real-time video conferencing, Chat can be built into Moodle. Moodle has its own Chat, but there are advantages to using your institution's platform, such as Teams. In this case, you would log into Moodle, but your Teams application would be simultaneously running (as it usually is) at the same time on your desktop, tablet, or phone.
If your institution does not use Teams or another cloud-based productivity or collaboration app and prefers that everyone participate only in Moodle, Moodle's Chat function is a good option. For example, if you are a training organization and you are attracting students from many organizations, groups, or schools, it will be impossible to communicate through everyone's Teams, Zoom, or Google accounts. Instead, it is better to use Moodle's Chat. Also, individuals may use WhatsApp or phone texts. However, if you use Moodle's Chat module, you can save the chat conversations within Moodle. Saving the transcripts of chats can be very important for instructors who want to ensure that they are communicating, and also for students who may wish to keep a record of what they have said.
Perhaps the most popular form of text generated in an online course is that which is generated through live captioning, which is available through Zoom and PowerPoint, just to name two. The transcript can be saved and used as notes. Instructors who find they say their most insightful things while giving a lecture can use the live transcript chat text as a source of ideas for their next article or book. It is useful to keep in mind that collaborative chat was the method used to write the book Angrynomics (https://www.gapingvoid.com/blog/2020/02/27/why-we-wrote-angrynomics-by-mark-blyth/), which came about as two authors recorded their conversations and used speech-to-text to transcribe them.
Another advantage of Chat is that your students may use speech-to-text applications (built-in as closed-captioning in Zoom, YouTube Live, and Google, for example), which automatically inserts a microphone avatar or logo. You can use it as an assistive technology as it is a good way to have students practice speech-to-text and can also be very helpful for those students who may have limited vision or limited physical mobility.
A chat room can be useful for students who are in a group. However, it's not necessarily a good idea to have a chat with the entire class, because threads can get lost fairly quickly if people are commenting at the same time.
When you add a chat room to a course, by default, any student in the course can enter this chat room at any time. As with other activities, access restrictions can be set to override this default. The Course Chat Room area can become a meeting place for students in the course, where they can come to collaborate on work and exchange information. If you give group assignments or have students rate other students' assignments, consider adding a chat room to the course and encouraging students to use it. Also, consider saving transcripts of the chat sessions so that they can act as other reference tools for students.
When you schedule a chat session, the scheduled time appears in the Course Calendar area and is also displayed in the Upcoming events block:
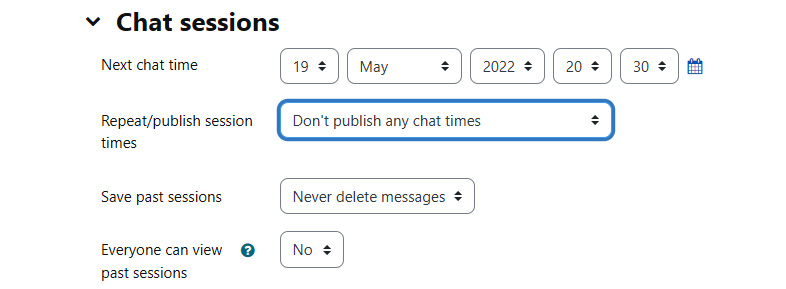
Figure 8.3 – Scheduling a chat session in the calendar
As the chat module is open all the time, when you put a chat on the calendar, you are not restricting access to the chat module. You are just creating a reminder to inform students when they should click on the chat module. You can also hide the chat when you don't want students to enter it.
If a group of more than five or six wants to communicate, it's usually much better to use a discussion board rather than a chat. That said, if you are launching a webinar, it is always good to have Chat available to send questions and comments and to alert the instructor if there are technical difficulties. BigBlueButton and Zoom have Chat built-in so that people can communicate via Chat as they also converse with each other via video or pure audio.
When a student selects a chat, they see the description that you entered when you created the chat. You can use this Description to instruct the student about the purpose of the chat:
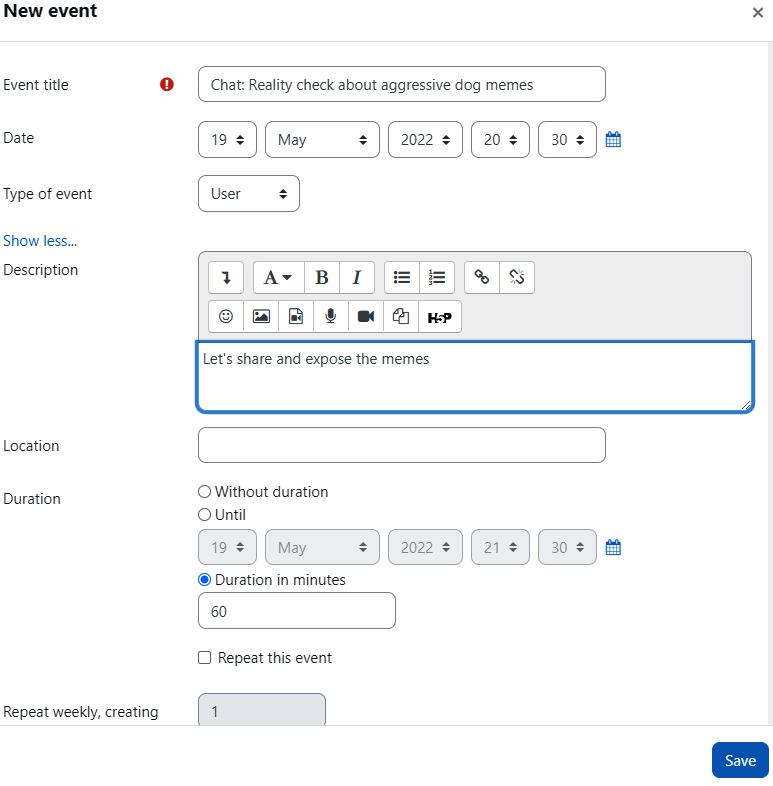
Figure 8.4 – Developing a description for the chat
When you enter a chat, it launches a pop-up window. You can choose between two themes: Bubble or Compact, I've selected Bubble. Ensure that your students don't have popups blocked:
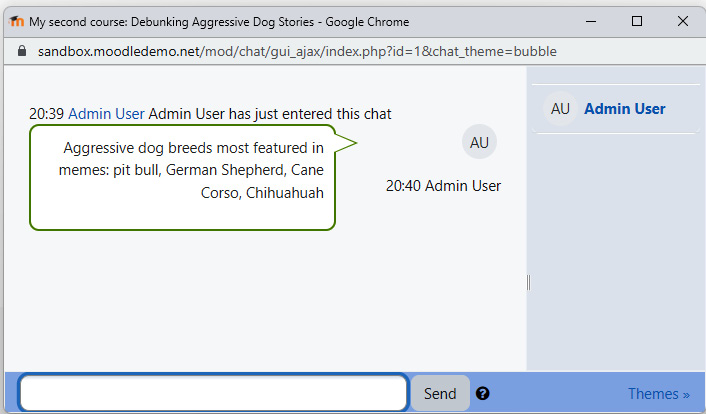
Figure 8.5 – Using the Bubble theme for a chat
Let's look at the settings that you will use to create a chat.
The chat settings page
The Adding a new Chat page is where you create and select settings for a chat. When you first add a chat, you will be taken to this page. To edit the settings for an existing chat, select the chat. Then, from the horizontal top menu bar, select Settings. This will take you to the same page, but it will be called Updating Chat instead of Adding a new Chat. Both pages have the same settings.
Keep in mind that entering a name for a chat room generates a pop-up window. As you add a chat, you'll need to add it to the calendar so that it shows up from the student's Dashboard in the Calendar block:
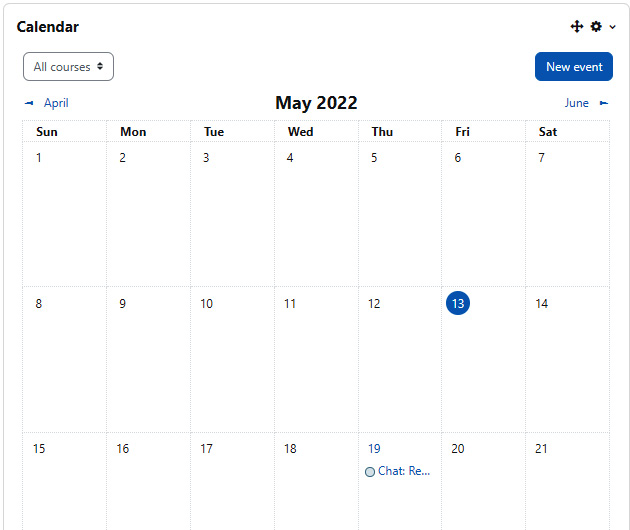
Figure 8.6 – How the chat appears in the Calendar block in the Dashboard
Let's consider the options you have for settings on this page. Note that as in all the activities, you now have a chance to tie the chat so that it fulfills competencies. You can also tag the topics for use in social media, and you can also restrict access so that the chat takes place within groups.
The following screenshot shows how to describe the chat room and also where to click to restrict access. Note that in Moodle 4.0, you can restrict access based on achieving a passing grade. While this restriction may seem more important for activities such as quizzes, it does keep the student from moving ahead before they're ready and have demonstrated mastery of the learning objectives:

Figure 8.7 – Ways to restrict access to the chat
Once you've named the chat room, it will appear on your course's home page.
The name of the chat room
This is the name that students will see on the course's home page:
Figure 8.8 – How the chat room appears on the course's home page
Description
When the students enter the room, its Description will appear. Ensure that the description makes sense and does not confuse or distract your students.
When a student selects a chat, they will see the introduction text before clicking on the chat room. You can also display the description on the course's home page.
Scheduling office hours
It's often a good idea to schedule virtual office hours before a high-stakes test or a big project. One good way to do so is to make a calendar entry for the chat session and then make it available to all the members of the course. Then, you can be available for questions. Ensure that you save the transcript, because many people may have the same questions but, perhaps, cannot attend at the same time. In this case, the forum could be used as an exam review or FAQ site. You can post your chat transcript here. Keep in mind that your chat room will be open all the time, not just during office hours. Your office hours' notice on the calendar simply means that you'll be there and waiting for questions.
The next chat time and repeat/publish sessions
As stated at the beginning of this section, so long as a chat is visible to the student, they can enter that chat room at any time. Due to this, the settings for Next chat time and Repeat sessions don't open and close the chat. Instead, these settings put a time and date for the chat on the class calendar.
Chat times are listed in the Calendar and Upcoming Events blocks. Note that chats are not restricted to these times; they are only announced as a way for people in the course to make a date for the chat. However, this is a good way for the teacher to announce online office hours and also help students manage their time by scheduling times to pop into the chat and discuss their work and possible collaborative projects.
Spontaneous chats have the best chance of happening if the course has a lot of students who frequent the course's home page. Also, consider adding the Online Users block so that when students visit the site, they will know who is online and can invite others to the chat room.
Saving past sessions – Save past sessions and Everyone can view past sessions
Past chats are automatically saved. The Save past sessions setting enables you to choose how long the system saves the chats. The Everyone can view past sessions setting determines whether students can view past chats (Yes) or whether only teachers can (No).
Chat logs
The only security for a chat room is turning the group mode on so that only students in a selected group can see each other in this chat room. You can find the group settings under Common module settings.
Remember that on the Course settings page, you can set Enrolment duration to Unlimited. This means that once a student is enrolled in the course, they are always enrolled until you manually unenroll the student. If you leave the course open to all the students who were ever enrolled, consider segregating your chat into groups. Then, create a group that only includes the currently enrolled students:
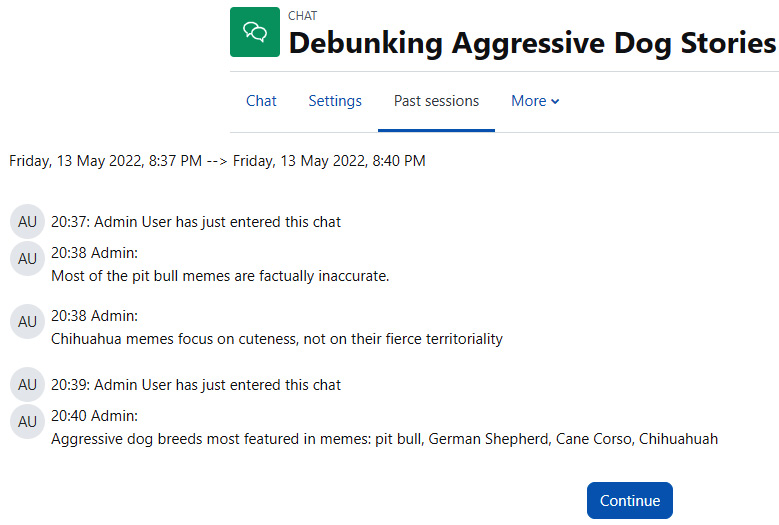
Figure 8.9 – A view of the Chat log
Once you've set up synchronous communication in the form of chats, you can look at developing asynchronous student engagement and communication in the form of discussion boards, called forums in Moodle.
Adding and running forums
Discussion boards, also known as forums, are at the heart of Moodle, and they provide you with a way to organize and launch group projects and investigations, add student interaction, provide peer review, share information, and disseminate course content. You can also use forums to provide links to assessments. Many instructors use forums as the primary method for organizing content in the course. For example, in an eight-module course, you can lead each week with a forum. In the forum's description, you can include links to the readings and multimedia (audio, images, and videos). Then, you can ask students questions to respond to them in the forum.
We can get started by creating a Forum activity. After you select Forum from the activity menu, you'll be asked to give the forum a name.
To add the Forum activity, we can follow the same procedure as in the other activities. Click on Add an activity or resource and then select the Forum icon. As shown in the following screenshot, you can name and describe the forum, and also review the different settings:
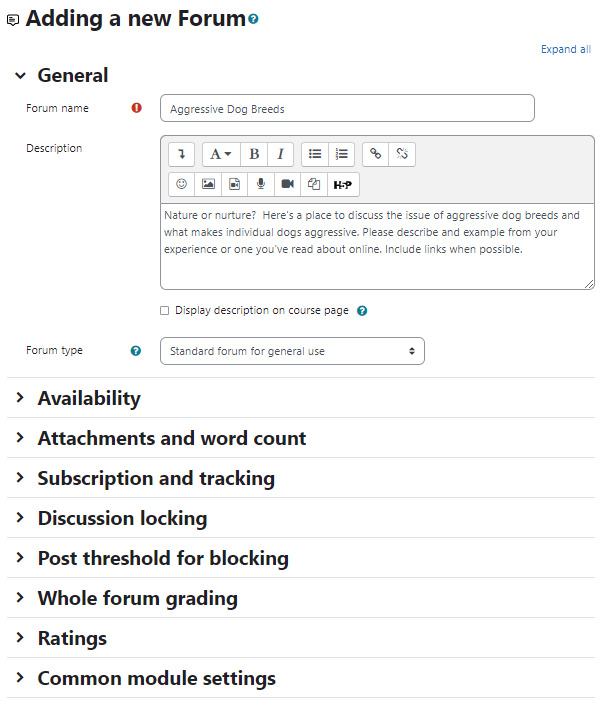
Figure 8.10 – The Adding a new Forum screen, with places to add a name and description
By tying the course content to a forum, you're emphasizing interaction and engagement. Engagement is what keeps people making satisfactory student progress, so this is a good thing to do. If you run the forum well and incentivize students to interact positively with each other, you can stimulate thoughtful discussion and motivate students to become involved, which will result in unexpected and intriguing insights.
Taking the idea of active and ongoing engagement through forums to an extreme, you can also create a course that consists only of a forum. The course's home page is the forum. The course will consist of only discussion topics. You can do this using the Social course type under the course settings.
With this structure, you will need to plan carefully. The discussion topics will need to correspond to units, and you will need to be consistent as you place the course readings, videos, student responses, and links to assessments.
Multiple forums
Remember that a class can have as many forums as you want. If your course uses groups, you can use groups in the forum. Also, you can hide old forums and create new ones. This is useful if you run students through a course on a schedule. Just turning off old forums and creating new ones enables you to refresh parts of the course.
Forum settings
The Settings page is where you select settings for a forum. It can be accessed by going to Administration | Forum administration | Settings. Let's take a look at how each of these settings affects the user experience.
General settings
The general settings affect the appearance and function of the forum.
Forum name
This is the name that students will see when a forum is listed on the course's home page.
Forum description
When a student enters a forum, they will see Forum description at the top of the forum's page. This text should tell the student what the forum is about. You can also use this introduction to tell the student if they can rate posts by other students. It also tells the student how to link to a document with more extensive instructions on how to use the forum. This is possible because the description is a full-featured web page that can hold anything you put on a web page.
As with other activities, if you check the Show description box, the description will be displayed on the course page.
The forum type
On Moodle, you can create several types of forums. Each type can be used differently. The different types of forums can be seen in the following screenshot:
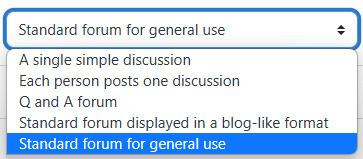
Figure 8.11 – Drop-down menu for you to select the forum type
The following table looks at each type of forum in more detail. Standard forum for general use is probably the most popular for courses. However, a forum for Q&A is also very important to include, particularly for student success:

Figure 8.12 - Types of forums
The maximum attachment size
Students can attach files to forum postings. This sets the maximum file size the student can upload. One of the settings turns off the student's ability to upload files to the Uploads are not allowed forum.
The maximum number of attachments
This sets the maximum number of files that can be attached to one post, not the maximum for the whole forum.
The display word count option
When set to Yes, the forum will show how many words are in each post. The word count is shown at the bottom of the post, so you won't see the word count until you have clicked on the post. This is useful for an "explain in 100 words or less" type of activity. It can also connect to a rubric. We will discuss rubrics later in this book. For an excellent guide on rubrics, please check out the University of Oklahoma's useful checklist and guide for creating and using rubrics: https://www.ou.edu/assessment/faculty-resources/creating-and-using-rubrics.
The subscription mode
Selecting Force subscription subscribes all students to the forum automatically (even students who enroll in the course at a later time). Before using this setting, consider its long-term effect on students who took your class.
If you reuse the same course for a later group of students, the previous group will still be enrolled. Do you want previous students to be notified of new postings in the current class's forum? If not, there are several solutions:
- Don't force all students to be subscribed.
- Use groups to separate the current group of students in the class from the previous groups.
- Create a fresh instance of the course for each new group.
- Reset the course, which will unenroll past students.
- Create a new forum for a new group of students.
If you select Auto subscription, everyone in the course will be subscribed to the forum, but later, they can unsubscribe. With Force subscription, the student cannot unsubscribe so long as they are enrolled in the course.
Read tracking
When turned on, this highlights the forum posts that the students haven't read.
Once you have reviewed how to set up forums, you can take a step back and start thinking of the uses for your forums. In the next section, we will learn how to use forums for delivering content, as well as spurring interaction and engagement.
Using the Announcements forum for notifications
Moodle has simplified how to notify students of general news and announcements by setting up a special forum called the Announcements forum. It is automatically created in a new course, and there can only be one, except in very special occasions in which it has been imported from a different system.
Your new, automatically generated Announcement forum is placed at the top of the central section by default. Posting is restricted to teachers, managers, and administrators. The default subscription setting is the "forced subscription." You can set how many discussions appear in the Announcement forum.
If you do not want to have an Announcement forum, you can remove it in several ways. The easiest way is to simply hide the Announcements forum. This is recommended because you may want to post an announcement sometime in the future. Other ways include deleting the Announcements forum from the course home page or deleting the Latest announcements block.
If, for some reason, you do not want to have the auto-creation of Announcements by default, you can simply set Number of announcements to 0 in the Course default settings. You can still override this setting if there are one or two courses in which you would like to have Announcement forums.
Now that you know how to set up different types of chat and forum modules, you can think about how to take collaboration a step further. In the next section, you will learn how to set up links to the collaboration platforms that your organization makes available to learners.
Forum-based content delivery
As we mentioned previously, a very convenient way to deliver content is to create forums that correspond to the weeks in the course. For example, if you have an 8-week course, you can create eight separate forums. Each one can correspond to specific content (text, blocks, video, audio, presentations, and more) that you would like the students to read. By putting the links in the forum threads, you can ensure that everyone progresses through the course at the same pace and covers the same content. You can then include a few questions in the forum and open threads that allow students to ask questions, as well as reflect on the material. It's a good place to add a few reflective questions. As you develop your questions, make sure that they are structured so that each person can give a unique, personal answer. For example, you may ask students to find an example of an article or website that relates to the topic. You can also ask them to describe their own experiences. Avoid questions that can be provided with yes/no answers or ones that will result in the same response.
Forum-based assignments
By organizing assignments in your forums, you can ensure that you attach the necessary content and reviews to the assignments. For example, you may wish to have students write essays about readings. If you do so, you can open up a forum in which you describe the paper, include expectations, and even incorporate a rubric. For example, if you ask students to write a short response to a reading, you can post a link to the reading, a series of guiding questions, and a description of the structure of the paper they are to write. Then, you can include a checklist of the criteria (number of words, content, structure, organization, grammar, mechanics, and so on). You can open threads for students to ask questions, and you can put a link to Dropbox so that they can, with a single click, submit their assignments.
One advantage of using forum-based assignments is that if you have any changes you wish to make, you can be assured that most of your students will see the changes because they will occur in the same location that everyone is visiting. It's a "one-stop shopping" point for assignments.
It is a perfect place to create an assignment that encourages students to apply knowledge, such as in tackling a current issue or problem or doing research into topics that require creativity and imagination, as well as the ability to comprehend the learning materials and seek and find new content, potentially in your online library or web-based repositories and publications.
Forum-based peer review
Forums are an excellent way to boost student engagement because they can interact with each other in a meaningful way and thus humanize the online experience. Using forums for peer review is also a good idea, but you'll need to ensure that you establish good ground rules because the forum is, after all, a public place. If you want a more detailed and granular kind of peer review interaction, and you'd like to be able to easily grade each interaction, it is better to "upgrade" to Moodle's Workshop activity. If you use the forum as a place for students to start a thread, post a draft, and then respond to each other's drafts, you'll need to ensure that they keep their comments positive and productive. One good way to do that is to provide a checklist of items to respond to. If you want to grade each checklist item, it's better to use the Workshop activity rather than a Forum activity. For example, you can ask students to respond to a series of questions:
- What did you like about this post?
- How could the post have been more specific or have provided more details?
- As you were reading the post, when did you want to know more? What could the author have provided?
The key is to keep the peer review questions brief and avoid having too many. After all, you want to motivate your students to interact, not frighten them into avoiding the forum altogether.
Forum-based review and linking to assessments
Forums are a wonderful place to provide a self-contained place for quizzes, exam reviews, and practice before they take the full exam. The best way to organize forums for assessment review, practice, and performance is to tie the forum title to the topics covered in the assessment. Then, you can create a link to the key content covered and describe the learning goals or outcomes. After that, you can include a few review questions. Ensure that your practice or review questions are in the same format as the ones that they will be taking for their final assessments.
The practice forum is a great place for students to develop self-efficacy and an "I can do it!" attitude. The way to develop self-confidence is to allow feedback in the practice test and allow the students to take the test or quiz as many times as they like. Ensure that you always link back to the course content that contains the correct responses or the information they need.
Now that we have covered the structure and functionality of the Moodle Forum activity, we can take a deep dive into starting, posting, and communicating via a forum. Please keep in mind that as you work through the forum, you may wish to use a Workshop instead of a Moodle Forum. To make that determination, you'll need to review your goals in the course, and also evaluate how easily your students are managing the forum. If they are comfortable with the easy-to-navigate structure of the forum but are confused by more complex activities, it's best to stick to the Forum activity.
Starting and posting to a forum
When a student enters a general-purpose forum, they see the description that was entered during the creation of the forum, as shown in the following screenshot:

Figure 8.13 – Making a post in the Forum activity
Once you click Save, the forum will be listed under Discussion. Fellow learners will be able to click on the topic and then add a response. Notice that there are several options, which include Permalink, Edit, Delete, and Reply.
Encourage students to subscribe to the form by clicking the Subscribe button on the main Discussion screen. They will receive notices when people post, which can be very engaging, especially if a student is using a tablet or phone and they can respond quickly:
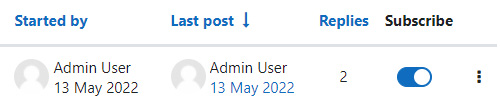
Figure 8.14 – Subscribing to the Forum activity to receive notices when someone has posted
You can set the way that responses are displayed. The available options are shown in the following screenshot:

Figure 8.15 – How to configure the way the responses are shown
To post a reply, simply click Reply and type a response. The following screenshot shows the text box. To add images, files, links, emoticons, HTML5, and more, you will need to click on Advanced to open the full menu:
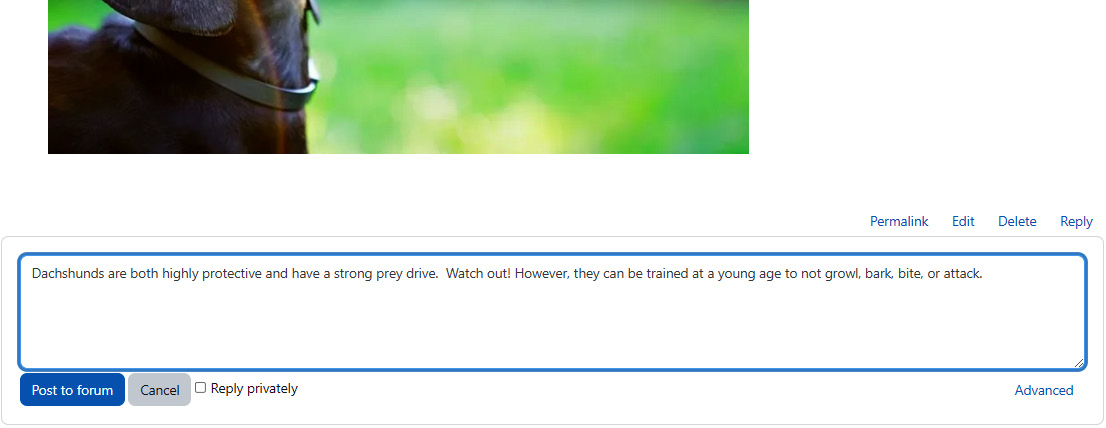
Figure 8.16 – The Forum activity without the formatting bar enabled
After clicking Advanced, the horizontal formatting bar will open, where you can select from different formatting and information-sharing options, as shown in the following screenshot:

Figure 8.17 – The student's view of a general forum with the formatting bar enabled
If you want to ensure your students see the discussion, you can star it. You can also pin it so that it appears at the top of the module. If you don't want any more posts, you can lock the discussion. In Moodle 4.0, you're automatically subscribed to the discussion so that you receive notices if people post. You can unsubscribe if you do not want to receive push notices:
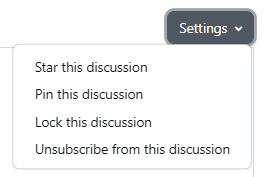
Figure 8.18 – Discussion settings that allow you to do things to the Forum activity that make it easier to see and avoid distractions
If you ask students to collaborate on assignments or ask them to review each others' work, consider adding a forum specifically to discuss the assignment. Some people may use a Workshop for that purpose, but a Forum works well because students have an informal way to read each other's drafts and thus feel more confident about their own. Furthermore, a Forum is a good place to discuss exemplar work. Then, for more granular peer reviews, you can use a Workshop.
To encourage collaboration, you may wish to display the forum postings in a flat format, with the newest first. This option shows the text, which can be engaging and pique the students' curiosity, inspiring them to engage and post:
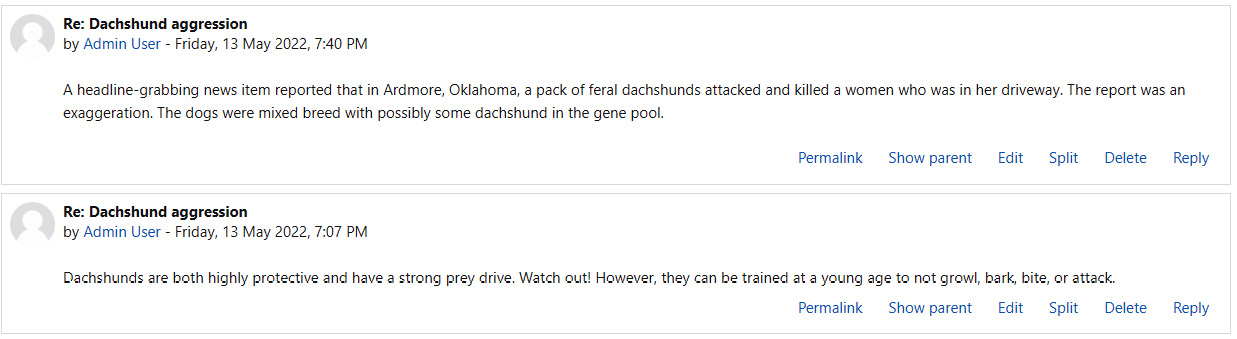
Figure 8.19 – Forum displayed in a flat format
You may couple the forums with an occasional synchronous discussion on the topic to provide a hybrid experience that mixes synchronous with asynchronous contact with each other. In this way, you will be motivating students by creating an open, welcoming environment where students can use the forum to preview each other's work and informally share and collaborate on the assignments you complete via a forum.
Linking to collaboration platforms (Functionality booster)
Forums are interactive and often collaborative activities, and as such, they can encourage students to learn from each other. Sometimes, it is useful to have students collaborate on a single document. Students can collaborate in a shared document. In a Moodle Forum, having a collaborative document can encourage people to add content. It's not granularly peer-reviewed and assessed as in a Moodle Workshop, nor is it intended to be a wiki. It's simply to encourage engagement. It may seem complicated, but it's quite simple, especially if your school or organization uses Microsoft Office 365 products and OneDrive, or if students have a Google account that gives them access to Google Drive, Docs, Sheets, and more. They can also use other collaborative spaces, such as Dropbox. For more complex tasks, students may collaborate in a spreadsheet that has a timeline and critical path. Some organizations use project management tools such as Basecamp or Slack for informing team members of milestones and building in automatic alerts. Google Drive may be one of the easier approaches because it integrates with email and other applications.
They can use the following steps:
- Log into their school shared drive account. Let's use Google for this example.
- Go to Google Drive.
- Set up a folder for the course.
- Open the folder.
- Within the folder, create a new Google document (this can be a document, sheet, or something else).
- Name the document.
- Obtain the link for the document and post it in the forum. You can set it so that anyone with the link can see the document. You can also grant permission for your partners to be able to edit the document. You'll need their Gmail email addresses. Non-Gmail addresses do not seem to play nicely with Google Drive, and Gmail will automatically send out an email requesting permissions.
Once you have set up the documents, you can let people in the class see what you're doing as you progress. If you'd like to keep the drafts and the progress private, you can simply change the settings so that only people with permission can view and/or edit the document.
One advantage to using a collaboration platform rather than sending documents back and forth in email is the fact that it's easier to keep up with version control. Furthermore, once you've finished one draft and everyone has included their contributions, you can start a new document that indicates that it's a new revision or version. Sometimes, it's easiest to keep separate folders within the main folder to keep everything clear and well sorted.
If your organization is using Teams, you can collaborate on documents in a folder you can set up in Files. Here, you can add documents, and anyone in your team can collaborate on them. If you are using Google Classroom, you can use it in conjunction with Moodle for access to shared Google documents. You'll simply need to include a link to a folder with shared documents in Google or Google Classroom.
Summary
In this chapter, you learned how to create a sense of adventure and excitement by creating places where students interact and learn from each other, both in real-time (synchronously) and on-demand (asynchronously), using chat and forums.
In learning about how best to use chat and forum activities to encourage engagement and motivate students, we've reviewed the different types as well as purposes. We also discussed how Moodle 4.0 makes it easier for students to interact with each other, and for the teacher to make sure that students are staying on track and not bounding ahead before they're ready. Moodle 4.0 focuses on student success.
In the next chapter, you will learn how to encourage collaboration among students using wikis and glossaries. You will learn how to use collaboration as an instructional strategy and how to select the collaborative activities that work particularly well in Moodle.