
Chapter 13. Shazam for Food: Developing Android Apps with TensorFlow Lite and ML Kit
After developing the viral Not Hotdog app (that we looked at in Chapter 12), Jian-Yang was originally supposed to build a classifier to recognize all food in existence. In fact, the app was originally supposed to be called SeeFood—an app that can “see” food and know it right away (Figure 13-1). In other words, the “Shazam for Food.” However, the app was too successful for its own good and was acquired by Periscope. The original vision of his investor, Erlich Bachman, remains unfulfilled. In this chapter, our mission is to fulfill this dream.

Figure 13-1. Not Hotdog app listing on the Apple App Store
Where would such a feature be useful? For health nuts, it could look at a dish and provide the nutritional information, including the number of calories. Or, it could scan a few ingredients, and recommend a recipe based on them. Or, it could even look at a product in the market, and check whether it contains any blacklisted ingredients such as specific allergens.
This is an interesting problem to solve for several reasons because it represents several challenges:
- Data collection challenge
-
There are more than a hundred cuisines around the world, each with hundreds if not thousands of dishes.
- Accuracy challenge
-
It should be right most of the time.
- Performance challenge
-
It should run near instantly.
- Platform challenge
-
An iPhone app alone would be insufficient. A lot of users in developing countries use less powerful smartphones, particularly Android devices. Cross-platform development is a must.
Making a food classifier app for one cuisine is tricky enough. Imagine having to do that for every food in existence—and doing it on two platforms! An individual or a small team will quickly run into scaling issues trying to tackle this problem. In this chapter, we use this example as a motivation to explore the different parts of the mobile AI development life cycle that we explored in Chapter 11.
The material we explore here does not need to be limited to smartphones, either. We can apply our learnings beyond mobile to edge devices such as Google Coral and Raspberry Pi, which we discuss later in the book.
The Life Cycle of a Food Classifier App
So, we want to build a global multicuisine, multiplatform food classifier. It sounds like a daunting task, but we can break it down into manageable steps. As in life, we first need to crawl, then walk, and then run. The following is one potential approach to consider:
-
Collect a small initial set images for a single cuisine (e.g., Italian).
-
Label these images with their corresponding dish identifiers (e.g.,
margherita_pizza). -
Train a classifier model.
-
Convert the model to a mobile framework-compatible format (e.g., .tflite).
-
Build a mobile app by integrating the model with a great UX.
-
Recruit alpha users and share the app with them.
-
Collect detailed usage metrics along with feedback from active users, including camera frames (which tend to reflect real-world usage) and corresponding proxy labels (indicating whether the classification was right or wrong).
-
Improve the model using the newly collected images as additional training data. This process needs to be iterative.
-
When the quality of the model meets the minimum quality bar, ship the app/feature to more/all users. Continue to monitor and improve the quality of the model for that cuisine.
-
Repeat these steps for each cuisine.
Tip
For step 7, we could alternatively integrate the feedback within the UX itself. For example, the app could show a ranked list of predictions (by probability) that are likely candidates for a given picture. If our model is doing well, the user should be selecting the first option most of the time. Selecting a lower ranked prediction would essentially be considered an incorrect prediction. In the worst case, if none of the options were correct, allow the user to manually add a new label. That photo, along with the label (in all three scenarios), can be incorporated as training data.
We don’t need a whole lot of data to get underway. Although each of the aforementioned steps might sound involved, we can significantly automate the process. What’s cool about this approach is that the more the app is used, the better it becomes, automatically. It’s as if it has a life of its own. We explore this self-evolving approach for a model toward the end of the chapter.
Tip
A die-hard fan of your app/company would make for a good alpha user. Alpha users ideally are people who have a vested interest in the success of your product. For a food recognition app, a potential group of users could be fitness buffs who watch every calorie and ingredient they eat. These users understand that the quality of the app will not be up to par early on, but they also see their role in shaping it through consistent, constructive feedback. They voluntarily agree to a liberal data-sharing agreement in order to provide data such as usage metrics and image frames from day-to-day use. We would recommend that your users know exactly what information you would be collecting about them and allow them to opt out or delete. Don’t be creepy!
In this chapter, we explore the different parts of the aforementioned life cycle and the tools that help us with each of those steps. In the end, we will take a holistic, end-to-end look at the entire mobile development life cycle, not just from this chapter, but also from the previous chapters, and combine them to see how we could effectively use them in building a production-quality, real-world application.
Our journey begins with understanding the following tools from the Google ecosystem.
- TensorFlow Lite
-
Model conversion and mobile inference engine.
- ML Kit
-
High-level software development kit (SDK) with several built-in APIs, along with the ability to run custom TensorFlow Lite models as well as integration with Firebase on Google Cloud.
- Firebase
-
A cloud-based framework that provides the necessary infrastructure for production-quality mobile applications, including analytics, crash reporting, A/B testing, push notifications, and more.
- TensorFlow Model Optimization Toolkit
-
A set of tools for optimizing the size and performance of models.
An Overview of TensorFlow Lite
As mentioned in Chapter 11, Google released an on-device inference engine called TensorFlow Lite that expanded the reach of the TensorFlow ecosystem beyond the cloud and desktops. Prior to this, the options within the TensorFlow ecosystem were porting the entire TensorFlow library itself to iOS (which was heavy and slow) and, later on, its slightly stripped-down version called TensorFlow Mobile (an improvement, but still fairly bulky).
TensorFlow Lite is optimized from the ground up for mobile, with the following salient features:
- Small
-
TensorFlow Lite comes packaged with a much lighter interpreter. Even with all the operators included, the interpreter is less than 300 KB. In typical usage with common models like MobileNet, we can expect that footprint to be less than 200 KB. For reference, the previous generation TensorFlow Mobile used to occupy 1.5 MB. Additionally, TensorFlow Lite uses selective registration—it packages only the operations that it knows will be used by the model, minimizing unnecessary overheads.
- Fast
-
TensorFlow Lite provides a significant speedup because it is able to take advantage of on-device hardware acceleration such as GPUs and NPUs, where available. In the Android ecosystem, it uses the Android Neural Networks API for acceleration. Analogously on iPhones, it uses the Metal API. Google claims two to seven times speedup over a range of tasks when using GPUs (relative to CPUs).
TensorFlow uses Protocol Buffers (Protobufs) for deserialization/serialization. Protobufs are a powerful tool for representing data due to their flexibility and extensibility. However, that comes at a performance cost that can be felt on low-power devices such as mobiles.
FlatBuffers turned out to be the answer to this problem. Originally built for video game development, for which low overhead and high performance are a must, they proved to be a good solution for mobiles as well in significantly reducing the code footprint, memory usage, and CPU cycles spent for serialization and deserialization of models. This also improved start-up time by a fair amount.
Within a network, there are some layers that have fixed computations at inference time; for example, the batch normalization layers, which can be precomputed because they rely on values obtained during training, such as mean and standard deviation. So, the batch normalization layer computation can be fused (i.e., combined) with the previous layer’s computation ahead of time (i.e., during model conversion), thereby reducing the inference time and making the entire model much faster. This is known as prefused activation, which TensorFlow Lite supports.
The interpreter uses static memory and a static execution plan. This helps in decreasing the model load time.
- Fewer dependencies
-
The TensorFlow Lite codebase is mostly standard C/C++ with a minimal number of dependencies. It makes it easier to package and deploy and additionally reduces the size of the deployed package.
- Supports custom operators
-
TensorFlow Lite contains quantized and floating-point core operators, many of which have been tuned for mobile platforms, and can be used to create and run custom models. If TensorFlow Lite does not support an operation in our model, we can also write custom operators to get our model running.
Before we build our initial Android app, it would be useful to examine TensorFlow Lite’s architecture.
TensorFlow Lite Architecture
Figure 13-2 provides a high-level view of the TensorFlow Lite architecture.

Figure 13-2. High-level architecture of the TensorFlow Lite ecosystem
As app developers, we will be working in the topmost layer while interacting with the TensorFlow Lite API (or optionally with ML Kit, which in turn uses TensorFlow Lite). The TensorFlow Lite API abstracts away all of the complexities involved in using a lower-level API such as the Android’s Neural Network API. Recall that this is similar to how Core ML works within the Apple ecosystem.
Looking at the other extreme, computations can be run on various types of hardware modules. The most common among them is the CPU, simply because of its ubiquity and flexibility. Modern smartphones are increasingly equipped with specialized modules, including the GPU and the newer NPU (especially built for neural network computations like on the iPhone X). Additionally, Digital Signal Processors (DSP) specialize in singular tasks such as facial authentication, fingerprint authentication, and wake word detection (like “Hey Siri”).
In the world of Internet of Things (IoT), microcontrollers (MCUs) reign supreme. With no OS, no processor, and very little memory (KBs), these are cheap to produce in mass quantities and easy to incorporate into various applications. With TensorFlow Lite for Microcontrollers, developers can run AI on these bare-metal devices without needing internet connectivity. The pared-down version (roughly 20 KB) of the TensorFlow Lite Interpreter for MCUs is called the TensorFlow Lite Micro Interpreter.
So how does TensorFlow Lite interact with hardware? By using delegates that are platform-aware objects that expose a consistent platform-agnostic API. In other words, delegates shield the interpreter from needing to know anything about the specific hardware it runs on. They take on all or part of the responsibility of graph execution that would have otherwise been run on the CPU and instead run on the much more efficient GPUs and NPUs. On Android, the GPU delegate accelerates performance using OpenGL, whereas on iOS, the Metal API is used.
Given that TensorFlow Lite by itself is platform agnostic, it needs to call into a platform-specific library that implements a known contract. This contract is the TensorFlow Lite Delegate API. Within Android, this contract is fulfilled by the Android Neural Network API (available on devices running Android 8.1 and above). The Neural Network API is designed to provide a base layer of functionality for higher-level machine learning frameworks. The equivalent of the Neural Network API within the Apple world is Metal Performance Shaders.
With the information we have looked at so far, let’s get hands on.
Model Conversion to TensorFlow Lite
At this point in the book, we should already have a model at hand (either pretrained on ImageNet or custom trained in Keras). Before we can plug that model into an Android app, we need to convert it to the TensorFlow Lite format (a .tflite file).
Let’s take a look at how to convert the model using the TensorFlow Lite Converter tool, the tflite_convert command that comes bundled with our TensorFlow installation:
# Keras to TensorFlow Lite
$ tflite_convert
  --output_file=my_model.tflite
  --keras_model_file=my_model.h5

# TensorFlow to TensorFlow Lite
$ tflite_convert
  --output_file=my_model.tflite
  --graph_def_file=my_model/frozen_graph.pb
The output of this command is the new my_model.tflite file, which we can then plug into the Android app in the following section. Later, we look at how to make that model more performant by using the tflite_convert tool again. Additionally, the TensorFlow Lite team has created many pretrained models that are available in TensorFlow Lite format, saving us this conversation step.
Building a Real-Time Object Recognition App
Running the sample app from the TensorFlow repository is an easy way to play with the TensorFlow Lite API. Note that we would need an Android phone or tablet to run the app. Following are steps to build and deploy the app:
-
Clone the TensorFlow repository:
git clone https://github.com/tensorflow/tensorflow.git
-
Download and install Android Studio from https://developer.android.com/studio.
-
Open Android Studio and then select “Open an existing Android Studio project” (Figure 13-3).

Figure 13-3. Start screen of Android Studio
-
Go to the location of the cloned TensorFlow repository and then navigate further to tensorflow/tensorflow/contrib/lite/java/demo/ (Figure 13-4). Select Open.

Figure 13-4. Android Studio “Open Existing Project” screen in the TensorFlow repository
-
On the Android device, enable Developer Options. (Note that we used a Pixel device here, which uses the stock Android OS. For other manufacturers, the instructions might be a little different.)
-
Go to Settings.
-
Scroll down to the About Phone or About Tablet option (Figure 13-5) and select it.

Figure 13-5. System information screen on an Android phone; select the About Phone option here
-
Look for the Build Number row and tap it seven times. (Yeah, you read that right—seven!)
-
You should see a message (Figure 13-6) confirming that developer mode is enabled.

Figure 13-6. The About Phone screen on an Android device
-
If you are using a phone, tap the back button to go back to the previous menu.
-
You should see a “Developer options” button, directly above the “About phone” or “About tablet” option (Figure 13-7). Tab this button to reveal the “Developer options” menu (Figure 13-8).

Figure 13-7. The System information screen showing “Developer options” enabled

Figure 13-8. “Developer options” screen on an Android device with USB debugging enabled
-
-
Plug the Android device into the computer via a USB cable.
-
The Android device might show a message asking to allow USB debugging. Enable “Always allow this computer,” and then select OK (Figure 13-9).

Figure 13-9. Allow USB debugging on the displayed alert
-
In Android Studio, on the Debug toolbar bar (Figure 13-10), click the Run App button (the right-facing triangle).

Figure 13-10. Debug toolbar in Android Studio
-
A window opens displaying all the available devices and emulators (Figure 13-11). Choose your device, and then select OK.

Figure 13-11. Select the phone from the deployment target selection screen
-
The app should install and begin running on our phone.
-
The app will request permission for your camera; go ahead and grant it permission.
-
A live view of the camera should appear, along with real-time predictions of object classification, plus the number of seconds it took to make the prediction, as shown in Figure 13-12.

Figure 13-12. The app up-and-running app, showing real-time predictions
And there you have it! We have a basic app running on the phone that takes video frames and classifies them. It’s simple and it works reasonably well.
Beyond object classification, the TensorFlow Lite repository also has sample apps (iOS and Android) for many other AI problems, including the following:
-
Object detection
-
Pose estimation
-
Gesture recognition
-
Speech recognition
The great thing about having these sample apps is that with basic instructions, someone without a mobile development background can get them running on a phone. Even better, if we have a custom trained model, we can plug it into the app and see it run for our custom task.
This is great for starting out. However, things are a lot more complicated in the real world. Developers of serious real-world applications with thousands or even millions of users need to think beyond just inference—like updating and distributing models, testing different versions among subsets of users, maintaining parity between iOS and Android, and ultimately reducing the engineering cost of each. Doing all of this in-house can be expensive, time consuming, and frankly unnecessary. Naturally, platforms that provide these features would be enticing. This is where ML Kit and Firebase come in.
ML Kit + Firebase
ML Kit is a mobile SDK launched during the 2018 Google I/O conference. It provides convenient APIs for novices as well as advanced ML developers to do a lot of common ML tasks. By default, ML Kit comes with a generic feature set in vision and language intelligence. Table 4-1 lists some of the common ML tasks that we can do in just a few lines.
| Vision | Language |
|---|---|
|
Object classification Object detection and tracking Popular landmark detection Text recognition Face detection Barcode detection |
Language identification On-device translation Smart replies |
ML Kit also gives us the ability to use custom trained TensorFlow Lite models for inference. Let’s take a moment to appreciate why this is so great for developers. Imagine that we were building a business card scanner. We could bring in a custom business card detection model, recognize when a business card is visible and its boundaries (to make a nice visual user interface), run the built-in text recognition, and filter out text outside of those boundaries to prevent extraneous characters. Or, consider a language learning game that can be built by pointing at objects, running an object classifier, and then using the on-device translation API to announce the labels in French. It is entirely possible to build these relatively quickly using ML Kit. Although many of these features are available in Core ML, too, ML Kit has the added advantage of being cross-platform.
ML Kit, though, is only one piece of the puzzle. It integrates into Google’s Firebase, the mobile and web application development platform that is part of Google Cloud. Firebase offers an array of features that are necessary infrastructure for production-quality apps, such as the following:
-
Push notifications
-
Authentication
-
Crash reporting
-
Logging
-
Performance monitoring
-
Hosted device testing
-
A/B testing
-
Model management
The last point is very pertinent to us. One of the biggest benefits that Firebase gives us is the ability to host our custom models on the cloud and download them within the app as needed. Simply copy the models over to Firebase on Google Cloud, reference the model on ML Kit inside the app, and we’re good to go. The A/B testing feature gives us the ability to show different users different versions of the same model and measure the performance across the different models.
Note
For a lot of the built-in functionality, ML Kit optionally provides a feature to process images in the cloud, where the models are much larger compared to on-device models. These larger models obviously require more powerful hardware to run them, with the benefit of providing some improvement in accuracy and potentially a much larger taxonomy (like thousands of object classes instead of hundreds). In fact, some functionality such as the landmark recognition feature works only on the cloud.
The cloud processing option is particularly useful when we need a little bit of extra accuracy and/or the user’s phone has low processing power that prevents it from running the on-device model well.
Object Classification in ML Kit
For our previous task of object classification in real time, if we use ML Kit instead of vanilla TensorFlow Lite, we can simplify our code to just the following lines (in Kotlin):
valimage=FirebaseVisionImage.fromBitmap(bitmap)valdetector=FirebaseVision.getInstance().visionLabelDetectorvalresult=detector.detectInImage(image).addOnSuccessListener{labels->// Print labels}
Custom Models in ML Kit
In addition to the prebuilt models provided by ML Kit, we can also run our own custom models. These models must be in the TensorFlow Lite format. Following is a simple piece of code to load a custom model that’s bundled into the app:
valcustomModel=FirebaseLocalModelSource.Builder("my_custom_model").setAssetFilePath("my_custom_model.tflite").build()FirebaseModelManager.getInstance().registerLocalModelSource(customModel)
Next, we specify the model’s input and output configuration (for a model that takes in an RGB image of size 224x224 and gives predictions for 1,000 class names):
valIMAGE_WIDTH=224valIMAGE_HEIGHT=224valmodelConfig=FirebaseModelInputOutputOptions.Builder().setInputFormat(0,FirebaseModelDataType.FLOAT32,intArrayOf(1,IMAGE_WIDTH,IMAGE_HEIGHT,3)).setOutputFormat(0,FirebaseModelDataType.FLOAT32,intArrayOf(1,1000)).build()
Next, we create an array of a single image and normalize each pixel to the range [–1,1]:
valbitmap=Bitmap.createScaledBitmap(image,IMAGE_WIDTH,IMAGE_HEIGHT,true)valinput=Array(1){Array(IMAGE_WIDTH){Array(IMAGE_HEIGHT){FloatArray(3)}}}for(xin0..IMAGE_WIDTH){for(yin0..IMAGE_HEIGHT){valpixel=bitmap.getPixel(x,y)input[0][x][y][0]=(Color.red(pixel)-127)/128.0finput[0][x][y][1]=(Color.green(pixel)-127)/128.0finput[0][x][y][2]=(Color.blue(pixel)-127)/128.0f}}
Now, we set up an interpreter based on our custom model:
valoptions=FirebaseModelOptions.Builder().setLocalModelName("my_custom_model").build()valinterpreter=FirebaseModelInterpreter.getInstance(options)
Next, we run our input batch on the interpreter:
valmodelInputs=FirebaseModelInputs.Builder().add(input).build()interpreter.run(modelInputs,modelConfig).addOnSuccessListener{result->// Print results}
Yup, it’s really that simple! Here, we’ve seen how we can bundle custom models along with the app. Sometimes, we might want the app to dynamically download the model from the cloud for reasons such as the following:
-
We want to keep the default app size small on the Play Store so as to not prevent users with data usage constraints from downloading our app.
-
We want to experiment with a different variety of models and pick the best one based on the available metrics.
-
We want the user to have the latest and greatest model, without having to go through the whole app release process.
-
The feature that needs the model might be optional, and we want to conserve space on the user’s device.
This brings us to hosted models.
Hosted Models
ML Kit, along with Firebase, gives us the ability to upload and store our model on Google Cloud and download it from the app when needed. After the model is downloaded, it functions exactly like it would have if we had bundled the model into the app. Additionally, it provides us with the ability to push updates to the model without having to do an entire release of the app. Also, it lets us do experiments with our models to see which ones perform best in the real world. For hosted models, there are two aspects that we need to look at.
Accessing a hosted model
The following lines inform Firebase that we’d like to use the model named my_remote_custom_model:
valremoteModel=FirebaseCloudModelSource.Builder("my_remote_custom_model").enableModelUpdates(true).build()FirebaseModelManager.getInstance().registerCloudModelSource(remoteModel)
Notice that we set enableModelUpdates to enable us to push updates to the model from the cloud to the device. We can also optionally configure the conditions under which the model would be downloaded for the first time versus every subsequent time—whether the device is idle, whether it’s currently charging, and whether the download is restricted to WiFi networks only.
Next, we set up an interpreter much like we did with our local model:
valoptions=FirebaseModelOptions.Builder().setCloudModelName("my_remote_custom_model").build()valinterpreter=FirebaseModelInterpreter.getInstance(options)
After this point, the code to perform the prediction would look exactly the same as that for local models.
Next, we discuss the other aspect to hosted models—uploading the model.
Uploading a hosted model
As of this writing, Firebase supports only models hosted on GCP. In this section, we walk through the simple process of creating, uploading, and storing a hosted model. This subsection presumes that we already have an existing GCP account.
The following lists the steps that we need to take to get a model hosted on the cloud:
-
Go to https://console.firebase.google.com. Select an existing project or add a new one (Figure 13-13).

Figure 13-13. Home page of Google Cloud Firebase
-
On the Project Overview screen, create an Android app (Figure 13-14).

Figure 13-14. The Project Overview screen on Google Cloud Firebase
-
Use the app ID from the project in Android Studio (Figure 13-15).

Figure 13-15. App creation screen on Firebase
-
After clicking “Register app,” download the configuration file. This configuration file gives the necessary credentials to the app for it to access our cloud account. Add the configuration file and the Firebase SDK to the Android app as shown on the app creation page.
-
In the ML Kit section, select Get Started, and then select “Add custom model” (Figure 13-16).

Figure 13-16. The ML Kit custom models tab
-
In the name field, enter
my_remote_custom_modelto match the name in the code. -
Upload the model file from your computer (Figure 13-17).

Figure 13-17. Uploading a TensorFlow Lite model file to Firebase
-
Tap the “Publish” button after the file upload completes.
That’s it! Our model is now ready to be accessed and used from the app dynamically. Next, we examine how we can do A/B testing between models using Firebase.
A/B Testing Hosted Models
Let’s take the scenario in which we had a version 1 model named my_model_v1 to start off with and deployed it to our users. After some usage by them, we obtained more data that we were able to train on. The result of this training was my_model_v2 (Figure 13-18). We want to assess whether this new version would give us better results. This is where A/B testing comes in.

Figure 13-18. Currently uploaded custom models to Firebase
Widely used by industry, A/B testing is a statistical hypothesis testing technique, which answers the question “Is B better than A?” Here A and B could be anything of the same kind: content on a website, design elements on a phone app, or even deep learning models. A/B testing is a really useful feature for us when actively developing a model and discovering how our users respond to different iterations of the model.
Users have been using my_model_v1 for some time now, and we’d like to see whether the v2 iteration has our users going gaga. We’d like to start slow; maybe just 10% of our users should get v2. For that, we can set up an A/B testing experiment as follows:
-
In Firebase, click the A/B Testing section, and then select “Create experiment” (Figure 13-19).

Figure 13-19. A/B testing screen in Firebase where we can create an experiment
-
Select the Remote Config option.
-
In the Basics section, in the “Experiment name” box, enter the experiment name and an optional description (Figure 13-20), and then click Next.

Figure 13-20. The Basics section of the screen to create a remote configuration experiment
-
In the Targeting section that opens, from the “Target users” drop-down menu, select our app and enter the percentage of target users (Figure 13-21).

Figure 13-21. The Targeting section of the Remote Config screen
-
Select a goal metric that makes sense. We discuss this in a little more detail in the next section.
-
In the variants section (Figure 13-22), create a new parameter called
model_namethat reflects the name of the model a particular user would use. The control group gets the default model, which ismy_model_v1. We also create an additional variant with the namemy_model_v2,which goes to 10% of the users.
Figure 13-22. The Variants section of the Remote Config screen
-
Select Review and then select “Start experiment.” Over time, we can increase the distribution of users using the variant.
Ta-da! Now we have our experiment up and running.
Measuring an experiment
Where do we go from here? We want to give our experiment some time to see how it performs. Depending on the type of experiment, we might want to give it a few days to a few weeks. The success of the experiments can be determined by any number of criteria. Google provides a few metrics out of the box that we can use, as shown in Figure 13-23.

Figure 13-23. Analytics available when setting up an A/B testing experiment
Suppose that we want to maximize our estimated total revenue—after all, we all want to become rich like Jian-Yang. We would measure our revenue from the users who have the experiment turned on against the baseline; that is, the users who do not have the experiment turned on. If our revenue per user increased against the baseline, we would consider the experiment a success. Conversely, we would conclude the opposite if there were no increase/decrease in revenue per user. For successful experiments, we want to slowly roll them out to all users. At that point, it ceases to be an experiment and it “graduates” to become a core offering.
Using the Experiment in Code
Now that we have set up an experiment, let’s see how to include it in our application using code. To use the appropriate model within our code, we simply need to access the remote configuration object (remoteConfig) and get the model name from it. The model name that we get from the remote configuration object will depend on whether the user is included in the experiment. The following lines of code accomplish that:
valremoteConfig=FirebaseRemoteConfig.getInstance()remoteConfig.fetch()valmodelName=remoteConfig.getString("current_best_model")valremoteModel=FirebaseCloudModelSource.Builder(modelName).enableModelUpdates(true).build()FirebaseModelManager.getInstance().registerCloudModelSource(remoteModel)
The rest of the code to perform the prediction remains exactly the same as in the previous sections. Our app is now ready to use the correct model as dictated by our experiment.
TensorFlow Lite on iOS
The previous chapters demonstrate how easy it is to use Apple’s Core ML on iOS. We can simply drag and drop a model into Xcode and start making inferences with just a couple of lines of code. In contrast, even looking at basic iOS examples such as those on TensorFlow Lite’s repository, it becomes evident that it needs a significant amount of boilerplate code to get even the most basic of apps running. In contrast, TensorFlow Lite used in conjunction with ML Kit is a rather pleasant experience. In addition to being able to use a clean and concise API, we get all the features we detailed earlier in this chapter—remotely downloading and updating models, model A/B testing, and cloud fallback for processing. All of this without having to do much extra work. A developer writing a deep learning app for both iOS and Android might consider using ML Kit as a way to “build once, use everywhere.”
Performance Optimizations
In Chapter 6, we explored quantization and pruning, mostly from a theoretical standpoint. Let’s see them up close from TensorFlow Lite’s perspective and the tools to achieve them.
Quantizing with TensorFlow Lite Converter
For iOS, Apple provides quantization_utils in its Core ML Tools package. And for TensorFlow Lite, the equivalent is the already built-in tflite_convert tool, which we used earlier in this chapter. On the command line, we can specify the input file, the model graph, the data type to convert to, and the names of the input and output (which can be inspected using Netron, as shown in Chapter 11). Going from 32-bit to 8-bit integer representation means a four times smaller model, with relatively little loss in accuracy.
$ tflite_convert
  --output_file=quantized-model.tflite
  --graph_def_file=/tmp/some-graph.pb
  --inference_type=QUANTIZED_UINT8
  --input_arrays=input
  --output_arrays=MobilenetV1/Predictions/Reshape_1
  --mean_values=128
  --std_dev_values=127
When it’s finished, this command should give us the quantized-model.tflite model.
TensorFlow Model Optimization Toolkit
The TensorFlow Lite converter is the simplest way to get our models quantized. It’s worth noting that the converter quantizes the models post-training. Due to the decrease in representation power, there can be a tiny but noticeable loss in accuracy. Could we do better? Quantization-aware training, as the name suggests, accounts for the effects of quantization during training time and attempts to compensate and minimize the losses that would have happened in post-training quantization.
Although both forms of quantization offer 75% reduction in the size of the model, experiments have shown the following:
-
In the case of MobileNetV2, compared to an eight-point loss in accuracy with post-training quantization, quantization-aware training yielded only a one-point loss.
-
For InceptionV3, quantization-aware training yielded a whopping 52% reduction in latency, compared to 25% reduction with post-training quantization.
Note
It is worth noting that these accuracy metrics are on the 1,000 class ImageNet test set. Most problems have less complexity with a smaller number of classes. Post-training quantization should result in a smaller loss on such simpler problems.
Quantization-aware training can be implemented with the TensorFlow Model Optimization Toolkit. This toolkit additional offers an increasing array of tools for model compression, including pruning. Additionally, the TensorFlow Lite model repository already offers these prequantized models using this technique. Table 13-2 lists the effects of various quantization strategies.
| Model | MobileNet | MobileNetV2 | InceptionV3 | |
|---|---|---|---|---|
| Top-1 accuracy | Original | 0.709 | 0.719 | 0.78 |
| Post-training quantized | 0.657 | 0.637 | 0.772 | |
| Quantization-aware training | 0.7 | 0.709 | 0.775 | |
| Latency (ms) | Original | 124 | 89 | 1130 |
| Post-training quantized | 112 | 98 | 845 | |
| Quantization-aware training | 64 | 54 | 543 | |
| Size (MB) | Original | 16.9 | 14 | 95.7 |
| Optimized | 4.3 | 3.6 | 23.9 | |
Fritz
As we have seen so far, the primary purpose of Core ML and TensorFlow Lite is to serve fast mobile inferences. Have a model, plug it into the app, and run inferences. Then came ML Kit, which apart from its built-in AI capabilities, made it easier to deploy models and monitor our custom models (with Firebase). Taking a step back to look at the end-to-end pipeline, we had training, conversion to mobile format, optimizing its speed, deploying to users, monitoring the performance, keeping track of model versions. These are several steps spread across many tools. And there is a good chance that there is no single owner of the entire pipeline. This is because oftentimes these tools require some level of familiarity (e.g., having to deploy a model to users might be outside a data scientist’s comfort zone). Fritz, a Boston-based startup, is attempting to bring down these barriers and make the full cycle from model development to deployment even more straightforward for both data scientists and mobile developers.
Fritz offers an end-to-end solution for mobile AI development that includes the following noteworthy features:
-
Ability to deploy models directly to user devices from Keras after training completes using callbacks.
-
Ability to benchmark a model directly from the computer without having to deploy it on a phone. The following code demonstrates this:
$ fritz model benchmark <path to keras model.h5>
 ...
 ------------------------
 Fritz Model Grade Report
 ------------------------

 Core ML Compatible:              True
 Predicted Runtime (iPhone X):    31.4 ms (31.9 fps)
 Total MFLOPS:                    686.90
 Total Parameters:                1,258,580
 Fritz Version ID:                <Version UID>
-
Ability to encrypt models so that our intellectual property can be protected from theft from a device by nefarious actors.
-
Ability to implement many advanced computer-vision algorithms with just a few lines of code. The SDK comes with ready-to-use, mobile-friendly implementations of these algorithms, which run at high frame rates. For example, image segmentation, style transfer, object detection, and pose estimation. Figure 13-24 shows benchmarks of object detection run on various iOS devices.
letposeModel=FritzVisionPoseModel()guardletposeResult=try?poseModel.predict(image)else{return}letimageWithPose=poseResult.drawPose()//Overlaysposeoninput.
Figure 13-24. Performance of Fritz SDK’s object detection functionality on different mobile devices, relative to the iPhone X
-
Ability to customize the prebuilt models to custom datasets by retraining using their Jupyter notebooks. It’s worth noting that this can be a difficult problem (even for professional data scientists) that is simplified significantly because the developer has only to ensure that the data is in the right format.
-
Ability to manage all model versions from the command line.
-
Ability to test out mobile readiness of our models using Fritz’ open source app called Heartbeat (also available on iOS/Android app stores). Assuming that we have a model ready without much mobile know how, we can clone the app, swap the existing model with our own, and get to see it run on the phone.
-
A vibrant community of contributors blogging about the latest in mobile AI on heartbeat.fritz.ai.
A Holistic Look at the Mobile AI App Development Cycle
Until this point in the book, we’ve looked at a bunch of techniques and technologies that enable us to perform individual tasks in the mobile AI development cycle. Here, we tie everything together by exploring the kind of questions that come up throughout this life cycle. Figure 13-25 provides a broad overview of the development cycle.

Figure 13-25. Mobile AI app development life cycle
How Do I Collect Initial Data?
We can apply a few different strategies to accomplish this:
-
Find the object of interest and manually take photos with different angles, lighting, environments, framing, and so on.
-
Scrape from the internet using browser extensions like Fatkun (Chapter 12).
-
Find existing datasets (Google Dataset Search). For example, Food-101 for dishes.
-
Synthesize your own dataset.
-
Place the object (foreground) in front of a green screen (background) and take a photograph of it. Replace the background with random images to synthesize a large dataset, while zooming, cropping, and rotating to create potentially hundreds of images.
-
If a green screen is not possible, segment (i.e., cut) the object out of the background from existing real-world images and repeat the previous step in order to build a robust, diverse dataset. It’s important to note that, in points (a) and (b), there needs to be sufficient diversity in the foreground; otherwise, the network might overlearn that one example instead of understanding the object.
-
Find a realistic 3D model of the object of interest and place it in realistic environments using a 3D framework such as Unity. Adjust the lighting and camera position, zoom, and rotation to take snapshots of this object from many angles. We explored companies such as AI.Reverie and CVEDIA in Chapter 7 that work in this space. We use photo-realistic simulators to train models for the self-driving chapters (Chapter 16 and Chapter 17).
-
How Do I Label My Data?
Most of the steps in the previous answer should have already given you labels for the data. For unlabeled collections, use labeling tools such as Supervisely, Labelbox, and Diffgram. For really large datasets in which annotating data by yourself is not feasible, socially responsible labeling services such as Digital Data Divide, iMerit, and Samasource, which provide income opportunities to disadvantaged populations, might be a good option.
How Do I Train My Model?
The following are the two broad approaches to train a model:
-
With code: Use Keras and TensorFlow (Chapter 3).
-
Without code: Use custom classifier services such as Google’s Auto ML, Microsoft’s CustomVision.ai, and Clarifai (benchmarked in Chapter 8), or Apple’s ecosystem-only Create ML (Chapter 12).
How Do I Convert the Model to a Mobile-Friendly Format?
The following are a few different ways to convert a model to a mobile-compatible format:
-
Use Core ML Tools (Apple only).
-
Use TensorFlow Lite Converter for iOS and Android.
-
Alternatively, use Fritz for the end-to-end pipeline.
How Do I Make my Model Performant?
Here are some techniques to make a model performant:
-
Start with an efficient model such as the MobileNet family, or even better, EfficientNet.
-
Make the model smaller in size by quantizing and pruning it to improve loading and inference times, while keeping the model accuracy relatively intact (Chapter 6, Chapter 11, and Chapter 13). Expect up to a 75% reduction in size with little loss in accuracy.
-
Use Core ML Tools for the Apple ecosystem or TensorFlow Model Optimization Kit for both iOS and Android.
How Do I Build a Great UX for My Users?
Obviously, that’s going to depend on the kind of problem you are trying to solve. But a general guideline is to strike the proper balance between interactivity, performance, and resource usage (memory, CPU, battery, etc.). And, of course, an intelligent feedback mechanism that enables effortless data collection and feedback helps. Gamifying this experience would take it to an entirely new level.
In the case of the food classifier app, after the user takes a picture, our UI would show a list of top five candidate predictions (in decreasing order of confidence) for a given photo. For example, if the user takes a picture of a pizza, the candidate predictions shown on screen could be “pie - 75%,” “pizza - 15%,” “naan - 6%,” “bread - 3%,” “casserole - 1%.” In this case, the user would have selected the second prediction. For a perfect model, the user would always select the first prediction. Because our model is not perfect, the rank of the prediction the user selects becomes a signal that will help improve the model in the future. In the absolute worst case, in which none of the predictions were correct, the user should have a way to manually label the data. Providing an autosuggest feature during manual entry will help keep clean labels in the dataset.
An even better experience could be one in which the user never needs to click a picture. Rather, the predictions are available in real time.
How Do I Make the Model Available to My Users?
The following are some ways to deploy models to users:
-
Bundle the model into the app binary and release it on the app stores.
-
Alternatively, host the model in the cloud and have the app download the model, as necessary.
-
Use a model management service like Fritz or Firebase (integrated with ML Kit).
How Do I Measure the Success of My Model?
The very first step is to determine the success criteria. Consider the following examples:
-
“My model should run inferences in under 200 ms at the 90th percentile.”
-
“Users who use this model open the app every day.”
-
In the food classifier app, a success metric could be something along the lines of “80% of users selected the first prediction in the list of predictions.”
These success criteria are not set in stone and should continue to evolve over time. It’s very essential to be data driven. When you have a new model version, run A/B tests on a subset of users and evaluate the success criteria against that version to determine whether it’s an improvement over the previous version.
How Do I Improve My Model?
Here are some ways to improve the quality of our models:
-
Collect feedback on individual predictions from users: what was correct, and, more important, what was incorrect. Feed these images along with the corresponding labels as input for the next model training cycle. Figure 13-26 illustrates this.
-
For users who have explicitly opted in, collect frames automatically whenever the prediction confidence is low. Manually label those frames and feed them into the next training cycle.

Figure 13-26. The feedback cycle of an incorrect prediction, generating more training data, leading to an improved model
How Do I Update the Model on My Users’ Phones?
Here are some ways to update the model on your users’ phones:
-
Bundle the new model into the next app release. This is slow and inflexible.
-
Host the new model on the cloud and force the apps out in the world to download the new model. Prefer to do this when the user is on WiFi.
-
Use a model management system such as Firebase (in conjunction with ML Kit) or Fritz to automate a lot of the grunt work involved.
With all of these questions answered, let’s appreciate the beauty of how this app improves on its own.
The Self-Evolving Model
For applications that need only mature pretrained models, our job is already done. Just plug the model into an app and we’re ready to go. For custom-trained models that rely especially on scarce training data, we can get the user involved in building a self-improving, ever-evolving model.
At the most fundamental level, each time a user uses the app, they’re providing the necessary feedback (image + label) to improve the model further, as illustrated in Figure 13-27.

Figure 13-27. The self-evolving model cycle
Just like a university student must graduate multiple years before getting ready to step into the real world, a model needs to go through phases of development before it reaches its final users. The following is a popular model of phasing releases in software, which is also a useful guideline for releasing AI models.
- 1. Dev
-
This is the initial phase of development in which the developers of the app are the only users of it. Data accumulation is slow, the experience is very buggy, and model predictions can be quite unreliable.
- 2. Alpha
-
After the app is ready to be tested by a few users beyond the developers, it is now considered to be in alpha. User feedback is extremely crucial here because it would serve to improve the app experience as well provide data at a greater scale to the pipeline. The experience is not nearly as buggy, and the model predictions are a little more reliable here. In some organizations, this phase is also known as dogfooding (i.e., internal application testing by employees).
- 3. Beta
-
An app in beta has significantly more users than in alpha. User feedback is also quite important here. The data collection rate is at an even larger scale. Many different devices are out in the real world collecting data to help improve the model rapidly. The experience is a lot more stable, and the model predictions are a lot more reliable, thanks to the alpha users. Beta apps tend to be hosted on Apple’s TestFlight for iOS and Google Play Console for Android. Third-party services such as HockeyApp and TestFairy are also popular for hosting beta programs.
- 4. Prod
-
An app in production is stable and is widely available. Although the data is coming in at large rates, the model is fairly stable at this point, and it does not learn as much. However, as real-world usage keeps growing, it’s able to get better at edge cases it might not have been seen before in the first three phases. When the model is mature enough, small version improvements can be alpha/beta tested or A/B tested on subsets of the production audience.
Although many data scientists assume the data to be available before starting development, people in the mobile AI world might need to bootstrap on a small dataset and improve their system incrementally.
With this self-evolving system for the Shazam for Food app, the most difficult choice that the developers must make should be the restaurants they visit to collect their seed data.
Case Studies
Let’s look at a few interesting examples that show how what we have learned so far is applied in the industry.
Lose It!
We need to confess here. The app we were building all along in this chapter already exists. Erlich Bachman’s dream was already built a year before by a Boston-based company named Fit Now. Lose It! (Figure 13-28) claims to have helped 30 million users lose 85 million pounds by tracking what they eat. Users can point their phone’s camera at barcodes, nutritional labels, and the food that they’re just about to eat to track calories and macros they’re consuming for every single meal.
The company first implemented its food scanning system with a cloud-based algorithm. Due to the resource demands and network delay, the experience could not be real time. To improve the experience, the Fit Now team migrated its models to TensorFlow Lite to optimize them for mobile and used ML Kit to seamlessly deploy to its millions of users. With a constant feedback loop, model updates, and A/B testing, the app keeps improving essentially on its own.
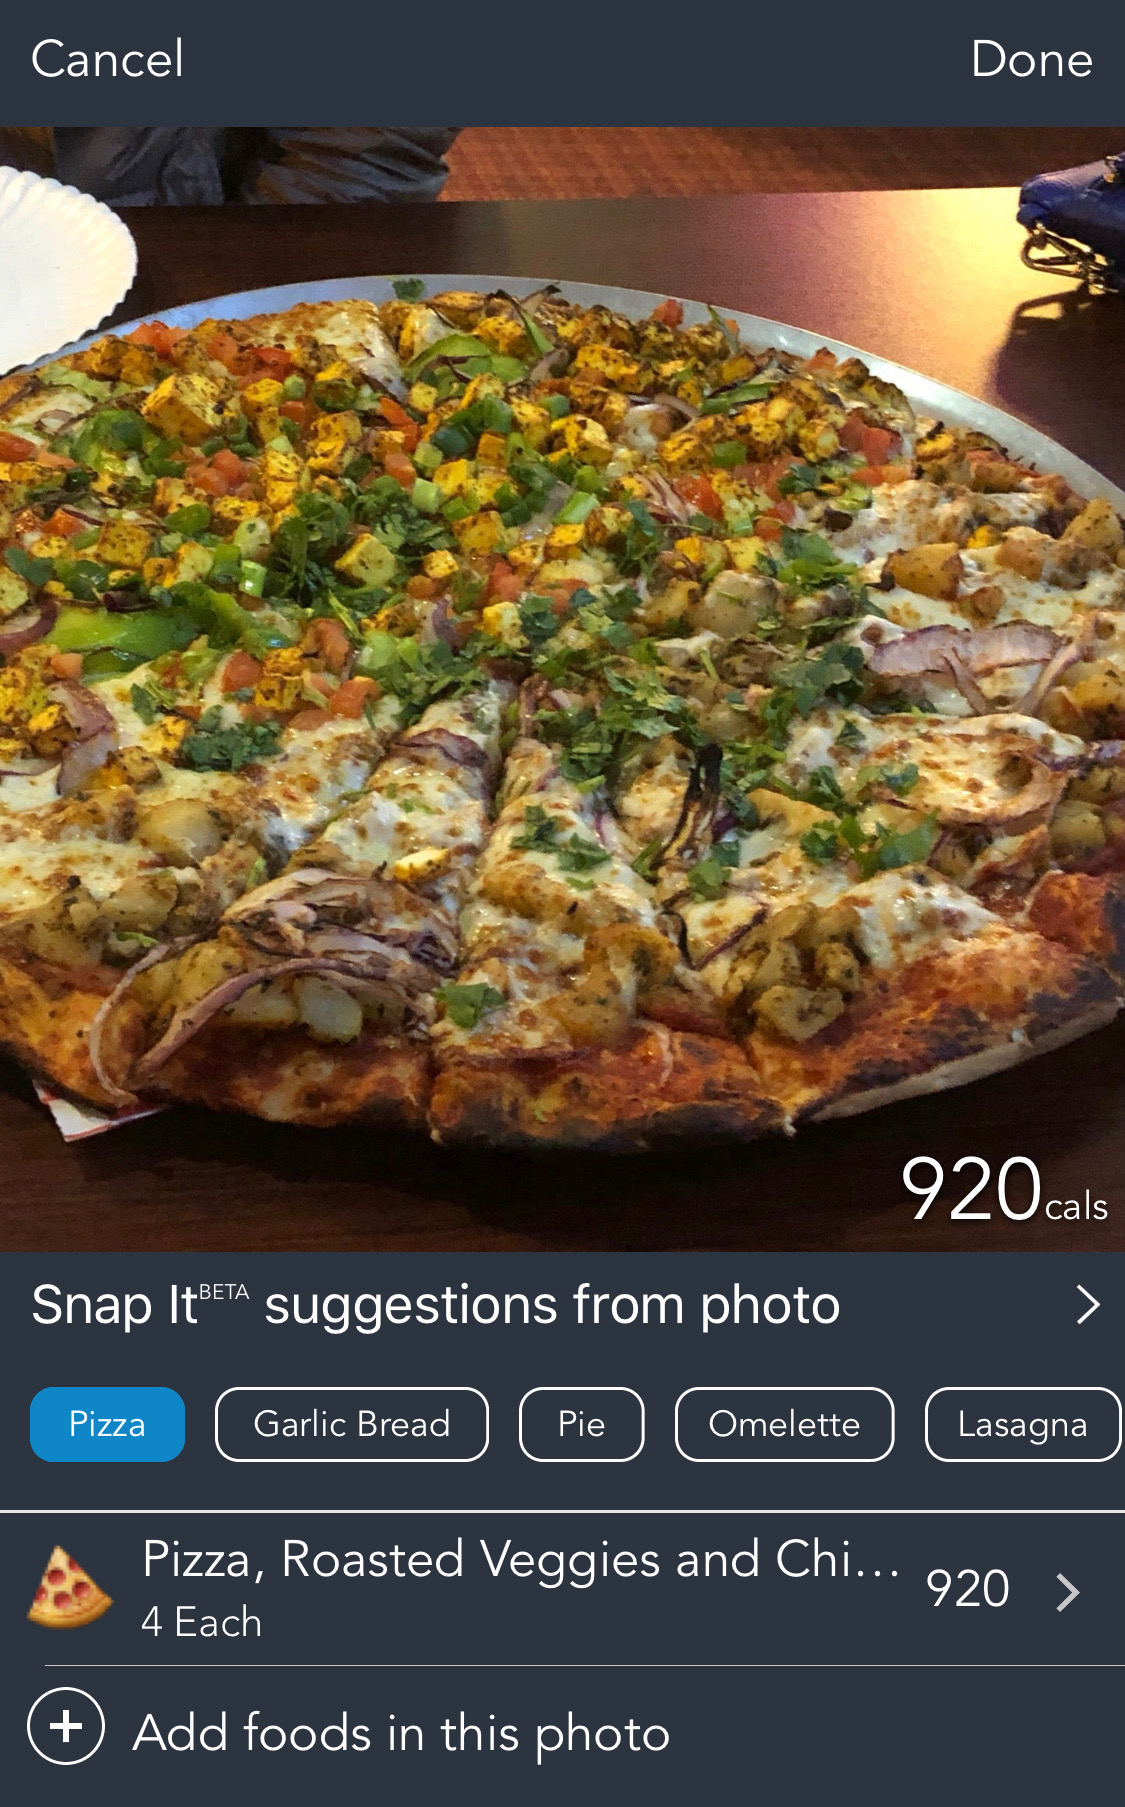
Figure 13-28. Snap It feature from Lose It! showing multiple suggestions for a scanned food item
Portrait Mode on Pixel 3 Phones
One of the key visual concepts that separates professional photographers from the amateur wannabes is bokeh, or blurring of the background behind the subject of the image. (Not to be confused with the Python visualization tool of the same name.) The closer the camera is located to the subject, the more the background appears blurred. With the help of professional lenses with a low f-stop number (which often run into the thousands of dollars), one can produce spectacular blurs.
But if you don’t have that kind of money, AI can help. Google’s Pixel 3 offers a “Portrait” mode that creates the bokeh effect. Essentially, it uses a CNN to estimate the depth of each pixel in a scene, and determine which pixels belong to the foreground and the background. The background pixels are then blurred to varying intensities to create the bokeh effect, as demonstrated in Figure 13-29.
Depth estimation is a compute-intensive task so running it fast is essential. Tensorflow Lite with a GPU backend comes to the rescue, with a roughly 3.5 times speedup over a CPU backend.
Google accomplished this by training a neural network that specializes in depth estimation. It used a rig with multiple phone cameras (which it termed “Frankenphone”) to take pictures of the same scene from slightly different viewpoints belonging to each camera. It then used the parallax effect experienced by each pixel to precisely determine the depth of each pixel. This depth map was then fed into the CNN along with the images.

Figure 13-29. Portrait effect on Pixel 3, which achieves separation between foreground and background using blurring
Speaker Recognition by Alibaba
Imagine speaking “Hey Siri” or “Hey Google” into a friend’s phone, followed by the magical words “read the last text.” From a privacy standpoint, it would be terrifying if this worked. Obviously, most mobile operating systems today ask us to unlock the phone first before proceeding. This creates a not-so-smooth experience for the owner of the phone.
Alibaba Machine Intelligence Labs solved this problem using the following approach. First, by converting speech into images of spectrograms (extracting audio features with mel-frequency cepstrum algorithm), training a CNN (using transfer learning), and finally deploying it to devices using Tensorflow Lite. That’s right: CNNs can do more than just computer vision!
By recognizing speakers, they are able to personalize the content on devices with many users in a family (e.g., in its “Talk to your TV” feature on its Netflix-like TV app). Additionally, by recognizing whether the sound is a human voice, it is able to isolate the spoken commands to transcribe from background noise. To make processing faster with Tensorflow Lite, engineers kept the USE_NEON flag to accelerate instruction sets for ARM-based CPUs. The team reported a speed increase of four times with this optimization.
Face Contours in ML Kit
Want to quickly build a Snapchat face filter–like functionality without getting a Ph.D.? ML Kit also provides the goods to do that—an API to identify facial contours, a set of points (in x and y coordinates) that follow the shape of facial features in the input image. In total, 133 points map to the various facial contours, including 16 points representing each eye, while 36 points map to the oval shape around the face, as demonstrated in Figure 13-30.
Internally, ML Kit is running a deep learning model using TensorFlow Lite. In experiments with the new TensorFlow Lite GPU backend, Google found an increase in speed of four times on Pixel 3 and Samsung Galaxy S9, and a six-times speedup on iPhone 7, compared to the previous CPU backend. The effect of this is that we can precisely place a hat or sunglasses on a face in real time.

Figure 13-30. 133 Face contour points identified by ML Kit (image source)
Real-Time Video Segmentation in YouTube Stories
Green screens are staple equipment for anyone in the video production industry. By choosing a color not matching the subject, the background can be changed during postproduction using the chroma keying technique. Obviously, this requires expensive software and powerful machines for postproduction. Many YouTubers have the same needs but might not have the budget. And now they have a solution within the YouTube Stories app—a real-time video segmentation option implemented over TensorFlow Lite.
The key requirements here are first, to run semantic segmentation fast (more than 30 frames per second), and second, be temporally consistent; for instance, achieving smooth frame-to-frame temporal continuity on the edges. If we attempt to run semantic segmentation over multiple frames, we’ll quickly notice the edges of many of the segmented masks bouncing around. The key trick employed here is to pass the segmented masks of the person’s face to the next frame as a prior. Because we traditionally work on three channels (RGB), the trick is to add a fourth channel, which essentially is the output of the previous frame, as illustrated in Figure 13-31.

Figure 13-31. An input image (left) is broken down into its three components layers (R, G, B). The output mask of the previous frame is then appended with these components (image source)
With other optimizations to the structure of the base CNN, the YouTube team was able to run the system at more than 100 frames per second on an iPhone 7, and faster than 40 frames per second on a Pixel 2. Additionally, comparing the CPU versus GPU backend of TensorFlow Lite, an increase in speed of 18 times is observed when choosing the GPU backend over the CPU backend (much more acceleration compared to the usual two to seven times for other semantic segmentation tasks for images only).
Summary
In this chapter, we discussed the architecture of TensorFlow Lite, as it relates to Android’s Neural Network API. We then worked on getting a simple object recognition app running on an Android device. We covered Google’s ML Kit and talked about the reasons why you might want to use it. We additionally went through how to convert our TensorFlow models to TensorFlow Lite format so that they could be used within an Android device. We finally discussed a couple of examples of how TensorFlow Lite is being used to solve real-world problems.
In the next chapter, we look at how we can use real-time deep learning to develop an interactive, real-world application.