
Namespaces
Even if you did not realize it, you have been using namespaces since the beginning of this book. For example, System, System.Diagnostics, and System.Data.SqlClient are all namespaces contained within the .NET Framework. Namespaces are an easy concept to understand; in short, the .NET Framework is built using a collection of libraries. These libraries allow for both a hierarchy of classes that are related to a given topic and horizontally for classes that fill in unrelated capabilities.
Namespaces are important to the CLR in that depending on which version of the .NET Framework you are targeting, which class libraries are available may change. As noted different .NET Platforms and Profiles provide an implementation for different features. As such when selecting which version of the .NET Framework and CLR your application will run against, you are selecting which namespaces should be available to it.
What Is a Namespace?
Namespaces are a way of organizing the vast number of classes, structures, enumerations, delegates, and interfaces that a version of the .NET Framework class library provides. They are a hierarchically structured index into a class library, which is available to all of the .NET languages, not only the Visual Basic 2012 language (with the exception of the My namespace). The namespaces, or object references, are typically organized by function. For example, the System.IO namespace contains classes, structures, and interfaces for working with input/output streams and files. The classes in this namespace do not necessarily inherit from the same base classes (apart from Object, of course).
A namespace is a combination of a naming convention and an assembly, which organizes collections of objects and prevents ambiguity about object references. A namespace can be, and often is, implemented across several physical assemblies, but from the reference side, it is the namespace that ties these assemblies together. A namespace consists of not only classes, but also other (child) namespaces. For example, IO is a child namespace of the System namespace.
Namespaces provide identification beyond the component name. With a namespace, it is possible to use a more meaningful title (for example, System) followed by a grouping (for example, Text) to group together a collection of classes that contain similar functions. For example, the System.Text namespace contains a powerful class called StringBuilder. To reference this class, you can use the fully qualified namespace reference of System.Text.StringBuilder, as shown here:
Dim sb As New System.Text.StringBuilder()
The structure of a namespace is not a reflection of the physical inheritance of classes that make up the namespace. For example, the System.Text namespace contains another child namespace called RegularExpressions. This namespace contains several classes, but they do not inherit or otherwise reference the classes that make up the System.Text namespace.
Figure 2.7 shows how the System namespace contains the Text child namespace, which also has a child namespace, called RegularExpressions. Both of these child namespaces, Text and RegularExpressions, contain a number of objects in the inheritance model for these classes, as shown in the figure.
Figure 2.7 Logical class relationships in namespace

As shown in Figure 2.7, while some of the classes in each namespace do inherit from each other, and while all of the classes eventually inherit from the generic Object, the classes in System.Text.RegularExpressions do not inherit from the classes in System.Text.
To emphasize the usefulness of namespaces, we can draw another good example from Figure 2.7. If you make a reference to System.Drawing.Imaging.Encoder in your application, then you are making a reference to a completely different Encoder class than the namespace shown in Figure 2.7—System.Text.Encoder. Being able to clearly identify classes that have the same name but very different functions, and disambiguate them, is yet another advantage of namespaces.
The System namespace, imported by default as part of every project created with Visual Studio, contains not only the default Object class, but also many other classes that are used as the basis for every .NET language.
What if a class you need isn't available in your project? The problem may be with the references in your project. For example, by default, the System.DirectoryServices namespace, used to get programmatic access to the Active Directory objects, is not part of your project's assembly. Using it requires adding a reference to the project assembly.
In fact, with all this talk about referencing, it is probably a good idea to look at an example of adding an additional namespace to a project. Before doing that, though, you should know a little bit about how a namespace is actually implemented.
Namespaces are implemented within .NET assemblies. The System namespace is implemented in an assembly called System.dll provided with Visual Studio. By referencing this assembly, the project is capable of referencing all the child namespaces of System that happen to be implemented in this assembly. Using the preceding table, the project can import and use the System.Text namespace, because its implementation is in the System.dll assembly. However, although it is listed, the project cannot import or use the System.Data namespace unless it references the assembly that implements this child of the System namespace, System.Data.dll.
You will now create a sample project so you can examine the role that namespaces play within it. Using Visual Studio 2012, create a new Visual Basic Console Application project; for the download this project was called ProVB_Namespaces.
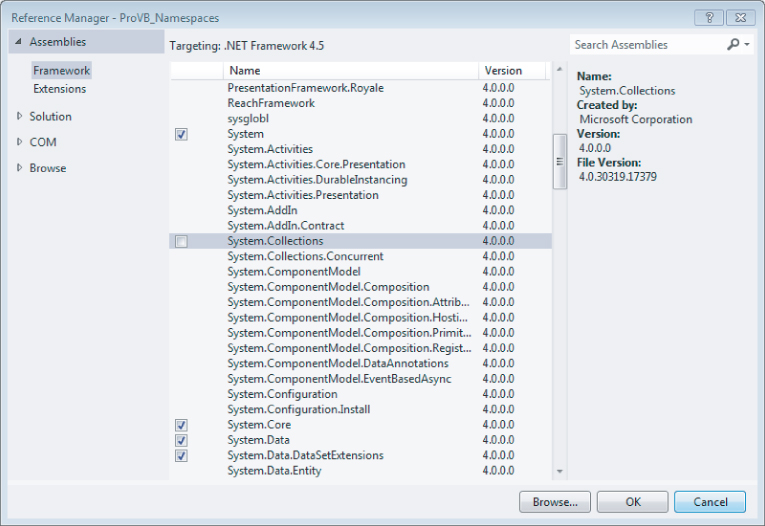
The System.Collections library is not, by default, part of Visual Basic 2012 console applications. To gain access to the classes that this namespace provides, you need to add it to your project. You can do this by using the Add Reference dialog (available by right-clicking the Project Name node within the Visual Studio Solution Explorer). The Add Reference dialog has four tabs, each containing elements that can be referenced from your project:
The Add Reference dialog is shown in Figure 2.8. The available .NET namespaces are listed by component name. This is the equivalent of the namespace name.
Figure 2.8 Reference Manager
Namespaces and References
The list of default references automatically included varies depending on the type of project. By right-clicking on your project and going to the References tab you see the list shown in Figure 2.9. If the project type were an ASP.NET Web service (not shown), then the list would include references to the System.Web and System.Web.Services namespaces.
Figure 2.9 Properties Window showing References

In addition to making the namespaces available, references play a second important role in your project. One of the advantages of .NET is using services and components built on the common language runtime (CLR), which enables you to avoid DLL conflicts. The various problems that can occur related to DLL versioning, commonly referred to as DLL hell, involve two types of conflict.
The first situation occurs when you have a component that requires a minimum DLL version, and an older version of the same DLL causes your product to break. The alternative situation is when you require an older version of a DLL, and a new version is incompatible. In either case, the result is that a shared file, outside of your control, creates a system-wide dependency that affects your software. With .NET, it is possible, but not required, to indicate that a DLL should be shipped as part of your project to avoid an external dependency.
To indicate that a referenced component should be included locally, you can select the reference in the Solution Explorer and then examine the properties associated with that reference. One editable property is called Copy Local. You will see this property and its value in the Properties window within Visual Studio 2012. For those assemblies that are part of a Visual Studio 2012 installation, this value defaults to False, as shown in Figure 2.9. However, for custom references, this property defaults to True to indicate that the referenced DLL should be included as part of the assembly. Changing this property to True changes the path associated with the assembly. Instead of using the path to the referenced file's location on the system, the project copies the referenced DLL into your application's runtime folder.
The benefit of this is that even when another version of the DLL is later placed on the system, your project's assembly will continue to call its local copy. However, this protection from a conflicting version comes at a price: Future updates to the namespace assembly to fix flaws will be in the system version, but not in the private version that is part of your project's assembly.
To resolve this, Microsoft's solution is to place new versions in directories based on their version information. If you examine the path information for all of the Visual Studio 2012 references, you will see that it includes a version number. As new versions of these DLLs are released, they are installed in a separate directory. This method allows for an escape from DLL hell by keeping new versions from overwriting old versions, and it enables old versions to be easily located for maintenance updates. Therefore, it is often best to leave alone the default behavior of Visual Studio 2012, which is set to copy only locally custom components, until your organization implements a directory structure with version information similar to that of Microsoft.
Visual Studio 2012 will not allow you to add a reference to your assembly if the targeted implementation includes a reference that is not also referenced in your assembly. The good news is that the compiler will help. The compiler will flag references to invalid namespaces with underlining, similar to the Microsoft Word spelling or grammar error underlines. When you click the underlined text, the compiler will either tell you which other assemblies need to be referenced in the project in order to use the class in question, or indicate that the namespace isn't available.
Common Namespaces
Every Visual Basic 2012 project includes the namespace Microsoft.VisualBasic. This namespace is part of the Visual Studio project templates for Visual Basic 2012 and is, in short, what makes Visual Basic 2012 different from C# or any other .NET language. The implicit inclusion of this namespace is the reason why you can call IsDBNull and other methods of Visual Basic 2012 directly. The only difference in the default namespaces included with Visual Basic 2012 and C# application projects is that the former use Microsoft.VisualBasic and the latter use Microsoft.CSharp.
Figure 2.9 shows an example of the namespaces that are imported automatically for a console application. Of course, to really make use of the classes and other objects in this list, you need more detailed information. In addition to resources such as Visual Studio 2010's help files, the best source of information is the Object Browser, available directly in the Visual Studio 2012 IDE. You can find it by selecting View ⇒ Object Browser if you are using Visual Studio 2012, 2010, 2005, or 2003. The Visual Studio 2012 Object Browser is shown in Figure 2.10.
Figure 2.10 Object Browser
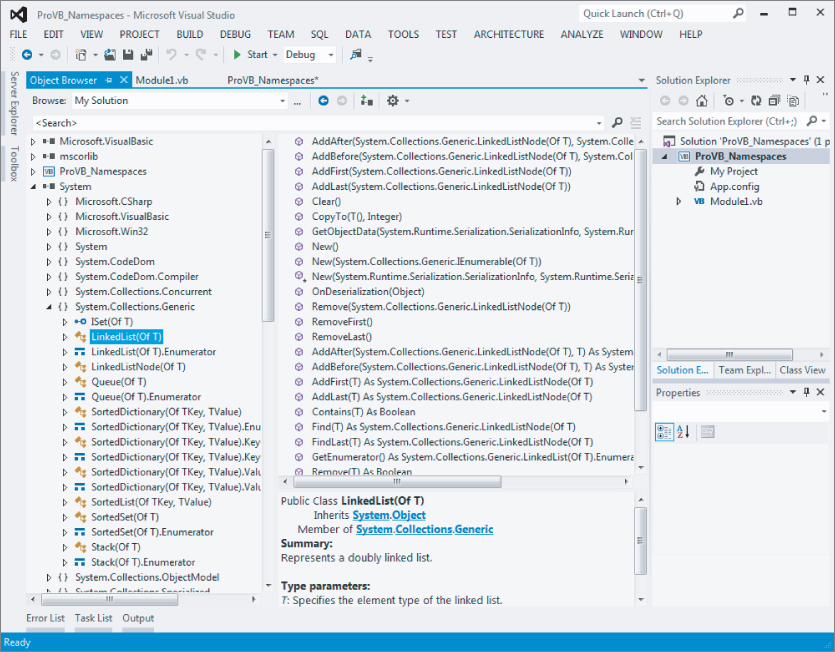
The Object Browser displays each of the referenced assemblies and enables you to drill down into the various namespaces. Figure 2.10 illustrates how the System.dll implements a number of namespaces, including some that are part of the System namespace. By drilling down into a namespace, you can see some of the classes available. By further selecting a class, the browser shows not only the methods and properties associated with the selected class, but also a brief outline of what that class does.
Using the Object Browser is an excellent way to gain insight into which classes and interfaces are available via the different assemblies included in your project, and how they work. Clearly, the ability to actually see which classes are available and know how to use them is fundamental to being able to work efficiently. Working effectively in the .NET CLR environment requires finding the right class for the task.
Importing and Aliasing Namespaces
Not all namespaces should be imported at the global level. Although you have looked at the namespaces included at this level, it is much better to import namespaces only in the module where they will be used. As with variables used in a project, it is possible to define a namespace at the module level. The advantage of this is similar to using local variables in that it helps to prevent different namespaces from interfering with each other. As this section shows, it is possible for two different namespaces to contain classes or even child namespaces with the same name.
Importing Namespaces
The development environment and compiler need a way to prioritize the order in which namespaces should be checked when a class is referenced. It is always possible to unequivocally specify a class by stating its complete namespace path. This is referred to as fully qualifying your declaration. The following example fully qualifies a StringBuilder object:
Dim sb = New System.Text.StringBuilder
However, if every reference to every class needed its full namespace declaration, then Visual Basic 2010 and every other .NET language would be very difficult to program in. After all, who wants to type System.Collections.ArrayList each time an instance of the ArrayList class is wanted? If you review the global references, you will recall we added a reference to the System.Collections namespace. Thus, you can just type ArrayList whenever you need an instance of this class, as the reference to the larger System.Collections namespace has already been made by the application.
In theory, another way to reference the StringBuilder class is to use Text.StringBuilder, but with all namespaces imported globally, there is a problem with this, caused by what is known as namespace crowding. Because there is a second namespace, System.Drawing, that has a child called Text, the compiler does not have a clear location for the Text namespace and, therefore, cannot resolve the StringBuilder class. The solution to this problem is to ensure that only a single version of the Text child namespace is found locally. That way, the compiler will use this namespace regardless of the global availability of the System.Drawing.Text namespace.
Imports statements specify to the compiler those namespaces that the code will use:
Imports Microsoft.Win32
Imports System
Imports SysText = System.Text
Once they are imported into the file, you are not required to fully qualify your object declarations in your code. For instance, if you imported the System.Data.SqlClient namespace into your file, then you would be able to create a SqlConnection object in the following manner:
Dim conn As New SqlConnection
Each of the preceding Imports statements illustrates a different facet of importing namespaces. The first namespace, Microsoft.Win32, is not imported at the global level. Looking at the reference list, you may not see the Microsoft assembly referenced directly. However, opening the Object Browser reveals that this namespace is actually included as part of the System.dll.
As noted earlier, the StringBuilder references become ambiguous because both System.Text and System.Drawing.Text are valid namespaces at the global level. As a result, the compiler has no way to determine which Text child namespace is being referenced. Without any clear indication, the compiler flags Text.StringBuilder declarations in the command handler. However, using the Imports System declaration in the module tells the compiler that before checking namespaces imported at the global level, it should attempt to match incomplete references at the module level. Because the System namespace is declared at this level, if System.Drawing is not, then there is no ambiguity regarding to which child namespace Text.StringBuilder belongs.
This sequence demonstrates how the compiler looks at each possible declaration:
- It first determines whether the item is a complete reference, such as System.Text.StringBuilder.
- If the declaration does not match a complete reference, then the compiler tries to determine whether the declaration is from a child namespace of one of the module-level imports.
- Finally, if a match is not found, then the compiler looks at the global-level imports to determine whether the declaration can be associated with a namespace imported for the entire assembly.
While the preceding logical progression of moving from a full declaration through module-level to global-level imports resolves the majority of issues, it does not handle all possibilities. Specifically, if you import System.Drawing at the module level, the namespace collision would return. This is where the third Imports statement becomes important—this Imports statement uses an alias.
Aliasing Namespaces
Aliasing has two benefits in .NET. First, aliasing enables a long namespace such as System.EnterpriseServices to be replaced with a shorthand name such as COMPlus. Second, it adds a way to prevent ambiguity among child namespaces at the module level.
As noted earlier, the System and System.Drawing namespaces both contain a child namespace of Text. Because you will be using a number of classes from the System.Drawing namespace, it follows that this namespace should be imported into the form's module. However, were this namespace imported along with the System namespace, the compiler would again find references to the Text child namespace ambiguous. By aliasing the System.Drawing namespace to SysDraw, the compiler knows that it should check the System.Drawing namespace only when a declaration begins with that alias. The result is that although multiple namespaces with the same child namespace are now available at the module level, the compiler knows that one (or more) of them should be checked at this level only when they are explicitly referenced.
Aliasing as defined here is done in the following fashion:
Imports SysText = System.Text
Referencing Namespaces in ASP.NET
Making a reference to a namespace in ASP.NET is quite similar to working with Windows applications, but you have to take some simple, additional steps. From your ASP.NET solution, first make a reference to the assemblies from the References folder, just as you do with Windows Forms. Once there, import these namespaces at the top of the page file in order to avoid having to fully qualify the reference every time on that particular page.
For example, instead of using System.Collections.Generic for each instance, use the < %# Import % > page directive at the top of the ASP.NET page (if the page is constructed using the inline coding style) or use the Imports keyword at the top of the ASP.NET page's code-behind file (just as you would with Windows Forms applications). The following example shows how to perform this task when using inline coding for ASP.NET pages:
<%# Import Namespace="System.Collections.Generic" %>
Now that this reference is in place on the page, you can access everything this namespace contains without having to fully qualify the object you are accessing. Note that the Import keyword in the inline example is not missing an “s” at the end. When importing in this manner, it is Import (without the “s”) instead of Imports—as it is in the ASP.NET code-behind model and Windows Forms.
In ASP.NET 1.0/1.1, if you used a particular namespace on each page of your application, you needed the Import statement on each and every page where that namespace was needed. ASP.NET 3.5 introduced the ability to use the web.config file to make a global reference so that you don't need to make further references on the pages themselves, as shown in the following example:
<pages>
   <namespaces>
      <add namespace="System.Drawing" />
      <add namespace="Wrox.Books" />
   </namespaces>
</pages>
In this example, using the <namespaces> element in the web.config file, references are made to the System.Drawing namespace and the Wrox.Books namespace. Because these references are now contained within the web.config file, there is no need to again reference them on any of the ASP.NET pages contained within this solution.