
Building Windows 8 Style Apps with HTML and JavaScript
In the previous chapter you saw how to build Windows 8 style apps using Visual Basic and XAML. You can also build these kinds of apps using HTML and JavaScript. You'll take a brief look at how to do so by building a sample application similar to the others you've built in this chapter.
The key to building Windows 8 style apps with Web technologies is the Windows Library for JavaScript (WinJS). Not only does it include a set of controls you can use to build the interface for your applications, but it includes functionality that enables us to call services, interact with Windows, and much more. The sample application demonstrates how to use WinJS controls and how to use WinJS to call Web services and to enable data-binding. Note that you'll only be able to build and run the sample application if you are using Windows 8.
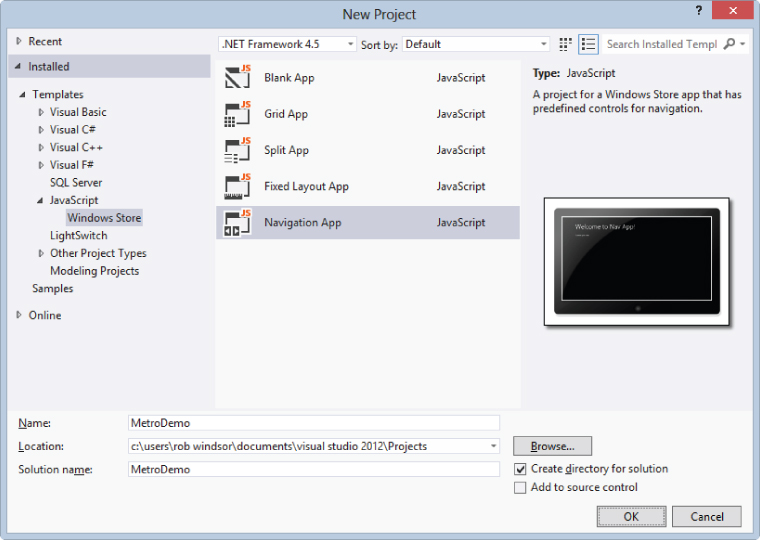
Open Visual Studio and select File ⇒ New ⇒ Project. In the New Project dialog, select the Installed ⇒ Templates ⇒ JavaScript ⇒ Windows Store category on the left, then select the Navigation App template, set the Name to MetroDemo, and click the OK button (see Figure 14.56).
Figure 14.56 Creating a Windows 8 style app project
When the project has been created, expand the pages and home nodes in the Solution Explorer. You should see something similar to Figure 14.57.
Figure 14.57 Files added by the project template
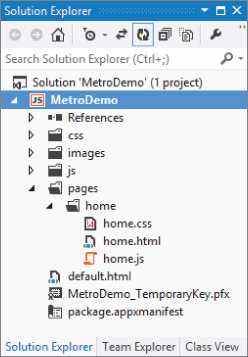
In a navigation app, default.html is the shell page. Home.html and the other custom content you'll create are PageControls that get inserted into the shell. It's somewhat analogous to the master and content pages you saw in Web Forms. You'll update home.html to show a list of products grouped by category, and then you'll create a new page control to show the product details when a product is selected.
Before you build your first page, you'll examine how to use WinJS with markup in a little more detail. Instead of having custom tags to represent controls you use <div> tags with a data-win-control attribute. If you set the value of this attribute to “WinJS.UI.Rating” you get a Rating control, if you set it to “WinJS.UI.ListView” you get a ListView control, and so on.
You use the win-data-bind attribute to configure data-binding. The value of this attribute is a set of name value pairs. For example, say you are binding to the Ipoh Coffee product in the Northwind database. Setting the value of win-data-bind to “innerText: ProductName; id: ProductID” on an <h2> tag would result in <h2 id="43">Ipoh Coffee</h2>.
Now that you have an overview of WinS, you can implement your first PageControl. Open pageshomehome.html and set the text of the <span> tag in the header to Products. Then replace the main content section with the contents of the code snippet below. In this markup you have three WinJS controls, a ListView, and two Templates. The Templates are used to represent the markup that will be contained in the ListView. You'll configure the ListView to use these Templates in the code-behind for the page.
Recall that the product data will be shown grouped by category. The first Template defines how the category will be shown. It will be an <h2> tag with the category name as the text. The second Template defines how each of the products will be shown. It will be in a blue square (a tile) with the name of the product shown inside (code file: pageshomehome.html).
<section aria-label="Main content" role="main">
    <div id="productsHeaderTemplate"
        data-win-control="WinJS.Binding.Template">
        <div>
            <h2 data-win-bind="innerText: category"></h2>
        </div>
    </div>

    <div id="productsTemplate"
        data-win-control="WinJS.Binding.Template">
        <div style="width: 200px; height: 130px; background-color: #557EB9">
            <h4 data-win-bind="innerText:name" />
        </div>
    </div>

    <div id="productsList" data-win-control="WinJS.UI.ListView" />
</section>
Now open pageshomehome.js. This is the code-behind for the page. The first thing to note is this piece of code near the top of the file: WinJS.UI.Pages.define("/pages/home/home.html"); this creates the PageControl and links the code-behind to the markup for the page.
Inside the define method you also have the ready function, which is called after the page control contents have been loaded. This is where you'll put your code. Implement the ready function with the code shown in the code snippet below. There's quite a bit going on here; you'll go through it step by step.
The first thing you'll do is create a variable of type WinJS.Binding.List to store the data you are going to bind to the ListView. Then you'll use WinJS to call the REST service you created in the last part of this chapter to get the product data. The code to do this is very similar to what you saw earlier, except instead of using jQuery's ajax and done functions you're using WinJS's xhr and then methods. Note that you may need to change the host address in the code snippet below to match that used by the REST service. Once you have the data, which comes to us as a string, you'll parse it into an array of JSON objects and use that array to populate the binding list.
You want to show the product data grouped by category, so you'll use the binding list's createGrouped function to do the grouping. The first parameter is used to determine which groups there are, and the second is used to determine which items belong in each group. Once you have the grouped data you can bind it to the ListView.
You get a reference to the ListView using the winControl property of the <div> element that contains it. You can then set the data sources for the items and groups and configure the templates.
Finally you want to attach an event handler for when one of the product tiles is clicked. When this happens you want to navigate to a page that shows the details for the product (you'll create this page control next). When you navigate you want to pass a reference to the item from the binding list associated with the product that was clicked. The target page will use it to retrieve the appropriate item data (code file: pageshomehome.js).
ready: function (element, options) {
    // Create an observable list for data-binding
    var products = new WinJS.Binding.List();

    // Get the product data and populate the binding list
    WinJS.xhr({
        url: "http://localhost:62830/api/products"
    }).then(function (xhr) {
        var data = JSON.parse(xhr.response);
        data.forEach(function (i) {
            var item = {
                id: i.ProductID,
                name: i.ProductName,
                category: i.CategoryName
            }
            products.push(item);
        });
    });

    // Group the product data by category
    var groupedProducts = products.createGrouped(
        function (i) { return i.category; },
        function (i) { return { category: i.category } }
    );

    // Get a reference to the ListView
    var lstCategories = document.getElementById("productsList").winControl;

    // Set the data sources and templates used by the ListView
    lstCategories.itemDataSource = groupedProducts.dataSource;
    lstCategories.itemTemplate = document.getElementById("productsTemplate");
    lstCategories.groupDataSource = groupedProducts.groups.dataSource;
    lstCategories.groupHeaderTemplate =
        document.getElementById("productsHeaderTemplate");

    // Add an event handler for when a product tile is clicked
    lstCategories.addEventListener("iteminvoked", function (e) {
        var item = groupedProducts.getAt(e.detail.itemIndex);
        WinJS.Navigation.navigate("/pages/detail/detail.html", item);
    });
}
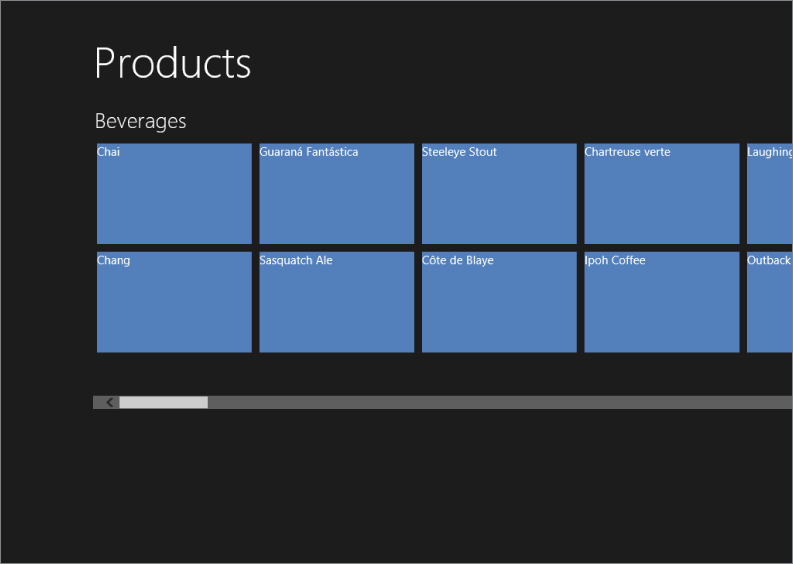
Open another instance of Visual Studio and open the JavaScriptDemo project you created earlier. Press F5 to start this application and leave it running so you can make calls to the REST service. Now switch back to the MetroDemo project and press F5 to run it. You should see something similar to what is shown in Figure 14.58.
Figure 14.58 Showing products grouped by category
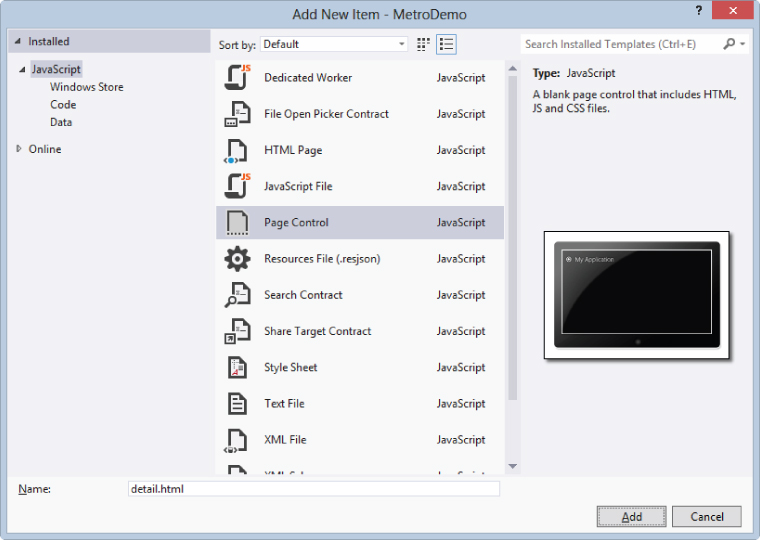
Now you'll create the page to show the product details. In the Solution Explorer, right-click on the pages folder and create a new folder named detail. Then right-click on the newly created folder and select Add ⇒ New Item. In the Add New Item dialog select the Page Control template, set the Name to detail.html, and click the Add button (see Figure 14.59).
Figure 14.59 Adding the detail page control
Open detail.html and set the text of the <span> tag in the header to Product Detail. In the main content section add the markup to show the properties of a product in text box controls. You can use a <fieldset> as you did in the Web Pages sample or a table as, shown in the following code snippet. You could use data-binding to populate the controls, but it's really unnecessary in such a simple page. You populate the control values the old-fashioned way, with JavaScript code (code file: pagesdetaildetail.html).
<section aria-label="Main content" role="main">
    <div style="padding-left:50px; width:80%">
        <table>
            <tr>
                <td>Product:</td>
                <td>
                    <input id="ProductName" type="text" />
                </td>
            </tr>
            <tr>
                <td>Quantity Per Unit:</td>
                <td>
                    <input id="QuantityPerUnit" type="text" />
                </td>
            </tr>
            <tr>
                <td>Unit Price:</td>
                <td>
                    <input id="UnitPrice" type="text" />
                </td>
            </tr>
            <tr>
                <td>Units in Stock:</td>
                <td>
                    <input id="UnitsInStock" type="text" />
                </td>
            </tr>
            <tr>
                <td>Units on Order:</td>
                <td>
                    <input id="UnitsOnOrder" type="text" />
                </td>
            </tr>
        </table>
    </div>
</section>
Now open detail.js and implement the ready function as shown in the code snippet below. This code is pretty simple. The options parameter contains a reference to the object from the binding list associated with the product selected by the user. The id property of this object contains the product ID. You'll use this ID in a call to the REST service to get the product data and then use that data to populate the text box controls on the page. Again note that you may have to change the host address used in the service call to match that used by the REST service (code file: pagesdetaildetail.js).
ready: function (element, options) {
    WinJS.xhr({
        url: "http://localhost:62830/api/products/" + options.id
    }).then(function (xhr) {
        var data = JSON.parse(xhr.response);
        document.getElementById("ProductName").value = data.ProductName;
        document.getElementById("QuantityPerUnit").value = data.QuantityPerUnit;
        document.getElementById("UnitPrice").value = data.UnitPrice;
        document.getElementById("UnitsInStock").value = data.UnitsInStock;
        document.getElementById("UnitsOnOrder").value = data.UnitsOnOrder;
    });
},
Run the JavaScriptDemo application if it's not running and then run the MetroDemo application. When the product list appears, click on one of the product tiles, and you should be redirected to a page that looks similar to the one shown in Figure 14.60.
Figure 14.60 Product details
