
Defining Your Application UAC Settings
By default in Visual Studio, your application settings include information related to UAC. It is possible to create your application so that it ships with certain permissions. Within your application manifest you'll find the section requestedPrivileges. This section is where the requested UAC execution level for your application is defined. Note that these settings are applicable to Windows Store applications that run on Windows RT.
To get to your application manifest, right-click on your project in Solution Explorer and select Properties. In the Properties pane, select the Application tab and there you'll find a button labeled View Windows Settings. Selecting this button will open your application manifest (app.manifest) XML file in the editor window. Within the XML, you'll find the requestedPrivileges node, a copy of which is shown in the code block that is part of Listing 18.1.
Listing 18.1 : Manifest Level Rights—My Projectapp.manifest
      <requestedPrivileges xmlns="urn:schemas-microsoft-com:asm.v3">
        <!-- UAC Manifest Options
            If you want to change the Windows User Account Control level
                 replace the
            requestedExecutionLevel node with one of the following.

        <requestedExecutionLevel  level="asInvoker" uiAccess="false" />
        <requestedExecutionLevel  level="requireAdministrator" uiAccess="false" />
        <requestedExecutionLevel  level="highestAvailable" uiAccess="false" />

            Specifying requestedExecutionLevel node will disable file and registry
            virtualization. If you want to utilize File and Registry
               Virtualization
            for backward compatibility then delete the
               requestedExecutionLevel node.-->
        <requestedExecutionLevel level="asInvoker" uiAccess="false" />
      </requestedPrivileges>
The beauty of this XML is that Microsoft took the time to include meaningful XML comments about the requestedExecutionLevel setting. By default, as shown in the preceding snippet, your application requests to run asInvoker. Thus, as discussed earlier when looking at which group you are running as, this means you are running as a user, not an administrator.
As the comments make clear, it is possible to change this to requireAdministrator, so make this change. Next ensure that you have both the Sub DisplayPrincipalIdentity() and the Sub TestFileIOPermission() uncommented in the button's click event handler within the ProVB2012_Security project.
Finally, within the Sub TestFileIOPermission(), ensure that you have restored which block is commented out; the code should look like the previous listing where the bottom half of the method is commented and the top half is uncommented. Now that you have indicated that this application requires administrator privileges, you can repeat the first test where the user account didn't have permission to write to NoPermission.txt, but where the code attempted to grant permission. Note, this test depends on the Administrator having permission to access the file C:TestNoPermission.txt. Save your change to the app.manifest and attempt to run the application. If you are running on Windows 7 and didn't start Visual Studio using Run as Administrator, you should get the error shown in Figure 18.7.
Figure 18.7 Elevated permissions dialogue
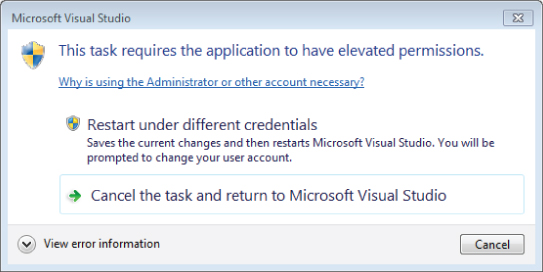
What happened? As noted previously, the error message in Figure 18.7 is dependent on having not started Visual Studio with the Run as Administrator option from the right-click context menu. Since Visual Studio is running under your downgraded rights at the level of user, when it attempts to create a new process with the rights for administrator, the system refuses.
Just as you can't use code access security to grant the running account additional rights, you can't use the application manifest for the same purpose. The operating system knows that the current process has only user rights, so when you attempt to have that process spawn a new debugging process with administrator rights, the operating system throws an error.
You can get around this in one of two ways. The first, obviously, is to start or restart Visual Studio running as Administrator. Alternatively, you can go to the bin/debug folder and manually start the ProVB2012_Security.exe executable outside of the debugger. In either case you should now be prompted to grant administrator rights to this assembly, because the current code does not sign the assembly. Accepting this grant of elevated privileges, the results should be similar to what is shown in Figure 18.8.
Figure 18.8 Output when running as an administrator

The successful completion of the Run Code button highlights two important points. First, as shown in Figure 18.8, the fact that the WSheldon account is in fact an administrator is now reflected in the onscreen permission display. Second, no error was thrown in the attempt to write the NoPermission.txt because the application is now running with the rights of an Administrator.
Regarding the uiAccess setting within the application manifest, this Boolean value defaults to false, and in most cases this is the correct setting. Changing this value to true will allow your code to update the user interface that is part of another assembly. However, setting this to true means that the application must be signed and that it must run from a trusted location.
As noted, signing your application will make the elevated privileges warning more meaningful and user friendly. Application signing is typically done during deployment, as discussed in Chapter 17, “Assemblies and Reflection.” It is not suggested that you just go in and start marking all of your applications with the requireAdministrator flag. Instead, you should elevate a user's rights when those rights are needed. Unfortunately, this option is available only at the time your application starts, but there is an important capability involved. In short, if you mark your application as essentially requiring Administrator rights, only administrators will be able to run the application.
Thus, the third application activation alternative is to use the highestAvailable setting. This setting allows both users and administrators to run your application. Within your application code, you'll need to check what privileges are available to the current user. As demonstrated earlier in this chapter, this will allow you to enable or disable application features depending upon whether the current user is an administrator.
Security Tools
Microsoft provides many security tools in its .NET SDK. Most of these tools are console-based utility applications. These tools can be used to help implement the security processes outlined earlier. They are not described in great detail, though they do deserve a review. Basically, two groups of tools are provided with the SDK:
Table 18.4 describes the permissions and assembly management tools. Table 18.5 describes the certificate management tools.
Table 18.4 Permissions and Assembly Management Tools
| Program Name | Description |
| Storeadm.exe | An administrative tool for isolated storage management. It restricts code access to the file system. |
| Peverify.exe | Checks whether the executable file will pass the runtime test for type-safe coding. |
| Sn.exe | Creates assemblies with strong names—that is, a digitally signed namespace and version information. |
Table 18.5 Certificate Management Tools
| Program Name | Description |
| Makecert.exe | Creates an X.509 certificate for testing purposes. |
| Certmgr.exe | Assembles certificates into a CTL (Certificate Trust List). It can also be used for revoking certificates. |
| Cert2spc.exe | Creates an SPC (Software Publisher Certificate) from an X.509 certificate. |
Exceptions Using the SecurityException Class
Originally, using the .NET Framework versions 1.0/1.1, the SecurityException class provided very little information in terms of actually telling you what was wrong and why an exception was thrown. Due to this limitation, the .NET Framework 2.0 added a number of new properties to the SecurityException class. Table 18.6 details some of these properties.
Table 18.6 Common SecurityException Properties
| Property | Description |
| Action | Retrieves the security action that caused the exception to occur |
| Data | Gets a collection of key/value pairs that provide user-defined information about an exception |
| Demanded | Returns the permissions, permission sets, or permission set collections that caused the error to occur |
| DenySetInstance | Returns the denied permissions, permission sets, or permission set collections that caused the security actions to fail |
| FailedAssemblyInfo | Returns information about the failed assembly |
| FirstPermissionThatFailed | Returns the first permission contained in the permission set or permission set collection that failed |
| GrantedSet | Returns the set of permissions that caused the security actions to fail |
| HelpLink | Gets or sets a link to a help file associated with this error |
| InnerException | A reference to an earlier exception that triggered the current exception |
| Method | Returns information about the method connected to the exception |
| PermissionState | Returns the state of the permission that threw the exception |
| PermissionType | Returns the type of the permission that threw the exception |
| PermitOnlySetInstance | Returns a permission set or permission set collection that is part of the permit-only stack frame if a security action has failed |
| RefusedSet | Returns the permissions that were refused by the assembly |
| Source | Gets or sets the name of the application or object that triggered the error |
| Url | Returns the URL of the assembly that caused the exception |
| Zone | Returns the zone of the assembly that caused the exception |
Clearly, you can get your hands on a lot of information if a security exception is thrown in your application. For instance, you can use something similar to the following Catch section of code to check for security errors:
Dim myFile as FileInfo

Try
   myFile = _
      My.Computer.FileSystem.GetFileInfo("C:TestNoPermission.txt")
Catch ex As Security.SecurityException
   MessageBox.Show(ex.Method.Name.ToString())
End Try