
10
Animating a Simple Sequence
Up to this point, we have learned all about rigging a character for animation. Now, we will put that character into a scene and have them move around, talk, and interact with a second character. We will be splitting this task over this chapter and the next – here we will start with some of the more simple tasks, and work up to creating a more cohesive scene in the next chapter.
So, in this chapter, we will be laying down key moments and actions to plug into the scene. We will record dialogue using our camera and mic, as well as using the external audio lip-sync feature. With these actions in place, we can then arrange and polish what we have created in the next chapter.
More specifically, we will be covering the following:
- Assembling the set
- Positioning the characters in the scene
- Recording dialogue
Technical requirements
For this chapter, we will reference Version 7 in the Chat_With_Chaz Character Animator project file. We will also reference Alien_Guest_v2.psd, which is a rig that is set up similarly to Chaz, but there are some minor differences. You may find exploring the rig layout to be useful, but it’s not required. An audio file labeled alien_line.wav will be referenced. Also, we will use the following images to build our set:
- BG.png
- CAMERA.png
- GUEST CHAIR.png
- HOST CHAIR.png
- STUDIO LIGHT.png
- TABLE.png
With that said, let’s start by building our set and laying out the first frame.
Assembling the set
When you load Version 7, Alien_Guest_v2.psd will already be in your project panel, rigged and ready. But what about a background or set? Setting our characters on a white background may be a bit boring. Let’s import some images and assemble a set for our characters to interact in.
Importing the background assets
To start this process, we will need to import the background assets:
- Make sure you’re on the Rig tab.
- Double-click the Project panel.
- Browse your book files and choose the six background assets we listed in the Technical requirements section.

Figure 10.1: List of images that make up the scene
You may find the Project panel is becoming cluttered and hard to navigate. Let’s take a moment and organize it. Let’s create three groups, bg assets, rigs, and scenes, and group our files accordingly. You can use the following screenshot as a visual example:
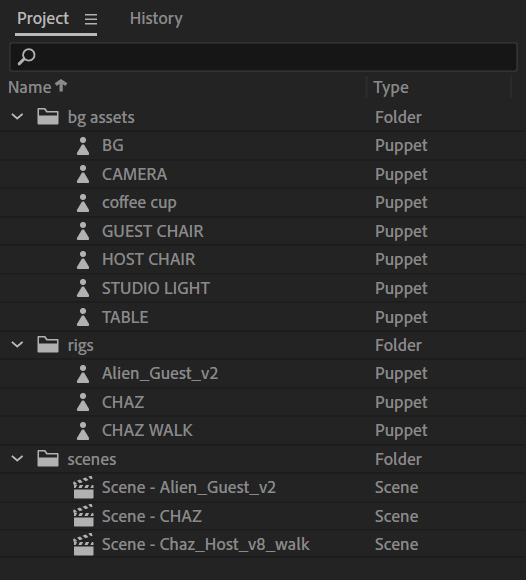
Figure 10.2: The Project panel rearranged with groups
Getting started with building the set
Now, with the assets in our project, we can create a new scene and start building the set:
- Click BG in the Project panel.
- Click the Scene button at the bottom of the panel to create a new scene with this image.
- Rename the new scene to MAIN and drop it into the scenes folder in the Project panel.
- In this new scene, while on the Record panel, drag and drop the remaining images from the bg assets folder onto the scene.
- Finally, rearrange the images on the timeline so that they appear in this order:
- STUDIO LIGHT
- CAMERA
- TABLE
- GUEST CHAIR
- HOST CHAIR
- BG

Figure 10.3: The proper layer order for the timeline
With the images in place, your set should now look as in the following screenshot:
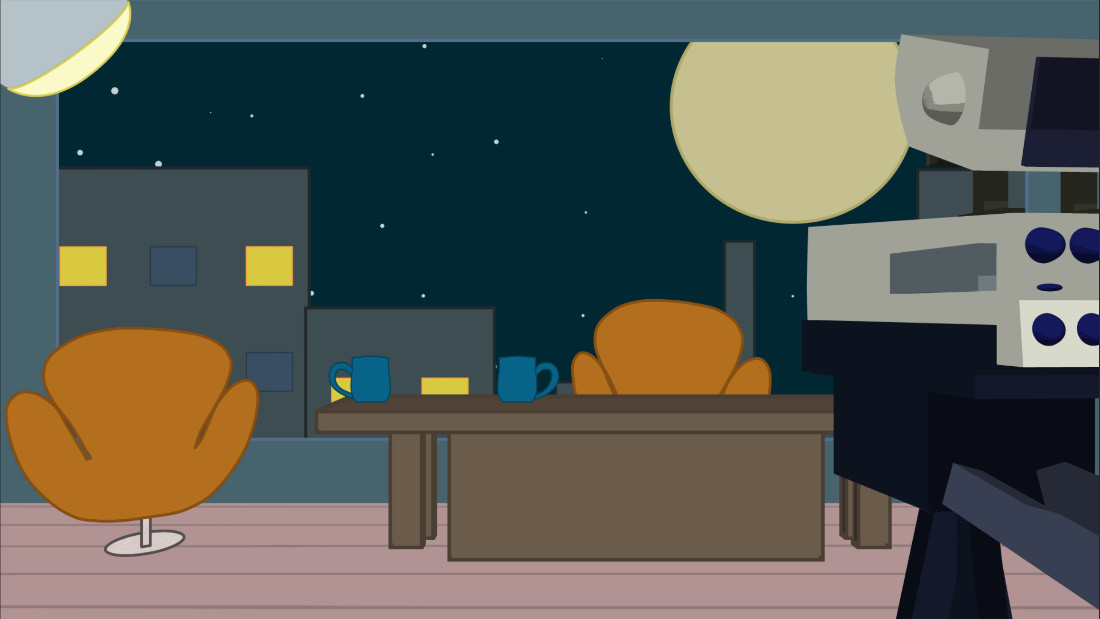
Figure 10.4: The set assembled in the scene panel
With the set arranged with the proper layer order, we can move on to positioning our characters on the set to create the start point.
Positioning the characters in the scene
With the assets for our background and foreground in place, it’s time to bring in our rigs, set up the first frame for our sequence, and start adding Chaz into the scene.
Importing and positioning Chaz
To import Chaz into the scene, take the following steps:
- Go into the rigs group on the Project panel.
- Click and drag CHAZ onto the scene.
- On the Behavior panel, resize the layer to 31% using Scale.
- Rearrange the layers so Chaz is behind his desk, but in front of his chair.

Figure 10.5: We can move the rig around to properly set the scene
Move Chaz down and move the feet up to hide them behind the table. This will make it look like he’s sitting in the chair.

Figure 10.6: Moving the rig down and hiding the feet gives the appearance he’s sitting in the chair
You may also find CHAZ’s whole body tilts when moving your head to control the rig with your webcam. While some tilting is fine and adds life, having too much can be distracting. You can adjust this by reducing Head Tilt Strength to 28% under the Face behaviors.

Figure 10.7: Head Position and Head Tilt parameters for Chaz
With Chaz positioned behind his desk, we will want to create a keyframe and record this frame on the timeline. Right now, if we were to move back to the Rig panel or focus on something else, we would lose the position we just set.
To record the action, take the following steps:
- Make sure CHAZ is still selected on the timeline.
- To ensure we don’t record any unnecessary actions, let’s disable the record action for all behaviors except for Dragger. To do this, click the red button next to each unwanted action.
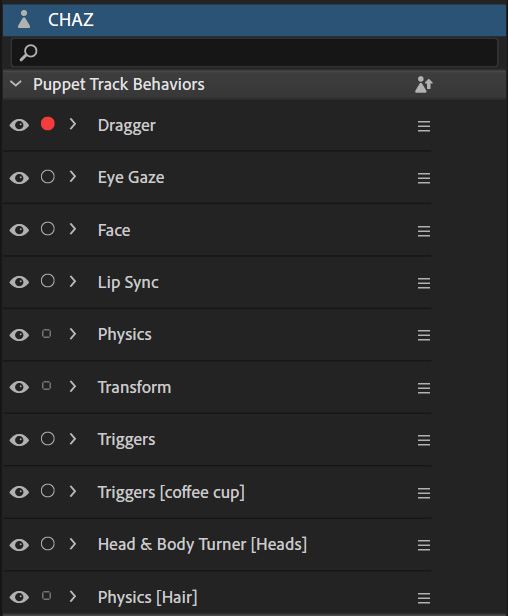
Figure 10.8: All behaviors are disabled from tracking except for Dragger
The recording countdown will launch.
- After about a second has been recorded, press Stop. You should now have the Dragger action recorded for CHAZ on the timeline.

Figure 10.9: The Dragger keyframe on the timeline for CHAZ
Chaz is now set and ready for the scene! Let’s move over to the alien guest and get him ready next.
Importing and positioning the alien guest
To import the alien guest, we will follow a similar procedure as we did for Chaz. But we will add a little body language to his performance as well. Here’s what we need to do:
- While still on Record, drag the Alien_Guest_v2 rig onto the scene.
- Resize the character to 32% using Scale under Transform on the Behavior panel.
- For Scale X, set the number to –100. This will cause the character to face right.
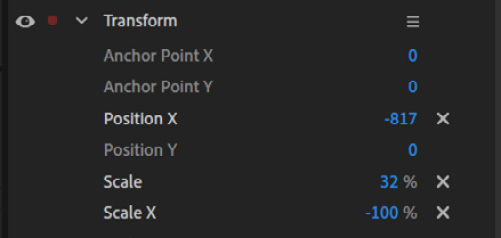
Figure 10.10: The Transform behavior properties of the alien
- Position the alien over the chair using the Position X and Position Y settings under Transform.

Figure 10.11: Using a negative scale, we can flip the character horizontally or vertically
- Now, following a similar pattern as we did for Chaz, let’s reposition our character using the draggers to make it look like he’s sitting in the chair; there are many positions we could choose, so choose the one you’d like!

Figure 10.12: By using draggers, we can sit the alien comfortably in the chair
Like with Chaz, you will want to record the Dragger behavior for a few seconds to set the pose. With the characters now set, we can focus on adding dialogue to the scene!
Recording dialogue
There are a couple of ways we can add dialogue to a scene. First, we can use a mic in the Record panel to capture audio in real time and have the rig track the mouth poses. We can also import external audio and have Character Animator calculate it for the poses. Both methods are viable and depend on your setup and how you want to go about the production.
To show both methods, we will record in real time with Chaz and use a .wav file for the alien.
Using a screenplay or outline
When recording your dialogue and setting up scenes, you will want to have a script, or at least an idea, ready to go so you know what to say and how to act. The same especially applies if you plan to use outside actors. You will want to convey the feeling and emotion of the scene so the actors have a blueprint. With this book, we will keep it simple. Here is the scene outline we will follow:
We will start with a zoom-in on the stage as the audience cheers.
Chaz laughs and welcomes the audience back from the commercial break:
“Welcome back to Chatting with Chaz! I am, of course, your adoring host, Chaz, and today we have a special guest!”
Cut to show alien.
“An alien from outer space! How are you doing, sir?”
The alien replies: “Oh, you know, just sort of hanging out, planning to take over Earth, that sort of thing.”
“Well, that’s great, I... wait, what?”
Suddenly, three more aliens transport onto the set!
This is a very simple script but should be effective for this example.
Recording Chaz’s dialogue in real time
To record Chaz’s dialogue, or any character, in Character Animator, you will need to be in the Record panel. Make sure your mic and webcam are on and calibrated.
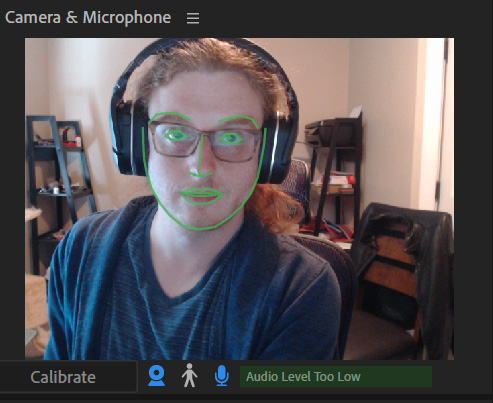
Figure 10.13: Be sure to calibrate your webcam and enable the microphone
Since we only have one voice actor, we are going to break the dialogue up and edit it at the end of the chapter to match what Chaz and the alien are saying. Let’s record all of Chaz’s lines first:
- Click the CHAZ layer.
- Turn the behaviors we turned off for CHAZ back on, except for Dragger, so we don’t record over the position we set previously.
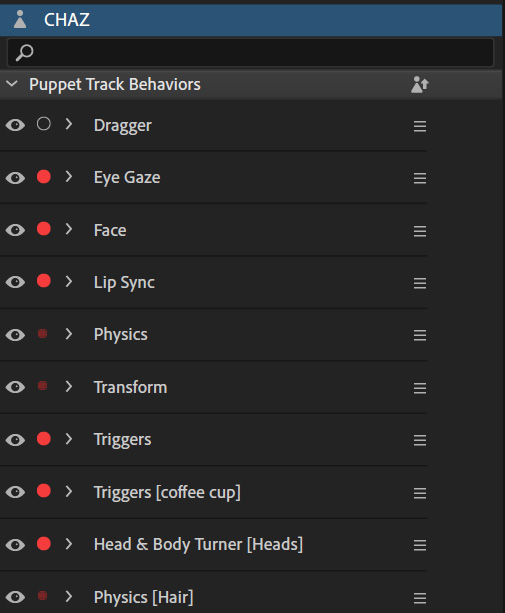
Figure 10.14: Enable all behaviors to track except for Dragger
- Place your script in front of you, or memorize the lines.
- Press Record and start speaking after the countdown.
- As you recite the script, watch the character’s mouth react accordingly. You will also see the head turn, eyes blink, pupils move, and body tilt as you act out the scene. If you mess up, don’t worry! Just press stop, then undo the action or delete the keyframes that appear and try again.
- Once finished, press Stop and you should now see new keyframes for all the behaviors we were tracking.

Figure 10.15: Any behavior marked for record will appear on the timeline once you complete a record session
Play back the animation. Depending on your setup, you may find the results to be a bit lacking. Perhaps the head turn is too sensitive. Or maybe the eyes didn’t track, or a mouth pose doesn’t match a word. Don’t worry, we will come back to this in the next chapter as we make the scene more robust and add polish. For now, having the base animation down with audio recorded is what we need.
Now, let’s add the alien’s dialogue. We’re going to tackle this a bit differently to show another way you can lip-sync, especially if you have little desire to use the webcam for animation.
Importing and lip-syncing the alien’s dialogue
As stated, we are going to use a different tool to lip-sync the alien. We are going to import audio and have the software read the waveform and generate visemes for us. This is useful if you have actors who are sending you audio files and can’t record directly in Character Animator. Or maybe you want to edit the audio, such as adding a filter, which can’t be done live. Perhaps you just want to use the lip-sync feature and forgo using a webcam or microphone to animate. These are just a few examples of how this could be useful.
So, here’s how we do this:
- While still on Record, use the Import command to bring the alienline.wav audio file into the project.
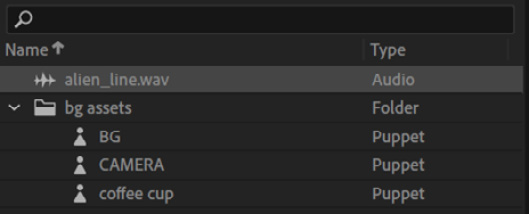
Figure 10.16: You can import external audio files into Character Animator
- Drag the audio file onto the timeline. Placing it above Chaz’s audio is a good practice to keep the audio organized.

Figure 10.17: Both audio files on the timeline
- Click the Alien_Guest_v2 layer on the timeline.
- Hold the Ctrl or ⌘ key and click alienline.wav on the timeline so both layers are selected.

Figure 10.18: Both the rig and audio files must be selected
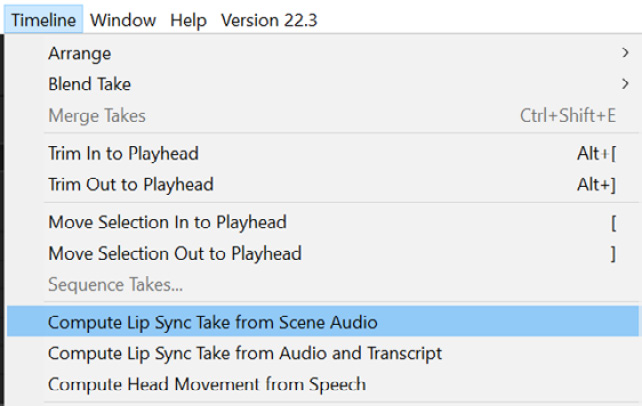
Figure 10.19: The Project panel rearranged with groups
The app will render the take.
- Once complete, you will see a new action, Lip Sync, with visemes visible under the Alien_Guest_v2 layer.

Figure 10.20: The alien’s visemes
Play the scene. You should find the audio matches well with the mouth. If not, we will show how to make viseme corrections, plus more, as we finish the animation for this sequence in the next chapter. But this is a significant feature that can literally save hours, compared to traditional lip-syncing.
This auto lip-sync feature can go beyond Character Animator, if desired. As an example, you might want to animate a mouth automatically using this method, export out a synced mouth as a sequence, and bring it into another animation software you may be using. That goes beyond the scope of this book. But we wanted to mention it, just so you’re aware of how robust this system can be.
Summary
With Character Animator, we can lay out the scenery and create sets for our characters to interact with. The process is like importing rigs. But in this case, we used separate images to build the scene, which allows us to overlay foreground objects, as an example.
You can easily choose what you want to record. If you only want to focus on draggers, that’s easily done by checking off all other actions before recording. You can focus on certain actions and repeat your recordings as many times as needed. With one actor, sometimes it’s best to take it one piece at a time as opposed to trying to act everything out at once.
Finally, the Compute Lip Sync Take From Scene Audio feature is a great time-saver and has multiple uses, even going beyond the app itself.
We now have our pieces for the sequence laid out. Up next, we will properly order the timeline actions, polish up the recorded actions, and add a bit more complexity before we export for further editing.