4
Working with Masks in Adobe Substance 3D Painter
This is chapter is quite important because we will learn how masks are created inside Adobe Substance 3D Painter. You might have noticed that in movies and video games where 3D objects are used, they look quite realistic because of their imperfections, withering, dirt, and the damage effects used on them, and without these effects, the objects will not look realistic and attractive.
Masking is very useful when creating withering, dirt maps, or curvature-based damage effects inside Adobe 3D Substance Painter – this chapter will take you on that journey and explain the whole process with easy yet comprehensive methods.
In this chapter, we will cover the following topics:
- Creating complex masks in Adobe Substance 3D Painter
- Creating planar masks in Substance Painter
Creating complex masks in Adobe Substance 3D Painter
Regular masks are only used to show textures in the white-masked area, while the black area hides the texture, as we studied in the previous chapters. However, complex masks can do more than regular masks – for example, you can create nested masks and each mask can control different MATERIAL settings. So let us do that:
- Select TV_Middle_Casing from TEXTURE SET LIST – you will notice that the middle casing of the retro television looks new and untouched, whereas it should look dirtier, as it’s an old television set.
- In the LAYERS panel, make sure the Black_Plastic folder is collapsed so that it will not annoy you and the LAYERS panel looks clean and organized. To collapse any folder, you just need to click on the folder icon, as shown in Figure 4.1:
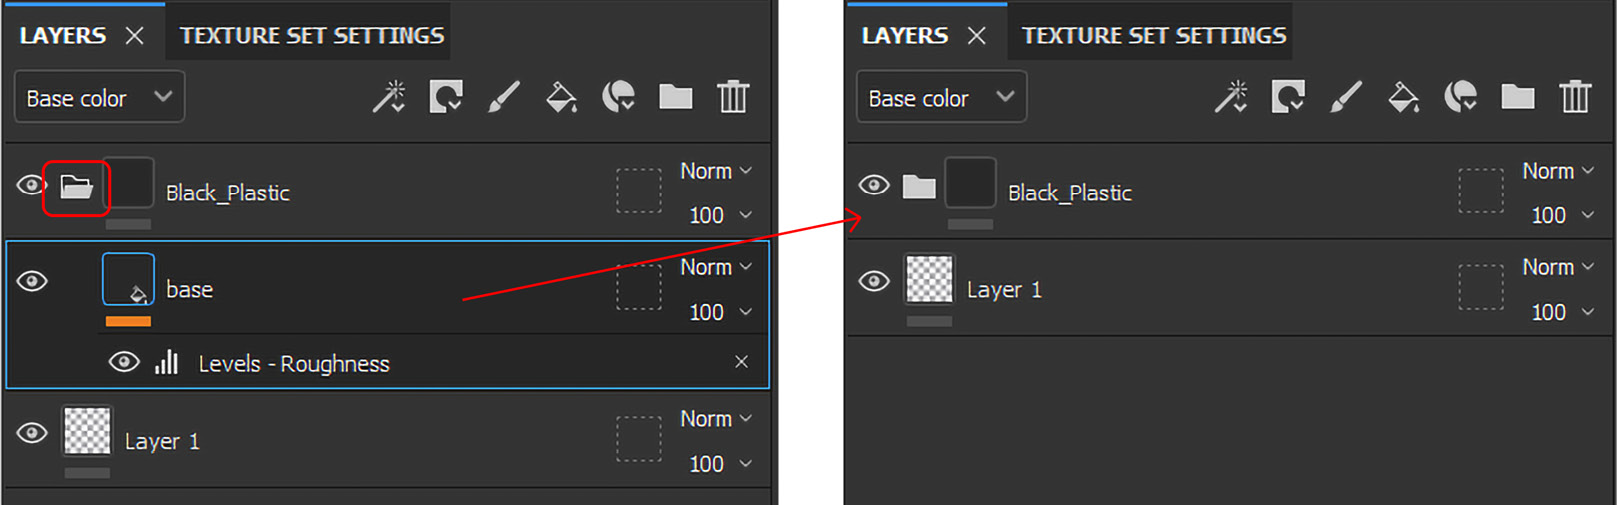
Figure 4.1 – Collapsing a folder

Figure 4.2 – Adding a group
- Rename the newly created folder Dirt Scratches:

Figure 4.3 – Renaming the folder
- We will add a new fill layer – this will cover our previously created Black_Plastic layer. However, don’t worry about it because Black_Plastic was only added to teach you the methods of adding a fill layer. Now, select Add fill layer inside the Dirt Scratches folder, rename it Base, and change its Base color property to black:

Figure 4.4 – A new fill layer
This new Base fill layer will act as a base for the dirt map we will create – creating this base layer will prevent the Black_Plastic layer from being affected.
- Now, change the Roughness property under PROPERTIES HYPHEN FILL of the Base layer to 0.4444, as shown in Figure 4.5:

Figure 4.5 – The Roughness value for the Base layer of Dirt Scratches
This will make the base of TV_Middle_Casing a bit rougher, as shown in Figure 4.6:

Figure 4.6 – The Roughness effect on the Base layer of Dirt Scratches
- Now, select Add fill layer above the Base layer and rename it Dirt Roughness, as shown in Figure 4.7:

Figure 4.7 – A new Dirt Roughness layer
- Now, under PROPERTIES HYPHEN FILL of the Dirt Roughness layer, deselect all the MATERIAL settings except for rough, as shown in Figure 4.8:
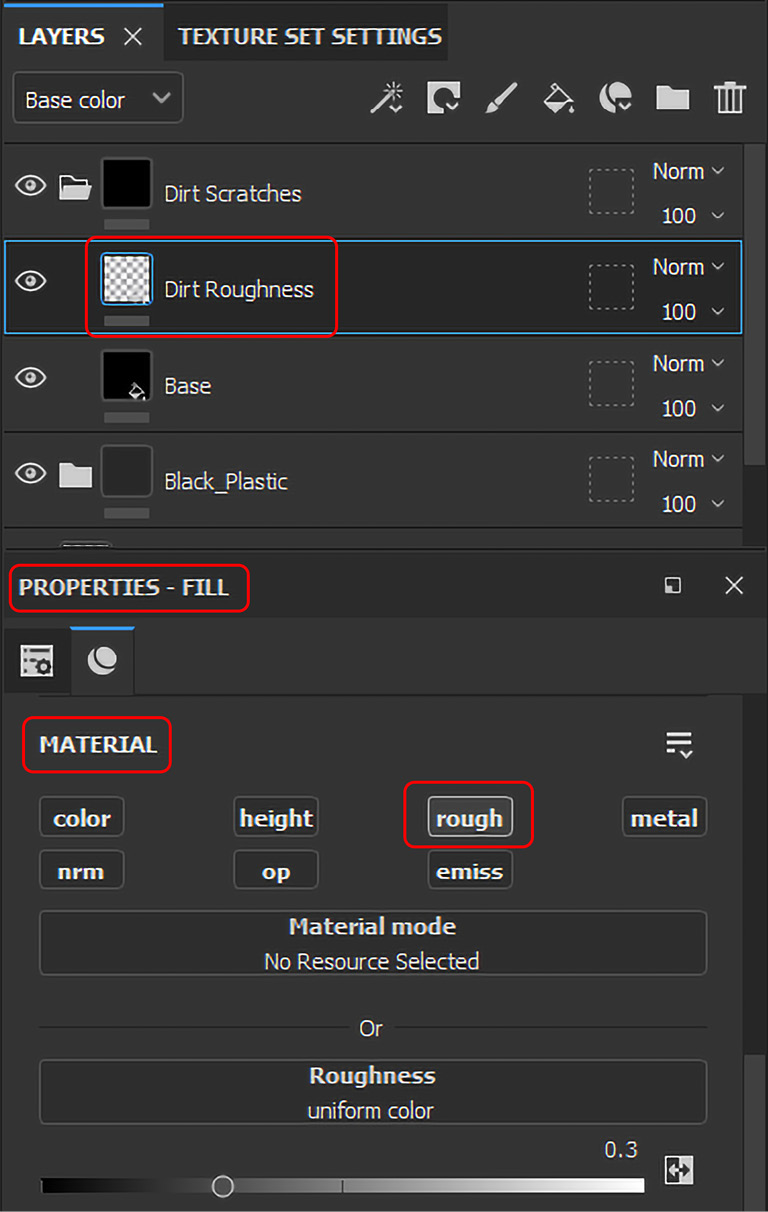
Figure 4.8 – The MATERIAL properties of the Dirt Roughness fill layer
- Instead of directly applying any materials to the Dirt Roughness layer, we will use Add black mask on it so that the main Dirt Roughness layer stays independent in case we want to change its Base color property or any other MATERIAL settings:
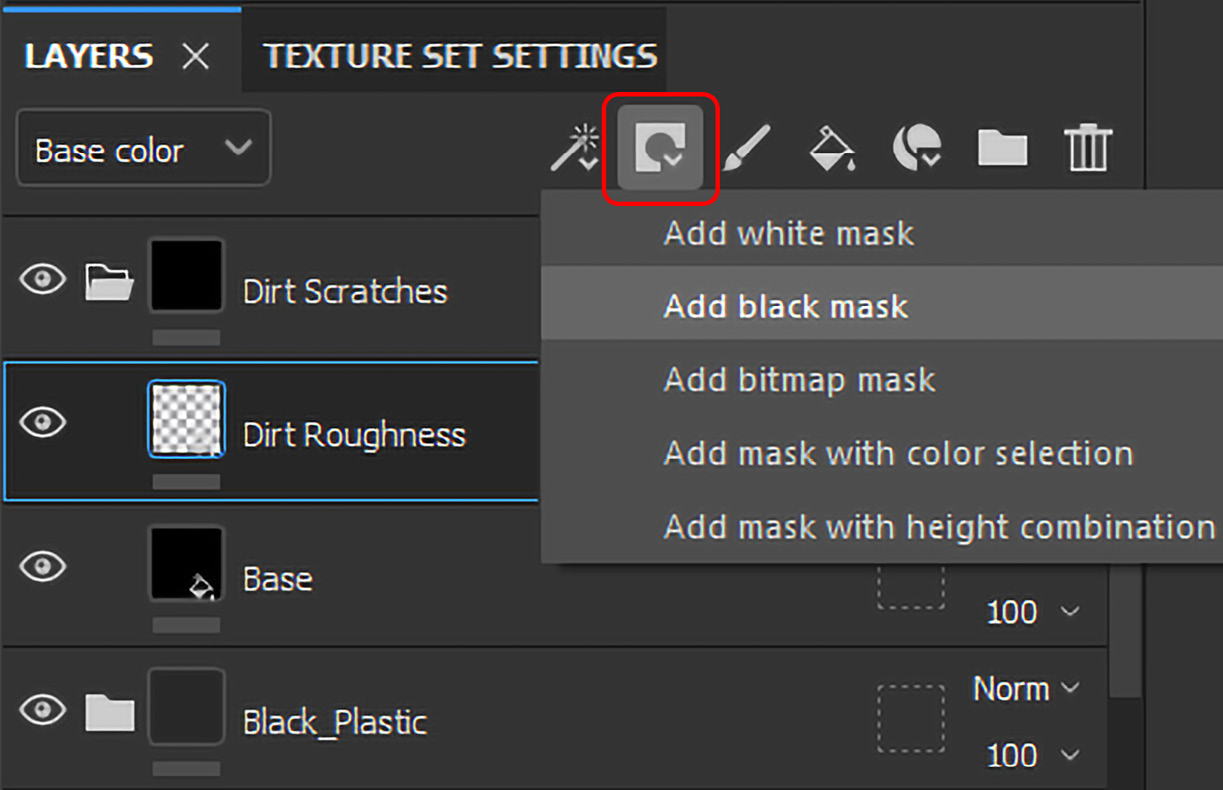
Figure 4.9 – Adding a black mask to the Dirt Roughness layer
- Now, select the black mask that we have created on the Dirt Roughness layer and choose Add fill under the Add effect option, as shown in Figure 4.10:
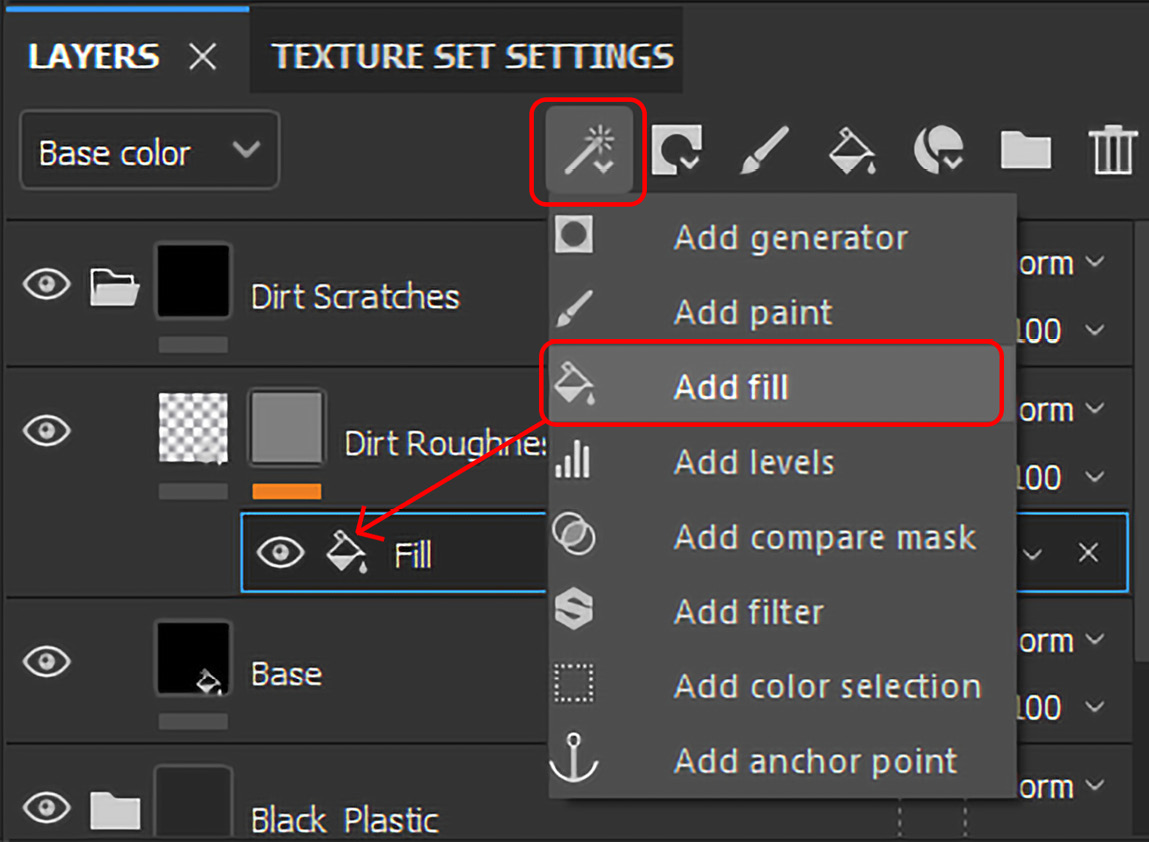
Figure 4.10 – Adding a fill layer to the Dirt Roughness mask
- After adding the fill layer to the Dirt Roughness mask, select the same mask, and under PROPERTIES HYPHEN FILL, go to the GRAYSCALE settings and click on grayscale uniform color. Then, in the RESOURCES area, search for the grunge rough dirty mask and select it.
This mask will create an old dirty effect on TV_Middle_Casing. The fill layer of the Dirt Roughness mask layer will automatically be renamed grunge rough dirty:

Figure 4.11 – Using a grayscale uniform color on Dirt Roughness
- Select the Grunge Rough Dirty mask layer and apply the following changes:
- Projection: Tri-planar projection
- UV transformations Scale: 2
- 3D projection settings Scale Y: 0.72
- 3D projection settings Scale Z: 0.77
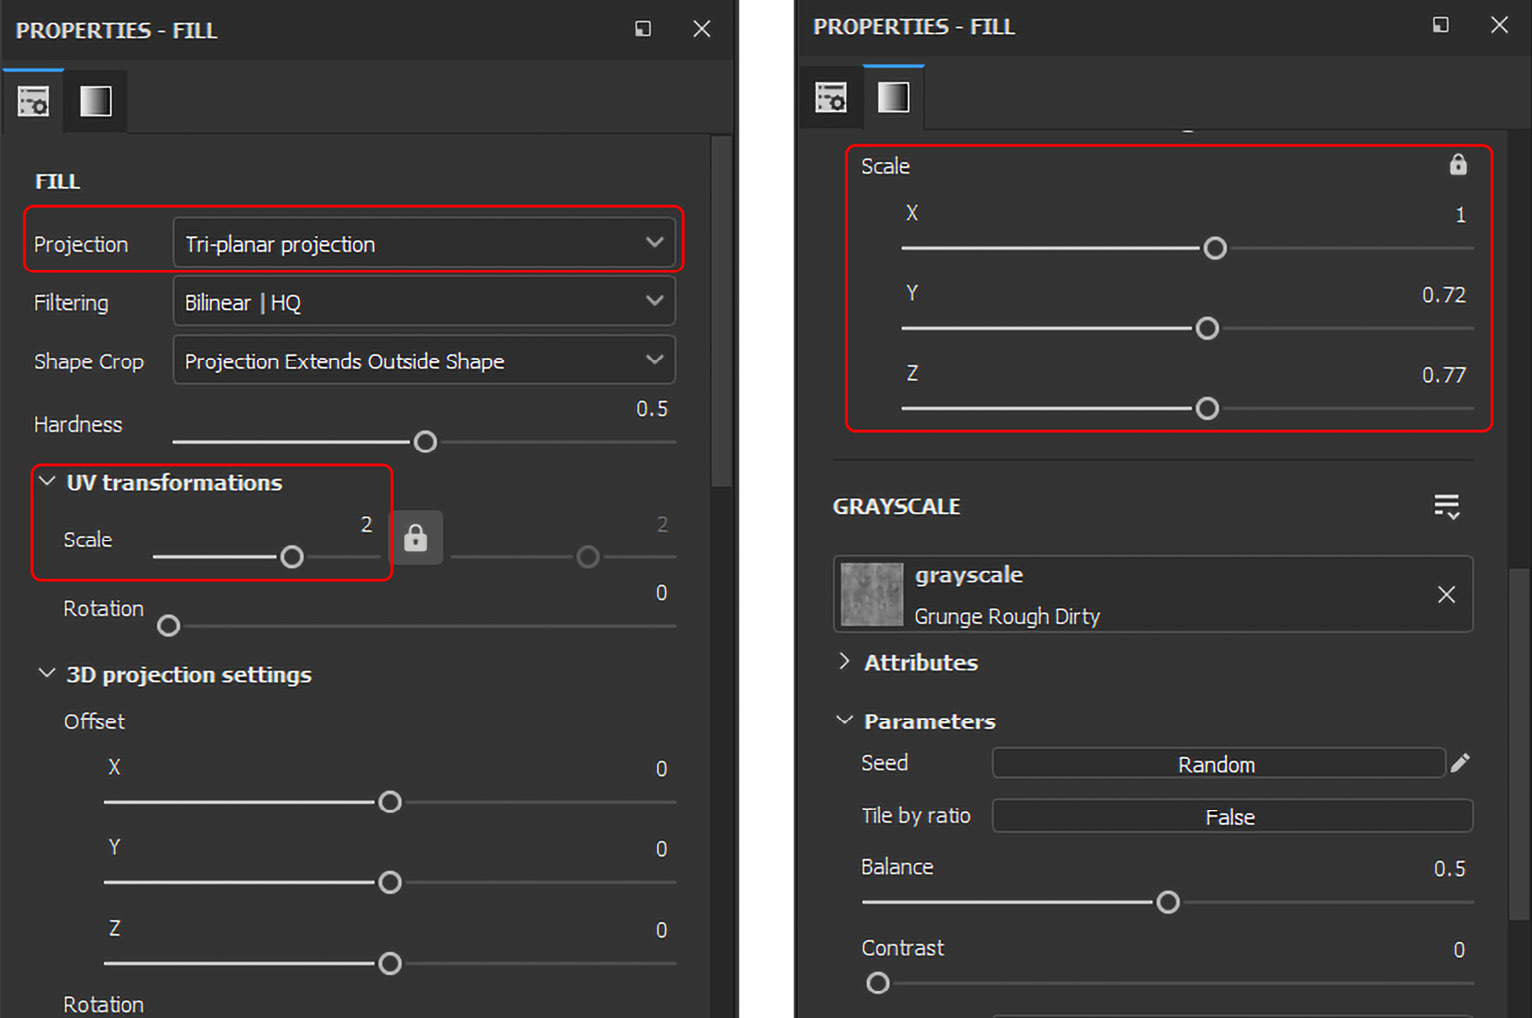
Figure 4.12 – Settings for the Grunge Rough Dirty mask
- Now, select the main Dirt Roughness layer, and under the PROPERTIES HYPHEN FILL settings, set Roughness uniform color to 0.1, and you will notice that TV_Middle_Casing looks old and rough, as shown in Figure 4.13:
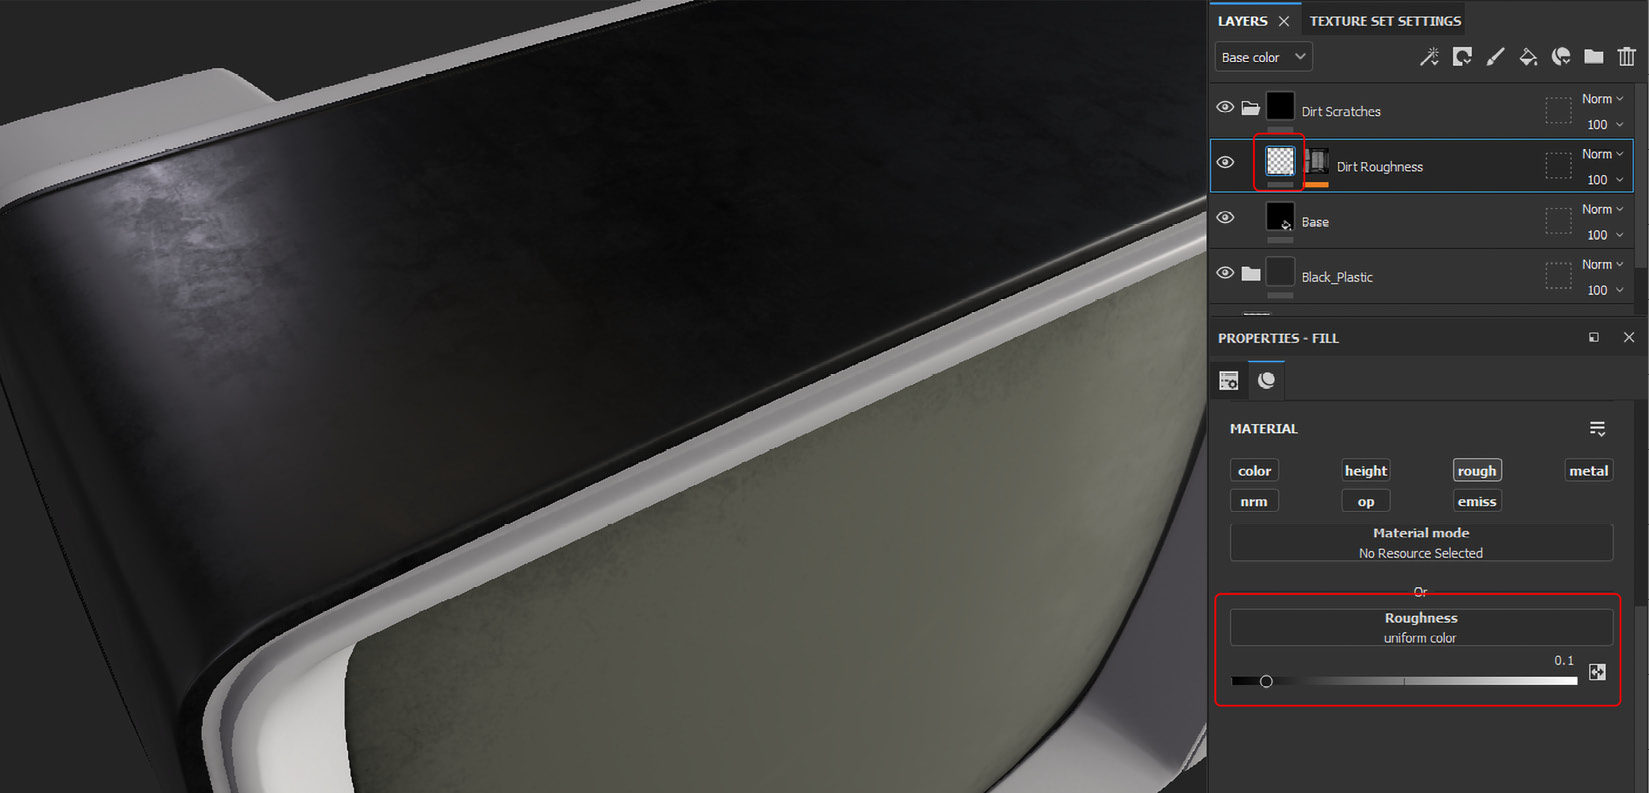
Figure 4.13 – The final Dirt Roughness material
Now that you have hopefully comprehended the usage, purpose, and importance of complex masks, in the next section, we will learn how to create planar masks inside Painter.
Creating planar masks in Substance Painter
Planar masks use Planar projection to create uniformly scaled planar textures on 3D models – to avoid stretched and squeezed textures, Planar projection uses the Depth Culling feature:
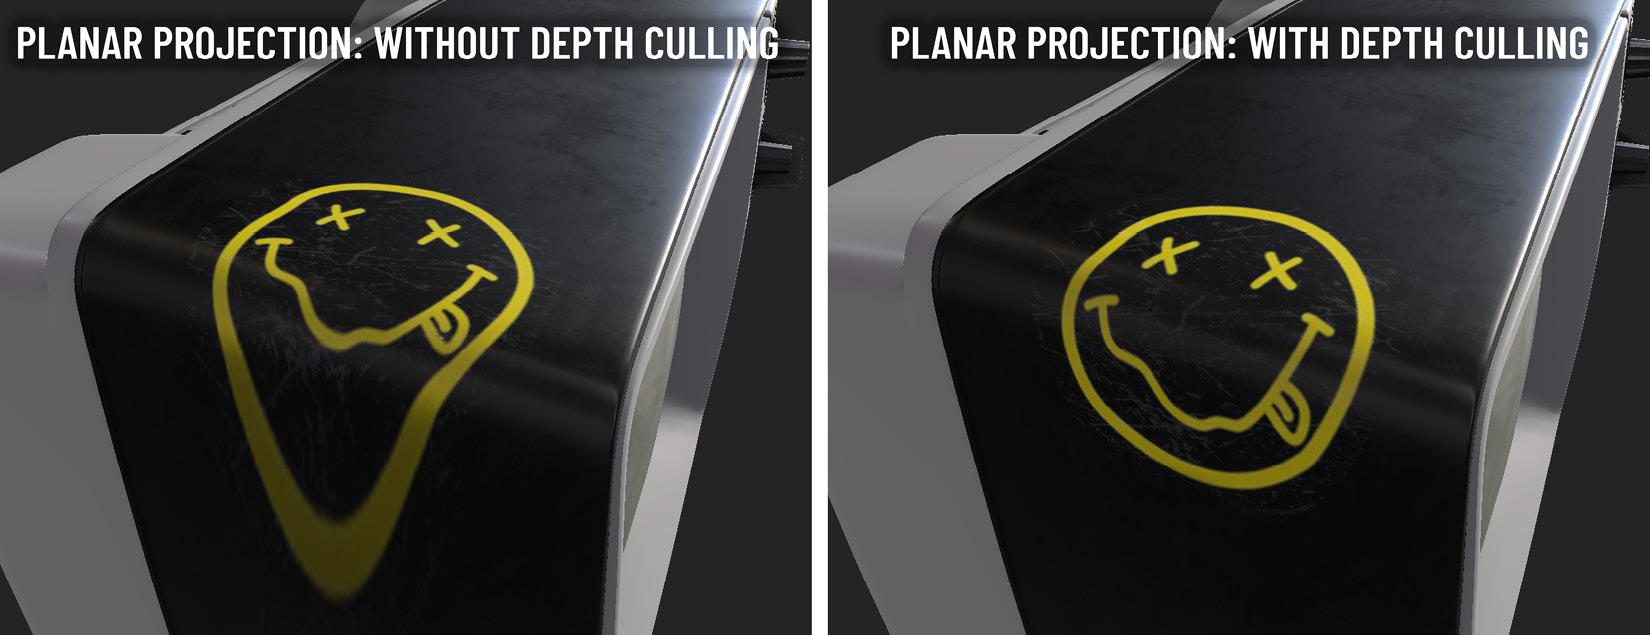
Figure 4.14 – The difference between planar projection with and without the Depth Culling feature
So, let’s put this all together and apply a sticker on the television using Planar projection:
- Keep TV_Middle_Casing TEXTURE SET LIST selected and go to the ASSETS panel. Click on the small arrow next to the All libraries breadcrumbs and change it to Project. Then, click on the small arrow next to Project, select Retro, and select the Textures asset type:
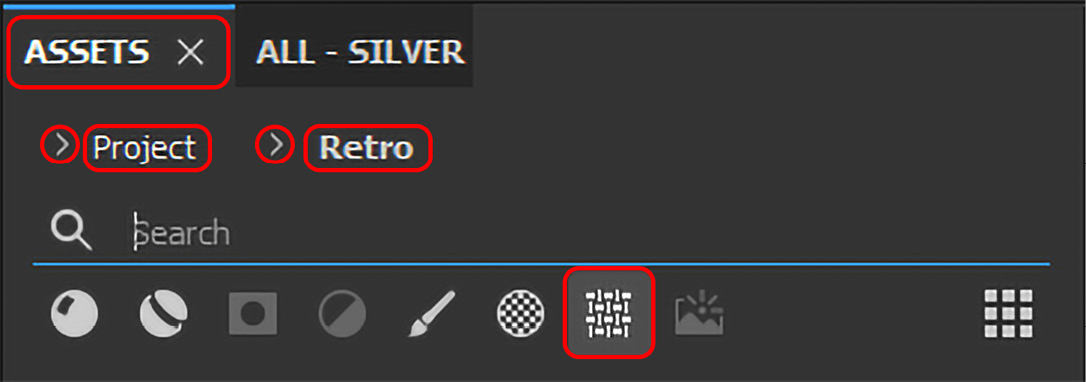
Figure 4.15 – Viewing the imported textures in the ASSETS panel
- You will see the MTV Sticker inside the ASSETS panel. Drag that logo onto the upper-left-hand corner of the television, and after dropping the logo, a menu will appear for selecting the MATERIAL type. Choose the Base color property from the menu, as shown in Figure 4.16:

Figure 4.16 – Applying the MTV logo sticker to the television
- After applying MTV Sticker on the television, a new layer will be created under the LAYERS panel called Sticker6-MTV – it’s the same name as the sticker:

Figure 4.17 – The automatic creation of the Sticker6-MTV layer
- Keep Sticker6-MTV selected. Under PROPERTIES HYPHEN FILL, go to the Projection type and choose Planar projection. Set Scale to 1.5 and Rotation to 45 under UV transformations. Make sure the Depth Culling and Blackface Culling checkboxes are checked:

Figure 4.18 – The Sticker6-MTV settings
- If you notice a black fading feather effect on MTV Sticker, as shown in Figure 4.20, that means the logo is stretching and that black feather effect is the Depth Culling indication, which warns you about stretching or any other sort of deformation:

Figure 4.19 – Depth Culling
- To avoid stretching, we need to reposition the sticker until we stop seeing any Depth Culling indication. To reposition the sticker, you have to change the 3D projection settings properties for Sticker6-MTV under PROPERTIES HYPHEN FILL as follows:
- Offset X: -0.946 ; Rotation X: 92
- Offset Y: 0.658 ; Rotation Y: -137
- Offset Z: 0.38 ; Rotation Z: 92
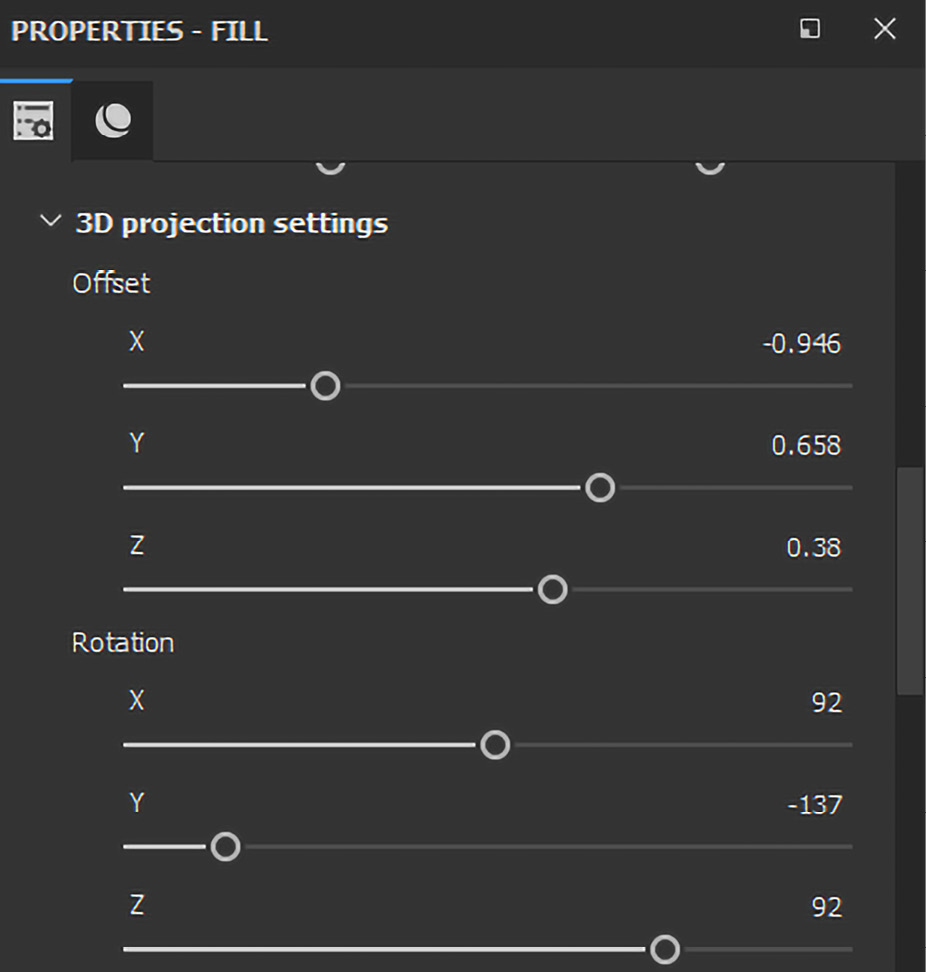
Figure 4.20 – Sticker6-MTV’s 3D projection settings
- After changing 3D projection settings for Sticker6-MTV, the sticker will look cleaner and more uniform, as shown in Figure 4.22:
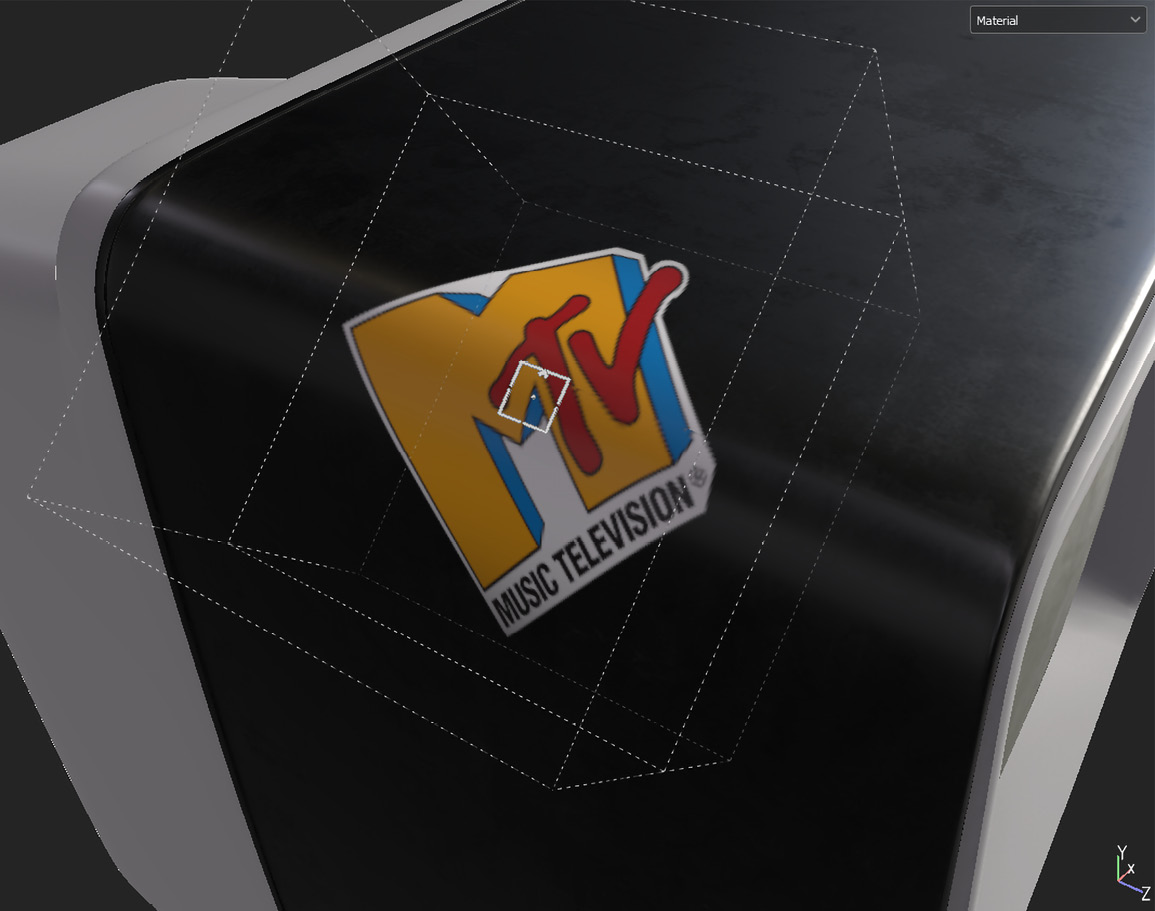
Figure 4.21 – The uniform MTV sticker
- If you do not want to move the planar textures with 3D projection settings under PROPERTIES - FILL, you can use the 3D projection settings feature located in the contextual toolbar, as shown in Figure 4.23, and with your mouse, you can move, rotate, scale, flip, and warp your planar texture:

Figure 4.22 – 3D projection settings in the contextual toolbar
Summary
Now that you are familiar with complex masks, you can create nested masks with different types of creative effects. Moreover, we have learned how to apply a uniform planar texture, which prevents any type of stretching or deformation.
In the next chapter, we will learn how to apply bitmap textures, create a 3D logo from scratch, make a custom brush, work with stencils and projection, and use text, fonts, and the clone tool and smudge tool in Adobe Substance 3D Painter.