
![]()
Customizing New General Ledger Accounting
In this chapter, you learn how to define leading and non-leading ledgers based on the totals table in the new G/L accounts. These ledgers will enable you to perform parallel accounting to meet different accounting disclosure requirements.
At the end of this chapter, you will be able to:
- Explain what a new general ledger is
- Define ledgers for general ledger accounting
- Define leading and non-leading ledgers
- Define currencies of a leading ledger
- Explain what a scenario is
- Assign accounting principles to ledger groups
- Describe real-time integration of controlling with FI
- Define documents for entry view in a ledger
- Define document splitting characteristics for G/L accounts
- Define foreign currencies valuation
- Perform closing of foreign currency valuation and balance carry forward
- Reclassify GR/IR clearing
New General Ledger
Disclosure in financial reporting has increased significantly in recent times. Up until version 4.7, companies attempting to meet disclosure requirements had to install different components to meet varied requirements and standards. Compliance with IAS/IFRS principles has heightened the need for parallel and segmented reporting. In attempt to meet legal and local (company code) accounting and reporting requirements, companies must maintain G/L accounts for two or more accounting areas for local and group reporting with two retained earnings (X & Y).
The drawback to these settings is that reconciliation between G/L accounts can be cumbersome. The new G/L eliminates many of the problems associated with various reporting (parallel accounting) to meet disclosure requirements by incorporating additional ledger(s).
Therefore, a new general ledger can be seen as an attempt to provide a full picture of an accounting report that meets the standard accounting disclosure. It incorporates other aspects of business operations to ensure that comprehensive accounting information is always available. The benefits of the new general ledger include:
- An extended data structure that allows customer fields to be added to the general ledger.
- Real-time document splitting, which makes it possible to create balance sheets for various entities such as segments reporting in line with IAS (International Accounting Standards) and U.S. GAAP (Generally Accepted Accounting Principles).
- The ability to run real-time reconciliation of management accounting with FI (reconciliation with controlling), making it possible to eliminate time-consuming reconciliations.
- Management of multiple ledgers within the general ledger accounting. This is one of the ways to portray parallel accounting in SAP.
- The flexibility to define one or more fiscal year variants using non-leading ledgers for various financial reporting needs.
- Financial statements to be created using standard reporting functions.
- A function that allows you to combine classic G/L accounting and special ledger objects.
Other features of a new G/L include the leading ledger and the non-leading ledger. Only one leading ledger is allowed in a new general ledger, but you can define other non-leading ledgers that can be assigned to other objects, such as fiscal year variants/currencies.
Leading Ledger
Leading ledger is a form of consolidation that integrates other non-leading ledgers in all company codes. It is important to note that all company codes are automatically assigned the leading ledger. The leading ledger gets some of its control parameters from the company code. For example, it uses the fiscal year variant, posting period variant, and local currencies assigned to the company code.
Non-Leading Ledger
Non-leading ledgers are termed as parallel ledgers to the leading ledger to allow parallel reporting to meet other and local requirements. Once you have defined your non-leading ledger, you have to activate it by the company code. The system will automatically create a group ledger for the ledger you just created.
Let’s look at how to define leading and non-leading ledgers by working through a problem.
Problem: Company C900 must create accounting reports for various stakeholders. As a SAP financial consultant, your task is to define leading and non-leading ledgers in a new general ledger using the standard SAP table called FAGLFLEXT. This will enable the finance team to produce various financial reports to meet legal requirements with different fiscal years.
The company wants the financial year to run from January to December for global and local reporting. It also wants to have separate reporting for a local tax requirement from April to March.
You were given the following information to work with:
- Company Code: C900
- Company Currency: Pound Sterling (GBP)
- Chart of Accounts: CA90
- Leading Ledger Fiscal Year: January–December
- Non-Leading Ledger Fiscal Year: March–April
Define Ledgers for General Ledger Accounting
The ledgers for the general ledger are defined in this exercise. The ledgers you define here are specifically for additional reporting, such as for company code and tax reporting with their respective total tables FAGLFLEXT. A totals table is a database table that stores totals used in general ledger accounting for parallel ledgers. SAP comes with the standard totals table called FAGLFLEXT for general ledger accounting.
The ledgers available here are leading ledger and non-leading ledgers. The Leading Ledger (0L) comes with predefined total tables (FAGLFLEXT). You don’t need to define a leading ledger for general ledger accounting. It is recommended that you use the pre-defined 0L leading ledger supplied by SAP. On the other hand, when you define non-leading ledgers, you should apply the predefined total table called FAGLFLEXT.
Only one leading ledger is assigned to a company code. Make sure that you set the leading indicator for the 0L leading ledger. In this exercise, you will define the ledgers based on total tables that are used in general ledger accounting. To define ledgers for general ledger accounting, follow this menu path: IMG: Financial Accounting (New) ![]() Financial Accounting Global Settings (New)
Financial Accounting Global Settings (New) ![]() Ledgers
Ledgers ![]() Ledger
Ledger ![]() Define Ledgers for General Ledger Accounting. The Change View “Define Ledgers in General Ledger Accounting:” Overview screen is displayed. To define ledgers in general ledger accounting, click the
Define Ledgers for General Ledger Accounting. The Change View “Define Ledgers in General Ledger Accounting:” Overview screen is displayed. To define ledgers in general ledger accounting, click the ![]() button at the top of the screen. The New Entries: Overview of Added Entries screen appears (Figure 19-1).
button at the top of the screen. The New Entries: Overview of Added Entries screen appears (Figure 19-1).

Figure 19-1. Defining additional ledgers for local accounting (company code) and tax reporting for general ledger accounting
Update the following fields:
- Ld: Enter two unique identification codes for your ledger. This is a freely definable code. There is no hard and fast rule as to what you can use here. You can use any two characters of your choice.
- Ledger Name: Enter a name describing your ledger. You can enter any meaningful name that best describes your ledger.
- Totals Table: Enter the Totals tables FAGLFLEXT. This is supplied by the system.
Click the Enter ![]() button on the top-left side of the screen and save
button on the top-left side of the screen and save ![]() your ledgers. The Information dialog box comes up with a message, “Ledger group T1 is created only with ledger T1”. Click the Continue
your ledgers. The Information dialog box comes up with a message, “Ledger group T1 is created only with ledger T1”. Click the Continue ![]() button at the bottom of the screen and a second information box comes up for ledger T2 with the message, “Ledger group T2 is created only with ledger T2”. Click the Continue
button at the bottom of the screen and a second information box comes up for ledger T2 with the message, “Ledger group T2 is created only with ledger T2”. Click the Continue ![]() button again to confirm your entries.
button again to confirm your entries.
Define Currencies of Leading Ledger
You must specify the currencies that you want to apply to the leading ledger in the new general ledger. Normally, an average of three currencies settings is applicable to a company code. This is made up of a company code currency and two additional currencies—a group currency and hard currency—(Figure 19-2). Group currency is the currency for a consolidation group and hard currency is often country-specific and used in countries with high inflation rates.
Figure 19-2. Defining local currency and additional currencies in the leading ledger
In this exercise, you will define the additional currencies (the group and hard currencies). The company code currency is determined from the company code settings you carried out when you defined your company code in Chapter 1. The local and additional currency (parallel currency) settings are unique to each company code. To define currencies for the leading ledger, follow this menu path: IMG: Financial Accounting (New) ![]() Financial Accounting Global Settings (New)
Financial Accounting Global Settings (New) ![]() Ledgers
Ledgers ![]() Ledger
Ledger ![]() Define Currencies of Leading Ledger. The Change View “Additional Local Currencies for Company Code”: Overview screen is displayed. Click the
Define Currencies of Leading Ledger. The Change View “Additional Local Currencies for Company Code”: Overview screen is displayed. Click the ![]() button on the top-left side of the screen to go to the New Entries: Details of Added Entries screen (Figure 19-3) to specify the additional currencies for the leading ledger.
button on the top-left side of the screen to go to the New Entries: Details of Added Entries screen (Figure 19-3) to specify the additional currencies for the leading ledger.
Figure 19-3. Specifying additional currencies for the leading ledger
Update the following fields in the second local currency section:
- Crcy Type: The following currency types are supplied by SAP:
- 10 - Company code currency: This currency type is defined when defining the company code and managed in FI. It is sometimes referred to as the local currency.
- 30 - Group currency: This is for consolidation group. Managed as parallel currency in FI.
- 40 - Hard currency: This currency type is used in a high inflation rate environment.
- 50 - Index-based currency: This currency type is rarely used in practice. It can be used in a high inflation economy for comparison purposes to meet statutory reporting requirements.
- 60 - Global company currency: This currency is defined when you define your company and is used with internal partners.
Enter group currency type 30 in the currency type field.
- Valuation: For legal valuation, leave this field blank. Legal valuation option will allow you to evaluate your business processes in line with that of your company code while using the company code currency. This makes it possible for you to maintain the same financial reporting in FI and PCA (Profit Center Accounting).
- ExRate Type: Enter exchange rate type M for standard translation at average rate. Exchange rate types were discussed in Chapter 7.
- Srce Curr.: Enter 1 (translation taking transaction currency as a basis). The source currency 1 is the company code currency.
- TrsDte typ: Enter 3 transaction dates in the transaction date type field. This will allow the system to apply transaction dates.
Click the Enter![]() button on the top-left side of the screen and save
button on the top-left side of the screen and save ![]() .
.
Define and Activate Non-Leading Ledgers
In this exercise, you configure settings for non-leading ledgers for company code C900:
- To apply a non-leading ledger in the general ledger, you must specify and activate the non-leading ledger in your company code.
- You can define up to three additional currencies other than the company code currency for the leading ledger.
- The non-leading ledger allows you to define a fiscal year variant that is different from the leading ledger’s. If no fiscal year variant is defined, the system will automatically assign the fiscal year variant of the company code.
- You can also specify a Post period variant as part of your configuration.
We will be using two steps to illustrate this process. We do this because we are defining two ledgers to meet various reporting requirements: one for local (company code) reporting and one for tax reporting.
Step 1: Define Non-Leading Ledger for Company Code Reporting
To define and activate a non-leading ledger, follow this menu path: IMG Financial Accounting (New) ![]() Financial Accounting Global Settings (New)
Financial Accounting Global Settings (New) ![]() Ledgers
Ledgers ![]() Ledger
Ledger ![]() Define and Activate Non-Leading Ledger. The Determine Work Area: Entry screen pops up. Enter your first non-leading ledger identifier T1 (this is the ledger you defined earlier in the section “Define Ledgers for General Ledger Accounting”) in the Ledger Work Area field. Confirm your entry by clicking the Enter
Define and Activate Non-Leading Ledger. The Determine Work Area: Entry screen pops up. Enter your first non-leading ledger identifier T1 (this is the ledger you defined earlier in the section “Define Ledgers for General Ledger Accounting”) in the Ledger Work Area field. Confirm your entry by clicking the Enter ![]() button. You go to the screen where you can assign your company code, currency, and fiscal year variant to the ledger T1 Local (company code) reporting. The Change View “Settings for Non-Leading Ledgers in General Ledger”: Overview screen is displayed. Click the
button. You go to the screen where you can assign your company code, currency, and fiscal year variant to the ledger T1 Local (company code) reporting. The Change View “Settings for Non-Leading Ledgers in General Ledger”: Overview screen is displayed. Click the ![]() button. The New Entries: Overview of Added Entries screen appears. Enter your company code (C900) in the company code (CoCd) field and click the Enter
button. The New Entries: Overview of Added Entries screen appears. Enter your company code (C900) in the company code (CoCd) field and click the Enter ![]() button on the top-left side of the screen to confirm your entries.
button on the top-left side of the screen to confirm your entries.
The Consistency Check message box comes up with migration information and the question, “Is the ledger assigned to a company code that is used productively?” Click the ![]() button at the bottom of the screen. The New Entries: Overview of Added Entries Screen Ledger T1 is displayed, as shown in Figure 19-4.
button at the bottom of the screen. The New Entries: Overview of Added Entries Screen Ledger T1 is displayed, as shown in Figure 19-4.

Figure 19-4. Specifying the company code for a non-leading ledger in the general ledger
![]() Note The migration service is used only for a production company code. To ensure data consistency for a company code that is already in use and to avoid the complication of data migration, it’s best to click the
Note The migration service is used only for a production company code. To ensure data consistency for a company code that is already in use and to avoid the complication of data migration, it’s best to click the ![]() button when the Consistency Check message appears.
button when the Consistency Check message appears.
You may not need to enter the fiscal year in the FV column on the screen, since the fiscal year for T1 Ledger Local (company code) reporting is the same as the company code’s fiscal year. If you leave this field blank, the system will automatically use the company’s fiscal year. If you leave the currency field bank, the system will automatically use the company code currency as well.
Save ![]() the ledger.
the ledger.
Step 2: Define a Non-Leading Ledger for a Different Fiscal Year Variant
The next step is to define the settings for non-leading ledger T2 for tax reporting purposes with a different fiscal year from the company code’s fiscal year (April to March using fiscal year variant V3). To define a non-leading ledger for tax reporting requirements, follow this menu path: IMG Financial Accounting (New) ![]() Financial Accounting Global Settings (New)
Financial Accounting Global Settings (New) ![]() Ledgers
Ledgers ![]() Ledger
Ledger ![]() Define and Activate Non-Leading Ledger. The Determine Work Area: Entry dialog box pops up. Enter your second non-leading ledger identifier, which is T2 (defined in “Define Ledger for General Ledger Accounting” section) in the Ledger Work Area field. Confirm your entry by clicking the Enter
Define and Activate Non-Leading Ledger. The Determine Work Area: Entry dialog box pops up. Enter your second non-leading ledger identifier, which is T2 (defined in “Define Ledger for General Ledger Accounting” section) in the Ledger Work Area field. Confirm your entry by clicking the Enter ![]() button at the bottom of the screen. This action will allow you to assign your company code, currency, and fiscal year variant to the ledger T2 for your tax reporting requirements.
button at the bottom of the screen. This action will allow you to assign your company code, currency, and fiscal year variant to the ledger T2 for your tax reporting requirements.
The Change View “Settings for Non-Leading Ledgers in General Ledger”: Overview screen is displayed. Click the ![]() button on the top-left side of the screen. The New Entries: Overview of Added Entries screen appears (Figure 19-5).
button on the top-left side of the screen. The New Entries: Overview of Added Entries screen appears (Figure 19-5).

Figure 19-5. Specifying a fiscal year variant for a non-leading ledger
Enter your company code (C900) in the company code (CoCd) field and enter V3 (this is a standard fiscal year for April – March supplied by SAP) in the FV column. Click the Enter ![]() button on the top-left side of the screen. The Consistency Check message box comes up with migration information and the question, “Is the ledger assigned to a company code that is used productively?” Click the
button on the top-left side of the screen. The Consistency Check message box comes up with migration information and the question, “Is the ledger assigned to a company code that is used productively?” Click the ![]() button at the bottom of the screen and then save
button at the bottom of the screen and then save ![]() your ledger.
your ledger.
What Is a Scenario in General Ledger Accounting?
Scenarios assigned to each ledger during customizing represent different business views. They control the fields that are updated in the ledger based on your settings when postings are made from other application components or modules in G/L accounting, for example, from cost center or profit center updates. You must use scenarios supplied by SAP, because they contain the predefined settings of business processes that are sufficient for your needs.
Scenarios provided by SAP include:
- FIN_AASEG – Segment Reporting for Fixed Assets (This function is used to create asset reporting at profit or segment level.)
- FINN_CCA – Cost Center Updated (This function updates the Sender and Receiver Cost Center fields.)
- FIN_CONS – Preparation for Consolidation (This function updates the Consolidation Transaction Type and Trading Partner fields.)
- FIN_PCA – Profit Center Update (This function updates the profit center and partner profit center.)
- FIN_SEGM – Segmentation (This function updates the Segment, Partner Segment, and Profit Center fields.)
- FIN_UKV – Cost of Sales Accounting (This function updates the sender and Receiver Functional Area fields.)
The scenario in a general ledger plays an important role in general ledger accounting. SAP supplies some basic settings that you can adapt and use. You may not need to define them again. So we have provided guidelines you may need to consider when customizing scenarios for your general ledger account:
- Once the fields are updated in scenarios they can be used to model certain business needs, such as segment reporting.
- Although SAP comes with predefined scenarios, you can define your own.
- It is possible to assign a ledger (leading ledger and non-leading ledger) to one or more scenarios at once.
- You may not need to assign the six scenarios presented by SAP at once to ledgers. The number of scenarios is based on the business process you want to model in the G/L account.
- Non-leading ledgers are needed in a business process where you want to have an accounting disclosure or reporting in accordance with certain accounting principles.
- You may not have to create a non-leading ledger when segment and parallel accounting is not needed.
Assign Scenarios and Customer Fields to Ledgers for Leading Ledger
In this exercise, you will assign the following objects to ledgers.
SAP comes with standard scenarios and customer fields that are assigned to ledgers in the leading ledger. So you do not need to customize the leading ledger. However, you can take a look at the scenarios in leading ledger and delete the items you don’t need. To assign scenarios and customer fields to ledgers, follow this menu path: IMG: Financial Accounting (New) ![]() Financial Accounting Global Settings (New)
Financial Accounting Global Settings (New) ![]() Ledgers
Ledgers ![]() Ledger
Ledger ![]() Assign Scenarios and Customer Fields to Ledgers. The Display View “Ledgers”: Overview screen comes up. On the screen, select 0L Leading Ledger from the list of displayed ledgers (Figure 19-6).
Assign Scenarios and Customer Fields to Ledgers. The Display View “Ledgers”: Overview screen comes up. On the screen, select 0L Leading Ledger from the list of displayed ledgers (Figure 19-6).

Figure 19-6. Ledgers overview screen for assigning scenarios – leading ledger
To go to the screen containing the list of standard scenarios supplied by SAP, double-click the ![]() folder on the left pane of the screen. The Change View “Scenarios”: Overview screen is displayed containing the list of standard scenarios in SAP (Figure 19-7).
folder on the left pane of the screen. The Change View “Scenarios”: Overview screen is displayed containing the list of standard scenarios in SAP (Figure 19-7).

Figure 19-7. The screen containing the standard list of scenarios supplied by SAP
You may not necessarily use all the scenarios provided by SAP. Let’s assume that you do not need to provide a report for business area, so you do not need to include it in your ledger. You will need to delete it from the list of scenarios assigned to the leading ledger 0L. To delete unwanted scenarios from the list, select business area (in this case) from the list of scenarios and click the Delete ![]() button at the top of the screen. The Business Area setting is deleted from the scenarios in the Leading Ledger 0L.
button at the top of the screen. The Business Area setting is deleted from the scenarios in the Leading Ledger 0L.
To define setting for versions, double-click the ![]() folder on the left pane. The Change View “Versions”: Overview screen is displayed. Click the
folder on the left pane. The Change View “Versions”: Overview screen is displayed. Click the ![]() button on the top-left side of the screen. Update the following fields:
button on the top-left side of the screen. Update the following fields:
- Ver.: Enter the version key (1).
- Man.Plan: Click the checkbox for Manual Plan. This allows you manually plan data for a combination of ledgers and versions.
- Integ.Planning: Click the checkbox for Integrated Planning if you want to transfer the data from other objects (such as Overhead Cost Controlling or Profit Analysis) to combine the ledger and the version.
- Version Description: Enter a description (Actual Plan) for the version plan.
Click the Enter ![]() button on the top-left side of the screen and save
button on the top-left side of the screen and save ![]() your version.
your version.
The next step is to define scenarios for non-leading ledgers T1 (Local Reporting) and T2 (Tax Reporting). Because the process of specifying scenarios is the same for every ledger, we will only define the scenarios for ledger T1. We will be leaving ledger T2 for you to do on your own, by following the same steps.
Non-Leading Ledger T1 for Local (Company Code) Reporting
To assign scenarios and customer fields to non-leading ledger T1, follow this menu path: IMG: Financial Accounting (New) ![]() Financial Accounting Global Settings (New)
Financial Accounting Global Settings (New) ![]() Ledgers
Ledgers ![]() Ledger
Ledger ![]() Assign Scenarios and Customer Fields to Ledgers. The Display View “Ledgers”: Overview screen comes up with a list containing the ledgers T1 and T2 you defined in the “Define and Activate Non-Leading Ledgers” section earlier and other existing ledgers on the screen (Figure 19-8).
Assign Scenarios and Customer Fields to Ledgers. The Display View “Ledgers”: Overview screen comes up with a list containing the ledgers T1 and T2 you defined in the “Define and Activate Non-Leading Ledgers” section earlier and other existing ledgers on the screen (Figure 19-8).

Figure 19-8. Ledgers overview screen for assigning scenarios – non-leading ledger
Select or highlight the T1 ledger for local (company code) reporting from the list and double-click the ![]() folder. The Display View “Scenarios”: Overview screen is displayed. To specify the scenarios for ledger T1, click the
folder. The Display View “Scenarios”: Overview screen is displayed. To specify the scenarios for ledger T1, click the ![]() button at the top of the screen. The New Entries: Overview of Added Entries screen is displayed (Figure 19-9).
button at the top of the screen. The New Entries: Overview of Added Entries screen is displayed (Figure 19-9).
Figure 19-9. New Entries screen where you specify scenarios for ledger – T1 for local reporting
You will specify the scenarios for your ledger that meet your requirements. In this exercise, we are using the following scenarios as an illustration to guide you through specifying scenarios for additional ledgers:
- Cost Center Update
- Preparation for Consolidation
- Profit Center Update
- Segmentation
Use the matchcode next to the Scenarios field so that the Scenarios for General Ledger Accounting screen containing the list of available scenarios is displayed (Figure 19-10).

Figure 19-10. List of scenarios for general ledger accounting
To include an item from the list of scenarios, select or highlight the item (Cost Center Update) and click the Enter ![]() button on the top-left side of the screen to confirm your selection. Notice that the scenario FIN_CCA Cost Center Update is entered into the Scenarios field in Figure 19-11.
button on the top-left side of the screen to confirm your selection. Notice that the scenario FIN_CCA Cost Center Update is entered into the Scenarios field in Figure 19-11.

Figure 19-11. The screen where you specify scenarios for ledgers
Click the Enter ![]() button on the top-left side of the screen and proceed to the next scenario field below FIN_CCA – Cost Center Update. Select FIN_CONS-Preparation for Consolidation.
button on the top-left side of the screen and proceed to the next scenario field below FIN_CCA – Cost Center Update. Select FIN_CONS-Preparation for Consolidation.
Repeat this process to assign the remaining scenarios for the T1 ledger:
- FIN_PCA – Profit Center Update
- FIN_SEGM – Segmentation
When you have completed your scenarios specifications, the scenarios assigned to the T1 ledger should look like those shown in Figure 19-12.

Figure 19-12. Ledgers overview screen displaying assigned scenarios
Save ![]() your scenarios assignment.
your scenarios assignment.
As part of this exercise, repeat the same process to specify the scenarios for the non-leading ledger T1 for Local Reporting to specify scenarios for ledger T2 for tax reporting.
Define Ledger Group
A ledger group allows you to classify ledgers with similar functions and business processes of general ledger accounting together in the same group. You can make postings to multiple ledgers at the same time. It’s also possible to impose restrictions in order to update individual postings to a ledger group, so that documents are only posted to ledgers in the group. When a ledger group is not specified, the system will automatically post to all ledgers. Likewise, when a ledger group is specified, the system will only post to ledgers in the same ledger group.
When defining a ledger group, you must specify which ledger will be the representative ledger in the group. Only one ledger in a group is used as a representative ledger. Often, the leading ledger is used. The system uses a representative ledger to check settings for an open period and to determine if a posting period is open.
![]() Note If the ledger group has a leading ledger, the leading ledger must be used as the representative ledger. When there is no leading ledger, you have to designate a representative ledger. If the ledger group has more than one ledger, the system will verify during document posting, based on the company’s fiscal year variant, that the representative ledger was selected correctly.
Note If the ledger group has a leading ledger, the leading ledger must be used as the representative ledger. When there is no leading ledger, you have to designate a representative ledger. If the ledger group has more than one ledger, the system will verify during document posting, based on the company’s fiscal year variant, that the representative ledger was selected correctly.
Here is how you choose which ledger to use in a group as the representative ledger:
- If all the ledgers in the ledger group have different fiscal year variants, use any ledger as the representative ledger.
- If one of the ledgers has the same fiscal year variant as the company code, use that ledger as the representative ledger.
In this exercise, we will not be defining ledger group, because we want the system to automatically post to all ledgers.
When you need to define a ledger group for your company, follow this menu path: IMG: Financial Accounting (New) ![]() Financial Accounting Global Settings (New)
Financial Accounting Global Settings (New) ![]() Ledgers
Ledgers ![]() Ledger
Ledger ![]() Define Ledger Group.
Define Ledger Group.
Accounting Principles
Accounting principle configuration is part of parallel accounting in SAP. The accounting principles that you define in this exercise enable you to perform valuations and closing preparations for your company code and produce financial reports for the group and your company code according to accounting principles (IAS/US GAAP), which enables you to meet various stakeholders’ needs.
![]() Warning Do not delete the accounting principles you have defined, because accounting principles have relationships with other accounting functions, like currency valuation and others, which can affect your customizations.
Warning Do not delete the accounting principles you have defined, because accounting principles have relationships with other accounting functions, like currency valuation and others, which can affect your customizations.
In this exercise, we will define accounting principles and assign the accounting principles we define to appropriate ledger groups. To define accounting principles, follow this menu path: IMG: Financial Accounting (New) ![]() Financial Accounting Global Settings (New)
Financial Accounting Global Settings (New) ![]() Ledgers
Ledgers ![]() Parallel Accounting
Parallel Accounting ![]() Define Accounting Principles. The Change View “Accounting Principles”: Overview screen is displayed. Click the
Define Accounting Principles. The Change View “Accounting Principles”: Overview screen is displayed. Click the ![]() button on the top-left side of the screen.
button on the top-left side of the screen.
![]() Note You cannot use an accounting principle key that has already been assigned to another ledger group in the system. If accounting principle keys C10, C20, C30 have been used, you can’t use them again. When defining accounting principle keys, use keys that have not been used already.
Note You cannot use an accounting principle key that has already been assigned to another ledger group in the system. If accounting principle keys C10, C20, C30 have been used, you can’t use them again. When defining accounting principle keys, use keys that have not been used already.
Using the information in Table 19-1, update the New Entries: Overview of Addition Entries screen.
Table 19-1. The Information Needed to Update the Screen Where You Define Your Accounting Principles
|
Accounting Principles |
Name/Description of Accounting Principles |
|---|---|
|
C10 |
Local GAAP – C900 |
|
C20 |
International Accounting Standards (IAS) – C900 |
|
C30 |
Local Tax (CRM) – C900 |
Click the Enter ![]() button on the top-left side of the screen to confirm your entries and save
button on the top-left side of the screen to confirm your entries and save ![]() your accounting principles.
your accounting principles.
The next step is to assign these accounting principles to the target ledger groups. Follow this menu path to do so: IMG: Financial Accounting (New) ![]() Financial Accounting Global Settings (New)
Financial Accounting Global Settings (New) ![]() Ledgers
Ledgers ![]() Parallel Accounting
Parallel Accounting ![]() Assign Accounting Principle to Ledger Groups. The Change View “Assignment of Accounting Principle to Target Ledger Group” screen is displayed. Click the
Assign Accounting Principle to Ledger Groups. The Change View “Assignment of Accounting Principle to Target Ledger Group” screen is displayed. Click the ![]() button at the top of the screen. The New Entries: Overview of Added Entries screen is displayed. Using the information in Table 19-2, update the Accounting Principle and Target ledger Group fields, as shown in Figure 19-13.
button at the top of the screen. The New Entries: Overview of Added Entries screen is displayed. Using the information in Table 19-2, update the Accounting Principle and Target ledger Group fields, as shown in Figure 19-13.
Table 19-2. The Data Needed to Update the Accounting Principles to the Target Ledger Group
|
Accounting Principles |
Target Ledger Group |
|---|---|
|
C10 |
0L – Leading Ledger |
|
C20 |
T1 – Ledger – Local Reporting C900 |
|
C30 |
T2 – Ledger – Tax Reporting C900 |

Figure 19-13. Assignment of accounting principles to a target ledger group
Click the Enter ![]() button on the top-left side of the screen to confirm your entries and save
button on the top-left side of the screen to confirm your entries and save ![]() your work.
your work.
Real-Time Integration of Controlling with Financial Accounting
All cost allocation and other postings within a controlling environment usually do not affect financial accounting transactions (that is, G/L accounts are not updated with postings carried out in controlling). However, there are some cost allocations in controlling which are relevant for evaluation in financial accounting that need to be reflected in FI, because of the effect they have on the year-end reporting (the profit and loss statement). This type of transaction will call for reconciliation between controlling and financial accounting to necessitate the transfer of relevant data from controlling to the new general ledger in financial accounting real-time. This is best achieved using real-time integration in SAP.
The advantage of real-time integration is that no reconciliation ledger is required, because the reconciliation postings are replaced by real-time integration. Hence, you do not need to set the reconciliation ledger active indicator in controlling. To define variants for real-time integration, follow this menu path: IMG: Financial Accounting (New) ![]() Financial Accounting Global Settings (New)
Financial Accounting Global Settings (New) ![]() Ledgers
Ledgers ![]() Real-Time Integration of Controlling with Financial Accounting
Real-Time Integration of Controlling with Financial Accounting ![]() Define Variants for Real-Time Integration. The Change View “Variants for Real-Time Integration CO->FI”: Overview screen is displayed. To specify the real-time integration, click the
Define Variants for Real-Time Integration. The Change View “Variants for Real-Time Integration CO->FI”: Overview screen is displayed. To specify the real-time integration, click the ![]() button at the top of the screen. The New Entries: Details of Added Entries screen is displayed (Figure 19-14).
button at the top of the screen. The New Entries: Details of Added Entries screen is displayed (Figure 19-14).

Figure 19-14. The screen where you specify variants for real-time integration of controlling with FI
Update the following fields:
- Var. for R-T Integ.: Enter an identification key that you want to use for your variant for real-time integration (C900). You can use up to four characters for the variant key.
- R.-Time Integ:Active: Do not click the Real-Time Integration Active checkbox. By clicking this checkbox, CO (controlling) postings are posted to FI in real time.
- Key Date: Active From: Enter the start date of the current fiscal year (01.01.2012 CO) of your company code. This will post the documents posted in CO from this date to FI.
- Acct Deter.: Active: Click the Account Determination: Active checkbox. When you click the box, the system carries out account determination during CO document transfer to FI.
- Document Type: Enter document type SA (General Account document type). You can access the list of document types supplied by SAP using the matchcode.
- Ledger Group (FI): Enter your leading ledger 0L in this field as the leading ledger group for your variant for real-time integration of CO with FI.
- Text: Enter a description for your variant (Integration of Controlling with Financial Account C900). The description you use here is a matter of choice, but use a meaningful description.
You can select document lines for real-time integration CO->FI by clicking the User checkboxes on the following objects:
- Cross-Company Code
- Cross -Business Area
- Cross-Functional Area
- Cross-Profit-Center
- Cross-Segment
Click the Enter ![]() button on the top-left side of the screen to confirm your entries and save
button on the top-left side of the screen to confirm your entries and save ![]() your work.
your work.
Assign Variants for Real-Time Integration to Company Codes
To activate real-time integration of controlling with FI for your company code, it is important to assign variants for real-time integration of CO with FI to your company code. The variants for real time integration you defined earlier can be assigned to one or more company codes. To Assign variants for real-time integration to company codes, follow this menu path: IMG: Financial Accounting (New) ![]() Financial Accounting Global Settings (New)
Financial Accounting Global Settings (New) ![]() Ledgers
Ledgers ![]() Real-Time Integration of Controlling with Financial Accounting
Real-Time Integration of Controlling with Financial Accounting ![]() Assign Variants for Real-Time Integration to Company Codes. The Change View “Assignment of Variants for Real-Time integration for CoCo screen is displayed. Click the
Assign Variants for Real-Time Integration to Company Codes. The Change View “Assignment of Variants for Real-Time integration for CoCo screen is displayed. Click the ![]() button at the top of the screen to assign your variant for real-time integration to your company code. The New Entries: Overview of Added Entries screen is displayed (Figure 19-15).
button at the top of the screen to assign your variant for real-time integration to your company code. The New Entries: Overview of Added Entries screen is displayed (Figure 19-15).

Figure 19-15. Assigning variants for real-time integration for the company code
Update the following fields:
- Company Code: Enter your company code (C900).
- Variant for Real-Time Integration: Enter your variant (C900).
Click the Enter ![]() button on the top-left side of the screen to confirm your entries and save
button on the top-left side of the screen to confirm your entries and save ![]() your efforts.
your efforts.
![]() Note Before you begin defining account determination for real-time integration, go to “Appendix A, Chapter 19, New General Ledger” to create the G/L accounts you need for this customization.
Note Before you begin defining account determination for real-time integration, go to “Appendix A, Chapter 19, New General Ledger” to create the G/L accounts you need for this customization.
Account Determination for Real-Time Integration
To be able to trace postings to FI, you must define account determination for real-time integration of controlling to financial accounting. Follow this menu path: IMG: Financial Accounting (New) ![]() Financial Accounting Global Settings (New)
Financial Accounting Global Settings (New) ![]() Ledgers
Ledgers ![]() Real-Time Integration of Controlling with Financial Accounting
Real-Time Integration of Controlling with Financial Accounting ![]() Account Determination for Real Time Integration
Account Determination for Real Time Integration ![]() Define Account Determination for Real Time Integration.
Define Account Determination for Real Time Integration.
The Set Controlling Area dialog box pops up. Enter your controlling area key (C900) in the Controlling Area field and click the Continue ![]() button on the bottom-right side of the screen. The Reconciliation Ledger: Change Account Determination screen is displayed. To maintain accounts determination for automatic posting, click the
button on the bottom-right side of the screen. The Reconciliation Ledger: Change Account Determination screen is displayed. To maintain accounts determination for automatic posting, click the ![]() button at the top of the screen. The Configuration Accounting Maintain: Automatic Posts – Rules screen is displayed. Specify the post rule for your account determination, click the CO Transaction checkbox, click the Save
button at the top of the screen. The Configuration Accounting Maintain: Automatic Posts – Rules screen is displayed. Specify the post rule for your account determination, click the CO Transaction checkbox, click the Save ![]() button, and then click the
button, and then click the ![]() button at the top of the screen. The Configuration Accounting Maintain: Automatic Posts – Accounts screen appears. Update the CO Transaction and Accounts fields using the details on the screen in Figure 19-16 to classify business transactions for postings automatically.
button at the top of the screen. The Configuration Accounting Maintain: Automatic Posts – Accounts screen appears. Update the CO Transaction and Accounts fields using the details on the screen in Figure 19-16 to classify business transactions for postings automatically.

Figure 19-16. Account assignment for automatic postings
You can access the list of business transactions for actual postings using the matchcode next to each CO Transaction field. Click the Enter ![]() button on the top-left side of the screen and save
button on the top-left side of the screen and save ![]() automatic account determination.
automatic account determination.
Document Types
Document types are standard codes supplied by SAP that play a significant role in differentiating business transactions and determining how documents are stored in the system’s database. In this exercise, we will be defining document types for entry view in a ledger and defining document types for general ledger view.
Define Document Types for Entry View in a Ledger
In this exercise, you will specify the document type for posting to the non-leading ledgers you defined earlier (Ledger – T2 and Ledger T2). The settings made here—Define Document Type for Entry View in a Ledger—allow you to define document type for your non-leading ledgers and assign a unique number range to each document type. This setting will affect all ledgers and postings to the leading ledger 0L. To define document types for entry view in a ledger, follow this menu path: IMG: Financial Accounting (New) ![]() Financial Accounting Global Settings (New)
Financial Accounting Global Settings (New) ![]() Document
Document ![]() Document Types
Document Types ![]() Define Document Types for Entry View in a Ledger. The Determine Work Area Entry dialog box pops up. Enter T1 (local reporting ledger), which you defined earlier (in the “Define Ledgers for General Ledger Accounting” section) in the Ledger field and click the Continue
Define Document Types for Entry View in a Ledger. The Determine Work Area Entry dialog box pops up. Enter T1 (local reporting ledger), which you defined earlier (in the “Define Ledgers for General Ledger Accounting” section) in the Ledger field and click the Continue ![]() button at the bottom of the screen to assign the document type to the non-leading ledger T1.
button at the bottom of the screen to assign the document type to the non-leading ledger T1.
The Change View “Document Types for Entry View in a Ledger”: Overview screen is displayed. Click the ![]() button on the top-left side of the screen to assign a document type and number range to your ledger T1. The New Entries: Overview of Added Entries screen appears. Assign a number range to each document type, as shown in Figure 19-17. Use the following document types:
button on the top-left side of the screen to assign a document type and number range to your ledger T1. The New Entries: Overview of Added Entries screen appears. Assign a number range to each document type, as shown in Figure 19-17. Use the following document types:
- AB – Accounting Document
- AE – Accounting Document
- AF – Dep. Posting
- SA – G/L Account Document
- SX – Closing Period

Figure 19-17. Assigning number ranges to document types for entry view in a ledger
Click the Enter ![]() button on the top-left side of the screen and save
button on the top-left side of the screen and save ![]() your efforts.
your efforts.
![]() Note You may experience a slight problem when saving your work. The system does not allow number overlap. You must avoid using the numbers that have already been assigned to document types. You can display the list of number ranges that have been used. Look for numbers that have not been used (between 1 and 100) and assign them to your document type. Document types were covered in Chapter 4.
Note You may experience a slight problem when saving your work. The system does not allow number overlap. You must avoid using the numbers that have already been assigned to document types. You can display the list of number ranges that have been used. Look for numbers that have not been used (between 1 and 100) and assign them to your document type. Document types were covered in Chapter 4.
To complete this exercise, repeat the same process for ledger T2 (tax reporting) on your own before continuing.
Define Document Types for General Ledger View
In this exercise, you will define document types for non-leading ledgers in the general ledger view. The settings here are applicable only to non-leading ledgers whose fiscal year variants are different from the leading ledger variant. In most cases, the leading ledger fiscal year variant is usually the same as the company code variant. Therefore, any non-leading ledger with a fiscal year variant different from the company code variant is considered in this customizing exercise. It is compulsory to define different document types and number range intervals for general ledger view for non-leading ledgers.
In this scenario, ledger T2 (tax reporting) has a different fiscal year variant V3 from leading ledger 0L (K4). Therefore, you need to define document types for general ledger view for non-leading ledger (ledger T2). Follow this menu path: IMG: Financial Accounting (New) ![]() Financial Accounting Global Settings (New)
Financial Accounting Global Settings (New) ![]() Document
Document ![]() Document Types
Document Types ![]() Define Document Types for General Ledger View. The Determine Work Area Entry dialog box pops up. Enter T2 (tax reporting ledger) that you defined earlier in the Ledger field and click the Continue
Define Document Types for General Ledger View. The Determine Work Area Entry dialog box pops up. Enter T2 (tax reporting ledger) that you defined earlier in the Ledger field and click the Continue ![]() button at the bottom of the screen. This will allow you to assign a document type for the general ledger view to non-leading ledger T2. The Change View “Document Types for General Ledger View in a Ledger”: Overview screen is displayed. Click the
button at the bottom of the screen. This will allow you to assign a document type for the general ledger view to non-leading ledger T2. The Change View “Document Types for General Ledger View in a Ledger”: Overview screen is displayed. Click the ![]() button at the top of the screen to assign a document type and number range to your ledger T2. The New Entries: Overview of Added Entries screen appears. Enter a document type that meets your requirements in the Type field and assign a number range (01) for each document type in the Number Range field, as shown in Figure 19-18. Since you are defining Document Types for General Ledger View in a ledger, it is not necessary to assign different number range to each document type for the new general ledger.
button at the top of the screen to assign a document type and number range to your ledger T2. The New Entries: Overview of Added Entries screen appears. Enter a document type that meets your requirements in the Type field and assign a number range (01) for each document type in the Number Range field, as shown in Figure 19-18. Since you are defining Document Types for General Ledger View in a ledger, it is not necessary to assign different number range to each document type for the new general ledger.
Figure 19-18. Further assignment of number ranges to document types for entry view in a ledger
![]() Note There is no special rule when assigning numbers to the document type in the general ledger view, as number range overlap is not a problem in this case.
Note There is no special rule when assigning numbers to the document type in the general ledger view, as number range overlap is not a problem in this case.
Standard document types are supplied by SAP. You can access them using the matchcode in the Type field.
Click the Enter ![]() button on the top-left side of the screen and save
button on the top-left side of the screen and save ![]() the definition of document types for the general ledger view.
the definition of document types for the general ledger view.
Document Splitting
Document splitting is a new feature in SAP in new general ledger accounting that provides the flexibility to split document line items based on defined dimensions (for example, receivables lines by profit center). This makes it possible to produce a financial statement for a given business aspect (such as Profit Centers, Business Areas, Segments, Funds, and so on) at any point in time. Document splitting makes it possible for the following functions to be carried out when document splitting configuration is completed:
- Automatic document splitting of line items based on defined dimensions.
- Online document splitting.
- Document splitting during posting of documents.
- Support financial statements reporting for legal purposes (for IAS, GAAP, and so on) and segmental reporting to display a partial balance sheet according to business functions.
- Create a zero balance setting in the document for any dimension such as segment.
You have the option of displaying the document in its original form with the generated clearing lines in the entry view or in the general ledger view from the ledger perspective. For the system to perform splitting, individual document items and all documents involved must be classified in accordance with a rule that defines how document splitting is to be performed and for which line items. SAP comes with a predefined set of standard rules that will satisfy your document splitting requirements. It is also possible to define your own set of rules and adapt them to meet your requirements.
The following are part of document splitting functions:
- Passive document splitting: All document-splitting processes are carried out by the system using a predetermined internal program with reference to the original document. Passive document splitting is not controlled by the settings you conducted in your customizing and does not take the settings in your configuration into consideration.
- Active document splitting: All document-splitting processes in active document splitting are carried out based on the settings you conducted in your customizing without reference to the original document.
Limitations to document splitting include:
- Only documents that are specifically assigned to a business process can be split when using the document-splitting function.
- When there are multiple business processes within one document, it becomes difficult to establish a valid relationship between the business process and the document.
Classify G/L Accounts for Document Splitting
Transactions entered into the system are automatically analyzed by the system based on predefined criteria to determine how individual line items in the system are to be treated during document processing (such as by splitting or to remain unchanged). You need to classify document items by assigning them to appropriate item categories. This categorization will allow the system to recognize how to handle document items splitting and manage the document-splitting processes based on your classifications in this exercise.
In this exercise, you will assign accounts to the appropriate category in the document-splitting procedure, which the system will post documents to.
The following categories are supplied by SAP so that you can assign them to your G/L accounts:
- 01000 – Balance Sheet Account
- 01001 – Zero Balance Posting (Free Balancing Units)
- 01300 – Cash Discount Clearing
- 02000 – Customer
- 02100 – Customer: Special G/L Transaction
- 03000 – Vendor
- 03100 – Vendor: Special G/L Transaction
- 04000 – Cash Account
- 05100 – Taxes on Sales/Purchases
- 05200 – Withholding Tax
- 06000 – Material
- 07000 – Asset
- 20000 – Expense
- 30000 – Revenue
- 40100 – Cash Discount (Expenses/Revenue/Loss)
- 40200 – Exchange Rate Difference
- 8000 – Customer-Specific Item Category
To classify G/L accounts for document splitting, follow this menu path: IMG: Financial Accounting (New) ![]() General Ledger Accounting (New)
General Ledger Accounting (New) ![]() General Ledger Account
General Ledger Account ![]() Document Splitting
Document Splitting ![]() Classify G/L Accounts for Document Splitting. The Determine Work Areas: Entry screen pops up. Enter your chart of accounts (CA90) in the chart of accounts field and click the Continue
Classify G/L Accounts for Document Splitting. The Determine Work Areas: Entry screen pops up. Enter your chart of accounts (CA90) in the chart of accounts field and click the Continue ![]() button at the bottom of the screen. The Change View “Classify G/L Accounts for Document Splitting”: Overview screen comes up. To perform the classification for document splitting, click the
button at the bottom of the screen. The Change View “Classify G/L Accounts for Document Splitting”: Overview screen comes up. To perform the classification for document splitting, click the ![]() button on the top-left side of the screen. We have provided a list of G/L accounts and categories you will need to update the screen in Table 19-3.
button on the top-left side of the screen. We have provided a list of G/L accounts and categories you will need to update the screen in Table 19-3.
After classifying the G/L accounts for document splitting, your screen should look like the one shown in Figure 19-19.

Figure 19-19. Account assignment to document splitting categories
Click the Enter ![]() button on the top-left side of the screen and save
button on the top-left side of the screen and save ![]() .
.
Classify Document Types for Document Splitting
When a transaction is entered into the system, it’s analyzed by the system to determine the splitting rule that is applicable to the document. For the system to determine the splitting rule that is applicable to a document, each document type must be assigned with the appropriate business transaction variant. Appropriate requirements have to be in place for splitting rules to function effectively. When a document is posted, the system checks each posting against the defined business transaction variant. If the conditions set out are not met, the system will automatically reject the posting.
The system does not provide the flexibility to define further business transactions, but it is possible to define your own business transaction variants. The system comes with standard business variants (0001). In this exercise, we will not be defining any variants. It is advisable that you stick to the standard business variants supplied by the system. To specify the document type for document splitting, follow this menu path: IMG: Financial Accounting (New) ![]() General Ledger Accounting (New)
General Ledger Accounting (New) ![]() Business Transactions
Business Transactions ![]() Document Splitting
Document Splitting ![]() Classify Document Types for Document Splitting.
Classify Document Types for Document Splitting.
Zero-Balance Clearing Account
The Zero-Balance Clearing Account function enables you to define document-splitting characteristics for the balance sheet. When document splitting is performed, the system checks if the account assignment object that you want to zero-balance actually has a zero balance after document splitting. If the account assignment does not have a zero balance, the system will generate additional clearing items (Figure 19-20) and post the items initiated in the document to the clearing account assigned for the zero-balance clearing account.
Figure 19-20. Flowchart depicting the zero-balance clearing process when document splitting
To define a zero-balance clearing account for your document-splitting process, follow this menu path: IMG: Financial Accounting (New) ![]() General Ledger Accounting (New)
General Ledger Accounting (New) ![]() Business Transactions
Business Transactions ![]() Document Splitting
Document Splitting ![]() Define Zero-Balance Clearing Account.
Define Zero-Balance Clearing Account.
![]() Note Before you define a zero-balance clearing account for document splitting, go to “Appendix A (Chapter 19)” to create the G/L account 199600.
Note Before you define a zero-balance clearing account for document splitting, go to “Appendix A (Chapter 19)” to create the G/L account 199600.
The Change View “Posting Key”: Overview screen is displayed. Select account key 000 for Standard Account for Zero Balance from the list of account keys onscreen (this is a standard key supplied by SAP ). Double-click the ![]() folder on the left side of the screen. The Set Chart of Accounts dialog box pops up. Enter your chart of accounts (CA90) and click the Continue
folder on the left side of the screen. The Set Chart of Accounts dialog box pops up. Enter your chart of accounts (CA90) and click the Continue ![]() button at the bottom of the screen. The Change View “Account”: Overview screen is displayed. To go to the input screen where you can specify the G/L account for the zero-balance clearing setting, click the
button at the bottom of the screen. The Change View “Account”: Overview screen is displayed. To go to the input screen where you can specify the G/L account for the zero-balance clearing setting, click the ![]() button at the top of the screen. The New Entries: Overview of Added Entries screen comes up (Figure 19-21). Enter the G/L account you have defined for Zero-Balance Clearing in the G/L Account field (199600).
button at the top of the screen. The New Entries: Overview of Added Entries screen comes up (Figure 19-21). Enter the G/L account you have defined for Zero-Balance Clearing in the G/L Account field (199600).
Figure 19-21. Assigning a G/L account to a zero-balance clearing account
Click the Enter ![]() button on the top-left side of the screen and save
button on the top-left side of the screen and save ![]() the zero-balance account clearing you have defined.
the zero-balance account clearing you have defined.
Posting General Ledger Accounting Documents
Having completed the required configuration process for the new general ledger accounting, let’s now look at how to post general ledger accounting documents and how to reverse documents in the new general ledger accounting.
Enter G/L Account Documents
Problem: Assume that $1,000 of the office supplies account (G/L account 476000) was mistakenly posted to the office expenses account (G/L account 477000) created in Chapter 5 (in the section “Creating G/L Account Master Record”). You have been asked to carry out the appropriate adjustment to correct this error.
G/L account document posting is part of the SAP R/3 Enjoy document. G/L account posting is the same as the conventional journal posting. To post a G/L account document, follow this menu path: Accounting ![]() Financial Accounting
Financial Accounting ![]() General Ledger
General Ledger ![]() Posting
Posting![]() FB50 – G/L Account Document. Or use transaction code FB50. The Enter G/L Account Document: Company Code C900 screen is displayed. Using the data in Table 19-4, update the screen.
FB50 – G/L Account Document. Or use transaction code FB50. The Enter G/L Account Document: Company Code C900 screen is displayed. Using the data in Table 19-4, update the screen.
Table 19-4. Data Needed to Post G/L Account Documents
|
Field |
Value |
Description |
|---|---|---|
|
Document Date |
Today’s date |
Enter the current date in this field. |
|
Posting Date |
Today’s date |
Enter the current date in this field. |
|
Currency |
GBP |
The currency code is set by default. You can overwrite it. |
|
G/L (1) |
476000 |
This is the account for office supplies. |
|
G/L (2) |
477000 |
This is the account for office expenses. |
|
D/C (1) |
Debit |
When you select debit, the document amount will be posted to the debit side of the account. |
|
DC (2) |
Credit |
When you select credit, the document amount will be posted to the credit side of the account. |
|
Amount |
1000 |
This is the document amount. |
|
Tax Code |
B2 |
This is the input tax code that the system will apply to calculate the tax amount applicable to the document amount. |
|
Cost Center |
4110 |
This is the cost center (Car - Vehicle) that the document amount will be posted to in the cost center. |
Click the Enter ![]() button at the top of the screen to confirm your entries. To display your entries, click the
button at the top of the screen to confirm your entries. To display your entries, click the ![]() button at the top of the screen. The Document Overview screen appears displaying your entries. Look through the displayed entries and then click Post
button at the top of the screen. The Document Overview screen appears displaying your entries. Look through the displayed entries and then click Post ![]() if you are satisfied with your entries.
if you are satisfied with your entries.
Enter G/L Account Document for Ledger Group
Let’s look at how to post to a specific ledger. For example, you can post documents to group reporting, local reporting, or tax reporting ledgers.
Problem: Post $1,000 from the office supplies account (G/L account 476000) to the office expenses account (G/L account 477000) in ledger T2.
To post a G/L account document for a ledger group, follow this menu path: Accounting ![]() Financial Accounting
Financial Accounting ![]() General Ledger
General Ledger ![]() Posting
Posting ![]() G/L Account Document for Ledger Group. Or use transaction code FB50L. The Enter G/L Acct Document for Ledger Group: Company Code C900 screen is displayed (Figure 19-22).
G/L Account Document for Ledger Group. Or use transaction code FB50L. The Enter G/L Acct Document for Ledger Group: Company Code C900 screen is displayed (Figure 19-22).

Figure 19-22. The screen to enter a G/L account document for the ledger group for your company code
Update the following fields:
- Document Date: Enter the document date. For this exercise, we used today’s date.
- Posting Date: Enter today’s date as your posting date.
- Currency: This defaults to your company code’s currency (GBP).
- Ledger Grp: Enter the ledger group T2 for tax reporting that you want to post the document to in this field.
- G/L (1): Enter the account number (476000) that you want to post the document to (debit).
- G.L (2): Enter the corresponding account number (477000) that you want to post the document to (credit).
- Amount: Enter the document amount ($1000) in this field.
- Tax Code: Enter the tax code B2 in this field. This is the input tax code that the system will use to calculate the tax amount applicable to the document amount.
- Cost Center: Enter the cost center 4110 in this field. This is the cost center that the document amount will be posted to in the cost center. (Car –Vehicle is a cost center that absorbs office supplies in this exercise).
Click the Enter ![]() button at the top of the screen to confirm your entries. To display your entries, click the
button at the top of the screen to confirm your entries. To display your entries, click the ![]() button at the top of the screen. The Document Overview screen appears displaying your entries (Figure 19-23).
button at the top of the screen. The Document Overview screen appears displaying your entries (Figure 19-23).

Figure 19-23. Displaying the documents entered for ledger group T2
Look through the displayed entries and click Post ![]() if you are satisfied with your entries.
if you are satisfied with your entries.
![]() Note The system will issue a warning that
Note The system will issue a warning that ![]() . This is because of the difference in fiscal year variant. Click the Enter
. This is because of the difference in fiscal year variant. Click the Enter ![]() button on the top-left side of the screen to confirm the adjustments.
button on the top-left side of the screen to confirm the adjustments.
Reverse Document
You can reverse an FI document that’s been incorrectly entered by using the Reverse Document function. Document reversal was covered in depth in Chapter 14 (Adjustment Posting/Reversal). We will look at how to reverse documents using the negative reversal method in this exercise.
![]() Note For the system to carry out negative reversal, the following conditions must be satisfied:
Note For the system to carry out negative reversal, the following conditions must be satisfied:
- The company code must be defined to allow negative postings.
- The document type should also allow negative postings.
Using transaction code FB70 and the data in Table 19-5, enter a customer invoice that you will reverse in this exercise.
Table 19-5. Details Needed to Post a Customer Document for Document Reversal
|
Field |
Value |
|---|---|
|
Invoice Date |
Today’s date |
|
Posting Date |
Today’s date |
|
Amount |
3000 |
|
Calculate Tax |
Click the checkbox (and specify the tax code 20% for output tax) |
|
G/L Acct |
477000 |
|
D/C |
Credit |
|
Amount |
3000 |
|
Tax Code |
A2 |
|
Cost Center |
4110 |
|
Segment |
SEG-A |
![]() Note When you post your document, the system will notify you in the status bar at the bottom of the screen that your document was posted and will issue a document number. Take note of this document number, because you will need it when reversing the document.
Note When you post your document, the system will notify you in the status bar at the bottom of the screen that your document was posted and will issue a document number. Take note of this document number, because you will need it when reversing the document.
To carry out individual document reversal, follow this menu path: Accounting ![]() Financial Accounting
Financial Accounting ![]() General Ledger
General Ledger ![]() Document
Document ![]() Reverse
Reverse ![]() Individual Reversal. Or use transaction code FB08. The Reverse Document: Header Data screen is displayed (Figure 19-24).
Individual Reversal. Or use transaction code FB08. The Reverse Document: Header Data screen is displayed (Figure 19-24).

Figure 19-24. Reverse document and post reverse document using negative reversal method
Update the following fields:
- Document Number: Enter the document number (1800000021) that you want to reverse. This number is usually displayed on the status bar the bottom of the screen when a document is posted. If you cannot remember the document number, use the
 button at the top of the screen to display the list of documents and search for your document and enter it in the document number field.
 - Company Code: Enter your company code (C900) in this field.
- Fiscal Year: Enter your company’s financial year or fiscal year 2012 in this field.
- Reversal Reason: Enter reason 01 (the standard reversal reason supplied by SAP) for reversing the document. You can access the list of reason codes using the matchcode next to the Reversal Reason field.
Before posting reversed documents, it is advisable to for check them to make sure that they are the documents you actually want to reverse. Reversing the wrong document could have a detrimental effect. To display the document you want to reverse, click the ![]() button at the top of the screen. The Display Document: Data Entry View screen displaying the document you want to reverse is displayed (Figure 19-25).
button at the top of the screen. The Display Document: Data Entry View screen displaying the document you want to reverse is displayed (Figure 19-25).

Figure 19-25. The document to be reversed using the Negative Reversal method
Click the Back ![]() button at the top of the screen to return to the previous screen (Document: Header Data), where you can post the reverse document. Click the Post
button at the top of the screen to return to the previous screen (Document: Header Data), where you can post the reverse document. Click the Post ![]() button for the system to reverse the document.
button for the system to reverse the document.
![]() Note The system will notify you on the status bar that
Note The system will notify you on the status bar that ![]() .
.
In this exercise, you learn how to display the G/L Account balance and line items in new general ledger accounting.
To display balances in new general ledger accounting, follow this menu path: Accounting ![]() Financial Accounting
Financial Accounting ![]() General Ledger
General Ledger ![]() Account
Account ![]() Display Balances (New). Or use transaction code FAGLB0. The G/L Account Balance Display screen appears. Update the following fields:
Display Balances (New). Or use transaction code FAGLB0. The G/L Account Balance Display screen appears. Update the following fields:
- Account Number: Enter the account number range (476000 – 477000) that you want to display in the account number fields.
- Company Code: Enter the company code (C900) that you want to display the balance in this field.
- Fiscal Year: Enter the financial year or fiscal year 2012 that you want to display the account balance in this field.
The system will automatically default to leading ledger 0L. You need to change this since you are displaying the ledger group T2 in this exercise. Click the ![]() button at the top of the screen; the Set Ledger dialog box pops up. This screen will allow you to set the appropriate non-leading ledger for your account balance display. Enter the non-leading ledger code T2 that you want to display the G/L account balance in the Ledger field. Click the Continue
button at the top of the screen; the Set Ledger dialog box pops up. This screen will allow you to set the appropriate non-leading ledger for your account balance display. Enter the non-leading ledger code T2 that you want to display the G/L account balance in the Ledger field. Click the Continue ![]() button on the bottom-right side of the screen. The non-leading ledger T2 will be entered into the Ledger field in the G/L Account Balance Display screen. Click the Execute
button on the bottom-right side of the screen. The non-leading ledger T2 will be entered into the Ledger field in the G/L Account Balance Display screen. Click the Execute ![]() on the top-left side of the screen to display the G/L account balance for ledger T2. The Balance Display: G/L Accounts for the Ledger T2 screen comes up with list of balances relating to non-leading ledger T2, as shown in Figure 19-26.
on the top-left side of the screen to display the G/L account balance for ledger T2. The Balance Display: G/L Accounts for the Ledger T2 screen comes up with list of balances relating to non-leading ledger T2, as shown in Figure 19-26.

Figure 19-26. G/L accounts balance display for non-leading ledger T2
It is also possible to display line items from the balance display screen. To do this, double-click the displayed account balance 12000 in the period (Period 5) you want to take into consideration. The G/L Account Line Item Display G/L View screen is displayed (Figure 19-27), showing all the line items relating to the balances you selected.

Figure 19-27. General ledger view G/L account displaying line items for ledger T2 in period 5
Closing
Some activities in FI need to be closed periodically. SAP provides a closing operations component that prepares and performs the activities needed for closing. Closing operations fall into three categories:
- Day-end closing
- Month-end closing
- Year-end closing
The primary purpose for performing closing is to enable the system to generate several reports needed by management from the posted account balance. The system supports the following closing operations:
- Foreign currency valuation
- Balance carry forward (receivables/payables and general ledger accounts)
- Reclassify GR/IR clearings
- Open and closing posting periods
- Creating financial statements
In this exercise, we will be looking at the closing processes involved in foreign currency valuation, balance carried forward, and reclassifying of GR/IR. We will not be looking at open and closing posting periods and the creation of financial statements, because that was already covered in Chapters 12 and 13.
During year-end closing operations, new posting periods are opened and balances from the previous year are carried forward into the new fiscal year. Once balances are carried forward, you can then prepare and generate several reports (including financial statements for the period) and archive documents online that are no longer needed.
Foreign Currency Valuation
At month’s end, foreign currency valuation is usually carried out. This operation is important as it valuates all transactions in the period posted in foreign currency. When performing monthly foreign currency valuation, an exchange rate is entered for the month’s end.
In order to generate financial statements , closing operations for foreign currency valuation have to be performed. For accounts run in foreign currency, you have to prepare and create the following items:
- Foreign currency balance sheet accounts for the G/L accounts that are valuated in foreign currency
- Open items in foreign currency open at a key date
The system also allows you to perform the following optional activities:
- Currency valuation per company code (local currency valuation)
- Currency valuation per group currency (parallel currency valuation)
- Use valuation procedure (for example, lowest value principle, strict lowest value principle, always valuate, and so on).
![]() Note When financial statements are required on a monthly basis, you must generate foreign currency valuation for open items for G/L accounts and vendor/customer accounts.
Note When financial statements are required on a monthly basis, you must generate foreign currency valuation for open items for G/L accounts and vendor/customer accounts.
It is advisable that each valuation be run individually, since valuations are posted as batch input sessions. For example, separate batch input sessions are generated for G/L accounts and vendor/customer open items.
Problem: Post some invoices for accounts receivable and accounts payable with foreign currency (for example, in USD or EUR).
To execute foreign currency valuation, follow this menu path: Accounting ![]() Financial Accounting
Financial Accounting ![]() General Ledger
General Ledger ![]() Periodic Processing
Periodic Processing ![]() Closing
Closing ![]() Valuate
Valuate ![]() Foreign Currency Valuation (New). Or use transaction code FAGL_FC_VAL. The Foreign Currency Valuation screen (Figure 19-28) is displayed.
Foreign Currency Valuation (New). Or use transaction code FAGL_FC_VAL. The Foreign Currency Valuation screen (Figure 19-28) is displayed.

Figure 19-28. Specifying foreign currency valuation
Update the following fields:
- Company Code: Enter your company code (C900) in this field.
- Valuation Key Date: This date defaults to today’s date. This is the date the currency valuation is carried out.
- Valuation Area: Enter the valuation area key (GR) for your foreign currency valuation closing in this field. GR entered in the Valuation Area is standard for Group Valuation.
- Create Postings: Click the Create Postings checkbox. This will enable you to create valuation documents.
- Batch Input Session Name: Enter a name for your batch input session (FCV012015) in this field. There is no specific batch input session name, so you can enter any name that is meaningful to you.
- Document Date: Enter your document date (today’s date) in this field.
- Posting Date: Enter the date the document is posted. Preferably, use today’s date.
- Reversal Posting Date: Enter today’s date plus one month (the first day of the next month) in this field.
![]() Note The date to post a reversal is usually the first day of next month.
Note The date to post a reversal is usually the first day of next month.
Click the ![]() tab at the middle of the screen under General Data Selection to go to the open item part of the screen. Click the Valuate Vendor Open Item and Valuate Customer Open item checkboxes and then click the Execute
tab at the middle of the screen under General Data Selection to go to the open item part of the screen. Click the Valuate Vendor Open Item and Valuate Customer Open item checkboxes and then click the Execute ![]() button.
button.
![]() Tip You can select only particular vendor/customer accounts to be valuated. If you leave the selection fields empty (as in this example), all the accounts in your company code will be selected for valuation.
Tip You can select only particular vendor/customer accounts to be valuated. If you leave the selection fields empty (as in this example), all the accounts in your company code will be selected for valuation.
When the Execute button is clicked, the system will automatically create a batch input session. The system will then generate and display valuated vendor and valuated customer open items. When you click the Postings button, the system will display the accounting documents.
Your valuation is not yet posted. To post it, you need to process the batch input session by using this menu path: System ![]() Services
Services ![]() Batch Input
Batch Input ![]() Sessions.
Sessions.
In the Batch Input: Session Overview screen, select the item you want to execute (FCV012012) and then click the Process button. The Process Session FCV012012 dialog box appears. In the processing mode, select the Display Errors Only radio button. This action will allow the system to display errors during processing. Click the Process button to allow the system to commence posting documents. The system will then notify you that, “Processing of batch input session is completed.”
To display the document, use transaction code FB03.
Balance Carry Forward
It is an accounting practice to carry forward balances from the old fiscal year to the new. The Balance Carry Forward function allows you to carry the following items forward from the previous fiscal year:
- Balance sheet account balances
- Profit and loss account balances to a retained earnings account
- G/L account balances
- Customer and vendor account balances
Balance Carry Forward (Customer/ Vendor)
For customers and vendors, a manual balance carry forward has to be performed. Postings in the current fiscal year do not necessarily update the balance carried forward. Hence, it is important that you perform a manual balance carry forward function for all customer and vendor accounts.
![]() Note The Balance Carry Forward function is performed at the beginning of the new fiscal year.
Note The Balance Carry Forward function is performed at the beginning of the new fiscal year.
To perform balance carry forward (customer/vendor), follow this menu path: Accounting ![]() Financial Accounting
Financial Accounting ![]() Accounts Payable
Accounts Payable ![]() Periodic Processing
Periodic Processing ![]() Closing
Closing ![]() Carry Forward
Carry Forward ![]() Balance Carryforward. Or use transaction code F.07. The Carry Forward Receivable/Payables screen is displayed (Figure 19-29).
Balance Carryforward. Or use transaction code F.07. The Carry Forward Receivable/Payables screen is displayed (Figure 19-29).

Figure 19-29. The screen carry forward receivables/payables
Update the following fields:
- Company Code: Enter your company code (C900) in this field.
- Carryforward to Fiscal Year: Specify a future fiscal year (current fiscal year) that you want to carry balances forward to.
- Select Customers: Click this checkbox. Receivables then will be included in the balance carry forward.
- Customer: Specify the customer number range (1 to 9999999999) you want to include in your selection.
- Select Vendors: Click this checkbox. Payables will then be included in the balance carry forward.
- Vendor: Specify the vendor number range (1 to 9999999999) you want to include in your selection.
- Test Run: Click this checkbox. This will allow you to preview the figures carried forward before they are posted.
- Detail Log: Click this checkbox so the system will display further information relating to carry forward receivables/payables.
To execute carry forward receivables/payables, click the Execute ![]() button on the top-left side of the screen. Since the Test Run checkbox is clicked, only a test run version of carry forward receivables/payables is displayed (Figure 19-30).
button on the top-left side of the screen. Since the Test Run checkbox is clicked, only a test run version of carry forward receivables/payables is displayed (Figure 19-30).

Figure 19-30. Carry forward receivables and payables test run (preview)
This is a test run. To carry out a productive run, click the Back ![]() button to return to the previous screen, uncheck the
button to return to the previous screen, uncheck the ![]() checkbox, and then click the Execute
checkbox, and then click the Execute ![]() button.
button.
Balance Carry Forward (General Ledger)
Balance carry forward for the new fiscal year also needs to be performed manually for general ledger balances, like the balance carry forward for customer/vendor. Once this function is performed, G/L balances are carried forward to the new fiscal year. This function can be performed several times. It is ideal to repeat this function when there are inconsistencies between the previous and current fiscal year G/L account balances.
Once balance carry forward for G/L accounts are performed, the following G/L balances are automatically carried forward:
- Balance sheet account balances
- Profit and loss account balances to a retained earnings account
- G/L account balances
To execute the BALANCE carry forward (general ledger), follow this menu path: Accounting ![]() Financial Accounting
Financial Accounting ![]() General Ledger
General Ledger ![]() Periodic Processing
Periodic Processing ![]() Closing
Closing ![]() Carrying Forward
Carrying Forward ![]() Balance Carry Forward (New). Or use transaction code FAGLGVTR. The Balance Carryforward screen is displayed (Figure 19-31).
Balance Carry Forward (New). Or use transaction code FAGLGVTR. The Balance Carryforward screen is displayed (Figure 19-31).

Figure 19-31. Executing a balance carry forward (general ledger) for the leading ledger 0L
Update the following fields: Balance carry forward function:general ledger
- Ledger: Enter the ledger 0L you want to take into consideration in your balance carry forward. In this case, it is the leading ledger.
- Company Code: Enter company code C900.
- Carry Forward to Fiscal Year: Enter the fiscal year (current fiscal year) that you want to carry forward balances to in this field.
- Test Run: This is set by default (it is important to perform a check run before performing production run). By selecting this checkbox, this will allow you to preview carry forward figures before actually performing actual carry forward.
- Output List of Results: By selecting this checkbox, the system will allow you to display balance sheet accounts and retained earnings accounts.
- Balance in Retain.Earng.Acct: By checking this checkbox, you can display detailed retained earnings accounts.
![]() Tip In order to see how balance carry forward works effectively, use the next year as your fiscal year.
Tip In order to see how balance carry forward works effectively, use the next year as your fiscal year.
To execute the balance carry forward, click the Execute ![]() button on the top-left side of the screen. The Balance Carryforward Ledger 0L for the Year X Test Run screen is displayed with the option to display the Balance Sheet Accounts or Retained Earnings Accounts. To display the balance sheet accounts, click the
button on the top-left side of the screen. The Balance Carryforward Ledger 0L for the Year X Test Run screen is displayed with the option to display the Balance Sheet Accounts or Retained Earnings Accounts. To display the balance sheet accounts, click the ![]() button on the top-left side of the screen. The system will then display the balance sheet accounts (Figure 19-32).
button on the top-left side of the screen. The system will then display the balance sheet accounts (Figure 19-32).
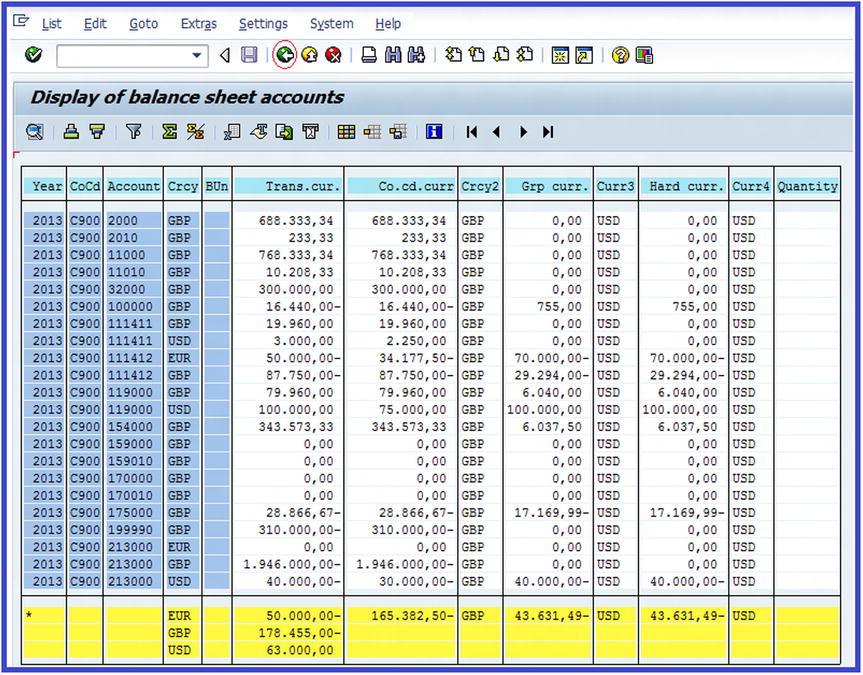
Figure 19-32. Displaying the balance sheet accounts
To display the retained earnings accounts, click the Back ![]() button at the top of the screen to return to the previous screen and then click the
button at the top of the screen to return to the previous screen and then click the ![]() button at the top of that screen. The system will then display the Display of Retained Earnings Accounts screen.
button at the top of that screen. The system will then display the Display of Retained Earnings Accounts screen.
![]() Note This is a test run. To carry out a productive run, click the Back
Note This is a test run. To carry out a productive run, click the Back ![]() button to return to the previous screen, unclick the
button to return to the previous screen, unclick the ![]() checkbox and then click the Execute
checkbox and then click the Execute ![]() button.
button.
To complete this exercise, carry out the balance carry forward steps for the remaining parallel ledgers (T1 and T2).
Reclassify GR/IR Clearing
The reclassify (goods receipt)/IR (invoice receipt) clearing function:
- Analyzes the GR (goods receipt)/IR (invoice receipt) during the specified period
- Clears GR/IR accounts at a specific key date
- Generates the necessary adjustment postings
![]() Note The GR (goods receipt)/IR (invoice receipt) clearing is covered in detail Chapter 8.
Note The GR (goods receipt)/IR (invoice receipt) clearing is covered in detail Chapter 8.
The importance of GR/IR classification is for the system to separate G/L account balances for IR (which is usually a debit balance) and treat them as assets in the balance sheet. Consequently, this classification also treats the GR net balance as a liability in the balance sheet. To go to the screen where GR/IR clearing analysis is executed, follow this menu path: Accounting ![]() Financial Accounting
Financial Accounting ![]() General Ledger
General Ledger ![]() Periodic Processing
Periodic Processing ![]() Closing
Closing ![]() Reclassify
Reclassify ![]() GR/IR Clearing. Or use transaction code F.19. The Analyze GR/IR Clearing Account and Display Acquisition Tax screen is displayed (Figure 19-33).
GR/IR Clearing. Or use transaction code F.19. The Analyze GR/IR Clearing Account and Display Acquisition Tax screen is displayed (Figure 19-33).

Figure 19-33. Analyzing GR/IR clearing accounts and display acquisition tax screen
Update the following fields in the G/L Account Selection section of the screen:
- G/L Account: Enter the G/L account number range (219910 – 219916) that you want to cover in the GR/IR clearing accounts.
- Company Code: Enter your company code (C900) in this field.
Update the following fields in the Parameters section of the screen:
- Key Date: Enter the run date in the key date field. This date is usually the end of the month. (For this exercise, use today’s date.)
- GR/IR Clearing: Click the checkbox for GR/IR clearing. This is set by default by the system.
The next step in this exercise is to post specifications for the GR/IR clearing. To do this, click the ![]() tab next to the Parameters tab and update the following fields:
tab next to the Parameters tab and update the following fields:
- Create Postings: Click the Create Postings checkbox.
- Name of Batch Input Session: Enter your own code (GR/IR-2012). This will enable you to identify your GR/IR account clearing during batch input processing.
- Ledger Group: Enter the ledger group that you want to execute. In this exercise, it is assumed that you want to execute GR/IR for the leading ledger 0L.
- Document Date: Document date is usually set by default.
- Document Type: Enter document type SA for G/L account posting.
- Posting Date: The posting date is set by default by the system.
- Reversal Posting Date: Reversal posting date is usually the first day of the following month (01.09.2012).
To post the GR/IR clearing adjustments, the batch input session needs to be processed. To process batch input sessions, click the Execute ![]() button on the top-left side of the screen or use this menu path: System
button on the top-left side of the screen or use this menu path: System ![]() Services
Services ![]() Batch input
Batch input ![]() Sessions. Or use transaction code SM35. On the Batch Input: Session Overview screen that’s displayed, select the item you want to execute: GR/IR-2012. Click the Process button on the top-left side of the screen. The Process Session GR/IR-2012 dialog box appears. From the Processing Mode section, click the Display Errors Only radio button. This action will allow the system to display errors during processing. Click the Process button at the bottom of the screen to allow the system to commence posting documents. The system will notify you that, “Processing of batch input session is completed.”
Sessions. Or use transaction code SM35. On the Batch Input: Session Overview screen that’s displayed, select the item you want to execute: GR/IR-2012. Click the Process button on the top-left side of the screen. The Process Session GR/IR-2012 dialog box appears. From the Processing Mode section, click the Display Errors Only radio button. This action will allow the system to display errors during processing. Click the Process button at the bottom of the screen to allow the system to commence posting documents. The system will notify you that, “Processing of batch input session is completed.”
Summary
This chapter explained what the new general ledger is and took a brief look at the benefits of the general ledger. You learned how to define ledgers for general ledger accounting. In an attempt to define a non-leading ledger for the new general ledger, you worked through an exercise. You then learned about ledgers for general ledger accounting for local reporting and tax reporting. We taught you how to define currencies of a leading ledger. In doing so, we defined group and hard currency for the leading ledger in the new general ledger. In that exercise, we defined and activated the ledger for global and local reporting.
Next, you learned what a scenario is. As part of the customizing of scenarios, we taught you how to assign scenarios and customer fields to ledgers for the leading ledger. You learned about the accounting principles for parallel accounting for local GAAP, International Accounting Standards (IAS), and local tax reporting. We also looked at the real-time integration of controlling with financial accounting, assigning variants for real-time integration to company codes, and carrying out account determination for real-time integration.
You also learned about the document types needed for the general ledger. In that process, we defined the document types for entry view in a ledger and document types for general ledger view. In that exercise, you learned about document splitting in a new general ledger. You learned what document splitting is, the importance of it, and the limitations of it. You then went on to look at the classification of G/L accounting for document splitting, document types for document splitting, and defining a zero-balance clearing account for account document splitting.
You also learned how to post general ledger accounting documents to the user side of the SAP system. During this process, you posted a G/L account document for a ledger group and a reverse document and looked at how to display posted documents to the system.
Finally, we taught you how to perform closing procedures by looking at foreign currency valuation, balance carry forward for customers/vendors, and balance carry forward for the general ledger.
Now that you have completed the customizing activities covered in this book, we are optimistic that you can apply what you learned in this book to real-world scenarios. This was our primary objective for writing this book. Good luck; we wish you the very best in the world of SAP FICO consultancy.