

Planning and Preparation
A Place to Gather
The main outdoor classroom spaces used for lessons and activities in this book are the schoolyard, neighborhood, and natural areas farther afield. You don't need formal outdoor classroom space to teach outdoors! Outdoor learning can happen anywhere. Due to the short time periods and the way you will use outdoor classroom spaces, they do not need to be elaborate. For activities and lessons included in this book, you may only need a designated place to gather and give directions before heading out to the neighborhood or playing a game in the schoolyard. This outdoor meeting space can be as simple as sitting under the shade of a tree or on the steps of the school building. (See Figure 1.1.)
When choosing a suitable outdoor meeting area, consider noise or other distractions and take into account proximity to the playground as well as the availability of shade/shelter. Shade is important in warmer weather or climates, while in winter you may wish to be in the sun or in a place that is sheltered from the wind (see Figure 1.2)! For this reason, you may need to change the meeting area location based on the seasons. Consider seating options, which can range from simply sitting on the grass or school steps to more elaborate setups such as tree stumps or benches.
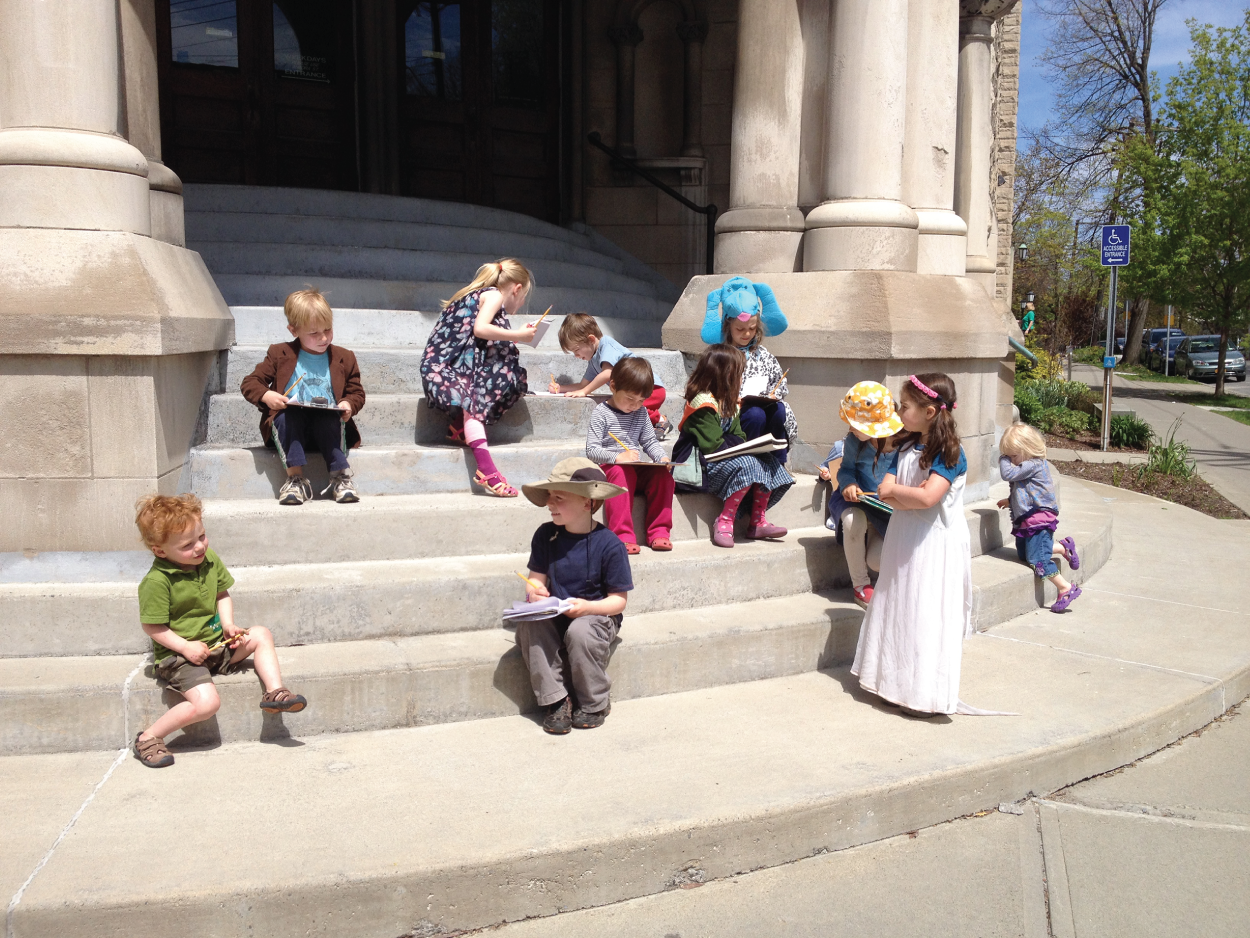
Figure 1.1 Students using the steps of a church for writing in the neighborhood
Source: Rachel Tidd
Simple outdoor classroom spaces
Here are some locations you can consider for a simple outdoor classroom space: a shady spot under a tree, a corner of the schoolyard, rooftop outdoor spaces (common in urban schools), school garden, existing benches or picnic tables, stairs on the side or front of the school, sheltered side or corner of the school, outdoor lunch areas (when not in use), tennis or basketball courts (when not in use), and shared use spaces (some schools have agreements with city/town/churches on using spaces nearby the school). (See Figure 1.3.)
Simple ways to enhance or create an outdoor gathering space
You don't have to be limited by what is available in your outdoor space. There are many ways to enhance your outdoor area to make it more functional for learning outdoors. Here are some simple, inexpensive ways to enhance your space: add seating options, consider shelter, make areas for display and writing during whole group lessons or discussions, and make sure to have surfaces for students to write on.

Figure 1.2 Lesson under an awning at P.S. 185 in Harlem, New York
Source: Teresa Bello
Adding seating options such as log stumps, straw bales, or simple benches made from logs can be perfect solutions to providing seating on a small budget. Often landscape companies or parks departments will donate these for free (see Figure 1.4)! For waterproof seating that can go anywhere, consider inexpensive or donated yoga mats cut into squares, inexpensive garden kneeling pads, tarps, taking school chairs outside, or even plastic bucket covers. If your space needs shelter from the sun or rain, a large tarp and rope can be used to fashion a simple temporary shelter.
You will find it necessary at times to write and record ideas, concepts, and discussions; portable chalk or whiteboards are ideal for this purpose. Stringing ropes from trees or between poles from which to hang chart paper or clip things (number lines, timelines, etc.) can be a great alternative.
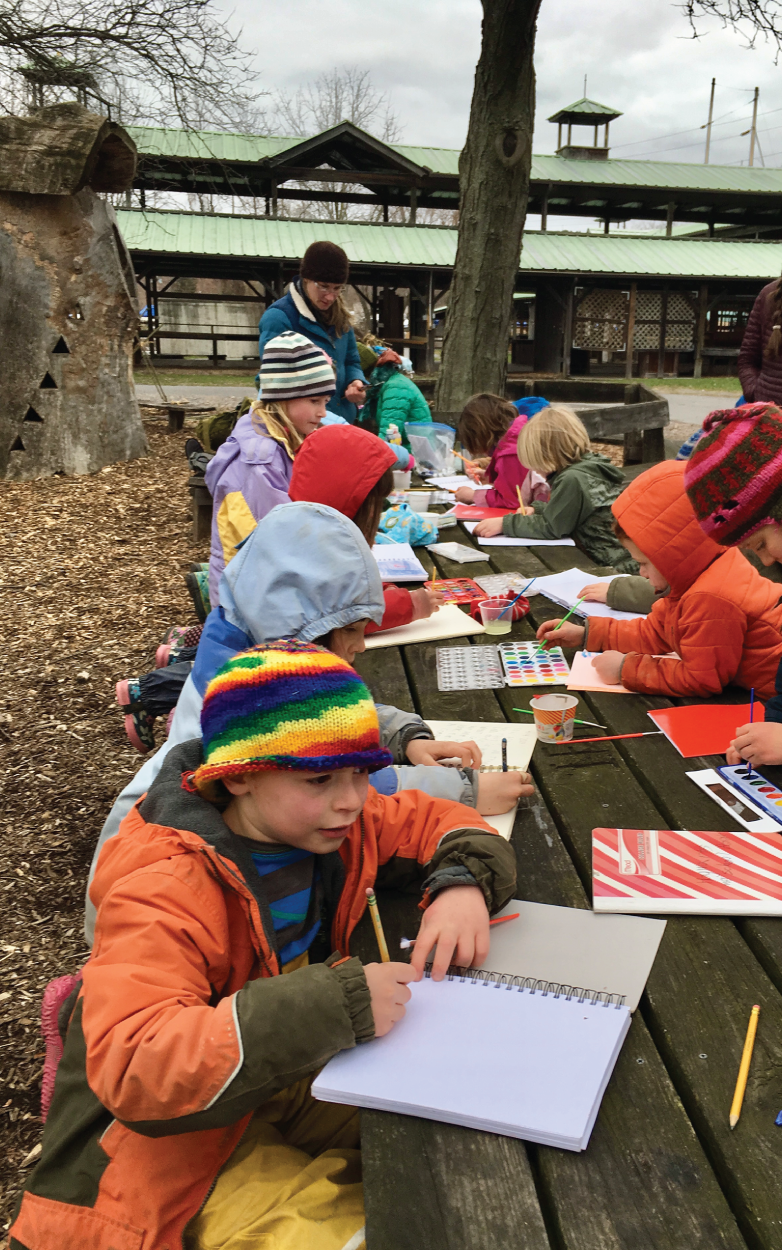
Figure 1.3 Working outdoors on picnic tables
Source: Rachel Tidd
For individual student writing, a notebook can work well for writing outdoors. Clipboards can be great for holding and writing on worksheets outdoors. To keep these materials organized, consider finding a plastic crate or canvas bag to store and transport them. In the winter, laminated cardstock and dry‐erase crayon/colored pencils work well as a waterproof writing surface.
If space and funds allow, larger additions to spaces such as hammocks for independent reading and writing, a covered outdoor library stocked with books, and a shed or other outdoor storage area to store supplies can be useful additions.
Before making even minor changes, reach out to other teachers, staff, administration, after‐school programs, and other community members about how the current schoolyard is used and identify the assets of the space, as well as any improvements that could be made. Including as many voices as possible in any discussions and planning will help bolster support for any proposed changes and minimize potential conflicts between different uses of the space. Consider and discuss how the area is used for recess, physical education classes, arrival/dismissal, fire drills, or by the community, and how any proposed additions or improvements may impact these uses.
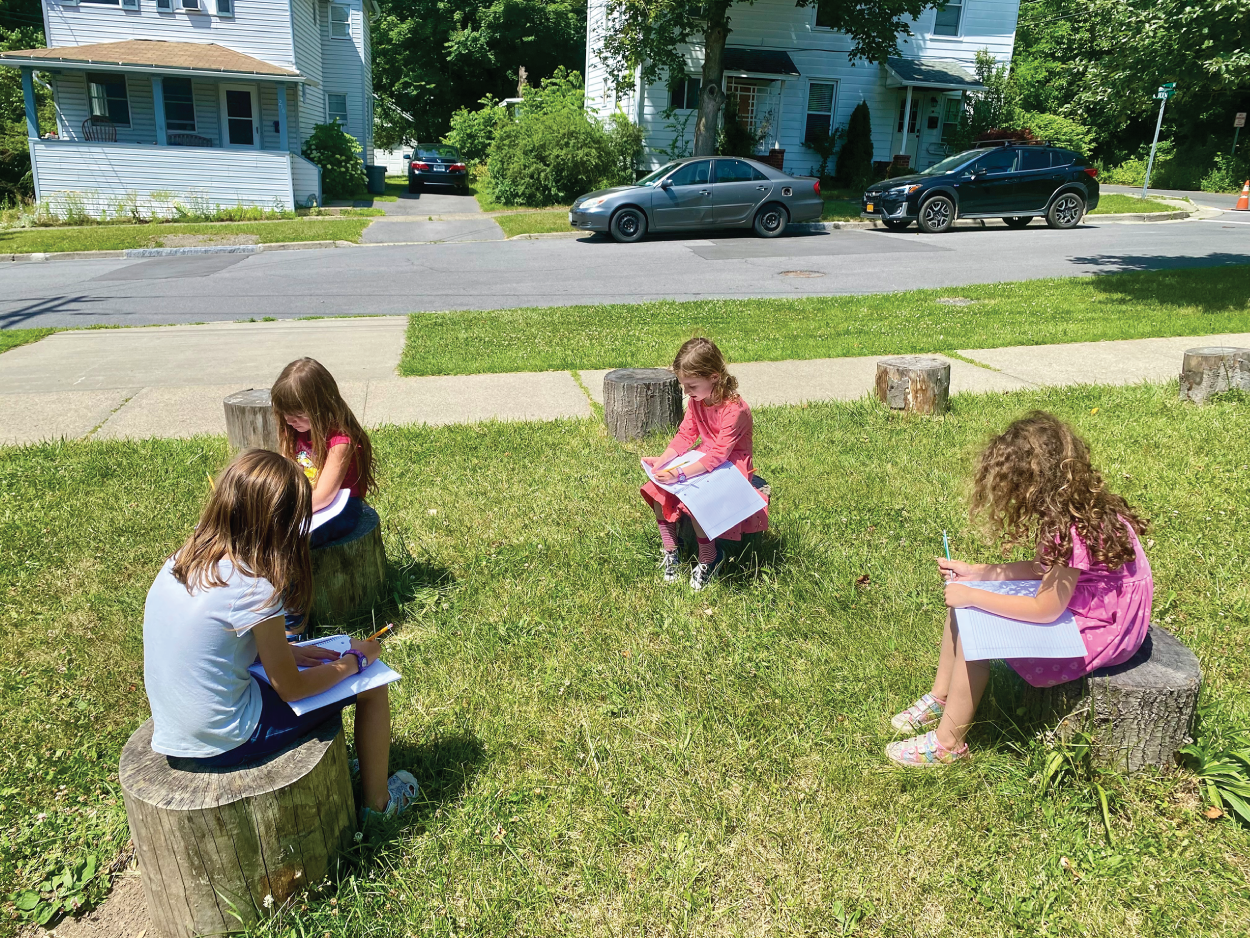
Figure 1.4 Group work while sitting on log stump seats
Source: Rachel Tidd
Safety Considerations
Keeping students and staff safe in the outdoor learning environment is essential. Before embarking on an outdoor learning regime, discuss your plans with your principal or administrator. You can prepare for and mitigate potential risks by educating yourself and any additional staff, parent volunteers, and your students about potential risks. This will help everyone stay safe when learning and playing outdoors. Safety considerations, rules, and guidelines will vary according to your geographic location, setting, and school. Safety considerations and rules may need to change depending on where the class will be working each day. Before discussing safety considerations and guidelines with parents and students, spend time crafting a list of the most important considerations for your class.
Basic safety considerations
- Before taking your class outdoors, survey the school grounds for any potential hazards such as glass, garbage, suspicious persons, construction, etc.
- Always let the main office know when you take your class outside and where you will be, and take a cell phone or walkie‐talkie with you.
- Obtain permission slips for walking field trips that cover the entire school year.
- Communicate to your students where they may explore and what the boundaries are when on school grounds, in the community, or in a natural area. Continue to survey the area when actively outside with your class for any emerging risks, such as weather.
- Before heading outside, review safety guidelines and rules that need to be followed.
- Become familiar with poisonous plants and plants that cause a reaction such as poison ivy. Learn how to identify them and teach your students and staff how to identify them.
- Learn about animals that may potentially be in the area and educate yourself, classroom staff, and your students about what to do if they come across any animals.
- Ask parents whether students have been stung by a bee and if there is any known reaction. Carry a list of students that have not been stung or have had a reaction. Discuss appropriate responses to bees, mosquitos, and other insects.
- Educate parents and students about how to dress for different types of weather (see the following section). Keep extra clothing in the classroom to lend if students are unprepared.
- Carry a small first aid kit.
- Bring plenty of water. Recycled gallon jugs work well for this purpose. Ask students to help carry them. They love being helpful!
- Determine the school's policy on applying sunscreen and bug spray if needed in your area. Do children bring and apply on their own? Do they apply before school? Are teachers allowed to apply it?
Getting Parents on Board with Outdoor Learning
Communicating with parents/guardians about the role and benefits of outdoor learning in your classroom and how they can help is essential to its success. Many teachers find it helpful to give examples of lessons, activities, or projects they plan on doing outdoors during an open house or meet the teacher night. This can also be a great time to discuss potential safety issues and how you plan on managing these concerns. Emphasize how the outdoor experiences enhance and support learning. Inviting parents to volunteer and help with outdoor activities and expeditions can help them see the benefits of learning outside firsthand and provide an extra pair of hands!
Consider incorporating information on your plans for outdoor learning in your welcome letter to parents/guardians, supply lists, and parent or open house nights at the beginning of the year. Being clear about any outdoor clothing needs, the frequency and schedule of outdoor experiences, and how they can support you will ensure the success of outdoor learning throughout the year. Make sure to mention if or how you can support families obtaining gear. (See “Making quality gear accessible for all” for ideas.) Sending a schedule and reminders home outlining any outdoor time or field trips planned each month can keep parents/guardians informed and help them prepare. Many teachers like to include this in their existing weekly or monthly newsletter to parents. Making outdoor learning time predictable and part of the weekly routine, such as devoting every Wednesday and Friday afternoon to outdoor lessons, can make it easier for parents and students to prepared with appropriate clothing and gear.
Planning Classroom Outdoor Time and Classroom Management
There are many ways to integrate outdoor learning time into your schedule. Making outdoor learning a part of the weekly routine can ensure your class gets outside regularly! Carving out consistent time(s) each week to take your class outside is the best way to ensure it happens.
If outdoor learning is new to you and your class, it may be best to start small. Choose one lesson or one morning/afternoon each week for outdoor learning. Focus your first outdoor lessons outdoors on introducing children to the new environment and the expectations. Just as we invest time in teaching classroom routines and expectations at the beginning of the school year, taking time to explain and practice the expectations for learning outside will set you and your students up for a success. You may want to focus initial lessons on getting to know the school grounds, learning how to interact respectfully with insects, identifying any plant or animal hazards, and reviewing rules and boundaries. Trying some easy, low‐preparation activities such as read‐alouds, free writes, independent reading, and games help students acclimate to the novelty of being outdoors before embarking on more in‐depth projects and activities.
Outdoor classroom management tips
- Have students brainstorm a list of expectations for outdoor learning and the classroom. Record their answers on chart paper and revisit the list periodically.
- Discuss with students what they know and want to know about safety outdoors. This can be a great way to decide on any safety areas you may want or need to target with further instruction – for example, a mini‐lesson on identifying poison ivy. Using a KWL (Know, Want to know, and Learned) chart to organize responses and track learning can be a great way to keep track of the discussion and learning.
- Consider assigning groups or partners before going outdoors. You can rotate groups monthly, quarterly, or any time that works best for your class.
- Follow a predictable routine each time you go out. This helps students know what to expect.
- Plan a loud signal for students to return after exploring or working on an activity. It might be a crow caw, howl, whistle, or phrase such as “circle up” or “all in!” Practice saying the signal and students responding.
- Use clipboards or notebooks to keep papers from flying away when working (see Figure 1.5).
- Use backpacks, bags, and/or bins devoted to outdoor learning to help keep materials ready and organized.
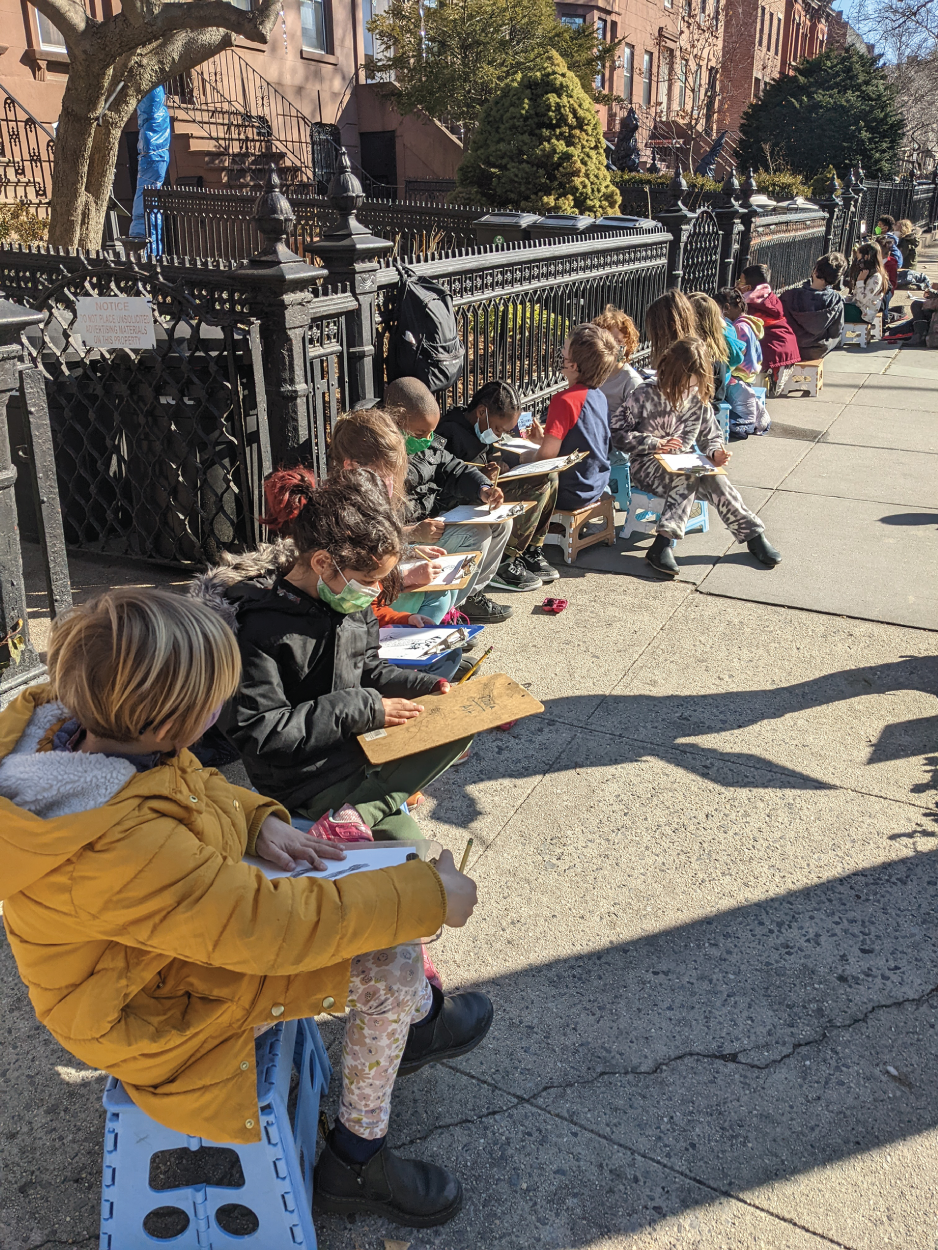
Figure 1.5 Students drawing trees in the neighborhood
Source: Andrew Chiappetta
Dressing for the Weather: Gear for Kids and Adults
There is no such thing as bad weather, only unsuitable clothing.
– Alfred Wainwright
While I agree with Alfred Wainwright's quote about the importance of outdoor clothing, everyone's personal level of comfort, school policies, resources, and weather challenges differ. There is no shame in rescheduling an outdoor lesson or day due to unusual or unsafe weather. Trying to learn or do an activity in a daylong rainstorm or heat wave without shelter can be downright unpleasant. Outdoor programs or schools that spend all day outside typically have various forms of shelter available, lots of gear, and can make a fire for warmth in very cold weather. Most teachers will not have these resources (at least initially!). Therefore, make decisions on the suitability and safety of weather conditions based on your situation.
If you and your students are new to outdoor learning, I suggest getting started when the weather is good and you and your students will not need extra gear. As you get more experienced with outdoor learning and begin to integrate it into your schedule regularly (and not just skip going out), you'll need to do some extra planning to determine appropriate gear requirements for your local climate.
Learning how to dress for various weather conditions can go a long way to making a variety of weather conditions suitable for outdoor learning (see Figure 1.7). It is essential to ensure that you, your students, and any staff or volunteers have appropriate gear for weather conditions typical for your geographic area.
Layers are key to adapting to changing conditions. Layers allow children and adults to adjust according to weather changes and activity levels (see Figure 1.8). Layers should be polyester, nylon, wool, or silk. Cotton absorbs moisture from sweat or weather conditions and draws heat from your body, making you cold. This can be dangerous in cold weather. Polyester and wool will keep you warm even if wet. Athletic clothing, fleece, and wool sweaters (some of the warmest are adult‐sized sweaters that “shrunk” in the wash by accident) all make excellent layers. For more on layering, see the section “Layering Basics: three‐layer rule for cold weather.” Proper footwear for weather conditions is also essential. Depending on the conditions, children may need waterproof boots, warm boots, or sneakers.
Keep extra supplies in the classroom and bring extra mittens/gloves, hats, and socks outside with you. These are the most common clothing pieces that need to be replaced when they get wet through use or by accident. If students bring backpacks or bags, have them pack extra socks and mittens/gloves in the winter. Children should also have a complete change of clothes (including socks and underwear) and extra mittens/gloves/hats stored in the classroom. These extra clothes can be stored in cubbies, bags, clear plastic tubs (one for each child), or two‐gallon reusable bags.
Layering basics: Three‐layer rule for cold weather
The three‐layer rule helps ensure you are dressed for any weather! It consists of three layers: the base layer, the insulating mid‐layer, and the weatherproof outer layer (see Figure 1.9).
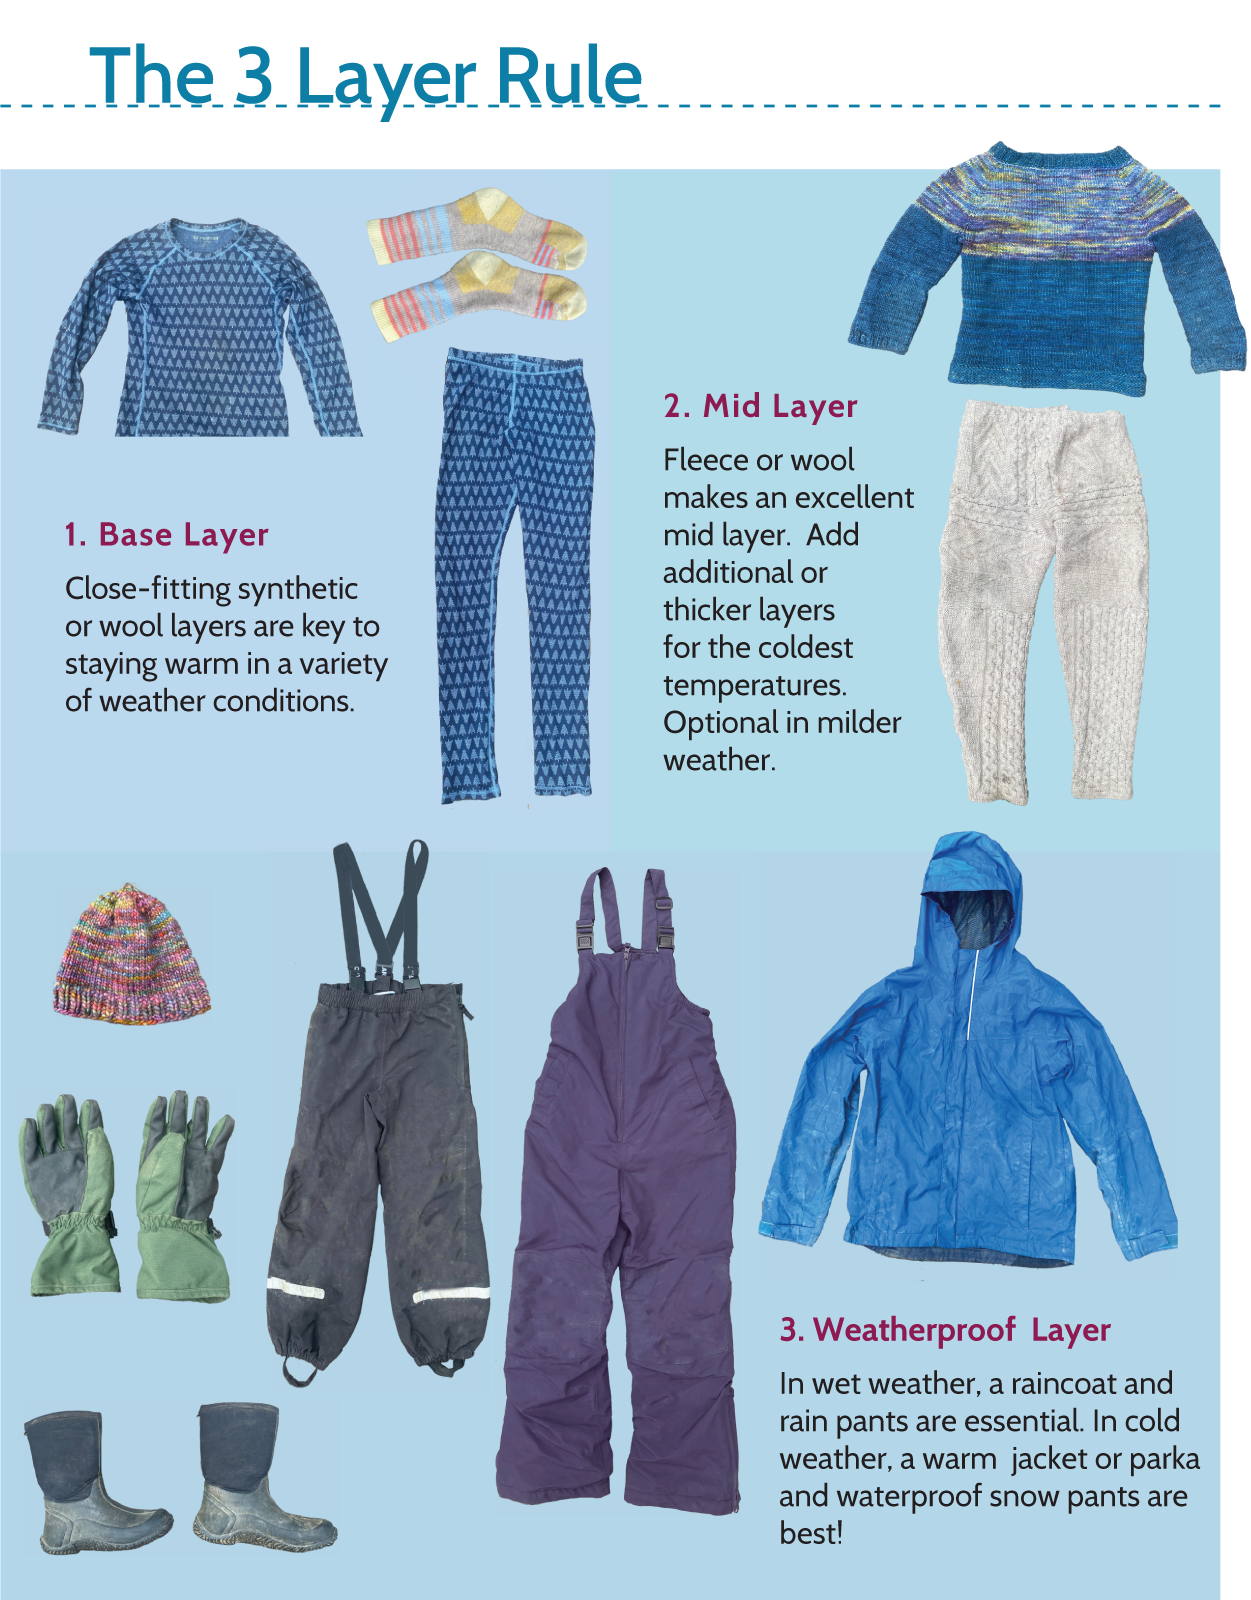
Figure 1.9 Layering infographic
Source: Design by Julie Manners, photos by Rachel Tidd
Layer 1: Base layer
Begin with the base layer, which should be close to the skin and made of polyester, fleece, or wool layers. This helps wick moisture from perspiration from skin, which can make you feel cold. Wool or synthetic socks are also important.
Layer 2: Insulating mid‐layer
Next, add a mid‐layer of fleece, wool, or other thicker non‐cotton midweight layer. Fleece pants, jackets, and wool sweaters make great midweight layers. Extra wool socks are recommended for freezing weather.
Layer 3: The weatherproof outer layer
Finally, depending on the weather, add a raincoat and rain pants or snow pants and a winter jacket. Accessories such as neoprene rain boots, mittens or gloves, a hat, and a scarf or balaclava can be added.
Dressing for specific weather conditions
Choosing suitable clothing for the day's weather conditions can be tricky! Following are some guidelines to help you select clothing for more challenging weather.
Dressing for wet or rainy weather
A raincoat with a hood, rain pants, and rain or neoprene‐insulated boots are essential to enjoying and learning in wet weather. Rain pant cuffs should go over the outside of boots. Layer as needed under rainwear. Polyester layers are best for milder temperatures. Umbrellas may also be helpful.
Dressing for very cold/dry weather (below 32°F or 0°C)
Layering is the key to being comfortable for long periods outdoors in cold weather. You can add more base or mid‐layers for extremely cold weather. Make sure that mittens or gloves have cuffs that are long enough that they do not let snow in. Balaclavas, hats with ear flaps, or a hat under a hood can be helpful in windy conditions. Insulated snow boots are recommended for the coldest weather conditions.
Dressing for cold and wet conditions
Cold and wet conditions can be the most challenging to dress for. Again, follow the three‐layer rule by adding layers as needed for the temperature. Then layer rain pants and a rain jacket with a hood on top of everything. Rain jackets can also be layered over a lightweight down or winter jacket to provide a waterproof outer layer. Having one to two extra pairs of waterproof mittens or gloves per student is recommended. Finish the outfit with insulated neoprene rain boots and wool socks. Regular rainboots are not recommended in these conditions because they are not warm enough.
Dressing for hot weather
Lightweight breathable clothing, sun hat, and closed‐toe shoes or sandals are important for warm‐weather adventures! Investigate your school's policy on sunscreen and bug spray application. You may need to obtain permission from parents to assist with the application or students may need to apply it themselves. Students should supply their own. It is a good idea to suggest that students apply sunscreen before coming to school. Umbrellas can also be useful for providing shade.
Creating a Positive Outdoor Experience for Students and Teachers
It is important to recognize that not all students and teachers will be comfortable with the outdoors. Students, teachers, and other community members may need support to feel welcome and safe while teaching and learning outside. Any fear of the outdoors harbored by a student will impact their learning. Therefore, teachers need to plan ways to make students feel welcome and safe when outside. Make sure to inform parents and students at the beginning of the year that you intend to incorporate outdoor learning throughout the year.
You can begin helping students feel more comfortable about the natural world by laying the groundwork for outdoor learning inside the classroom. A teacher's mindset and positive attitude significantly impact students’ perceptions, sense of security, and attitude toward the outdoors.1
Using positive language to describe the outdoors and creating a classroom culture of curiosity about the natural world can make a big difference for students. Activities in chapter 6, Bringing Nature Inside, provide many suggestions to encourage students to observe and wonder about nature while indoors. These experiences can help students with little experience with being outdoors or in nature become more comfortable and gain knowledge about the outdoors in a safe space.
Reading picture and chapter books about nature or stories that involve nature can also help students learn more about the natural environment before or in conjunction with outdoor experiences. Educating students, parents, and teachers about common risks such as insect bites or plants such as poison ivy can help them feel more prepared and reduce anxiety when venturing outside. Lead discussions of their concerns about going outside and together brainstorm ways to deal with them. Try taking short educational nature walks to show children things like poison ivy or to observe bee behavior. These real‐life experiences can decrease anxiety. When students are provided information and proper support, they will have the tools to overcome any fears or anxiety and be able to experience, learn, and enjoy being outside!
Some teachers may initially resist implementing outdoor learning if they lack training, resources, and support. Pairing up teachers new to outdoor learning with more experienced teachers or having pairs of teachers work together to implement outdoor learning can help provide needed support. Providing training, time to meet and plan, and resources can help reluctant teachers get started with outdoor learning. If teaching outdoors is new and you find yourself alone in your desire to teach outside, don't be afraid to dive in and learn! In addition, the organization Inside‐Outside, affiliated with Antioch University, has many chapters around the United States for teachers, school leaders, and others interested in outdoor learning. They also offer professional development and have many helpful resources on their website. You can find out more about them at insideoutside.org.
Materials for Outdoor Learning
There are a few materials that are utilized frequently in the activities and lessons in this book. Many of these materials you will already have in your classroom or available to you. Other materials needed for lessons will be found by the students in nature such as leaves, rocks, sticks, and pinecones. You may want to consider putting items such as sidewalk chalk on student supply lists at the beginning of the year. Also, don't forget that many classroom materials, such as math manipulatives, can also be used outside!
Suggested materials
- Sidewalk chalk
- Clipboards (dry erase boards, chalkboards, and sturdy pieces of cardboard can be converted to clipboards with binder clips) (see Figure 1.10)
- Permanent markers
- Field guides – plants, weeds, trees, animal tracks, birds, animals, etc. for your geographic area

Figure 1.10 Clipboards make an excellent surface for writing and drawing
Source: Andrew Chiappetta
- Movable alphabet and numbers (plastic, wood, or letters painted on rocks used for spelling, math, writing, and games)
- Rubber bands
- Clipboards
- Measuring tapes or yard/meter sticks
- Scissors
- Clear tape
- Chart paper
- Containers for collecting such as empty peanut butter jars with tops, buckets
- Laminated cardstock for writing outside in wet weather
- Dry‐erase colored pencils or crayons for writing outside in wet weather
- Plastic bag for trash or collecting natural items to examine more closely later
Additional lesson‐specific materials
- Thermometer
- Bean bags (bought or DIY)
- Bird feeders and supplies
- Large 9 × 12 paper for class nature book
- Magnifying glasses
Final Thoughts
Now that you have picked a meeting area for your class, planned out your schedule, and talked with students and teachers about expectations and safety considerations, it is time to get your gear on and head outside! The next chapter will provide ideas to teach and reinforce reading, writing, and math skills in the schoolyard environment.
Note
- 1. M. Byron, C. Hron, A. Marturano, R. Pringle, J. Tesner Kleiner, and J. Wollum. “Positive Outdoor Experiences,” Green Schoolyards America, https://www.greenschoolyards.org/positive-outdoor-experiences