
9. Notification and Rotation
Objective-C code is all about objects sending messages to other objects. This communication usually occurs between two objects — the sender and receiver. However, sometimes a bunch of objects are concerned with one object. They all want to know when this object does something interesting. But it’s just not feasible for that object to keep track of every interested object and send every one a message.
Instead, an object can post notifications about what it is doing to a centralized notification center. Interested objects can register to receive a message when a particular notification is posted or when a particular object posts. In this chapter, you will learn how to use a notification center to handle these notifications. You will also learn about the autorotation behavior of UIViewController.
Notification Center
In every application, there is an instance of NSNotificationCenter, which works like a smart bulletin board. An object can register as an observer (“Send any ‘lost dog’ notifications to me.”). When another object posts a notification (“I lost my dog.”), the notification center forwards that notification to the appropriate registered observers.
These notifications are instances of NSNotification. Every NSNotification object has a name and a pointer back to the object that posted it. When you register as an observer, you can specify a notification name and a posting object that you care about.
Here’s is a snippet of code that shows how you would register for notifications named LostDog posted by any object:

Note that nil works as a wildcard; in this case, the code requests that this method be triggered regardless of who posts the notification.
The method that is triggered when the notification arrives takes an NSNotification object as the argument:
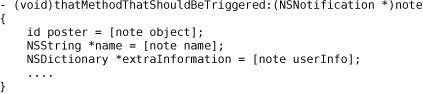
Notice that the notification object may also have a userInfo dictionary attached to it. This dictionary is used to pass added information. For example, when a keyboard is coming onto the screen, it posts a UIKeyboardDidShowNotification that has a userInfo dictionary. This dictionary contains the on-screen region that the newly visible keyboard occupies.
Here’s an example of an object posting a notification:

This is important: the notification center does not retain the observers. If you have an object that registered itself with the notification center, that object should unregister itself before it is deallocated. If an object does not unregister itself from the notification center, the next time any notification it was registered for is posted, the center will try and send the object a message. But that object will have been deallocated, and your application will crash.

UIDevice Notifications
One object that regularly posts notifications is UIDevice. Here are the constants for the notifications that a UIDevice posts:

Wouldn’t it be cool to get a message when the phone rotates? Or when the phone is placed next to the user’s face? These notifications do just that.
Create a new Window-based Application project and name it HeavyRotation. In HeavyRotationAppDelegate.m, register to receive notifications when the orientation of the device changes:
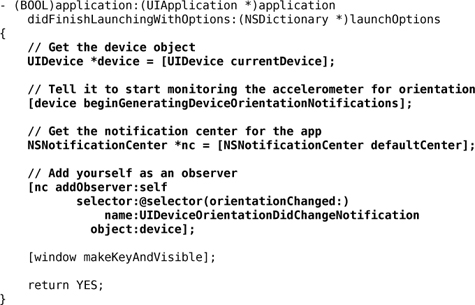
Now, whenever the device’s orientation changes, the message orientationChanged: will be sent to the instance of HeavyAppDelegate. In the same file, add an orientationChanged: method:

Build and run the application. (This is best run on the device because the simulator won’t let you achieve some orientations.)
Many classes post notifications including UIApplication, NSManagedObjectContext, MPMoviePlayerController, NSFileHandle, UIWindow, UITextField, and UITextView. See the reference pages for these classes in the docs for details.
Autorotation
Many applications rotate and resize all of their views when the user rotates the phone. You could implement this using notifications, but it would be a lot of work. Thankfully, Apple created autorotation to simplify the process.
When the device is rotated and if the view on screen is controlled by a view controller, the view controller is asked if it is okay to rotate the view. If the view controller agrees, the view is resized and rotated. The subviews are also resized and rotated.
To implement autorotation in HeavyRotation, you must
• override shouldAutorotateToInterfaceOrientation: in HeavyViewController to allow autorotation
• carefully set the autoresize mask on each subview so that it acts reasonably when the superview is resized to fill the rotated window.
In Xcode, create a UIViewController subclass with a XIB file and name it HeavyViewController.m.
In HeavyViewController.m, you could create an init method that specifies the NIB to load and override the designated initializer of the superclass to call that init method:
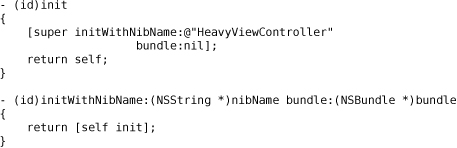
However, it really isn’t necessary. The init method of UIViewController calls [self initWithNibName:nil bundle:nil]. And if the nibName is nil, the view controller assumes that the name of the NIB file is the same as the name of the view controller. Because you don’t need to initialize any instance variables, this class doesn’t need an initializer at all; the default behavior is perfect.
Have your view controller allow autorotation for any orientation except upside-down:

(Other UIDevice orientation constants can be found in the documentation page for UIDevice.)
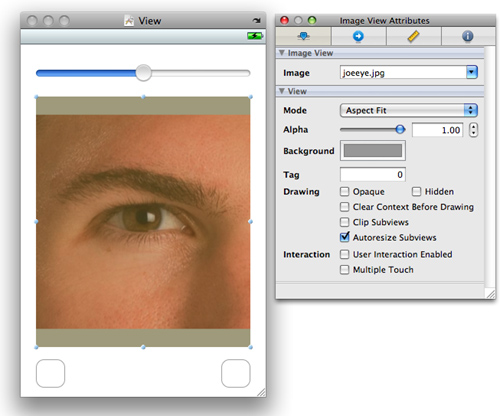
Drag any image from Finder into your project under the Resources group. (Or you can use the file joeeye.jpg in the downloadable solutions at http://www.bignerdranch.com/solutions/iPhoneProgramming.zip.)
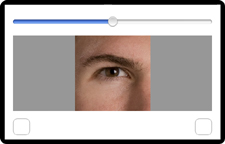
Double-click HeavyViewController.xib to open it in Interface Builder. Drop a slider, an image view, and two buttons onto the window. In the Attributes panel of the Inspector for the image view, set Image to your image file. Choose Aspect Fit mode to fit the image to the view without changing its aspect ratio and set the background color to gray as shown in Figure 9.1.
Now you need to set the autoresize mask for each view. The autoresize mask controls what happens to the view when its superview resizes. In the Size inspector, a view is a rectangle within a rectangle. The inner rectangle represents the selected view, and the outer rectangle represents its superview (Figure 9.2).
Figure 9.2. Autosizing in Size inspector

Clicking to turn on a red arrow inside the inner box means “It’s okay if this view resizes in this dimension.” Turning on a red strut between the inner and outer box means “The distance between this edge of the view and the corresponding edge of the superview is never allowed to change.” Still confused? Check out the little movie inside the inspector that demonstrates these choices.
Select each view and set the autoresize mask appropriately. The image view should resize with the window. The slider should get wider but not taller. The buttons should stay with their respective corners but not resize (Figure 9.3).
Figure 9.3. Autoresizing mask for views

Finally, you need to create an instance of HeavyViewController and set it as the rootViewController of the window. Add the following lines of code to application:didFinishLaunchingWithOptions: in HeavyRotationAppDelegate.m. Make sure to include the import statement at the top of the file.
Build and run the application. It should autorotate when you rotate the device as shown in Figure 9.4.
For the More Curious: Forcing Landscape Mode
If your application only makes sense in landscape mode, you can force it to run that way. First, make your view controller only allow autorotation to landscape orientations:

Figure 9.5. Choosing the initial orientation

In an application’s Info.plist, you can specify that the device be launched in a particular orientation. Double-click on the application’s Info.plist to open it. Add a key-value pair by selecting a row and clicking the + button next to it (Figure 9.5). From the Key column’s pop-up menu, choose Initial interface orientation (or type in UIInterfaceOrientation) and select the desired orientation from the pop-up list in the Value column.
Build and run your application. Regardless of how you rotate the device, it will only appear in landscape mode.
Challenge: Proximity Notifications
Register for proximity notifications too. You will need to turn on proximity monitoring:
[device setProximityMonitoringEnabled:YES];
For the More Curious: Overriding Autorotation
In most cases, autorotation does the right thing as long as the autoresizing masks are properly set. However, you might want to take additional action on an autorotation or override the autorotation process altogether to change the way the view looks when it rotates. You can do this by overriding willAnimateRotationToInterfaceOrientation:duration: in a view controller subclass.
When a view controller is about to autorotate its view, it checks to see if you have implemented this method. If you have, it invokes this method during the animation block of the rotation code. Therefore, all changes to subviews in this method will be animated as well. You can also perform some custom code within this method. Here is an example that will reposition a button and change the background color on autorotation:

Overriding this method is useful when you want to update your user interface for a different orientation. For example, you could change the zoom or position of a scroll view or a table view (which you will learn about shortly) or even swap in an entirely different view. Make sure, however, that you do not replace the view of the view controller in this method. If you wish to swap in another view, you must swap a subview of the view controller’s view.
This method is only available in iPhone OS 3.0 or later. In earlier versions of the OS, autorotation was performed in two steps. To implement additional actions for applications that support earlier versions of the OS, you can override two methods, willAnimateFirstHalfOfRotationToInterfaceOrientation:duration: and willAnimateSecondHalfOfRotationFromInterfaceOrientation:duration:. One caveat: if you implement either of these two methods, the one-step method, willAnimateRotationToInterfaceOrientation:duration:, will not be invoked.