
The Alfresco application is supported in various application servers; one of the supported platforms is JBoss. Installing Alfresco on JBoss requires some additional steps to installing on Tomcat.
Similar to what we did for installing Alfresco in Tomcat, install JDK, the JBoss application server, and the database based on the supported stack and follow the steps below to deploy Alfresco in JBoss. Make sure JBoss is not running. Here, are considering PostgreSQL database.
Refer to the JBoss installation and administration guide for more details on JBoss at: https://access.redhat.com/documentation/en-US/JBoss_Enterprise_Application_Platform/6.2/index.html
- Download the
alfresco-enterprise-ear-5.x.x.zipbundle from Alfresco support and extract the.zipbundle under some temporary location; let's call this directoryALFRESCO_TEMP_DEPLOYMENTfor future reference. For example, in Windows, if you have extracted Alfresco 5.0.3 within the C directory, the full path will look something like this;C:\ ALFRESCO_TEMP_DEPLOYMENT. On extraction of the.zipfile, you can see the directory structure as shown in the screenshot below: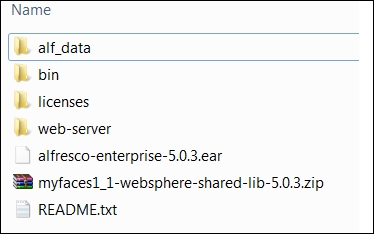
- All configurations of Alfresco will go under modules of JBoss. Create a
maindirectory in<JBOSS_HOME>/modules/org/alfresco/configuration. - Create a
module.xmlfile in thismaindirectory with the code snapshot below:<module xmlns="urn:jboss:module:1.0" name="org.alfresco.configuration"> <resources> <resource-root path="."/> </resources> </module> - Now copy all the files from
ALFRESCO_TEMP_DEPLOYMENT/web-server/classpath,which is in the temporary folder where the.zipfile was extracted, in the main directory created in step 2. - Configure the
alfresco-global.properties.samplefile under<JBOSS_HOME>/modules/org/alfresco/configuration/main,as we did in a similar way while deploying Alfresco in Tomcat. Remove the.sampleextension. Don't configure anything with the database at this point. You can refer to thealfresco-global.propertiesfile provided with the chapter. Also make sure thedir.rootcommand should point to the propercontentstorelocation. Copy thealf_datadirectory fromALFRESCO_TEMP_DEPLOYMENTto the location where the binary file will be stored. - Extract the
alfresco-enterprise-5.x.x.warfile located in theALFRESCO_TEMP_DEPLOYMENTdirectory created in step 1. You will have a set of.warfiles and aMETA-INFdirectory. WithinMETA-INF, make sure the filejboss-deployment-structure.xmlis set to the proper war configuration location, as shown here. Make sure the highlighted sections are configured properly, this is to link the configuration directory created in step 2 with the.warfiles.<jboss-deployment-structure> <sub-deployment name="alfresco.war"> <dependencies> <module name="org.alfresco.configuration" /> <module name="org.apache.xalan" /> </dependencies> </sub-deployment> <sub-deployment name="share.war"> <dependencies> <module name="org.alfresco.configuration" /> </dependencies> </sub-deployment> </jboss-deployment-structure>
- Assuming we are using a PostgreSQL database, create a directory,
org/postgresql/main,under the<JBOSS_HOME>/modulesdirectory. Copy the database connector.jarin thejbossmodule<JBOSS HOME>/modules/org/postgresql/maindirectory. For a different database, refer to JBoss configuration on the JBoss website. - Create a
module.xmlfile under the main directory for setting the PostgreSQL.jarlocation, as shown in the code snapshot below. The PostgreSQL connector.jarname should match with the one deployed in step 7.<module xmlns="urn:jboss:module:1.0" name="org.postgresql"> <resources> <resource-root path="postgresql-9.3-1102-jdbc41.jar"/> </resources> <dependencies> <module name="javax.api"/> <module name="javax.transaction.api"/> </dependencies> </module> - Now you have to configure the Datasource subsystem to point to the correct database and database connector location. Configure the
standalone.xmlfile located at<JBOSS Home>/standalone/configuration,as shown in the code snapshot below. The highlighted sections show the details to be configured. Make sure the connection URL and database credentials are configured properly. The maximum pool size should be configured based on the thread pool of the application server plus 75 more. If the thread pool size for the application server is 100, the database max connection pool size should be 175. Ensure your database is also configured accordingly. Refer to thestandalone.xmlfile provided with the chapter.<datasource jndi-name="java:jboss/PostgresDS" pool-name="jbossdatasource" enabled="true"> <connection-url>jdbc:postgresql://localhost:5432/postgresdb</connection-url> <driver>postgresql</driver> <pool> <min-pool-size>0</min-pool-size> <max-pool-size>20</max-pool-size> </pool> <security> <user-name>alfresco</user-name> <password>admin</password> </security> <validation> <valid-connection-checker class-name="org.jboss.jca.adapters.jdbc.extensions.postgres.PostgreSQLValidConnectionChecker"/> <exception-sorter class-name="org.jboss.jca.adapters.jdbc.extensions.postgres.PostgreSQLExceptionSorter"/> </validation> </datasource> <drivers> <driver name="postgresql" module="org.postgresql"> <xa-datasource-class>org.postgresql.xa.PGXADataSource</xa-datasource-class> </driver> </drivers>
- Set
enable-welcome-root="false"in thestandalone.xmlfile in<JBOSS Home>/standalone/configuration:<subsystem xmlns="urn:jboss:domain:web:1.5" default-virtual-server="default-host" native="false"> <connector name="http" protocol="HTTP/1.1" scheme="http" socket-binding="http"/> <virtual-server name="default-host" enable-welcome-root="false"> <alias name="localhost"/> <alias name="example.com"/> </virtual-server> </subsystem> - Unzip the
alfresco.warfile located in the temporary directoryALFRESCO_TEMP_DEPLOYMENTcreated in step 6 on extraction of the.earfile. Modify thejboss-context.xmlfile inWEB-INFto have the properdatasource jndi-namereference created in step 9. Below is the highlighted code snapshot:<resource-ref> <res-ref-name>jdbc/dataSource</res-ref-name> <jndi-name>java:jboss/PostgresDS</jndi-name> </resource-ref> <resource-ref> <res-ref-name>jdbc/activitiIdGeneratorDataSource</res-ref-name> <jndi-name>java:jboss/PostgresDS</jndi-name> </resource-ref>
- There are few issues with Java 8 and the Eclipse compiler for Java. To resolve this issue, you have to install a few additional libraries. Follow the steps below:
- Download the ECJ4.4
.jarfile - Update the
ecjjar location with the new.jarfile name in<JBOSS Home>/modules/system/layers/base/org/jboss/as/web/main/module.xml
- Download the ECJ4.4
The vaadin jarfile also need to be updated, so copy thevaadin-application-server-class-loader-workaround-1.0.1.jarfrom theALFRESCO_TEMP_DEPLOYMENT/web-server/libdirectory to the extractedalfresco.warfileWEB-INF/libcreated in step 11.- Make sure that proper memory is allocated to JBoss by configuring the
standalone.conffile located at<JBOSS Home>/bin. - Configure the
standalone.xmlfile located at<JBOSS Home>/standalone/configurationto set the proper URI encoding. Below is the code snapshot; add this after the extension tag. Refer to thestandalone.xmlfile provided with this chapter.<system-properties> <property name="org.apache.catalina.connector.URI_ENCODING" value="UTF-8"/> <property name="org.apache.catalina.connector.USE_BODY_ENCODING_FOR_QUERY_STRING" value="true"/> </system-properties>
- Disable the
webservicesmodule in JBoss by commenting out the listed extension below and subsystem tags in thestandalone.xmlfile located at<JBOSS_HOME>/standalone/configuration.<extension module="org.jboss.as.webservices"/> <subsystem xmlns="urn:jboss:domain:webservices:1.2"> .. </subsystem> - Enable Alfresco application logging by configuring
standalone.xml. A sample log snippet is to be added within<subsystem xmlns="urn:jboss:domain:logging:1.3">in thestandalone.xmlfile. Refer to thestandalone.xmlfile provided with this chapter.<logger category="org.alfresco.repo.admin"> <level name="INFO"/> </logger>
- Again, compress the extracted
alfresco.warandalfresco-enterprise-5.x.x.earfiles to include the changes. Start the JBoss server. - Open the JBoss Management console, add the Alfresco
.earfile created in step 17 in Runtime / Manage Deployments. Click the Enable button and Alfresco will be deployed.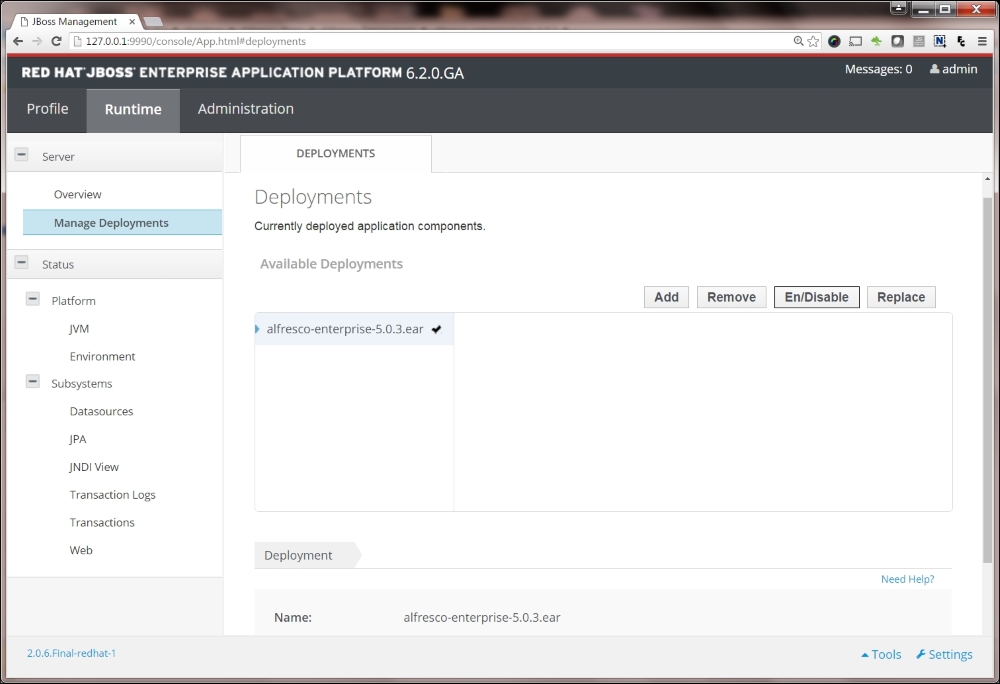
- Monitor the
logsfile for any startup issues.
..................Content has been hidden....................
You can't read the all page of ebook, please click here login for view all page.