Chapter 11
Building Templates
Saving Time Through a Little Bit of Pre-Design
On the Spot
Being original is an important aspect of your design abilities. Being done is a more important expression of your desire to keep your “high-paying" job. What’s a well-intentioned broadcast designer to do? Both!
By creating your own templates based on your designs and styles (or at least those approved by the art director), you can make deadlines and keep the look you want. The word template has gotten a bad stigma thanks to those who think buying a $399 DVD bundle replaces the need for real designers. But you can do good work and save time simultaneously. Let’s learn how!

Organization = Success (Photoshop)

When building templates it is critical that the elements of your image are organized. The contents of any template are items that you want to edit, and items that you want to stay the same, so organizing them in with this in mind will keep your templates clean when other people need to use them.
- Separate the editable portions of your template from the fixed elements by placing them into respective layer groups.
- Lock the groups and layers within the groups that you don’t want edited or changed.
- Clearly label the groups so that everyone is clear what should be edited and what should be left alone.
Organization = Success (After Effects)

As with Photoshop, you want to create an organization method in After Effects to keep the editable and fixed elements of your templates separate.
Use nested comps to separate the elements of a template. We recommend using three comps for templates:
One for your template elements that you don’t want edited
One for your editable content such as text or pictures
A render comp that the previous two comps are layered in.
- Name your comps so that they are clearly distinguishable as to what is to be left alone and what can be edited.
- For added protection, lock the layers in the template comps that you don’t want moved or edited.
Naming Text Layers

Have you ever noticed that when you create a text layer in Photoshop that the name of the layer assumes the text that was typed into the layer? For the most part this is helpful in identifying layers. However, when working with templates where you have fixed text fields, it is better for your workflow to name the text layers a more descriptive name. For example, if you are creating a lower third template it would be more informative to have a layer labeled “Name” as opposed to the persons name and a layer named “Title” as opposed to the person’s title. You can override Photoshop’s naming system by changing the name of a layer to a custom name.
- Double click on the name of a text layer.
- You will see the name highlight.
- Type a new, more descriptive name in for the layer.
- Hit the Enter key to accept.
Now the name of the layer will not change as the text within the text layer changes.
Check Your Alignment

When creating templates, the goal of the template should be to make creating a new graphic from the template as easy as possible. When creating your text layers for your graphics, make sure to check the alignment of the text in the Text Tool’s options palette when creating the text.
During the design phase of the template is when you should deal with alignment issues. Once the template is done, people should be able to double click on your text layer, type in new text, and not have to worry about whether or not the text aligns properly in the graphic.
For Once, Don't Save
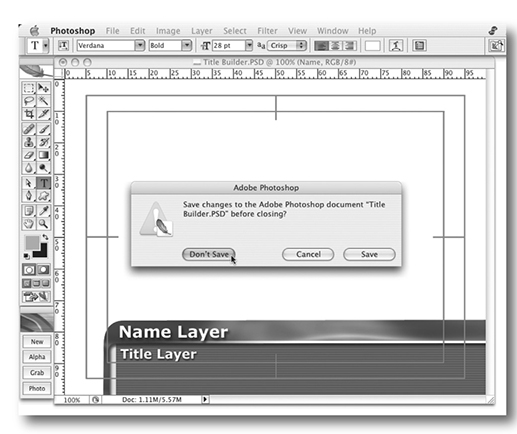
Another good practice when working with templates is to prevent changes from being made to the template so that other people using the template don't have to worry about things being out of place. Get in the habit of not saving changes to the template when text or other elements are changed for a new version of the image. Save a copy of the template and work from it, or duplicate the file before opening it in Photoshop. This keeps the template in its original state and prevents unwanted accidental changes.
On the Mac OS, you can go one step further.
- At the Finder level, select the document's icon.
- Press Cmd+I (Ctr+Il to call up the Info window.
- Click the Stationary Pad box to use this as a template file. When opened, you will have an untitled copy of the original. This can be edited and saved, but the original file remains untouched.
Check Your Leading and Plan Ahead

Keep in mind when designing a template in Photoshop that there may be instances where more than one line of text will be necessary for a given text layer. When designing the template, always type more than 1 line of text into the layers in your templates to make sure that you have the leading set for the layer where you want it. Otherwise you will find that people need to make core changes to the text layers in the template to get line spacing working after the fact.
Don't Overlook Anything

The design phase of the template is where you need to specify fonts and colors for your text layers. When the template is done, all of the text elements need to be set the way you want all graphics that are built from this template to look. Here are a few things to consider and when designing templates.
- Font choice. Save the template with the fonts that you intend to use in the graphics made from the template.
- Text color. Same thing goes for color. Set the text color to the color scheme that you will use in the finished graphics.
- Make sure you use layer styles for text. This makes your text editable so that your text effects follow text changes.
- heck all of your text settings including leading, kerning, • tracking and scale.
Defining Data Set Variable
Photoshop CS2 has included a new feature called Data Sets. This feature allows you to create a set of data that applies different text to the text layers, different visibility settings to all layers, or pixel replacement for art layers in your document. This is a great feature for use with templates. You can create a template file, then apply data sets to that template and save out individual variations of the template file as individual files. Let’s first look at how you define the data set.

- Open the Variables dialog (Image> Variables>Define).
- Choose the layer that you want to vary from set to set.
- Check the variable types that you wish to control for that layer. Either choose Text Replacement, Pixel Replacement, and/or Visibility.
- Assign a name to the variable. This will be used to identify the variable later when sets are created.
- Repeat the process for the other layers that need to be varied from one file to the next. Notice that layers that have variables assigned to them have an asterisk next to the layer name.
Now you have defined your variables, look at the next tip to assign data to your variables.
Defining Your Data Sets

Once you have defined your variables, you can create data sets. Each data set corresponds to a variation of your template. For each variable that you created in the previous tip, you can now set values to those variables.
- Open the Data Set dialog window (Image>Variable>Data Sets).
- Click the new data set button. This data set is based on the current state of your document.
- Assign a name to this data set.
- Move through your variables in the variables list and change the settings for each variable to reflect the state you want your image to be in for this data set.
- Continue creating new data sets, one for each file variation that you want from your template.
Make Your Data Sets Sing
Once you have created your data set, you can now apply data sets to your template. There are 2 ways to get use your data sets.

- You can apply an individual data set to your template. Choose Image>Apply Data Set… This will bring up a dialog listing all of the data sets that you created. Choose one and it is applied to your template. At this point, no files have been saved, you are just previewing the template with new variables applied.
- You can create a new file from the template for each data set that you have created. Choose File>Export>Data Sets as Files. This will bring up a dialog that will allow you to choose the set you want to apply, along with the naming of the files and the location that you want them saved.
One thing to remember about data sets is that they are saved with the file that they are created for. You can not reuse data sets from one template file to another.
External Data Sets
Sure. You can create a text file that can be imported as a data set. This gives you the ability to save your data sets and use them in more than one template file. Here are considerations when creating your data set as a text file for importing.

- The first line of the text file needs to be the variables separated by either a comma or a tab. The rest of the lines correspond to data sets.
- Type the setting for each variable separated by either a comma or a tab. For Visibility variables, use either “true” or “false.”
- For Pixel Replacement variables, type the actual path to the file that you wish to use.
- For Text Replacement variables, simply type the text that you want to use. If your text needs to be in quotes, use double quotes.
Here is a sample:
Variable1, Variable2, Variable3
true, TULIP, c:My Documents ulip.jpg
false, SUNFLOWER, c:MyDocumentssunflower.jpg
false, CALLA LILY, c:My Documentscalla.jpg
true, VIOLET, c:My Documentsviolet.jpg
Third-party Template Tools

Tools for Television PRO has a feature called Title Builder, which allows you to replace the text in up to five text layers, and generate individual files for each variation. It also handles the naming of files and creation of alpha channels for each file variation. It is geared towards lower third and factoid graphic creation. Your data sets within Title Builder can be saved out and re-used over multiple template files. For more information and a demo, check it out at http://www.toolsfortelevision.com.
Variety Is the Spice of Life
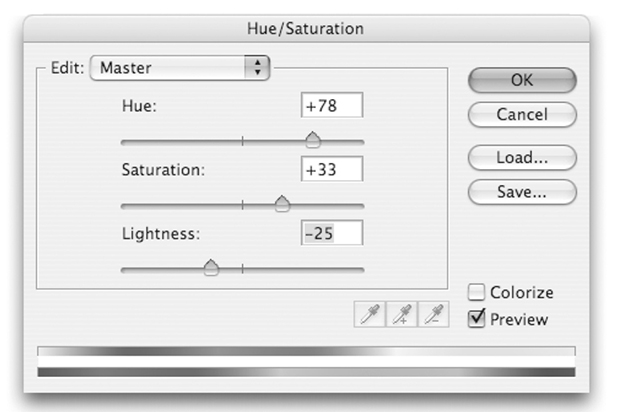
When creating templates, it is a good idea to create different variations on a theme. For example, you may have more than one full screen template based on the type of content needed for a given graphic. Some graphics may be very text heavy, and others may rely on images or bullet points. We recommend creating multiple variations of a template to fit the different needs that you have. This keeps you working fast and not doing a redesign when it comes time kick out graphics that have unique content. Also consider creating different variations of color schemes for a given template. All of these variations and forethought on your part will save hours down the road in pressure situations.
Using Actions with Templates
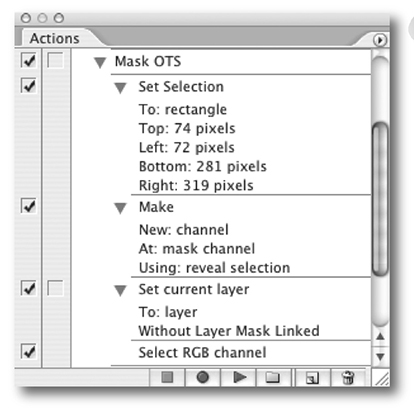
Many times we will work with templates that incorporate photos or images within the template. And most of the time, such as with an OTS graphic, you want the image to sit within a defined area. You can make bringing new photos into a template very easy by creating an action that applies a layer mask to the photos that masks the image to the pre-defined area. Follow these steps to create the action.
- Select the layer that you want to mask.
- Create a new action
- Make a selection with a marquee tool that fits the pre-defined area that the image needs to be bound by.
- Click the add layer mask button.
- Unlock the mask from the pixels of the layer.
- Stop the action.

Putting it to use:
You now have an action that will mask new elements in the template for you automatically.
- Now all you need to do when creating new graphics from the template is to place the photo on a layer inside the template.
- Run the action to mask it.
- Position the pixels of the layer and transform the size so you are viewing the portion of the photo that you want to see.
Travel with Your Fonts

As important as it is to make sure that your templates are set up with the correct fonts, colors, and other text settings, it is equally important to make sure that when you share your templates between different computers you need to send the fonts that you used with them. Fonts in Photoshop are not embedded in the file and need to be installed on all computers that will use the template.
Storing Logos in Photoshop

Did you know that you could save your logos as custom shapes or brushes in Photoshop? This makes it very easy to incorporate them into your templates.
- If you have your logo in the paths palette or as a vector layer, you can select the path and select Edit>Define custom shape. This will save it in the custom shapes tool.
- If your logo is rasterized as pixels, you can create a selection around the outside of the logo and define it as a custom brush (Edit>Define Brush Preset). You can now select the brush tool and paint your logo right onto your template.
Keep in mind that this limits you to using the logo as grayscale, but the foreground and background color selected in Photoshop will tint it when it is applied to a layer.