B. Customizing and Extending Dreamweaver
One of the best things about Dreamweaver is that it is both customizable and incredibly extensible. What’s the difference? Customizable means that you can change the keyboard shortcuts to suit your style of working, and of course you can customize using Dreamweaver’s Preferences. That’s fine, but extensibility, the ability to add new features to the program, is where the real action is.
As you’ve seen in the rest of this book, Dreamweaver can do an awful lot. But just because Dreamweaver is amazingly capable doesn’t mean that it does absolutely everything that people want it to do. Adobe allows software developers to write add-ons, called extensions, that add new features to Dreamweaver. These new features can range from the mundane (adding new Flash button styles) to the amazing (creating full site generators with associated page templates and navigation bars).
In this appendix, we’ll show you how to customize Dreamweaver’s keyboard shortcuts and how to find, acquire, and install Dreamweaver extensions.
Customizing Keyboard Shortcuts
Sometimes the keyboard shortcuts that come with Dreamweaver aren’t quite what you want. For example, some shortcut keys used for editing code with BBEdit (on Mac) or HomeSite (on Windows) aren’t the same as the shortcuts used for the equivalent commands in Dreamweaver CS3. No problem; you can change Dreamweaver shortcuts to match those in your favorite code editor. In fact, Dreamweaver comes with shortcut key sets for those two code editors, which makes it a snap to change shortcut keys and increase your productivity.
Of course, you can also change any keyboard shortcut, add shortcuts to menu items that may not already have them, or delete shortcut keys you don’t like. You can also print out a cheat sheet of keyboard commands to help you learn them.
To change between shortcut key sets
1. Choose Edit > Keyboard Shortcuts (Dreamweaver > Keyboard Shortcuts).
The Keyboard Shortcuts dialog appears (Figure B.1).
Figure B.1. Begin customizing your Dreamweaver experience in the Keyboard Shortcuts dialog.

2. Choose the keyboard shortcuts that you want from the Current set pop-up menu.
Your choices are: Dreamweaver Standard, which includes the standard shortcut keys for Creative Suite 3; Dreamweaver MX 2004, a slightly different set found in a previous version of Dreamweaver; BBEdit, which modifies the code editing keyboard shortcuts to match those used by the popular Macintosh code editor; and HomeSite, which modifies the code editing keyboard shortcuts to match the popular Windows code editor.
3. Click OK.
Dreamweaver changes its keyboard shortcuts to match the set that you chose.
To create a personalized set of keyboard shortcuts
1. Choose Edit > Keyboard Shortcuts (Dreamweaver > Keyboard Shortcuts).
The Keyboard Shortcuts dialog appears (Figure B.1).
2. From the Current set pop-up menu, choose the keyboard shortcuts set that you want to use as the basis for your personalized set.
3. Click the Duplicate set button.
The Duplicate Set dialog appears (Figure B.2).
Figure B.2. Enter the name of your new keyboard shortcuts set.
4. Type the name for your duplicate set.
5. Click OK.
Dreamweaver creates the duplicate set and makes it the active set. You can then personalize it, as shown next.
To add or change a keyboard shortcut
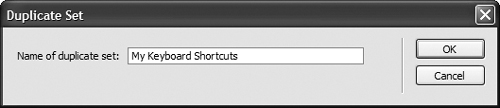
1. In the Keyboard Shortcuts dialog, choose the kind of command you want to modify from the Commands pop-up menu (Figure B.3).
Figure B.3. You can customize keyboard shortcuts for more items on Windows (top) than on Mac (bottom).
This pop-up menu differs on Windows and Mac, with more choices (and more functionality) on Windows. Besides Menu commands, Code editing, Document editing, and Snippets keyboard shortcuts, Dreamweaver for Windows also allows you to set keyboard shortcuts for the Files panel options menu, the Site panel, and the Site window.
Depending on what you chose, the Commands list changes.
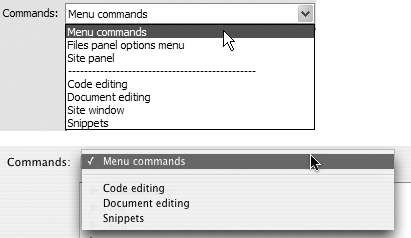
2. In the Commands list, navigate to the command that you want to change. Click the + icon next to the name of the menu to expand the choices for that menu.
The menu choices are shown with any existing shortcut keys (Figure B.4).
Figure B.4. Click the + buttons to display menu choices in an indented tree form.
3. Click on the command that you want to change.
The shortcuts assigned to the command appear in the Shortcuts text box (Figure B.5).
Figure B.5. Select the shortcut key that you want to change.

4. To add a shortcut, click the Add shortcut button (marked with a plus sign).
A new blank line appears in the Shortcuts text box.
or
To change an existing shortcut, select it in the Shortcuts text box.
5. Click in the Press key text box.
6. Press the key combination you want to use for the shortcut key.
If the key combination is already in use, Dreamweaver lets you know with a message at the bottom of the Keyboard Shortcuts dialog.
7. Click Change.
The new shortcut appears in the Shortcuts text box.
8. Click OK to save your changes and dismiss the Keyboard Shortcuts dialog.
To export a keyboard command cheat sheet
1. Choose Edit > Keyboard Shortcuts (Dreamweaver > Keyboard Shortcuts).
The Keyboard Shortcuts dialog appears (Figure B.1).
2. Click the Export set as HTML button.
The Save as HTML file dialog appears.
3. In the Save as text box, give the exported file a name, then navigate to where you want to save the HTML file.
4. Click Save.
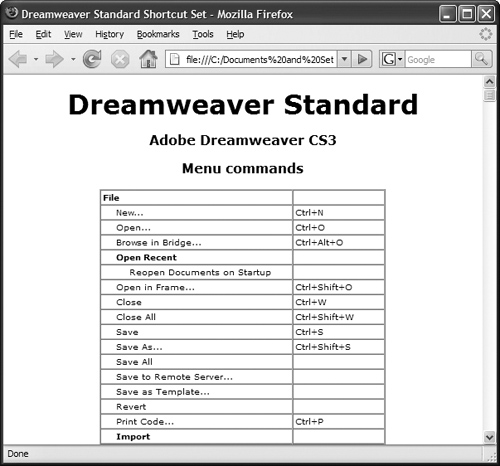
Dreamweaver saves the list of keyboard commands to your hard disk as an HTML file. You can then open it in Dreamweaver or any Web browser (Figure B.6).
Figure B.6. You can print your keyboard command cheat sheet from a Web browser.
Finding and Installing Extensions
You add extensions to Dreamweaver using Adobe Extension Manager, a program that was installed when you installed Dreamweaver on your system. After you install an extension, it appears as part of Dreamweaver. Where it appears within the program depends on what kind of extension it is. For example, if you have installed an extension that provides additional Flash buttons, those buttons will appear in the Insert Flash Button dialog. An extension that provides new ways to add pop-up menus may appear in the Commands menu. And extensions that add new scripting behaviors will appear in the Behaviors panel. Because Dreamweaver is almost infinitely extensible, the extensions you add can appear almost anywhere within the program.
You can find extensions in a variety of ways. Some extensions are free for downloading, and others are paid products. Many extension developers have Web sites where they host (and sometimes sell) their extensions. A Google search for “Dreamweaver extensions” will result in a large number of useful results.
But the most common way to find Dreamweaver extensions (and also extensions for other Adobe products, such as Photoshop, Fireworks, Flash, etc.) is to use the Adobe Exchange site, at www.adobe.com/exchange/dreamweaver/. The Dreamweaver Exchange portion of the site has lists and short descriptions of more than a thousand extensions.
In Dreamweaver, it’s easy to go to the Dreamweaver Exchange site. Just choose Help > Dreamweaver Exchange, and your default Web browser opens to the site (Figure B.7). From the Exchange site, or from an extension developer’s site, download the extension file to your hard disk. Then you’re ready to use Adobe Extension Manager to install the extension.
Figure B.7. The Dreamweaver Exchange site lists more than a thousand extensions.

To install an extension
1. If it’s running, quit Dreamweaver by choosing File > Quit (Dreamweaver > Quit).
2. Launch Adobe Extension Manager by double-clicking its icon.
On Windows, you’ll find it in C:Program FilesAdobeAdobe Extension Manager. On Mac, you’ll find it in /Applications/Adobe Extension Manager/.
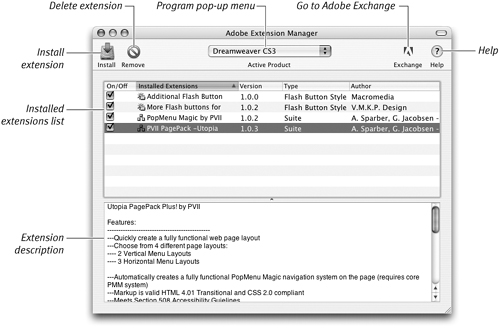
The Adobe Extension Manager window appears (Figure B.8).
Figure B.8. Use the Adobe Extension Manager program to install or remove extensions.
3. From the Program pop-up menu at the top of the Extension Manager window, choose Dreamweaver CS3.
Any extensions you have installed for Dreamweaver CS3 appear in the Installed Extensions list.
4. Click the Install button.
The Select Extension to Install (Windows)/Install Extension (Mac) dialog appears (Figure B.9).
Figure B.9. Find and select the extension file that you want to install.
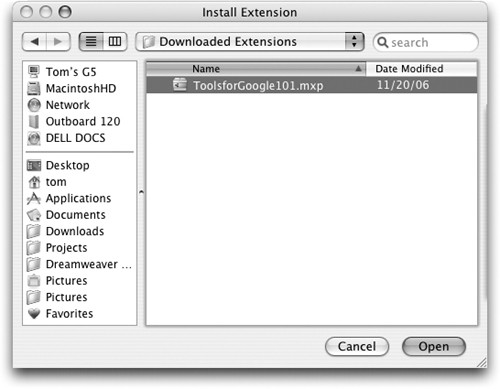
5. Navigate to and select the extension file you wish to install.
6. Click Install (Open).
A license dialog appears.
7. Click Accept.
The Extension Manager installs the extension and reports success with an alert dialog.
8. Click OK to dismiss the alert dialog.
The new extension appears in the Installed Extensions list.
9. Choose File > Exit (Extension Manager > Quit Extension Manager).
10. Launch Dreamweaver to use the new extension (Figure B.10).
Figure B.10. Extensions can provide a complete user interface, as in this example, Tools for Google, which helps you easily create a Google search box on your site.

 Tips
Tips
• If you have more than one version of Dreamweaver installed (perhaps you didn’t want to remove an older copy immediately when you upgraded to Dreamweaver CS3), you can have different sets of extensions installed for each version.
• Because each extension works differently, you need to refer to the instructions that came with the extension to discover how to access the extension from within Dreamweaver.