
Chapter 9
Socializing and Playing Games
QuickSteps to…
The iPad has a practical and useful side, as you’ve seen with Safari, email, messaging, and scheduling. It also has an entertaining side: listening to music; reading books, magazines, and newspapers; and taking and viewing photos and videos. Finally, as you’ll see in this chapter, it has a socializing and fun side: interacting with your family and friends, and playing games. While this is a lighter aspect of the iPad, it is no less important, and in this chapter you’ll see how to get connected and use Twitter and Facebook, as well as explore the Game Center and find, download, and use third-party games, some of which are multiplayer games where you can interact with your friends.
FOLLOW TWITTER 
Twitter is a social networking service on the Internet that allows you to post very small messages, called Tweets, of no more than 140 characters. Twitter says it is an information network of 140-character messages. You can choose to follow this stream of messages, or Tweets, on any topic and from any individual. You can also choose to add your own Tweets, which anyone can read. You can read the public postings of anyone else and sign up to be a follower of anyone. Twitter has a very large user base, with over half a billion active registered users who produce over 50 million Tweets per day and over two billion Twitter search engine queries per day. (Statistics from StatisticBrain.com as of 5-7-2013.
You must register with Twitter before you can use it. You can access Twitter from Safari at twitter.com or you can download for free the Twitter app from the App Store. The app is tailored to your iPad, so begin by downloading the app and then registering with Twitter. Next, locate some information and contributors who you want to follow. Finally, post Tweets of your own and build a following.
Download and Register with Twitter
1. From the Home screen, tap the App Store. Clear the Search box. Type twitter, and tap Twitter in the search results.
2. Tap Free | Install App, enter your Apple ID password, and tap OK. The Twitter app will be downloaded. Tap Open to display Twitter, as you see in Figure 9-1. If you want, tap OK to allow Twitter to use your current location.
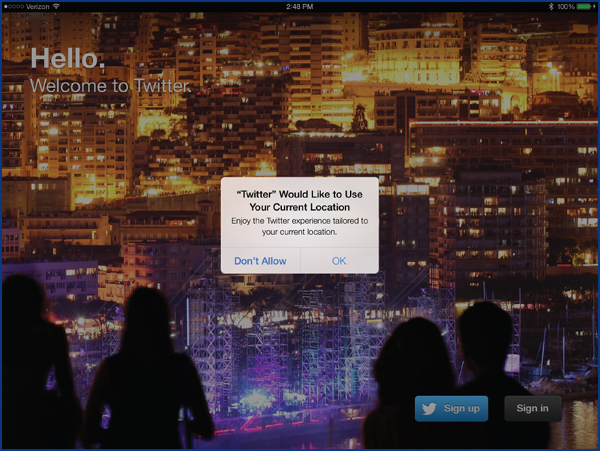
Figure 9-1: Twitter provides a world of information; only you can determine if it is worthwhile to you.
3. If you don’t have an existing Twitter account, tap Sign Up and enter the requested information. Otherwise, enter the email address and password for your existing Twitter account. Tap Don’t Allow or OK to allow notifications.
4. Tap Follow Your Friends and then tap OK, if you wish, to allow access to your contacts. A list of your contacts who are on Twitter will be displayed. Tap Follow for each person you want to follow, or tap Follow All to do that. Tap the Next arrow to display a list of your contacts who are not on Twitter and whom you can invite to join Twitter and follow you. Tap the Next arrow to display a list of people who your friends are following and are suggested as people you might want to follow. Tap Follow for each one you want to follow, or tap Follow All to do that.

5. You are asked if you want to add your photo to your Twitter account, and you are given the option of taking a photo with the iPad or choosing an existing photo. If you choose the latter, you are asked if you want to allow Twitter access to your Photos. Tap OK or Don’t Allow (if you choose Don’t Allow, you will need to take a photo and insert it unless you choose not to have a photo on Twitter). Select the photo you want, move and scale it, and tap Use | Finish. Your Home page opens displaying recent Tweets of those you are following, similar to Figure 9-2.

Figure 9-2: Some people seem to do nothing but Tweet, while others hardly do anything.
Locate Tweets to Follow
In setting up Twitter, you’ve added the people in your contact list who you want to follow, but it is likely that you want to follow others in areas that you are interested in. As I am writing this, Apple’s iOS 7 is in beta testing and I am interested in what people are saying about it. Also, I like to cook, so I am interested in new and unique recipes. I can search on both of these topics to see who is Tweeting on them.
1. Tap the Search icon  , type what you want to search for, and then tap the result you want to explore. In my case, I type and tap “iOS 7” to get the screen shown in Figure 9-3.
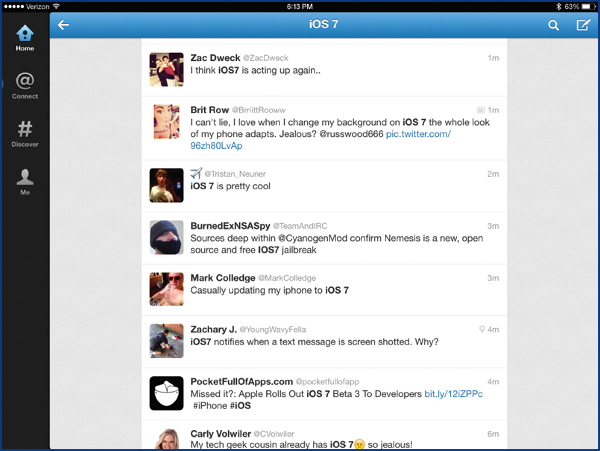
Figure 9-3: Depending on the subject, you may get a large number of Tweets to go through.
2. Scroll down the Tweets until you see one you might want to follow and then tap it. The selected Tweet will expand.
3. Tap Follow if you want to follow this Tweeter or subject.
4. Repeat the first three steps for as many subjects as you want to follow.
TIP Some subjects, like my interest in cooking, can provide a great many Tweeters to follow, many of whom do a lot of Tweeting (see Figure 9-4). |

Figure 9-4: A major task with Twitter is to separate the wheat from the chaff. Thankfully, there is a 140-character limit.
Search Categories
If searching on a name, keyword, or phrase does not get you what you want, or you just wonder what else is there in Twitter, use the #Discover option to review one or more of the suggested Tweets and open the huge list of categories in which to browse.
1. From within Twitter, tap #Discover in the left column. This opens a list of suggestions, based on what else you are following, for you to consider.
2. Tap one of the suggestions to explore it further. It may lead you to a website, and that may lead you to other sites, as shown in Figure 9-5.
Figure 9-5: Exploring one suggestion can lead to a totally unrelated site you want to follow.
3. When you have explored a path as far as you want, return to Twitter by tapping the X in the upper-left corner and then tapping the left arrow, also in the upper-left corner.
4. When you have looked through the suggestions as much as you want, scroll to the bottom of the Discover screen and tap Browse Categories to open the mother lode of possibilities (see Figure 9-6). Tap one of the major categories, such as News, and then scroll down the many options under that category, tapping Follow as desired.

Figure 9-6: One of the best places to find what you want to follow is through Categories.
While reading the Tweets of others can be interesting, beneficial, and even exciting, there is an equally compelling use of Twitter to get your thoughts and comments out to the world. You can do this by posting your own new Tweet, with and without photos, by replying to the Tweets of others, and by retweeting what others have posted.
Post a Tweet
Posting Tweets is no harder than posting a text message, except that you are limited to 140 characters, and, of course, you must figure out what to say.
1. On any Twitter page, tap the Tweet icon  to open the New Tweet dialog box, as you see in Figure 9-7.

Figure 9-7: You can Tweet about anything, but consider what would be of interest to others.
2. Type whatever you want to say in the text box. Notice the number in the lower-right corner, which starts at 140, is decreasing as you type, telling you the number of characters you have left.
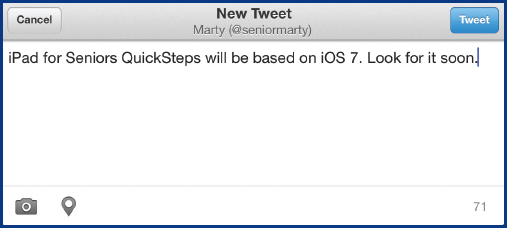
3. When you are ready, tap Tweet in the upper-right corner to post on Twitter.
4. If you are not already there, tap your Twitter Home screen and you will see what you posted.

Tweet with Photos and Add Your Location
You may have noticed two icons in the lower-left corner of the New Tweet dialog box. These allow you to add a photo to your Tweet and to add your location.
1. Open a New Tweet dialog box as described in the previous section, and enter a Tweet as you have previously.
2. Tap the Photo icon in the lower-left corner and tap either:

• Take Photo to open the iPad’s Camera app where you can take a photo as described in Chapter 8.
• Choose Existing Photo to open the gallery of existing photos that are available on your iPad where you can open an album and choose a photo.
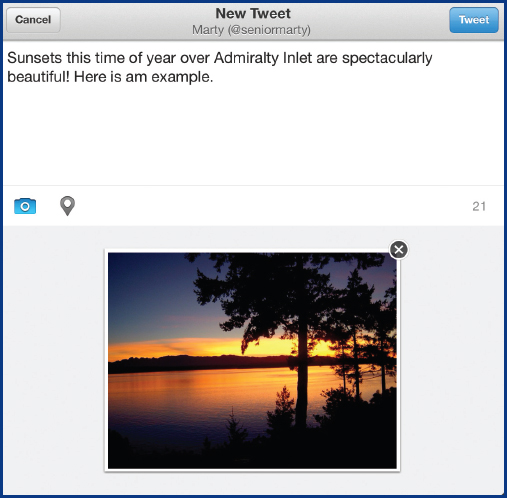
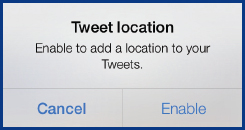
3. Tap the Location icon to be asked if you want to add your current location to your Tweets. Tap Enable to do that, or tap Cancel to not add your location.
4. When the Tweet is ready, tap Tweet to send it.
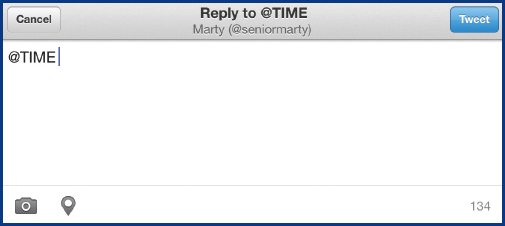
Reply to Tweets and Retweets
You can reply to the Tweets of others and you can retweet Tweets you find that might interest your followers. From the list of Tweets on your Twitter Home screen, tap a Tweet you want to reply to or retweet. The enlarged Tweet appears with a series of icons on the bottom right.

• Tap the Reply icon and enter a Tweet as you would normally.
• Tap the Retweet icon and tap Retweet to create a new Tweet that is nothing more than the original Tweet that goes to your followers with a green Retweet symbol in the upper-right corner.

• If you tap the Retweet icon after tapping Retweet, you can undo your last retweet.

• After tapping the Retweet icon, you can alternatively tap Quote Tweet to create a new Tweet that contains the full original Tweet, not leaving much room for any comments.

• Tap the Favorites icon to indicate a Tweet is one of your favorites.
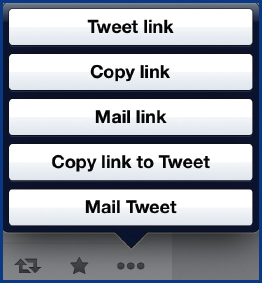
• Tap the More icon to take various actions with the link to the existing Tweet or to mail the Tweet.
Tailor Twitter Settings
You can change Twitter settings in both the iPad’s settings and in Twitter.
1. From the Home screen, tap Settings | Twitter. Tap your account to change your password and/or description. Tap Find Me By Email to allow people to search Twitter and find you using your email address. Tap Done to leave your account settings.
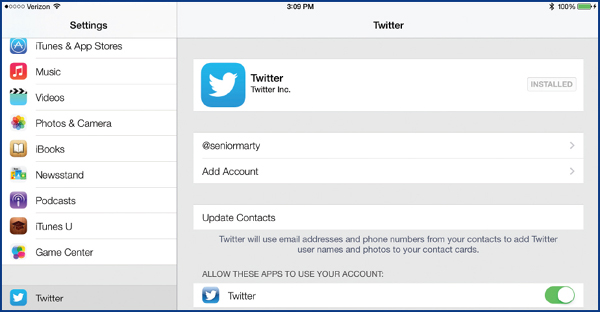
2. Also in iPad Settings you can add another Twitter account, either existing or new; update your possible Twitter followings based on changes to your contacts; and allow Twitter to use your Apple account.
3. While in iPad Settings, tap Notification Center | Twitter and choose the notification settings for Tweets that are correct for you. Return to the Home screen when you are finished.

4. Tap Twitter | Me and tap the Settings icon.

5. Tap Edit Profile to change your photo, header image, name, location, website, and bio. Tap Save when you are ready.

6. Tap Settings to change your font size, image quality, sound effects, and connect tab. Tap Done when you are ready.

7. Tap Sign Out and then tap it again to completely leave Twitter. The next time you want to use Twitter, you will have to sign in again.
EXPLORE FACEBOOK 
Facebook is the largest social networking site by a large margin, with over 1.15 billion active users worldwide as of March 2013 according to Wikipedia. Facebook allows people 13 and older to connect with their friends and share comments, pictures, and videos. To do that, each user, after registering, creates their own webpage and identifies the friends that they want to share with. You can limit sharing to just your friends, or have a public page that anyone can view. You can send invitations to people to be your Facebook friends, and you will likely receive invitations from others to be their friends. Making full use of Facebook is a book-length subject, and my wife, Carole Matthews, has written one, Facebook for Seniors QuickSteps, published by McGraw-Hill Education.
Like Twitter, you can use Facebook either through Safari or with the Facebook app, which you can download for free from the App Store. Also, like Twitter, I recommend using the app because it can then use the full page and is a little faster. Once you get Facebook open, if it is for the first time, you can immediately start using it by posting comments, photos, and videos. You will want to add friends who can see and respond to what you have posted. Finally, you may want to customize your page.
Download and Register with Facebook
1. From the Home screen, tap the App Store. Clear the Search box. Type facebook, and tap Facebook in the search results.

2. Tap Free | Install App, enter your Apple ID password, and tap OK. The Facebook app will be downloaded. Tap Open to display Facebook.
3. If you don’t have an existing Facebook account, tap Sign Up For Facebook and enter the requested information. Otherwise, enter the email address and password for your existing Facebook account. Facebook will open.

Use Facebook
If you have an existing Facebook account, your current Facebook page will open; otherwise, you are asked where you want to start, as you can see in Figure 9-8.
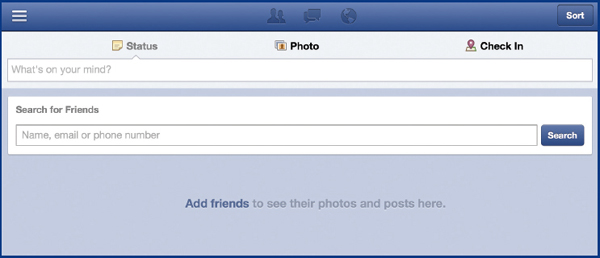
Figure 9-8: You can start using Facebook by posting a status or comment, posting a photo, or checking what is in your local neighborhood
1. Tap What’s On Your Mind and enter a status or comment that you would like to share with others. When you have completed entering the comment, tap Post. Your status or comment will appear on your page.

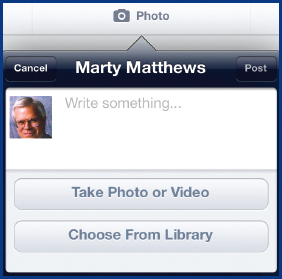
2. Tap Photo to add one. Tap either Take Photo Or Video or Choose From Library, and either take a photo as you normally would or select a photo from those on your computer, and then tap Post.
3. Tap Check In. Facebook will ask if it can use your current location. If that is acceptable to you, tap OK; otherwise, tap Don’t Allow. If you allow the use of your current location, Facebook will display a list of businesses that are close to you.

4. Tap the three bars in the upper-left corner to open the list of options, or “bookmarks,” you can select in the left column, as you can see in Figure 9-9, which also shows a photo I added in Step 2 (my desktop companion).
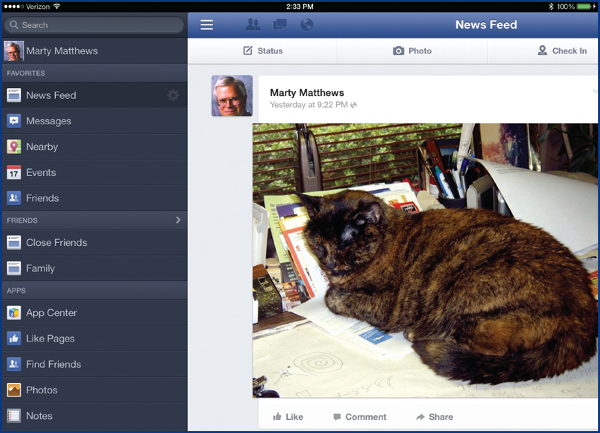
Figure 9-9: Facebook has two views, News Feed, which shows both your and your friends’ comments and photos, and Timeline, which is also called your “Wall.”
5. Tap your name at the top of the left column to open your Timeline or Wall, shown in Figure 9-10.

Figure 9-10: The Timeline or Wall view shows your posts as well as those your friends post specifically to you in chronological order.
6. Tap About in the top-left corner of your Timeline and then tap About again to open your profile page where you can enter information about yourself (see Figure 9-11). Also, you can tap any of the other options across the top of that page to add photos and location information; music, movies, TV shows, and books you like; and add notes and keep an activity log.
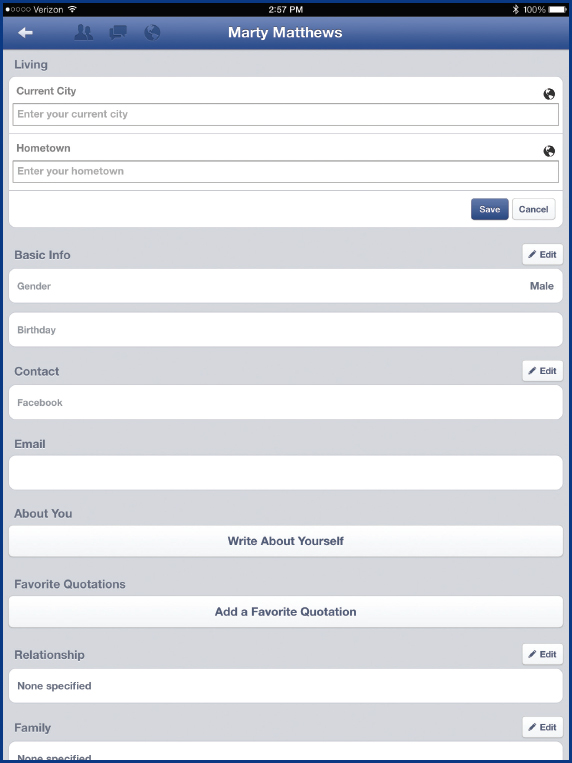
Figure 9-11: Facebook invites you to publicize a lot of information about yourself, but you might want to consider what you want everyone to know.
CAUTION! Consider carefully the information you put on Facebook and the degree to which you allow others to view your information. Even though you put limits on who can see your information (see “Manage Your Facebook Account” later in this chapter), a good assumption is that anything you put on Facebook is public information. See the “Protecting Your Online Identity” QuickFacts later in this chapter. |
Add and Contact Friends
Posting comments and statuses on Facebook doesn’t do a lot for you without a set of friends who will see them. If you add a few friends to start, the number of your friends will quickly grow as you get suggestions to add friends of friends and others will request that you be their friend as they learn you are on Facebook.
1. In the list of options on the left, tap Find Friends to see several ways to add friends. If you are just starting out, you will probably not see any people under Suggestions, Requests, or Filters.
2. Tap Search | Name Or Email and type a friend’s name or email address (an email address is preferred because if you enter a name, you then must search through all the people on Facebook with the same name—probably a lot). Finally, tap Search. (See illustration shown at right.)
3. When you see a friend you would like to add, tap that friend’s name to open their page and then tap Add Friend. You will see the label “Add Friend” change to “Friend Request Sent.”


4. Tap the return arrow in the upper-left corner twice to return to the Find Friends page and then tap Contacts to see a list of email providers. Tap your email provider, enter your email address and your password, and tap Find Friends. A list of people will appear. Tap Add opposite the people you want to be your friends.

5. After adding several requests for friends, tap Suggestions and you will see that you now have a number of suggestions based on the requests you have made and who their friends are. Tap the Add Friend icon  on the right of the people you want to be your friends. Your friends will receive a request in their email, like this:

6. After your friends have had a chance to see their email and respond, you will see them in the right column on your News Feed page. If you tap the Notification icon in the title bar, you will also see the friends who accepted your requests (see Figure 9-12).
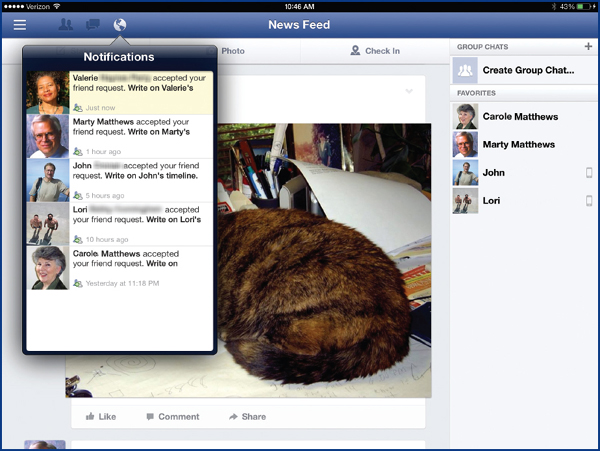
Figure 9-12: You will be surprised at how fast you will add friends.
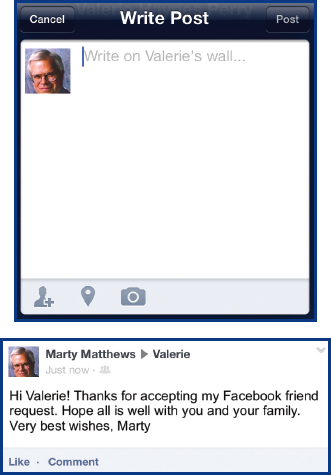
7. To say hello and thank a friend for responding, tap Write On friend’s Timeline. Your friend’s Timeline will appear. Tap Write Post to open a dialog box and write a message. Tap Post. Your message will appear in your friend’s Timeline.
Facebook can disseminate a lot of information about you, and it is important that you use the controls that Facebook provides to place the limitations you want on who can see what.
While there are a couple of settings for Facebook in the iPad’s settings, they are not significant. The settings you need to pay attention to are in Facebook in either Account Settings or Privacy Settings, which give you the same options.
1. In Facebook, if you don’t see the column of options on the left, either swipe the screen from left to right, or tap the three bars in the upper-left corner.
2. Drag or scroll the list of options up and tap Account Settings to open the Facebook Settings shown in Figure 9-13.
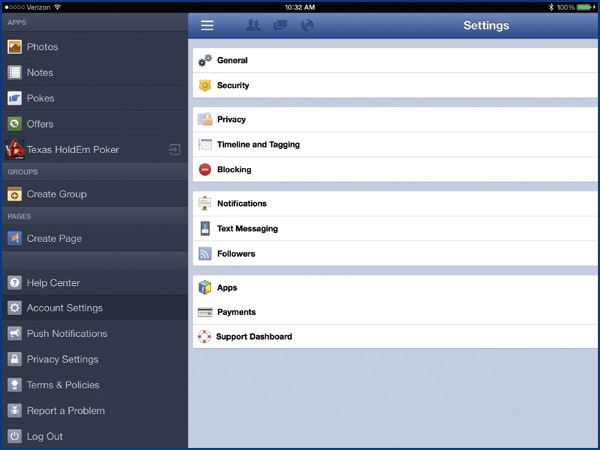
Figure 9-13: Become really familiar with the Facebook Settings and make sure they are set to your liking.
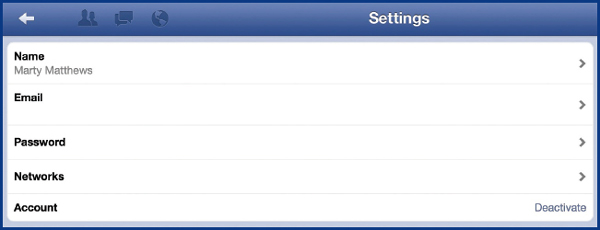
3. Tap General and tap any of the fields, Name, Email, or Password; make the desired changes; and tap Save. You can also deactivate your account by tapping that option, answering the questions, and tapping Deactivate again if you are sure you want to deactivate the account.
4. Tap the Return arrow in the upper-left corner and tap Security, tap the option below, and follow the instructions for the specified result:
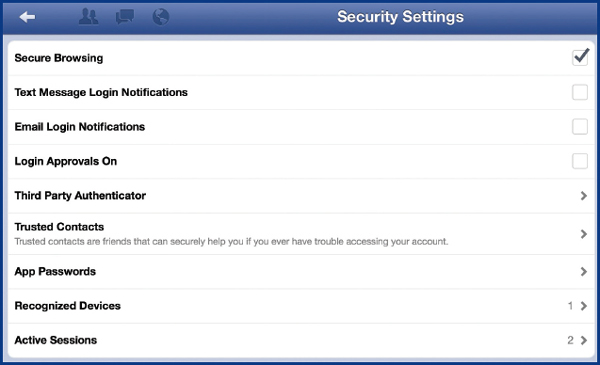
• Secure Browsing uses a secure Internet connection (https) when it is available.
• Login Notification sends either a text message or an email when your Facebook account is accessed from a device that you haven’t used before.
• Login Approvals requires a security code to access your Facebook account from a browser you haven’t used before.
• Third Party Authenticator sets up a third-party app to generate Facebook security codes used for Login Approvals or to reset your password.
• Trusted Contacts identifies friends to whom you give a security code that they can give you if you forget it and allow you to access your Facebook account.
• App Passwords sets up an app password to use in place of your normal Facebook login password that will allow you to securely log in to apps that cannot receive security codes.
• Recognized Devices reviews and possibly removes devices that are recognized by your Facebook account.
• Active Sessions reviews and possibly removes current sessions that are accessing your Facebook account.
5. Tap the Return arrow in the upper-left corner and tap Privacy, tap the option below, and follow the instructions for the specified result. For many of the options, you can choose among Public, Friends Of Friends, Friends, and Only Me.
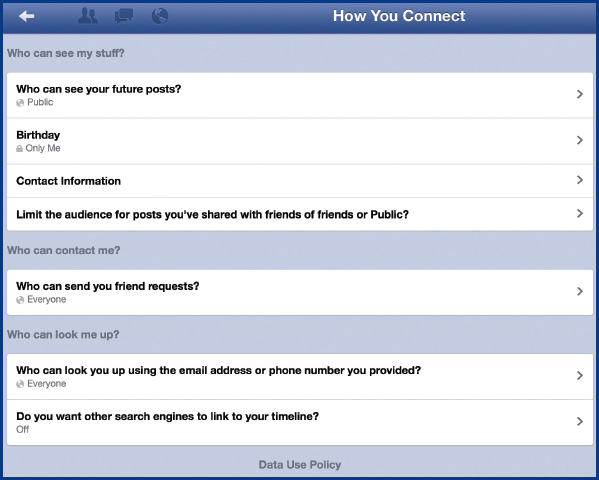
• Who Can See Your Future Posts lets you choose who can see your posts.
• Birthday lets you choose who can see your birthday.
• Contact Information lets you choose who has access to your physical and email addresses.
• Limit The Audience For Posts lets you limit the access to the old posts on your Timeline.
• Who Can Send You Friend Requests lets you say Everyone or just Friends Of Friends can send you friend requests.
• Who Can Look You Up Using Your Email Or Phone Number lets you choose who can do that.
• Do You Want Other Search Engines To Link To Your Timeline lets you choose whether to do that. If this is on, everybody, whether on Facebook or not, can find what is posted on your Timeline.
6. Tap the Return arrow in the upper-left corner and tap Timeline And Tagging to manage who can post to your Timeline and to see where you have been tagged or suggested to be tagged in your Timeline. A “tag” is where someone posts a picture where you have been tagged.
7. Tap the Return arrow in the upper-left corner and tap Blocking to add a name or email address of a person who you want to block from seeing things you post on your Timeline, inviting you to an event or group, starting a conversation with you, or adding you as a friend.
8. Tap Notifications to manage the notifications you get in Facebook that are generated from Facebook, email, iPad Notifications, or text messages.
9. Tap Text Messages to activate receiving text messages in Facebook. By default, it is turned off.
10. Tap Followers to allow followers to see more than your public posts.
11. Tap Apps to manage the apps you use.
12. Tap Payments to see the total of payments you have used and the currency it is in.
13. Tap Support Dashboard to see the history of your support from Facebook, Inc.
As you can see by the many options in the left column (when it is displayed with the three-bar icon in the upper left or by swiping from left to right), there are many elements of Facebook I haven’t discussed, and even for those I have, only the fundamentals have been covered. For a full discussion of Facebook, I recommend Facebook for Seniors QuickSteps by Carole Matthews and published by McGraw-Hill Education. On your own, I recommend that you select each of the options on the left and explore what you can do with it. This is especially true with the App Center, where you can find many additional activities you can do with Facebook and social networking such as playing games, sharing mutual interests such as travel, and dating. In your exploring, use common sense to protect yourself as discussed in the “Protecting Your Online Identity” QuickFacts later in this chapter.
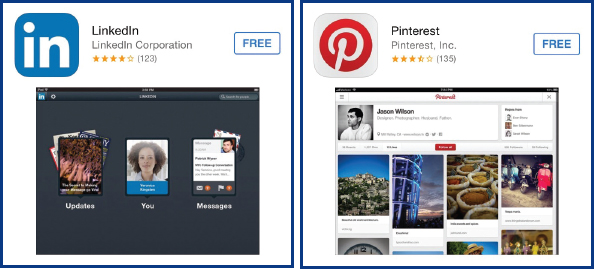
By looking at only Twitter and Facebook, I have only touched on social networking apps, although far and away the most popular ones, especially for seniors. If you are interested in business and job networking, I recommend looking at LinkedIn, and if you want to share a common interest, I recommend Pinterest, which you can do as an app in Facebook or directly as an iPad app. Talk to your friends and associates about what they are using and possibly try out other social networking apps.
Protecting Your Online Identity
It is a wonderful thing to be able to find and exchange information with people with similar interests. Social networking facilitates these communications so that we connect with broader webs of people, and with people we simply do not know. In today’s world, though, it is wise to be “street smart” when it comes to the streets of the Internet. Here are a few hard-and-fast rules for keeping your identity to yourself and your information private:
• Make sure your password is reasonably difficult to figure out, by using combinations of numbers, letters, and special characters. Protect your passwords for the various applications you use, such as Facebook; don’t share them with others. Change your password periodically.
• Be wise about the information you put on the Internet. For example, share only that information you are comfortable with unknown persons knowing. Don’t put highly personal information or photos in Facebook, for instance. Even if you think you are only sharing with friends, you may be surprised with whom they share.
• If you are in a forum or blog that is publicly available, don’t put information that could cause your identify or your home to be compromised—don’t put your address or even your town or city name. Put a city close by, for instance. Don’t use your last name, or use a fake ID. Be very aware of the information you are sharing and make it minimal. (However, there are some sites that require you to enter your correct information. In this case, you’ll have to enter your real data if you really want to use the site, but be stingy when you can.)
• Don’t click links from unknown persons. These can be programmed to gather information from you or your computer.
• Keep your computer browser software up to date so that the latest advances in security are on your computer. Equally important is making sure your antivirus or Internet security software is current.
• Be very wary about meeting people in person or sharing personal information with strangers in unprotected sites.
Social networking can be fun and a great way to meet people and interact with them. Just keep in mind that you want to be “street smart” while you are having that great time.
PLAY GAMES
Almost everybody likes to play games. They are a great time filler, and they test our ability and skill. If you looked at Facebook apps, as suggested earlier in this chapter, you saw a great many games. In addition to that, the iPad Apps Store offers a large number of games you can directly play, as you can see in Figure 9-14, and the iPad’s Game Center allows you to compete with others in multiplayer games and to keep track of how you are doing in the games you play. The Game Center is separate from the games themselves, so we’ll discuss them first.

Figure 9-14: Games in the iPad’s App Store offer you almost unlimited entertainment.
There are literally thousands of iPad games. Many are free, or at least start out free, and many more cost something from 99 cents on up. Just to find a game you want is a major undertaking, and to make sure it is well thought of and fun to play takes considerable research. There are many different types of games, such as action games, board games, card games, kid games, puzzle games, racing games, strategy games, and trivia games. You can limit yourself to free games, knowing that many “free” games get you hooked during free play and then have various ways to get you to pay something. While we’ll discuss several games here, I suggest that you do some initial research by typing best iPad games (see Figure 9-15) or best free iPad games into Google or Bing and reading through the reviews. If you are looking for a particular type of game, enter, for example, “best card games on iPad.”

Figure 9-15: You can search on either your computer or your iPad for opinions and reviews of games.
TIP As mentioned, many “free” games have ways to monetize themselves through advertising or in-app purchases they try to get you to buy. The best free games, though, are good enough to play without having to buy anything and with ads that are not too intrusive. |
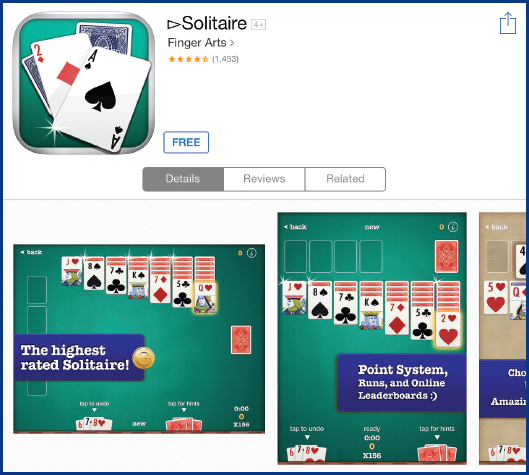
Back in your iPad, open the App Store, and do searches on games in general, free games, and then on particular types of games. For example, Figure 9-16 shows a search on “Solitaire.” In what follows I’ll describe two games that I think are fun to play and well crafted, as examples of the many that are available.

Figure 9-16: For most popular games, there are many alternatives to choose from.
Solitaire
The ancient card game Solitaire has been on computers since the earliest PCs and Macs and on the iPad since the first one. If you do an iPad App Store search on Solitaire, you will see a number of Solitaire games by different creators. One that I like is the free version by Finger Arts. It does have ads, but they are across the bottom of the screen, so they are not very intrusive. You can get an ad-free version for $2.99 (as of summer 2013).
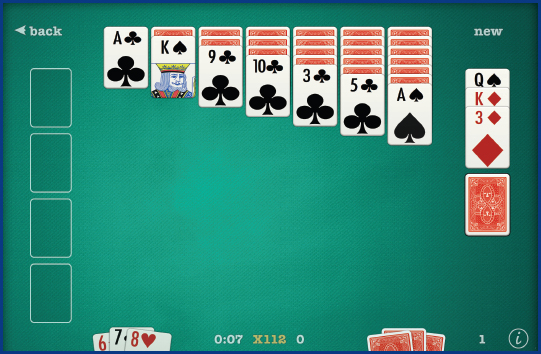
You can choose the look of the cards by tapping that option on the bottom of the screen and make other settings by tapping Options on the right. You can also jump right in and begin playing by clicking Play, choosing a difficulty and the number of cards to draw. At that point you can tap the card deck on the middle right to begin play.
Mahjong

This is an ancient Chinese game where you try to use up all the tiles by matching them. You tap first one tile and then a matching tile and the two disappear, allowing you to see and work with other tiles. The 1001 Ultimate Mahjong version of this game is free, but has some in-app purchases you can make. To me, the free version of the game without additions plays very well and is as addictive as ever.

When the game first opens, you are asked to choose from many different initial layouts of the tiles. You also can tap Options and choose from a number of tile sets, backgrounds, and themes, as well as set the volume. Upon choosing a layout, the game is created and you are given a number of pointers about the playing area, how to play, and several sets of options. Note in particular the Family Tiles where you don’t try to match the same tiles, just the same family. Work from the top down and the edges in. It is truly addictive.

It is difficult for me to understand that the Game Center is not where you go to play games. You play games by starting them from the Home screen. Game Center is where you keep track of how well you are doing and, most importantly, connect with others that play the same games that you do and challenge them to play against you. The Game Center helps you connect with other players, keeps track of the accomplishments of you and your opponents, and tells you about other multiplayer games.
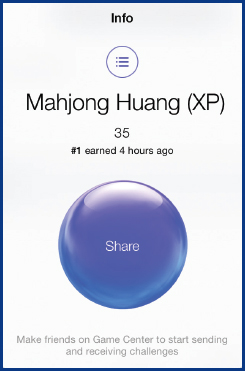
1. From the Home screen, tap Game Center. If you have never used Game Center before, you will be asked to enter your Apple ID and password and select a nickname. The Game Center will open as you see in Figure 9-17. If you installed the games discussed earlier, that will be reflected in the center Games bubble.
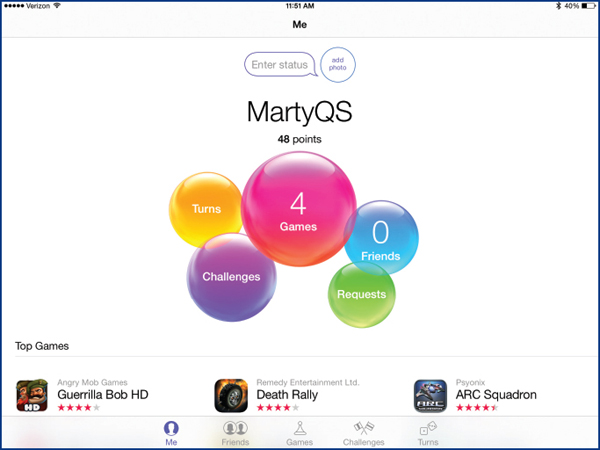
Figure 9-17: Only the multiplayer games that you have are reflected in the Game Center.
2. Tap Add Status to add any comment you want your game-playing friends to see and then, if you want, add a photo of yourself.
3. Tap the Games bubble to display the multiplayer games you have downloaded and some recommendations for others.

NOTE Although Zynga Poker is multiplayer, it does not operate within the framework of Game Center and, therefore, does not show up there. |
4. Tap one of your games to view your and your friends’ statistics. Tap your statistics and tap Share to share results with others and ask them if they want to play using Messages, Mail, Twitter, or Facebook. The appropriate message blank will open. Add an addressee and any comments you want, and then tap Send.

Paul Kukuk
I have the first-generation iPad, 16GB version with Wi-Fi and 3G cellular. I purchased the 3G model thinking we would use cellular Internet when Wi-Fi was not available. Since my wife and I each have iPhones, I soon discovered that the ongoing cost of two phones, each having data plans, plus an iPad with a data plan incurred more communication costs then we could justify. Therefore, we dropped the iPad data plan and only use Wi-Fi. This does not require a contract and may be canceled and restarted if we plan extended travel where we want cellular data.
For me, the iPad, like all Apple products, “just works.” It is intuitive to use, has a long battery life, and never crashes or freezes. I can store an amazing amount of information on the iPad, including photos, music, and documents.
I am a bit of a photographer and enjoy editing photos on my iPad. There are many third-party apps for editing photos and video. The newer version of the iPad has a camera and can use Apple iPhoto and iMovie apps, which are excellent to edit photos and video. I use iMovie on my iPhone to create and edit movies by dragging video clips and photos along with a music track from iTunes. I then transfer the finished video/slideshow to my iPad. If I had a current-model iPad, I would use it for movie creation. The large screen is wonderful to show photos and video to family and friends.
I try a number of inexpensive or free apps and if they don’t suit my needs, I can delete them and reinstall them later if I choose, without paying a second time. I have many of the same apps on my and my wife’s iPhones and the iPad. Apps, once purchased from the App Store, can be used on all of our devices.
My grandchildren enjoy playing games, listening to music, and looking at photos on my iPad. Children quickly become bored with games, so the free ones, or at most 99-cent games, are entertaining with little expense and can be removed when the children are no longer interested.
I have gotten books from my local library, purchased books from iTunes and other sources, and have downloaded many free books from various sites. These have given me an opportunity to read classics at no cost. The large iPad screen is very easy to read, even in the dark. The font size and type can be changed to suit my comfort level.
I found I needed a car charger and a set of noise-canceling headphones to allow me to use the iPad. This makes Skype calls much more convenient and of higher quality.
I use both Netflix and Hulu to stream movies both on the iPad directly and, with an Apple TV adapter, to a big-screen TV.
I also use the iPad to check weather, stock prices, as a calculator, for word processing, and spreadsheets. Apple’s word processing and spreadsheet apps are excellent and inexpensive.
The size and portability of the iPad are a large benefit over sitting in front of my computer. I can relax in a living room chair, on the deck, or in my car or RV, and do nearly anything that previously required sitting at my computer, using a mouse and keyboard.
..................Content has been hidden....................
You can't read the all page of ebook, please click here login for view all page.