
Chapter 10
Accessing, Securing, and Maintaining Your iPad
QuickSteps to…
The iPad has many settings to customize it the way that works best for you, a number of which you have already seen in earlier chapters. In this chapter we’ll look at other settings that may help you to more comfortably use the iPad, to protect it and you, to back up the data on your iPad, and to update and maintain your iPad.
USE YOUR IPAD COMFORTABLY
To fully use your iPad, it must be comfortable for you. You must be able to, as best as possible, understand what your iPad is displaying and saying, and to interact with it. To do this, the iPad has a number of accessibility features to assist your use.
You can enable the iPad’s accessibility features, shown in Figure 10-1, either from the iPad itself or from a computer attached to the iPad.
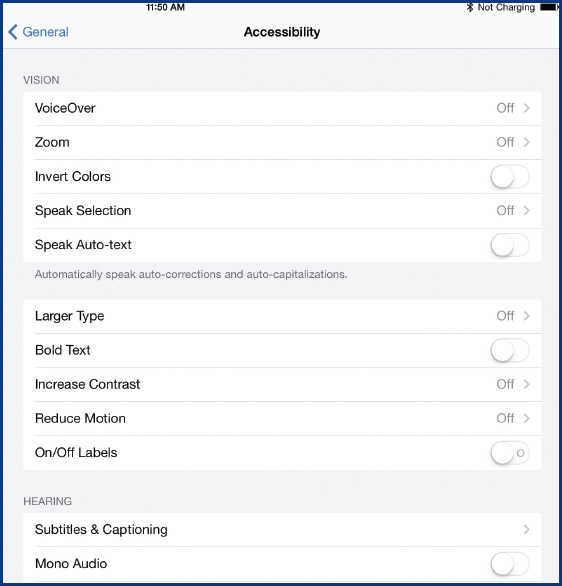
Figure 10-1: The iPad has an extensive list of accessibility features.
Enable from the iPad
From the Home screen, tap Settings | General | Accessibility.

Enable from a Computer
1. If you don’t already have iTunes on your computer, open a browser on the computer, go to apple.com/itunes, and click Download iTunes.
2. When the download is complete and you have iTunes running on your computer, turn on your iPad and plug it into your computer.
3. In iTunes on your computer, click your iPad in either the upper right or in the column or sidebar on the left (see Figure 10-2).
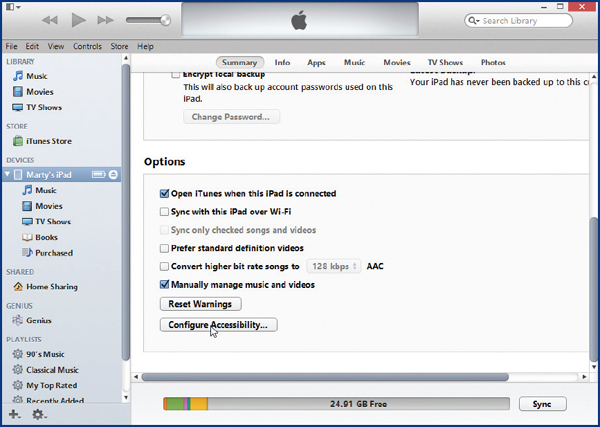
Figure 10-2: Some of the iPad’s accessibility features can be enabled from iTunes on your computer.
4. Scroll through the right pane to the bottom and click Configure Accessibility. A list of accessibility features will open.

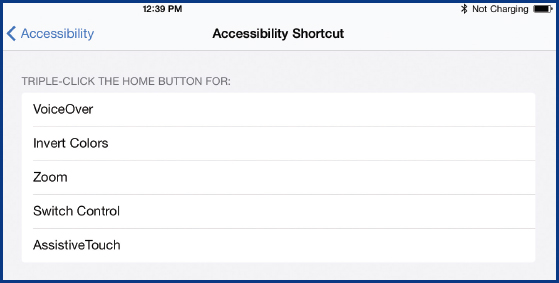
iPad Accessibility Shortcut
You can set up a quick shortcut on your iPad to enable one of the accessibility features by triple-pressing the Home button.
Set this up from the list of accessibility features by doing the following:
1. Scroll to the bottom of the list of accessibility settings and tap Accessibility Shortcut.
2. Tap the accessibility features you want to turn on with this shortcut.
The iPad’s accessibility features provide a wide range of support for vision, hearing, learning, and mobility. If you are finding any discomfort or difficulty in any of these areas, look over the following sections to see if any of them can be of assistance to you.
VoiceOver
VoiceOver provides a verbal description of what is on the iPad’s screen. This allows you to hear a confirmation of what you tap or drag your finger over on the screen. The language you hear is the one that you select in Settings | General | International | Language And Region Format, although not all languages are supported. This feature works whether you have Mail, Safari, Calendar, or other built-in apps active on the screen. (Some apps that are not built in—ones that you have to download—may also work with VoiceOver, but not all of them.)
To turn on VoiceOver (see Figure 10-3):

Figure 10-3: VoiceOver gives you audible corroboration of what is on the screen.
Tap Settings | General | Accessibility | VoiceOver | VoiceOver.
VoiceOver redefines the touch properties of the iPad’s screen so when you tap an item, you hear a description of it instead of activating it. You must double-tap an item to activate it. Dragging a finger around the screen allows you to hear whatever is under your finger. If Speak Hints is turned on, which I recommend, you are also told what you can do with the item you tapped or moved your finger over. There are a number of special gestures that VoiceOver uses to facilitate using your iPad. If you want your iPad to:
• Activate an item Double-tap it.
• Speak an item Tap it or drag your finger over it.
• Speak and activate an item Hold a finger on an item and tap anyplace on the screen with another finger.
• Speak the next or previous item Swipe to the left or right.
• Speak all information beginning from the top of the screen Swipe up with two fingers.
• Speak all information beginning from the current position Swipe down with two fingers.
• Speak additional information about an item Tap with three fingers.
• Speak the first item on the page Tap at the top of the page with four fingers.
• Speak the last item on the page Tap at the bottom of the page with four fingers.
• Stop speaking the current item Tap with two fingers.
• Go to the next or previous page Swipe to the left or right with three fingers.
• Scroll the page up or down Swipe up or down with three fingers.
It will take a while to get used to VoiceOver, but Apple gives you several tools to help you with it, including putting a rectangular box around what it is speaking about; providing a practice screen; playing sound effects, such as a sound when you change pages; providing phonetic feedback; and using pitch changes. There are also special VoiceOver commands for use with Safari, Maps, and both the onscreen and Bluetooth keyboards that you can read about in the Apple iPad User Guide. The key is to keep at it until you know whether an accessibility feature is helpful to you. If you have only a marginal need, you may be tempted to give up on it.
Zoom
Turning on Zoom magnifies the entire screen, initially by 200 percent. Once Zoom is turned on, you will see only a portion of the original screen images, but the contents are much larger; text, photos, menus, and commands are all magnified. (I can’t show an illustration of this because the screenshot only shows the normal screen without magnification. Turn on Zoom and see it for yourself.) By default, when you turn on Zoom or go to a new screen with Zoom turned on, you are automatically placed in the top-middle area of the screen. To move around and see the rest of the original screen area, you must use a three-finger drag and then revert to a one-finger drag to go to additional screens outside the original screen area—normal gestures are unaffected. The new commands that are available with Zoom include:
• Turn on Zoom by tapping Settings | General | Accessibility | Zoom | Zoom.
• When Zoom is turned on, temporarily turn it off and back on again by double-tapping the screen with three fingers.
• Increase or decrease the level of magnification by double-tapping, and on the second tap, do not lift your fingers, but either drag them up to increase the magnification or down to decrease it.
• Move around the area of the original screen by dragging with three fingers.
Colors and Contrast
The iPad’s accessibility features include two options: Invert Colors and Increase Contrast. These options may make it easier to see and read what is displayed on the iPad’s screen. (Once again, I cannot take a screenshot of this. You’ll have to try it for yourself.) Turn on these features and try them out:
• Turn on Invert Colors by tapping Settings | General | Accessibility | Invert Colors.
• Turn on Increase Contrast by tapping Settings | General | Accessibility | Increase Contrast | Increase Contrast.
Speak Selection and Auto-Text
You can have your iPad speak aloud selected text even when VoiceOver is turned off in two situations:
• Select text and tap Speak to have the selected text spoken to you by tapping Settings | General | Accessibility | Speak Selection | Speak Selection.
• Have the iPad speak automatic corrections and suggestions, such as spelling and capitalizations, by tapping Settings | General | Accessibility | Speak Auto-Text.
Larger Type and/or Bold Text
You can have your iPad enlarge type, independent of Zoom, in apps that support Dynamic Type, such as Alerts, Calendar, Mail, Messages, and Notes, or make all text bold, both with the objective to make it easier to read.
• Turn on Larger Type by tapping Settings | General | Accessibility | Larger Type | Larger Dynamic Type, and dragging the slider to the size you want.

• Turn on Bold Text by tapping Settings | General | Accessibility | Bold Text | Continue.
Reduce Motion
The way objects move on the screen, such as alerts, can be reduced to make them easier to see and recognize.
• Turn on Reduce Motion by tapping Settings | General | Accessibility | Reduce Motion | Reduce Motion.
Hearing
The iPad provides several features to support hearing impairment.

• Turn on Subtitles and Closed Captioning for those videos that support it by tapping Settings | General | Accessibility | Subtitles & Captioning | Closed Captions + SDH, tapping Style, and tapping a style.

• Combine both the left and right audio channels and feed the result evenly to both ears by tapping Settings | General | Accessibility | Mono Audio.
• Adjust the balance between the left and right audio channels by tapping Settings | General | Accessibility and dragging the Hearing slider to the left or right.
Guided Access
To make the iPad easier to learn, you can temporarily restrict all activity on the iPad to a single app and:
• Control which features in the app are active.
• Disable areas of the screen that aren’t related to the desired activity.
• Disable all of the iPad’s hardware buttons except triple-pressing the Home button.
To use Guided Access:
1. Tap Settings | General | Accessibility | Guided Access | Guided Access.
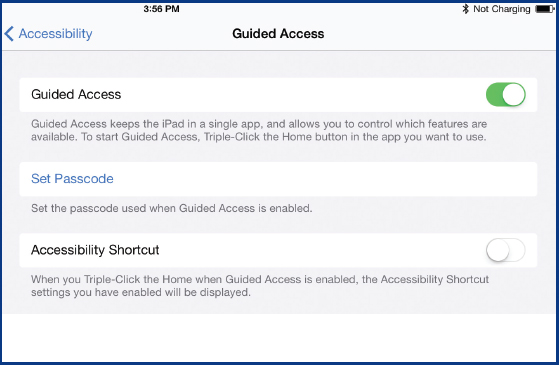
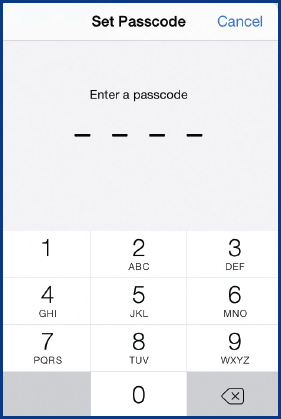
2. Tap Set Passcode and enter the passcode you want to use twice.
3. Open the app you want activity restricted to and press the Home button three times. A set of controls will appear at the bottom of the screen. (I can’t include a screenshot of these controls because the use of the buttons is restricted.)
a. Using your finger, draw a circle around the controls and areas of the screen you do not want used.
b. Tap Hardware Buttons Options and tap Sleep/Wake Button and/or Volume Button to restrict their use.
c. Tap the Touch button so it is on (has a green background) to allow touch in the areas of the screen that have not been restricted in Step 3a. When the Touch button is off, touch is prevented on the entire screen.
d. Tap the Motion button so it is on (has a green background) to allow the screen to go from landscape to portrait and vice versa.
4. When you are ready to start the restricted use, tap Start in the upper-right corner. The app screen will only be usable within the confines of the restrictions you have set.
5. When you want to temporarily stop restricted use, press the Home button three times and tap End in the upper-left corner of the screen.
6. To permanently turn off Guided Access, tap Settings | General | Accessibility | Guided Access | Guided Access.
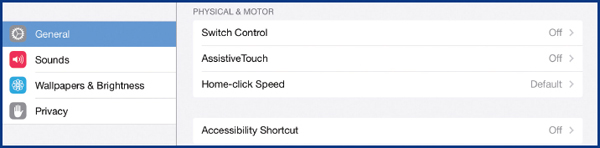
Physical Control
The iPad provides several features that help you use it even with limited physical ability:
• Switch Control allows you to use an adaptive accessory to select items on the screen by sequentially highlighting the items, which can then be selected. There are a number of options for customizing the highlighting and use of the accessory. Turn on Switch Control by tapping Settings | General | Accessibility | Switch Control | Switch Control.
• AssistiveTouch allows you to use your iPad when you have limited range of motion or you are using an adaptive accessory. Turn on AssistiveTouch by tapping Settings | General | Accessibility | AssistiveTouch | AssistiveTouch. When you turn on AssistiveTouch, a new button appears on the screen that looks like an onscreen Home button. When this control is touched, a menu appears that allows you to tap Home to replace pressing the Home button; tap Device and tap other icons to replace the Lock button, change the volume, mute sound, and rotate the screen; tap Siri to begin a conversation; and tap Favorites to define and use new gestures that perform selected tasks.

There are other features on your iPad in the normal set of items that you can use to assist your use of the device. Among these are Siri, Text Size, and Sounds.
Use Siri and Dictation
As you read in Chapter 6, Siri can help you reduce the use of the keyboard for many functions on the iPad, such as opening apps, writing notes, asking the time, taking a picture, asking where you are, adding a reminder or appointment, and many others. Also, using the dictation capability within Siri can assist in writing. See Chapter 6 for the details on using Siri and dictation.
Text Size
As you read earlier in this chapter, one of the iPad’s accessibility features includes turning on larger type. This same capability is found in General Settings | Text Size. There is no difference between the two—just two places to turn on the same feature.
Sound Volume
From the Home screen, tap Settings | Sounds to set the loudness and sounds used for ringtones and alerts to make them clearer and more auditable, as shown in Figure 10-4.
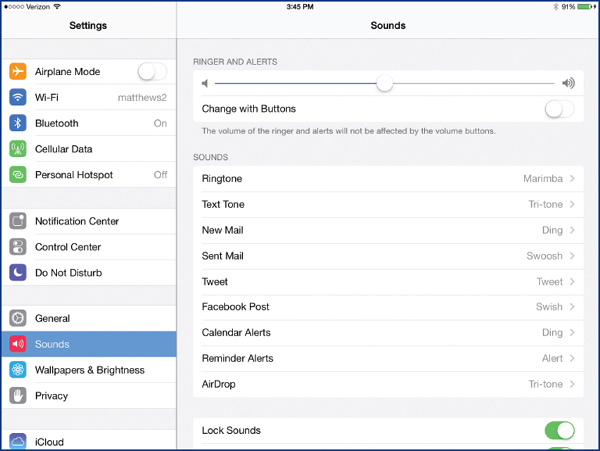
Figure 10-4: Identifiable ringtones and alerts can help you identify what is happening on the iPad.
• Drag the slider to the right to make ringtones and alerts louder.
• Alternatively, tap Change With Buttons to use the buttons on the side of the iPad to raise and lower the ringtone and make alert sounds louder or softer in the same way these buttons are used with music.
• Tap one of the ringtones or alerts and then choose and tap a sound to both hear and choose it as the new sound for the event.
SECURE YOUR IPAD AND YOU
In the reality of the world today, there are a lot of actions that can harm an iPad and can harm you using an iPad. To counter these threats, there are a number of steps you can take for both your iPad’s safety as well as your own. There are three elements of iPad protection: protection of the data on your iPad, physical protection of the iPad, and protection of you from being hurt by anything you do on the iPad.
The iPad gives you several ways that you can protect the information that is stored on it. The first and most obvious way is to lock the iPad either after a period of inactivity or when you shut it down. The second is to require a passcode when you first start it or when you unlock it. You can also restrict access to just some of the information on the iPad or to its apps.
TIP While you can take a number of steps to protect the information on your iPad, the simple truth is that if you want to totally protect information from falling into the wrong hands, don’t put it on the iPad. |
Auto-Lock
By default, your iPad automatically “goes to sleep” when you don’t use it for a period of time or you press the Sleep/Wake button. This turns off the screen and some internal functions, but you can still listen to music and get messages and alerts. To wake the iPad, you must either press the Sleep/Wake button or the Home button. When you do that, you will get a message: “Slide To Unlock.” At this point, you can add a passcode for further protection. See “Enable a Passcode” later in this chapter.

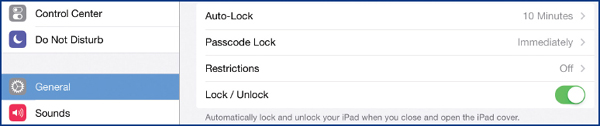
You can determine the amount of time with no activity before Auto-Lock takes effect by tapping Settings | General | Auto-Lock from the Home screen and tapping one of the alternatives.

Cover Lock
When you use an enabled iPad cover or case, such as Apple’s iPad Smart Cover or iPad Smart Case, and turn on the setting, the iPad will automatically go to sleep or wake when you close or open the case or cover. To adjust the setting, tap Settings | General | Lock/Unlock. (Do not tap Lock Rotation or Auto-Lock—scroll down to Lock/Unlock.)
Enable a Passcode
Locking and unlocking your iPad does no good without a passcode to prevent use of the iPad and access to its data when it is locked. To turn on a passcode, tap Settings | General | Passcode Lock | Turn Passcode On and then enter and re-enter a passcode.
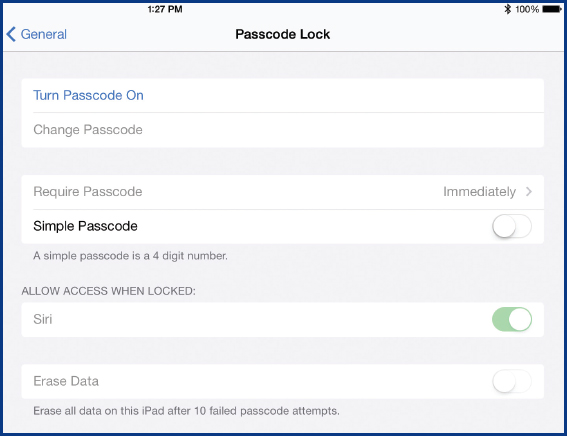
By default, the passcode is a simple one consisting of four numbers. The iPad, though, gives you the option of turning off the simple passcode by tapping Settings | General | Passcode Lock | Simple Passcode and allowing you to enter a more complex passcode of uppercase and lowercase letters, numbers, and special characters.
You can extend the length of time after the iPad goes to sleep before the passcode is set so if you wake the iPad within that time you do not need to enter the passcode. Tap Settings | General | Passcode Lock | Require Passcode and tap the length of time you want to use.

CAUTION! There is NO way to recover a passcode if you forget it. You must reset your iPad, erasing all of your data. See “Reset Your iPad” later in this chapter. |
Set Restrictions
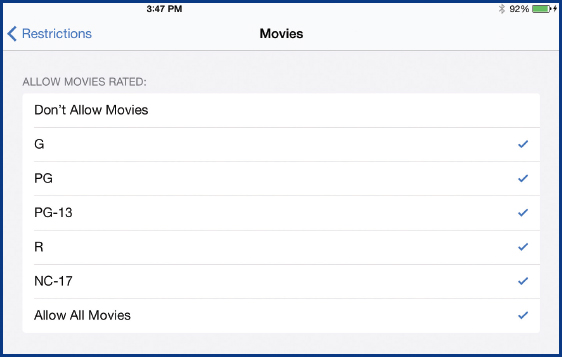
The iPad allows you to restrict access to certain apps and games, restrict certain content and access to features, and disallow changes in certain areas. This is more for the protection of younger users than for security purposes, but it’s still valuable. To set up restrictions, tap Settings | General | Restrictions | Enable Restrictions, and then enter and re-enter a Restrictions passcode. The Restrictions page will open, as shown in Figure 10-5.

Figure 10-5: The iPad makes it easy to control the content for young users.
Initially, all features, functions, and apps are allowed, so to restrict their use, you need to turn them off. To disallow:
• Certain apps and app-related functions, tap the option under Allow to turn it off.
• Certain types of content for particular types of media, tap the media under Allowed Content and then tap the type of content to disallow.
• Certain actions in related areas, tap the area or app under either Privacy or Allowed Changes and tap the actions to disallow.

• Certain types or functions of games to disallow them.
TIP Only a few apps are listed in the Allow list, but to prevent the use of others, uninstall them and do not allow new apps to be installed. |
NOTE When you disallow access to an app, its icon is simply removed from the Home screen. |
The iPad, being small, light, and attractive, is easily lost or stolen. A lot of its protection is just common sense: You keep track of it, you don’t leave it lying around, and you don’t advertise that you have it. But even with the best intentions, bad things happen. To counter this, the iPad has two features: Find My iPad and Erase Data.
Enable Find My iPad
Find My iPad uses iCloud to locate your iPad if it is turned on. You, of course, need to have an iCloud account first. See “Set Up iCloud” later in this chapter. Once you have turned on Find My iPad, you can:
• See on a map where your iPad is
• Play a sound and display a message on it
• Remotely lock it using a passcode
• Erase all of your data, apps, and settings
To enable Find My iPad and test it:
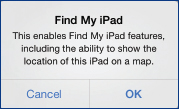
1. After setting up iCloud, turn on Find My iPad. From the Home screen, tap Settings | iCloud | Find My iPad | OK.
2. To locate your lost iPad, on a computer, open a browser and go to iCloud.com.
3. Type your Apple ID and password and press ENTER or RETURN. If requested and desired, click Install (possibly twice) to install the iCloud Web App. Click Done when you are finished installing iCloud.

4. Click Find My iPhone or possibly Find My iPad. If requested, type your iCloud password and you will see a map with green marker(s) indicating where your iOS devices are.

5. Click Devices in the upper-left corner. Click your iPad. Options for finding your iPad will appear.

6. Click Play Sound. An Alert message will appear on your iPad and play an alert sound, which in this case is a bell ringing.

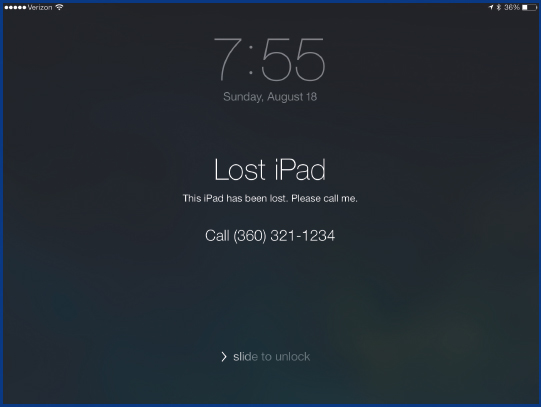
7. Click Lost Mode, enter a phone number (yours or a trusted friend) for the person who found your iPad to call about it, and click Next.
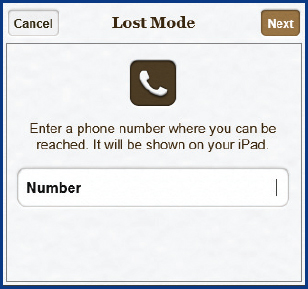
8. Accept the default message to display with the phone number on your iPad or make any change you want, and then click Done. Your message and phone number will appear on your iPad and then your iPad will shut down and lock.
9. As a final and last desperate step to take when you think your iPad has been stolen, click Erase iPad, and, if you really want to do it, click Erase. All data, apps, and settings will be removed.

CAUTION! Consider the warning message before erasing a missing iPad: “An erased iPad cannot be located or tracked.” |
Erase All Data
You can automatically erase all data on your iPad after ten failed attempts at entering a passcode. This prevents someone who is trying to guess your passcode from accessing your data. To turn on this feature:
From the Home screen, tap Settings | General | Passcode Lock, enter your passcode, and tap Erase Data.
TIP Unless you have an infallible memory, it is important to write your passcode down, especially if you have enabled Erase Data, and then store the paper you wrote it on in a safe place. |
The iPad is a great device, allowing you to do many things on the Internet and directly on the iPad. Some of the things that you can do have the possibility of harming your reputation and harming you financially, psychologically, and in very rare circumstances, even physically. The chance of harm is low, but it is real and you need to take measures to protect yourself. The most important is to be prudent and use good common sense.
• Be very careful of emails that ask you for money or for something like your bank account number, your Social Security number, or especially any password. Never give your passwords out for any reason. If you get email that looks like your bank or brokerage or other organization and it asks for your user name, password, or other personal numbers, do not give it out and report it to the bank or other organization. This is called phishing, and it is an attempt to acquire personal information by pretending to be someone or some organization they are not.
• As I said in the discussion of Facebook in Chapter 9, consider carefully before giving out information about yourself. Some information on Facebook you must give out, like your age, but no one says you have to be accurate, and you can prevent anyone else from seeing it.
• Remember the old adage: If something is too good to be true, it probably is. Consider carefully the offers you get and understand as much as possible what the other person is gaining through the transaction.
• As much as possible, shop and interact with people and organizations that you are fairly sure are reputable.
• Consider getting a credit card with a limited amount to use on the Internet. Also, use a credit card, not a debit card that can immediately draw money out of your checking account. Credit cards also often have more protections against misuse than a debit card does.
• Check prices. Amazon.com is often, but not always, a good source for low prices on many products, but in any case, check several sources before making a big Internet purchase.
• Be careful about the cables you plug into your iPad and the chargers you plug it into. The extra cables and chargers from Apple will cost a little more than alternatives you see on the Internet, but you know they will work and are safe. My experience with third-party cables is that they don’t always work and, in rare instances, they can be dangerous. In my mind, it is better to spend a little extra and get Apple cables and chargers.
USE ICLOUD
iCloud is an Internet service provided by Apple that allows you to store information “on the cloud,” which is, in reality, on computers known as servers belonging to Apple. If you sign up for iCloud, the information on your iPad is manually or automatically sent over the Internet to these servers. This allows you to keep a copy, or “backup,” of your information so if something happens to your iPad you will not lose it. This includes the apps, music, and books you have purchased, as well as the mail, contacts, Photo Stream, calendar, reminders, documents, bookmarks, and notes that you have created. The iCloud also allows you to share, and therefore access, the information you have backed up with your other iOS devices such as an iPhone or iPod and with your computer, and it is what facilitates Find My iPad. The connection between iCloud and your iPad or other devices is through Wi-Fi, so you must have a Wi-Fi connection to use iCloud.
You may have set up iCloud when you first set up your iPad and, therefore, already have an iCloud account. If so, jump to the next section, “Use iCloud Backup”; otherwise, set up iCloud now. It is very worthwhile to back up your iPad data, and it is free.
To set up iCloud, make sure you have a Wi-Fi connection to the Internet. With that:
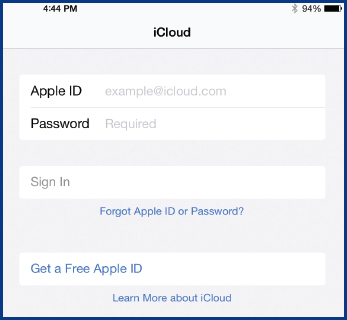
1. From the Home screen, tap Settings | iCloud. If you haven’t already set up iCloud, a form to do that will appear. Enter your Apple ID and password and tap Sign In.
2. Tap OK or Don’t Allow to allow iCloud to use the location of your iPad or not. Only if you allow this can you enable Find My iPad. The iCloud settings will appear, as you can see in Figure 10-6.

Figure 10-6: The iCloud settings let you determine which of the major functions of the iPad are backed up.
3. Tap the On/Off button for the services that you want iCloud to back up in addition to the default items of your purchased apps, songs, and books; your Camera Roll; settings; app data; screen setup; and messages. The first six items, from Mail to Notes, are obvious and you simply back them up or not.
You might ask, “Why wouldn’t I want to back up everything?” The only reason not to is because you have a limited amount (5GB) of free storage on iCloud (you can, of course, buy more—10GB costs $20 a year).
4. Tap Keychain to turn on the ability to store passwords and credit card information in an encrypted form so that only you can read it. Neither Apple nor anyone else without your iPad and passcode can read the information that is stored.
If you choose to use the iCloud Keychain, you must enter your Apple ID password and then choose whether you want to use your iPad’s passcode as your iCloud security code or create a new code. You then must enter either your current passcode or a new code, which must be re-entered. Next, you must enter a telephone number that can receive text messages (called SMS or Small Message Service messages), which is used to verify your identity when using your iCloud security code. Finally, after tapping Next, you must once more enter your Apple ID password.
NOTE When you store items in the iCloud Keychain, the information is encrypted, meaning it is transformed into an unreadable format that cannot easily be deciphered, if at all. During the encryption a key is generated that only you, or someone with your passcode, will be able to use to read the encrypted information as if it wasn’t encrypted. |
5. If you choose to store documents and data from various apps, you also have the choice of whether to use cellular data when Wi-Fi is not available. This provides for the backing up of word processing, spreadsheet, presentation, and similar documents and data.
See the discussion of using iCloud with Photo Stream and Photo Sharing to share your photos in Chapter 8, and see the discussion of Find My iPad earlier in this chapter.
iCloud Backup automatically makes a copy of your account on Apple servers of the music, apps, and books you have purchased, as well as the contents of your Camera Roll, settings, app data, messages, and screen contents and organization. Also, if you have enabled any of the items in Figure 10-6, these will be backed up. Once you have set up iCloud as described in the previous section, iCloud Backup is turned on by default, although you can change that. When your iPad is locked, meaning you are not using it, but you are connected to a power source and have Wi-Fi available, iCloud will automatically connect to your iPad and copy items it hasn’t previously backed up on Apple servers.
Manage iCloud Backup
With iCloud Backup turned on, backups happen automatically without any intervention by you. Your information is backed up on a periodic basis, and you can see when, both on your iPad and on your computer, your iPad is connected to it. iCloud settings allow you to see how much of your iCloud storage you have used (the first 5GB is free), buy more storage, see how the storage is being used, turn off or on iCloud Backup, see when the last backup was done, and do one now, as you can see in Figure 10-7.
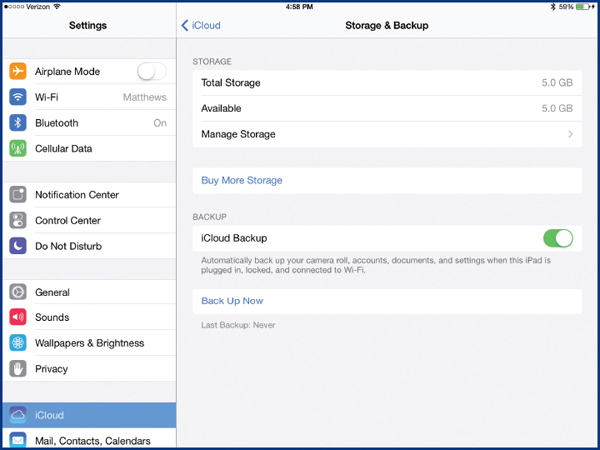
Figure 10-7: You do need to watch the amount of space that iCloud is using and manage how that space is being used.
1. To access iCloud Backup’s management settings, tap Settings | iCloud | Storage & Backup | Manage Storage | your iPad | Show All Apps to see what is included in your iCloud backup, as shown in Figure 10-8.
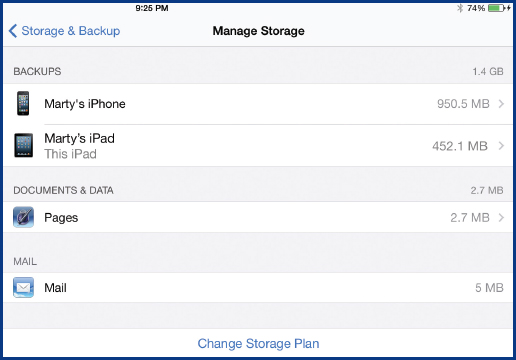

Figure 10-8: The iPad gives you a good facility for managing what is backed up with iCloud.
2. Go through your apps and turn off the ones that you don’t want backed up. Some apps, like the Kindle and Nook readers, also store your purchases on their site and do not need to be stored on iCloud. Other apps may not be worth storing. On the other hand, if you are not using very much of your iCloud’s free 5GB of storage, it doesn’t make any difference.
3. When you have the backup options the way you want them, tap Manage Storage | Storage & Backup | Back Up Now to do a current iCloud backup.
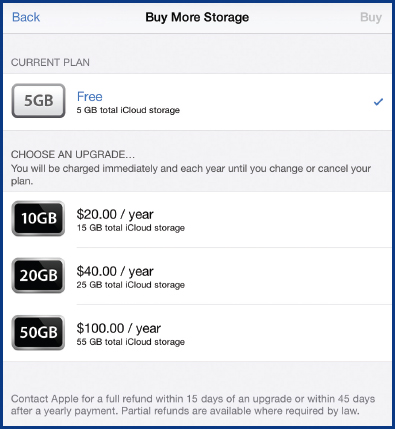
TIP To buy more iCloud storage, tap Settings | iCloud | Storage & Settings | Manage Storage | Change Storage Plan and select the storage plan you want to buy. |
Restore from an iCloud Backup
Should you need to restore your iPad and you have had iCloud doing automatic backups, it is very easy and should restore your iPad to its last backup. To do that:
1. From the Home screen, tap Settings | General | Reset | Erase All Content And Settings, enter your passcode if you have enabled one, tap Reset twice to confirm that you want to do that, and enter your Apple ID password (see “Reset Your iPad” later in this chapter). The iPad will erase itself, reload the operating system (iOS), and start the iPad setup.
2. Go through the iPad setup as described in Chapter 1, except that on the Set Up Your iPad screen, tap Restore From iCloud Backup. Enter your Apple ID and password and continue through the setup.

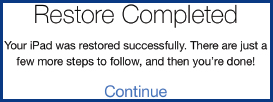
3. Choose the backup—normally, the latest is what you want to use. You will see the Restore From iCloud screen that will show you the progress of the restoration. Then the iPad will restart or “reboot.”
4. After restarting, you will get a message that the update has completed. Tap Continue.
5. Enter your Apple ID password. After reading a message about Find My iPad in iOS 7, tap Continue, create a passcode, tap Get Started, and enter your Apple ID to sign in to iCloud.
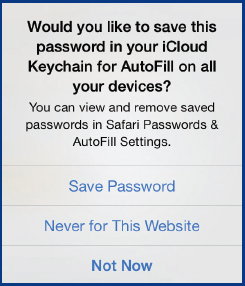
Use Keychain
Once you have set up iCloud Keychain, you will receive a query each time you use a password or a credit card as to whether you want to store the password and/or credit card in iCloud Keychain.
In addition to iCloud Backup, which is discussed in this chapter, you can use iTunes on your computer to back up your iPad on the computer. To do that:
1. Plug your iPad into your computer. If iTunes on the computer does not automatically start, start it.
2. Click your iPad in the left column sidebar. (If you don’t see the sidebar and possibly the menu bar, click the black and white rectangle in the upper-left corner and click Show Menu Bar. In the menu bar, click View | Show Sidebar.)
3. If it isn’t already selected, click Summary in the top of the right pane to open the summary and backup controls for your iPad, as you can see in Figure 10-9.
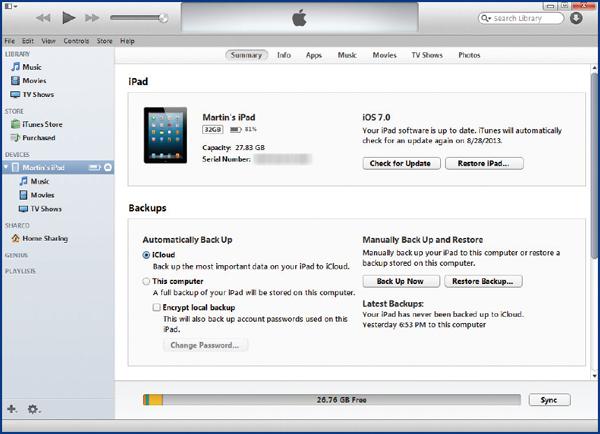
Figure 10-9: Backing up through iTunes on your computer is a little more cumbersome than wirelessly backing up to iCloud.
4. Under Backups, click This Computer | Encrypt Local Backup, enter and verify a password, and click Set Password. The backup will begin and show you its progress.
When the backup is complete, you will see today’s date and the time under Latest Backups. From that time on, your iPad will be automatically backed up to your computer, but you will see that the automatic iCloud backup is now disabled. You cannot automatically back up to both iCloud and your computer. You can manually back up to your computer and still automatically back up to iCloud. Click Back Up Now under Manually Back Up And Restore.
UPDATE AND MAINTAIN YOUR IPAD
Like any computer, it is important to keep your iPad updated and maintained so that it performs at its best for you.
Update means that you are using the latest version of the iPad’s operating system (iOS), which controls everything that the iPad does outside of an app, and iOS does a lot to support apps. Updates to iOS contain both fixes to problems (“bugs”) in the current version, as well as improvements to it. Finally, new apps, both Apple’s and third-party, often require the latest version of iOS. I strongly recommend that you periodically check on and install new iOS updates. Quarterly is a good schedule to use.
1. From the Home screen, tap Settings | General | Software Update. If your software is up to date, you will be told that.
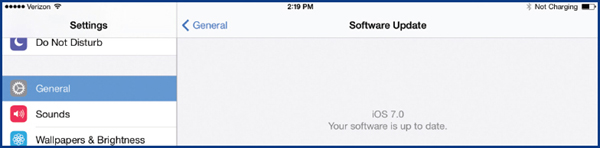
2. If a new version of iOS is available, you will be given the option to install it. Tap Install Update and enter your Apple ID password. The update will take place. You will see its progress.
Reset Your iPad
Resetting your iPad clears it of various levels of information, returning it, as the given level, to the condition that it existed in when you first took it out of the box. This can be helpful in several situations, the most drastic being when the iPad has been corrupted for some reason and you need to have it completely restored.
CAUTION! Resetting your iPad makes permanent changes to your iPad and, depending on the level of resetting that you do, you can do anything from simply rearranging the Home screen to totally erasing all content and settings, including all purchases (apps, music, videos, and books); all data; and all contacts, messages, calendar entries, messages, notes, and mail. It is strongly advised that you do a complete backup to your computer and to iCloud before doing any of the major resetting. |
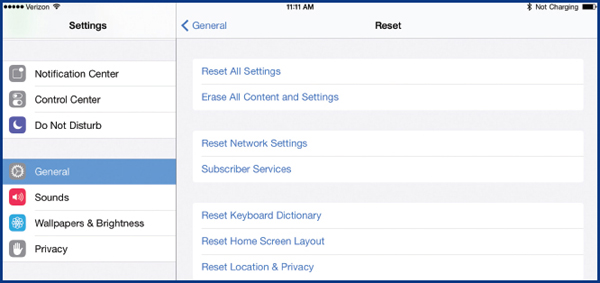
1. From the Home screen, tap Settings | General | Reset. You will see seven options for various levels of resetting:
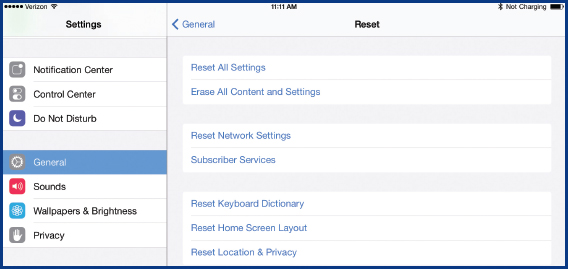
• Reset All Settings returns all settings and preferences to their factory settings. No changes are made to your information on the iPad, like mail, messages, contacts, and photos.
• Erase All Content And Settings totally removes everything that has been added to the iPad since it came from the factory, including all your purchases and data and all settings.
• Reset Network Settings disconnects you from all Wi-Fi networks you have joined and removes some VPN (virtual private networking) settings.
• Subscriber Services removes you from subscriptions you have by requiring you either to resubscribe or to enter a new authorization key.
• Reset Keyboard Dictionary erases all custom words you have entered into the spelling dictionary.
• Reset Home Screen Layout restores the Home screen to its original or factory layout.
• Reset Location & Privacy turns off all the location and access permissions you have given apps.
2. Tap the level of restoration that you want to do; enter your passcode, if you are using one; and, if asked, enter your restrictions passcode. Read the warning or explanation about what you are about to do, and tap Reset, if you, in fact, want to do that. Depending on the level, you may be requested to enter your Apple ID password and once more tap Reset.
NOTE Resetting and restoring are related, but are not the same thing. Resetting returns some or all of the iPad to its factory settings. Restoring often begins with resetting and then restores a backup to give the iPad the settings and content it had at the time of the backup. |
Maintaining your iPad involves taking care of it and, when they arise, fixing problems with it.
Take Care of Your iPad
Your iPad, like any electronics with a glass screen, is fragile. You don’t drop it on a hard surface, you pack it carefully when traveling, and you are careful not to spill coffee on it. There are also several proactive things that you can do for your iPad:
• Get and use a protective case for it. This was briefly discussed in Chapter 1, but if you don’t have one, do an Internet search for “iPad cases.”
• Get and install a protective film covering for the screen. They are not easy to install and it is hard to eliminate all the bubbles, but the effort is worthwhile to prevent the screen from being scratched and possibly broken.
• Use Apple cables and power converters. While they cost more than third-party replacements, they are guaranteed to work with your iPad and not cause a problem.
• Use only a soft cloth to clean the screen. Do not use any glass cleaning products!
• Do not use your iPad in dirty, dusty, or smoke-filled environments.
• Do not plug anything into your iPad that isn’t made specifically for the iPad.
• Use common sense.
Fix Problems with Your iPad
Again, as with any electronic device, no matter how well you treat it, things happen. Most commonly, apps are not behaving as they should, but sometimes it is more than that. Here are some steps to work through to see if you can fix your problem.
1. Turn your iPad off by pressing and holding the Sleep/Wake button on the top-right corner until you get Slide To Power Off and then swipe that. Leave the power off while doing Step 2.
2. If you have any suspicion that the iPad battery is low, plug the iPad into a direct power outlet, not into another device. Let the battery charge for at least 15 minutes before going on and leave it plugged in.
3. Restart the iPad by pressing and holding the Sleep/Wake button until you see the Apple logo. In many cases, these first three steps will fix most problems with apps.
4. Some apps have settings that allow you to just reset the app. Check by tapping Settings | app and look for Reset. Tap it.
TIP It can be helpful to fully close the apps that you have been using. They can be the cause of your problems, and if you just leave them, they are still running in the background. To fully close apps, press the Home button twice to display the multitasking view showing the apps that are still active. Swipe up the apps you want to close. I suggest all of them (you, of course, can’t close the Home screen). |
5. Do a basic reset of the iPad in which nothing is removed or changed by simultaneously pressing and holding the Sleep/Wake button and the Home button until you see the Apple logo. This will fix a number of other problems.
6. If the problem is with connecting to iTunes on your computer, try restarting iTunes and then restarting your computer. Also, make sure the Universal Serial Bus (USB) cable is in good shape and well connected.
7. Do a complete restore from an iCloud or iTunes backup as described earlier in this chapter in “Restore from an iCloud Backup.” Be sure to use Erase All Content And Settings in the reset stage. If nothing has worked to this point, Step 8 is the only alternative.
8. Take your iPad to an Apple store or an Apple-accredited repair location. It may be that the Genius bar may do the trick, or you will need hardware repair.
The good news is that the iPad is amazingly tough and resilient. To paraphrase Timex, it takes a licking and keeps on computing.

John Nelson “Seattle ‘Puter Tutor”
I love the iPad, its lightness, quickness, and portability. I take it everywhere; it is an extension of me. I use the iPad for many of the functions I used to do on a computer; still, it’s a very different tool. I don’t try to get it to do everything my computer does—it can’t. But what it does, it does very well. The iPad is an almost transparent interface between me and the information I want.
The one thing I do most on my iPad is keep notes and to-do lists in Evernote. I have lists of the day’s tasks, family birthdays, activity logs, resource lists, technical instructions, notes I clip from the Web, plans for remodeling projects, and much more. With Evernote, everything I type on the iPad automatically appears on my home computer, and vice versa. As a senior, with a senior’s unpredictable memory, Evernote is probably my favorite app—nothing gets lost!
Another app I find invaluable is Zite, which is a selective news aggregator. I can choose the categories of news I want, and it will scour the entire Internet and collect articles on those subjects. I can also add keywords, and it will group the articles on those words. And it learns as I use it exactly what I like and what I don’t.
Planetarium is an app that shows me an image of the entire night sky above me. I hold the iPad upside-down above me, and Planetarium correctly orients itself to my time, location, and exactly where I am looking. It shows me the night sky with names and information about the planets, stars, and star groupings I’m seeing. It also allows me to look at stars and planets on other dates and times so I can see their movement.
I do a lot of Google searching during my classes to keep ahead of my students, and during lunch and other free times I read news and other items; or if I’m especially brain-dead I just play Solitaire. I often keep my iPad near me during dinner to look up items that come up in conversation.
..................Content has been hidden....................
You can't read the all page of ebook, please click here login for view all page.