
Chapter 2
Exploring and Customizing Your iPad
QuickSteps to…
In Chapter 1 you reviewed the physical aspects of your iPad. In this chapter you’ll explore the iPad’s screen, how to manipulate the apps on it, what those apps do, and how to, in general, use them and how to navigate among them. Much of the rest of the book will be spent on how to use specific apps in detail. The balance of this chapter will be spent on how to customize your iPad to fit your particular use.
EXPLORE THE IPAD SCREEN
The screen is the central focus of the iPad, as shown in Figure 2-1, with the initial Home icons on it. The screen is used to both control the iPad and display everything that the iPad has available and does. Besides the few buttons along the edges or at the bottom front, the iPad is controlled on the screen. You do it with your fingers, often with just a touch, but there are other moves of your fingers that you need to know. With that knowledge, this section will then introduce the standard apps that are on the Home screen of new iPads. Most of these apps are described in more detail in later chapters. Finally, this section will describe how to start, pause, and leave apps as well as how to navigate among them.
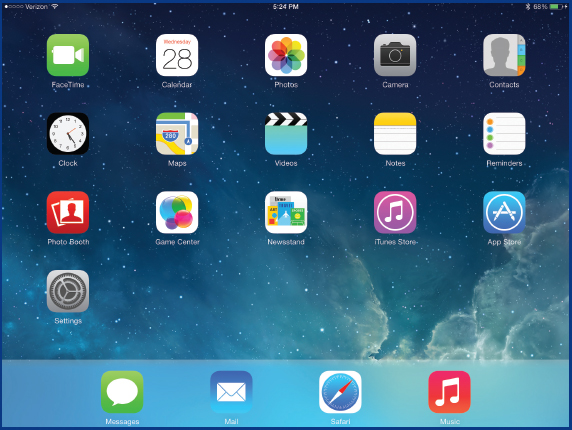
Figure 2-1: The Home screen provides the starting place for all that you do on the iPad.
The principal control device for your iPad is your fingers. You don’t have to remember to bring them along or learn how to use them, unlike a mouse, and their use is intuitive and simple.
Use One or Two Fingers
The principal commands used in this book can be performed with one or two fingers:
• Tap Lightly touch and withdraw your hand once from an object on the screen to select it.
• Tap an app on the Home screen to open or start the app.
• Tap an item in a list, such as an option in a menu or a photo in an album, to select or display it.
• Tap an action in an app, like a previous or next arrow, to follow that action, for example, to return to the previous page in Safari.
• Tap a text box, as in the address bar in Safari or text line in Notes, to identify the line into which text you type will go.
• Tap a key on the onscreen keyboard to place its character on a selected text box or text line.
• Tap the status bar at the top of the screen when a webpage, an email message, or a list is displayed to quickly move to the top of the page, message, or list.
• Double-tap Tap an object on the screen twice, such as a page in Safari or a map in Maps, to generally enlarge the content being displayed.
• Flick or Swipe Quickly move one finger up or down, left or right, to
• Scroll or move a webpage, an email message, or a list up or down or left or right
• Turn the pages in a newspaper, magazine, or book
• Open the Notification Center by flicking down from the top of the screen
• Open the Control Center by swiping up from the bottom of the screen
• Drag Press and hold a finger on an object until it is selected, or, in the case of the apps on the Home screen, until all apps wiggle and then drag the object to where you want to move it.
• Pinch Bring together two fingers, often your thumb and forefinger, to zoom out and display more area in a webpage, email message, reading page, or a map.
• Spread Spread apart two fingers to zoom in, enlarge, and display less area in a webpage, email message, reading page, or a map.
Use Multiple Fingers with Multitasking
The iPad has three multifinger gestures, called “multitasking gestures” because they have to do with switching among apps you have used and are still running in the background. The iPad keeps track of the apps you used and what they were doing when you last used them. The multitasking gestures let you work with this set of recently used apps. As you’ll see later in this chapter, you can turn multitasking gestures on and off in Settings. The multitasking gestures are as follows:
• Double-press the Home button to open multitasking view, showing the apps you have used and are still running. Tap any of the apps to switch to that app.
• Swipe up with four or five fingers to display the multitasking view, which is not easy to do.
• Swipe from right or left with four or five fingers to open one running app after the other when you are in one of them.
NOTE In multitasking view, you can switch from one app to another with a single finger swipe from the right or left. |
• Pinch together four or five fingers (your whole hand) to return to the Home screen from an app you are using.
• Swipe up with one finger on an app in multitasking view to close that app so it is no longer running.
• Press the Home button to close the multitasking view.
TIP The four- or five-finger pinch is extremely useful and very intuitive. I find it the preferred way to return to the Home screen from an app. |
On a new iPad there are 20 apps on the Home screen, as you saw in Figure 2-1 earlier in this chapter. The icons and their order can be different, depending on when you got your iPad, but here are the Home screen apps in the order they appear in iOS 7 in the fall of 2013:
 |
FaceTime Allows you to video-chat (conference) with anyone who has an iPhone, iPad, iPod touch, or a Mac computer for free if you are using Wi-Fi. FaceTime is discussed in Chapter 8. |
 |
Calendar Allows you to enter and keep track of appointments and events; create reminders; and sync with Microsoft Outlook, Mac iCal, and Google or iCloud Calendar. Calendar is discussed in Chapter 5. |
 |
Photos Stores, organizes, and displays photos that you have taken. Photos is discussed in Chapter 8. |
 |
Camera Allows you to take both still and video images from either the front or rear camera. Camera is discussed in Chapter 8. |
 |
Contacts Allows you to store names, addresses, email addresses, phone numbers, and notes about the people you want to keep track of. Contacts allows you to sync with the Mac Address Book, Microsoft Outlook, iCloud, Windows Live, and other PC and Mac applications. Contacts is discussed in Chapter 4. |
 |
Clock Displays the time of day, temperature, and weather conditions in up to 12 locations around the world. The Alarm component of Clock is discussed in Chapter 5. |
 |
Maps Displays maps and satellite views, gives driving direction, and shows you your current position, if you approve this. Maps is discussed in Chapter 7. |
 |
Videos Provides the means to store, organize, and play movies, TV shows, and other videos that you have collected through the iTunes Store or in some other way downloaded. Videos is discussed in Chapter 8. |
 |
Notes Allows you to jot down any thoughts you have, from a few words to several pages, and then save, email, print, and delete them. Notes is discussed in Chapter 6. |
 |
Reminders Allows you to create and keep track of calendar-oriented to-do lists. It can sync with Microsoft Outlook, Mac iCal, and iCloud. Reminders is discussed in Chapter 5. |
 |
Photo Booth Lets you play with images you are considering taking by allowing you to use one of nine special effects. Photo Booth is discussed in Chapter 8. |
 |
Game Center Provides a social networking site where you can find people to play with and get recognized for your ability to play a game. Game Center is discussed in Chapter 9. |
 |
Newsstand Provides a place to store, organize, and read magazines and newspapers that you have subscribed to. Newsstand is discussed in Chapter 7. |
 |
iTunes Store Allows you to purchase, store, play, and sync music, pictures, movies, TV shows, and university courses across most of your computing devices. iTunes is discussed in Chapter 7. |
 |
App Store Provides a place to search for, learn about, purchase, and download additional applications beyond the 20 that come standard with your iPad. App Store is discussed in further detail in this chapter and in many other chapters. |
 |
Settings Allows you to change the settings for the iPad itself, as well as many of the apps. Settings is discussed further in this chapter, in many other chapters, and in Chapter 10. |
 |
Messages Allows you to send text and media messages using iMessage to anyone who has an iPhone, iPad, iPod touch, or a Mac computer for free if you are using Wi-Fi. Messages are discussed in Chapter 4. |
 |
Mail Provides an email program that allows you to send, receive, reply to, and forward email messages from one or more email accounts. Mail is discussed in Chapter 4. |
 |
Safari Provides a web browser that allows you to search and surf the Internet and do anything you can do in a browser. Safari is discussed in Chapter 3. |
 |
Music Provides the means to store, organize, and play music that you have collected through the iTunes Store or in some other way downloaded. It closely resembles the functioning of an iPod touch. Music is discussed in Chapter 7. |
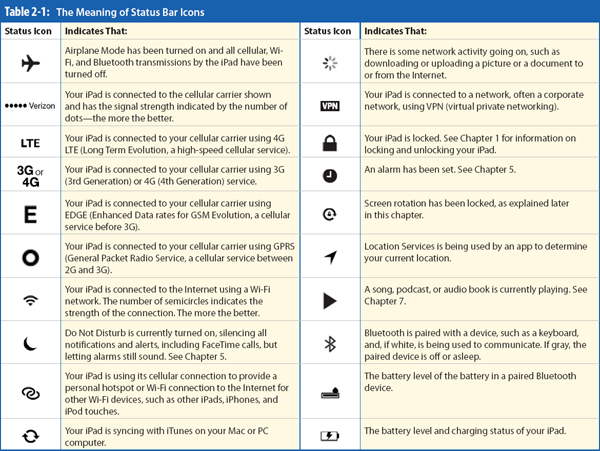
Along the top of the iPad’s screen is the status bar that can contain a number of icons, as described in Table 2-1. The icons appear at various times depending on what the iPad or its apps are doing. Many of these icons are described in this and other chapters.
You have seen that you can start an app by simply tapping its icon on the Home screen, but then what do you do? How do you get to other pages and parts of an app? When you are done using an app, what do you do with it? What if you want to temporarily leave an app to use another and then return to the original app? What happens when you have more apps than can fit on the Home screen? The iPad has techniques for handling all of these situations that include using your finger alone, the Home button, and the multitasking view.
TIP When you start an app, especially one of the 20 basic apps, and then start another app, put the iPad to sleep, or even turn the iPad off, and then come back to the first app, it is still where you left it. In other words, when you leave an app by simply starting another app or by switching away from it, the original app remains “active”—the definition of “active” depends on the app. This is the multitasking that was discussed earlier in this chapter. In almost all cases, when you come back to the app, you will return to where you were and what you were doing when you left the app. |
Navigate Within an App
There are differences in the ways that various apps work, but the majority of apps use one or more of the following techniques to navigate within the app:
• Drag your finger up or down or left or right to slowly scroll, or move to other areas of the app.
• Flick or swipe your finger up or down or left or right to quickly scroll or move to other areas of the app.
• Tap a link, such as a title, an item in a list, a picture, or a highlighted phrase, to display the page associated with that link.
• Tap a control, such as left-pointing and right-pointing arrows and Next and Prev buttons, to go to the previous or next page in an app, or buttons that say things like “Buy Now,” “Add To Cart,” and “Sign Up” to go to a page indicated.
Leave an App
When you are done using an app, you can leave it in four ways:
• Press the Home button to redisplay the Home screen.
• Bring all five fingers together in a pinching movement in the center of the screen to redisplay the Home screen.
• Quickly press the Sleep/Wake – On/Off button to turn off the screen, lock the iPad, and put it in sleep mode.
• Press and hold the Sleep/Wake – On/Off button to fully power down the iPad.
TIP You can think of the Home button as a “return,” “go back,” or “escape” key or command. |
Switch to Other Apps
When you are in one app and want to switch to another, there are four techniques:
• Press the Home button to redisplay the Home screen, and tap the app you want to switch to.
• Press the Home button twice in rapid succession to open the Multitasking view, and then tap the app you want to switch to.
• Swipe up with four or five fingers to open the Multitasking view and then tap the app you want to switch to.
• Swipe left or right with four or five fingers to scroll through the various apps that are open in the order of the most recently used.
TIP If you don’t see the recently used app you want on the multitasking view, scroll the bar by dragging one finger from right to left. |
Go Beyond the Home Screen
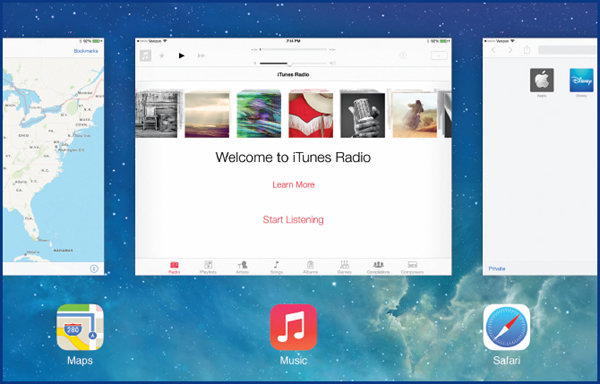
As you download new apps you will see that they do not appear on your Home screen; rather, the iPad puts them on their own screen, a second Home screen if you will, as shown in Figure 2-2. Later in this chapter you will see how you can rearrange the app icons so they appear on whatever screen you want. In any case, the iPad has multiple screens on which you can have apps. Just above the set of apps at the bottom of the screen there are one white and one gray dot, as you can see in Figure 2-2. These dots represent alternatives you have for the Home screen. The white dot signifies the page you are on. You can navigate among these screens by swiping to the left or right.
Figure 2-2: Apps you add to your iPad are not initially placed on the Home page, but you can move them there.
Searching with Spotlight
Spotlight is the iPad’s general-purpose search engine. With it you can search the information you have stored on the iPad, such as Contacts, Music, and Notes, and the apps you have downloaded. It will search for apps, names, authors, artists, titles, and words, as well as email messages, appointments, and websites.
Open Spotlight
• From any of the Home screens, swipe down beginning at or below the first row of apps (if you swipe down from the top of the screen, you will get the Notification area).
• From any app, press the Home button and then do the “midway” swipe down.
Use Search
In the Search box at the top of the screen, begin to type what you want to search for. As you type, items matching what you typed appear in a list below, as you can see in Figure 2-3.

Figure 2-3: The iPad’s Spotlight lets you search practically anything that can be reached through the iPad.
• If it is an app you want, tap the app name to open the app.
• If it is a contact, tap the name to open Contacts.
• If it is a song, a movie, or other media, tap the item to begin playing it.
• Dragging or swiping the screen from right to left to move to screens on the right, or from left to right to move to screens on the left.
• From any of the alternate Home screens, pressing the Home button will return to the Home screen.
• From any app not on the Home screen, pressing the Home button or doing the five-finger pinch will return you to the Home screen.
ENTER INFORMATION INTO YOUR IPAD
So far we’ve looked at what is on the iPad’s screen and how to manipulate it. In addition to getting information out of the iPad, you need to put information back into it, to tell it where to go, as in typing an address in Safari, or what to do, such as typing a piece of music to play. You also will probably want to add text into Mail, Messages, Notes, Reminders, Contacts, and Calendar. To do this you can use the onscreen keyboard, as briefly described in Chapter 1, or voice dictation, which the iPad has available, or even connect an external or Bluetooth keyboard.
Chapter 1 has a brief QuickFacts to get you started using the onscreen keyboard and facilitate setting up your iPad. Here we will review what was said in Chapter 1, look at a number of additional features used in entering text, and look at the international onscreen keyboards that are available.

Review Chapter 1
The primary techniques used with the onscreen keyboard are as follows:
• Tap a text box to open the onscreen keyboard.
• Tap the SHIFT key, the upward-pointing arrow, to capitalize a letter or use the top character in a two-character key.
• Double-tap the SHIFT key to lock it and type all capital letters until you turn it off by tapping the SHIFT key again.
• Tap the RETURN key to complete a line and go to the next one. You can also tap a new line on the screen.
• Tap the .?123 key to open the first alternate keyboard for typing numbers and some special characters.
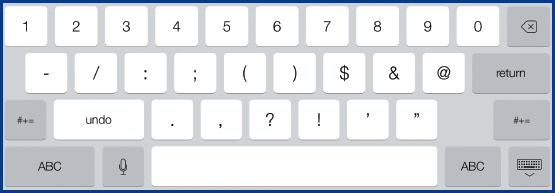
• Tap the #+ key to open the second alternate keyboard for typing additional special characters.


• Tap the BACKSPACE key to erase the previous key and replace it.

• Tap the Close key to put the onscreen keyboard away.

Benefit from Typing Shortcuts and Aids
The iPad has a number of shortcuts and aids to help you quickly type and correct text. Many of these, which are on by default, can be turned off in Settings, as you will see later in this chapter.
• Automatic capitalization is added to the first character in a text box or after a period.
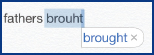
• Automatic spelling correction is attempted with a dictionary-based spelling checker as you type. When what the iPad thinks is an incorrect word is found as you type, a suggested correction is displayed beneath the supposedly incorrect word. Tap a space to accept the correction. Tap the correction to reject it.
• Manual spelling correction can be done in several ways:
• Undo and Redo in the second and third onscreen keyboards. Tap Undo in the numbers keyboard to remove and retype the incorrect word. Tap Redo in the special characters keyboard to restore the original word.
• Suggested corrections are provided when you tap a word suspected of being misspelled, identified with a dotted red underline.

• Automatic periods and a space are added at the end of a sentence when you tap a space twice.
• Automatic apostrophes are added to many contractions, such as “don’t,” “won’t” and “shouldn’t,” when you type the word without it. Press a space to accept the apostrophe or touch the suggestion to reject it.
• Slide to the correct letter when you see you are pointing at a wrong letter. Don’t lift your finger off the keyboard, but slide it to the letter you want. The letter isn’t selected until you lift your finger.
• Alternative letters are available to add accent marks to a character, like è, é, and ë, when you hold your finger on the letter. Vowels are the most common characters with alternatives, but “s” and “c” have alternatives, and some special characters, like the dollar sign, which shows other currency symbols, also have alternatives.

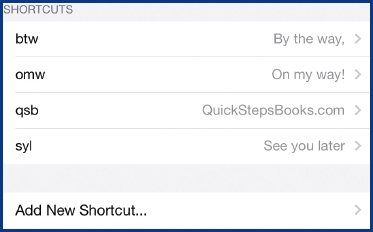
• Keyboard shortcuts can be created so that you can type “btw” or “syl” and get “By the way” or “See you later” on the screen. From the Home screen, tap Settings | General | Keyboard | Add New Shortcut. In the Phrase text box, type the expanded phrase you want—for example, By the way—tap Return, type the shortcut—for example, btw—and tap RETURN again. The next time you type “btw” you will get “By the way.”
NOTE In this book, the “|” or “pipe” character is used to replace repetitions of the leading verb. For example, instead of saying “tap Settings, tap General, tap Keyboard…,” we use “tap Settings | General | Keyboard,” making it less verbose and easier to read and follow. |
Edit Text
The iPad gives you a number of ways to assist in editing text, including using a magnifying glass to place an insertion point; selecting the text you want to change; and cutting, copying, and pasting text as needed:
• A magnifying glass is displayed when you hold your finger on a piece of text. You can then drag your finger to exactly place the insertion point.

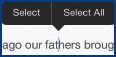
• Select text, after placing the insertion point and lifting your finger you get the options to select the current word, select all text, and, if you have recently cut or copied something, to paste it. Tap the option you want, or you can type a character to insert it at the insertion point, or use BACKSPACE.
• Change the selection by dragging the blue icons at the ends of the selection.
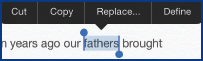
• Cut, copy, and paste text options are available if you have chosen Select or Select All. Like all such computer options, Cut removes the selected text and makes it available to be pasted elsewhere; Copy leaves the selected text and makes it available to be pasted elsewhere; Paste places the text that was most recently cut or copied at a new insertion point. There may be additional options such as Suggest, which suggests alternatives to a word, and Define, which provides a definition of a word.
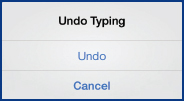
• Shake to undo cuts, pastes, and typing. You saw earlier how on the numeric keyboard you can tap Undo to restore something you have just changed. You can also shake your iPad (not too vigorously) and get a menu of undo and redo options pertinent to what you have just done. Tap the option you want.
In addition to the standard onscreen keyboard you have seen earlier in this chapter, the iPad offers several others on screen and the alternative to connect an external keyboard. On screen, you have the option to use a split keyboard for thumb texting, a specialized keyboard for use in Safari, an Emoji keyboard that gives you a wide range of emoticons, and a number of international keyboards.
Use a Split Keyboard
If you hold the iPad in your hands, it is pretty difficult to use the standard onscreen keyboard. For that reason the iPad offers a split keyboard with which you can type with your thumbs. To open the split keyboard, open the standard onscreen keyboard as you normally would. Then you can
• Place your two thumbs in the middle of the standard keyboard and drag them to the edges. The keyboard will split, as you can see in Figure 2-4. You can also do this one-handed, if your hand is big enough, by spreading apart two fingers in the middle of the keyboard.
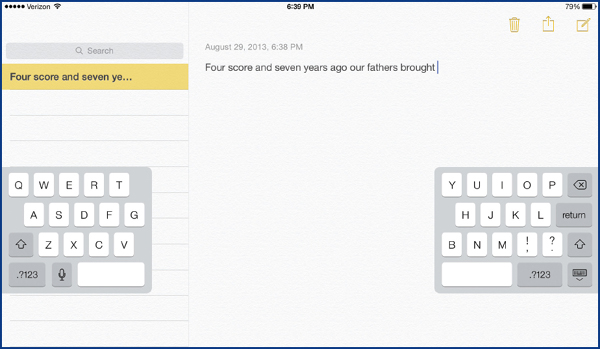
Figure 2-4: The split keyboard can be very useful when you don’t have a flat surface on which to lay the iPad.
• Hold your finger on the Close key in the lower-right corner of the keyboard. The Undock and Split menu will appear. Tap Undock to let the keyboard move to the center of the screen. Tap Split to split the keyboard in two and move it to the vertical center of the screen.

• Join a split keyboard together by pinching two fingers together. Start out by touching the two halves, or hold your finger on the Close key in the lower-right corner to display the menu, and then tap either Merge or Dock And Merge.
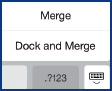
TIP If your split keyboard is stuck on the bottom of the screen, merge the two halves. Undock the keyboard by holding your finger on the Close key and tapping Undock and then splitting the keyboard again, either with your fingers or by selecting the menu option. |
Use an International Keyboard
The standard iPad keyboard is designed for use with U.S. English and, as you have seen, has a number of alternative characters with accents, umlauts, and so on. The iPad, though, goes a major step further by offering a number of international keyboards that you can choose from and, for many languages, multiple layouts and regional formats. To select an alternative keyboard and its related settings:

1. From the Home screen, tap Settings | General | International | Keyboards | Add New Keyboard. A list of new keyboards you can add is presented.

2. Scroll through the list of languages by dragging it up until you find the one you want. Tap it. A list of the languages you have chosen is displayed.

3. Tap the new keyboard you have just added to see a list of layouts you can also choose from.
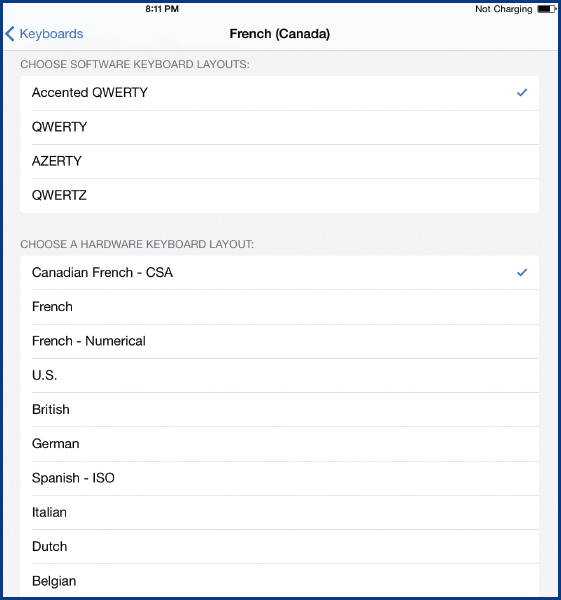
4. Tap Keyboards | International in the upper margin, and then tap Region Format to see a list of regions in the world with different language formats.

5. Scroll through the list of regions and tap the one you want to use. Press the Home button to return to the Home screen.
To switch to another keyboard:
1. Display your standard keyboard as you normally would. Notice that there is a new globe key to the left of the SPACEBAR.
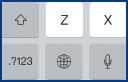
2. Tap the globe key once to display the keyboard you have most recently used. Keep tapping it to display the other keyboards you have chosen.
–Or–

Touch and hold on the globe key to see a list of the keyboards you have selected. Move your finger to the keyboard that you want to use.
To rearrange and remove a keyboard:
1. From the Home screen, tap Settings | General | International | Keyboards | Edit (the latter in the upper right) to display the list of your keyboards.
2. Touch and hold the three bars on the right of a keyboard (the “grip strip”) and drag the keyboard up or down to reposition it in the list.
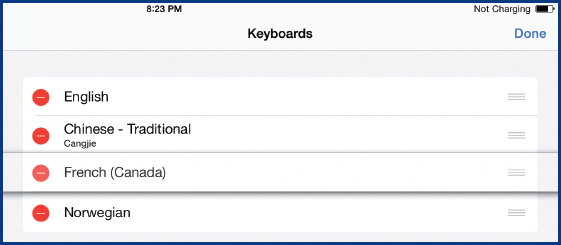
3. Tap the delete icon  next to the keyboard that you want to remove and then tap Delete to confirm it.
4. When you are done deleting and/or rearranging your keyboards, tap Done.
Add an External Keyboard
Apple and many other manufacturers make wireless external, Bluetooth keyboards for the iPad. At the end of Chapter 1, two of these keyboards were discussed. To connect and use an external Bluetooth keyboard:
1. Open and read the instructions for your keyboard. Each manufacturer is a little different.
2. From the iPad’s Home screen, tap Settings | Bluetooth | On to turn on Bluetooth. Your iPad begins searching for the keyboard.
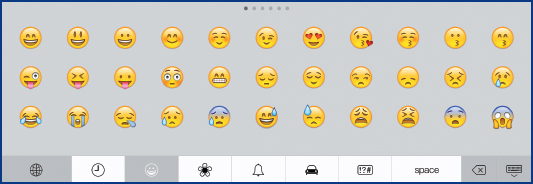
Using an Emoji Keyboard
The iPad also provides an alternative Emoji keyboard that allows you to add smiley faces and other icons to your text. You can select and use the Emoji keyboard in the same way you do any international keyboard.
1. From the Home screen, tap Settings | General | International | Keyboards | Add New Keyboard.
2. Scroll down until you see Emoji and then tap it.
3. In a text document, open a keyboard, touch and hold the globe key, and then tap Emoji. The Emoji keyboard will be displayed.
4. Drag or swipe the characters from right to left and tap the options in the bottom of the keyboard to display the many available characters.
5. Tap a character to add it to your document.
3. Follow your keyboard’s instructions. You may need to turn on the keyboard and then press a button that sends a signal to your iPad, which then, after a moment, tells you it has connected with the keyboard.

After being connected, the onscreen keyboard will no longer pop up so long as the external keyboard is within range of the iPad. You can do your typing on the new keyboard.
TIP When you have paired the iPad with a Bluetooth device such as a keyboard, the Bluetooth icon appears in the status bar as you saw earlier in this chapter. This icon is white on a dark background or black on a light background when the paired device is currently active, but the icon becomes gray when the device is out of range, sleeping, or turned off. With a keyboard, it may go to sleep if it isn’t used for a while, and you will have to press a key several times to awaken it. |
Siri is the iPad’s voice assistant. It allows you to speak to the iPad and have it respond. It can use information in your computer, as well as what it can find on the Internet. You can say, “What time is my appointment with John?” and Siri will look it up in the Calendar and give you the answer. You can also say, “Where is the movie Lincoln playing?” and Siri will search the Internet for the answer and tell you what it found. Siri is discussed further in Chapter 6.
Turn On and Use Siri
To use Siri, it must be turned on (if you don’t see a microphone key on the onscreen keyboard, Siri is not turned on), and you must be connected to the Internet by either Wi-Fi or a cellular service. If you use Siri, some information about you will be sent to Apple to facilitate this use—for example, your contacts, which might allow you to say to Siri “call Home” and Siri will look at your contacts for “Home” to carry out your request. If you don’t want to do that, then you should not use Siri.
1. From the Home screen, tap Settings | General | Siri | On.

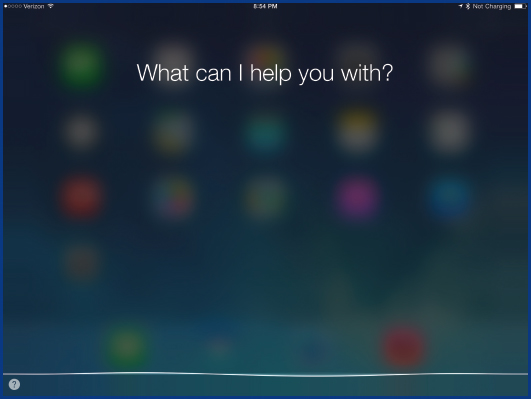
2. To use Siri, press and hold the Home button until a wavy line appears. When that happens, Siri will ask what it can help you with. Speak in a normal voice to respond.
Use Dictation
The iPad’s dictation, which runs under Siri, allows you to verbally add text anywhere the onscreen keyboard would normally appear, such as Mail, Messages, Calendar, Contacts, Safari, Notes, and Reminders, as well as the apps you have downloaded. You can tell if Siri is available by whether there is a microphone key on your keyboard. If there isn’t, use the previous steps to turn on Siri.
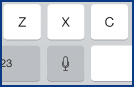
To use dictation, tap the microphone key and begin talking. You should see the modulated voice wave while you are talking. When you have finished, tap Done. After a bit, the text you dictated will appear. It is not fast. Pause often to let it catch up. You can verbally indicate punctuation by saying the words like “period,” “comma,” and “new paragraph.” When you are done with dictation, tap Done to turn it off.
NOTE The reason that you must be connected to the Internet to use Siri and do dictation is that your voice is sent over the Internet to servers at Apple where it is converted to text and then sent back to you. To facilitate the conversion, Apple also collects a lot of information about you like your name, address, the names in your contacts list, your current location, and so on. If you are not comfortable with this, turn off dictation by reversing the previous steps to set up Siri. |
Several standard apps let you wirelessly print using Apple’s AirPrint technology, which is standard in the iPad, to printers using the same technology. The standard apps that can use AirPrint include Notes, Mail, Photos, Camera, and Safari, as well as a number of apps you can download from the App Store. The printers that use AirPrint or compatible technology (most say “wireless printing”) include recent (since 2010) models from Brother, Canon, Dell, Epson, Hewlett-Packard, Lexmark, and Samsung, among others. In addition to the need for AirPrint, both the iPad and the printer must be connected to the same Wi-Fi network.
To use AirPrint:
1. Open one of the supported apps and display what you want to print.
2. Tap the share icon  and then tap Print.

3. In the Printer Options dialog box, if the printer you want to use isn’t displayed, tap Select Printer.

4. Tap the printer you want to use. If you don’t see the printer you want listed, make sure the printer is turned on, that it is connected to a Wi-Fi network, and that it is the same Wi-Fi network that the iPad is connected to (go to Settings | Wi-Fi and notice the name of the network; most printers also have a way of telling you the name of the network it is connected to; these must be the same).
5. Tap Print. The item you wanted should be printed.
Many printing apps are available in the App Store. A number are free, especially those from printer manufacturers like Canon, Epson, and Hewlett-Packard. Some of these apps say they will print everything on your iPad, but I have not verified that. For the most part, the standard AirPrint technology in your iPad does everything that most people need and may well satisfy you.
CUSTOMIZE YOUR IPAD
Your iPad should look and operate the way you want it to. The apps on the Home screen should be in the locations and possibly folders that make the most sense to you. The wallpaper on your Home screen should be pleasing to you, and the settings for your iPad in general and for your apps should reflect your wishes.
Organizing your Home screen includes putting the apps where you want them, deleting the ones you no longer want, and using folders to organize and store others.
Rearrange Apps
You can put the apps on your Home screen or on any of the additional Home screens in any location you want, including on the dock at the bottom of the screen.
1. Place and hold a finger on one of the apps on the Home screen until all the app icons begin to wiggle.
2. Drag an app you want to move to a new location. That can be
• Anywhere on the current screen.
• The area at the bottom of the screen, where there can be six apps, as you can see in Figure 2-5 (you need to use your imagination for the wiggling), by simply dragging the app to that location, or if needed or desired, dragging an app off the dock.

Figure 2-5: Once you loosen up the app icons and get them wiggling, they can be moved wherever you want them.
• On a different screen by dragging the app to the adjoining edge of its current screen, holding there for a moment until the new screen opens, and then continuing to drag the app onto the new screen and its final location.
3. When you are done rearranging your Home and other screens, press the Home button to stop the icons from wiggling.
TIP The principal reason for the dock at the bottom of the screen is that it remains on screen when you move to the ancillary Home screens. |
Delete Apps
You can delete apps you have downloaded, but not the original apps that came with the iPad. However, the latter can be hidden from the Home screen by tapping Settings | General | Restrictions, entering your Passcode, tapping Enable Restrictions, and tapping Off for the app you don’t want to be used.
NOTE Deleting an app on the iPad does not delete it from your iTunes account; it still shows that you have purchased the app. You can only totally delete an app in iTunes on your computer. |
1. Start the app icons wiggling as you read in the last section.
2. Delete the apps you no longer want by tapping the x in the upper-left corner of the app.
3. When you are done, press the Home button to end the wiggling.
Organize with Folders
Adding folders in which to contain your apps gives you two benefits: they can save space on the screen with multiple apps in a folder taking only the space of one app, and they can gather and therefore organize common apps. The negative, of course, is that to open an app you now have to first tap the folder and then tap the app. For whatever reason, if you want to add folders:
1. Start the app icons wiggling as you did in the earlier section.
2. Drag an app you want in the folder on top of another app you want in the folder. Do this slowly, because the bottom app will tend to jump out of the way. As you hold one app over the other you will see a box larger than the app forming with the bottom app in it and the top app moving in, as you can see in Figure 2-6. You can also change the name of the folder from what it defaults to if you choose.

Figure 2-6: Folders are easy to create, use, and get rid of.
3. Remove your finger to see the dock and folder fully formed. Drag as many more apps into the folder as you want. You then can drag the folder anywhere you can drag an app.
4. When you are done, press the Home button to end the wiggling.
If you want to put an app back on the Home screen, restart the wiggling, drag the app out of the folder, and stop the wiggling. If you drag all but one of the apps out of the folder, the last app will automatically appear on the Home screen and the folder will disappear.
The background or wallpaper behind the apps on the Home screen starts out with a default image. You can change that to anything you may want, perhaps a picture of your new grandchild, a favorite sunset, or a beautiful flower. If you have the picture on your computer or iPad or can get it, it can be your wallpaper. If it is in your photos, you can choose to use it as wallpaper by tapping the picture and then the share icon at the bottom-left area. This opens the share menu, as shown in Figure 2-7.

Figure 2-7: The share menu gives you a number of actions you can take with a selected object—a photo in this case.
Get Photos from Your Computer to Your iPad
Start with one or more pictures on your computer and look at how to get them through iTunes to your iPad.
1. On your computer, in My Pictures in Windows or iPhoto on a Mac, create a folder named “For iPad.” Place in this folder the photo or photos that you want on your iPad.

2. Still on your computer, start iTunes. Under Devices on the left, click your iPad and then click Photos in the upper-right corner.
3. If it is not already checked, click Sync Photos From and select My Pictures in Windows or iPhoto on a Mac.
4. Click Selected Folders and, under Folders, click For iPad, as you can see in Figure 2-8.

Figure 2-8: Syncing photos between iTunes on your computer and your iPad will move photos both ways.
5. In iTunes on your computer, click Apply to sync the photos in the For iPad folder with a similar folder on your iPad. You should see a message at the top of iTunes on your computer that synching is taking place.
Get a Photo to Wallpaper
Once you have the photo you want on your iPad, the final step is to turn it into wallpaper on your screen.
1. On your iPad’s Home screen, tap Photos. You should see an album labeled “For iPad.”
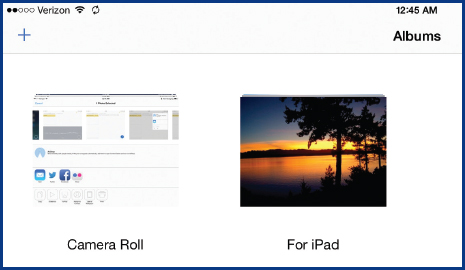
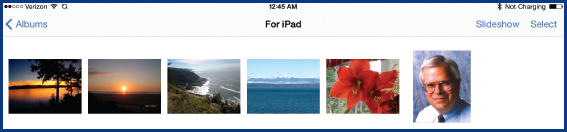
2. Tap the For iPad album to open it, and you should see the photos you transferred in the album.
3. Press the Home button to return to the Home screen.
4. Tap Settings | Wallpapers & Brightness to open those settings, and then tap Wallpaper.
5. Tap Wallpaper again. This displays the current choices that Apple provides, as well as your photo albums (see Figure 2-9).

Figure 2-9: Apple provides a number of choices for wallpaper on the iPad, but you may prefer your own photo.
6. Tap one of the wallpaper alternatives to see it full screen. Tap Set Lock Screen to use it there, tap Set Home Screen to use it for that purpose, or tap Set Both to use it in both the Lock and Home screens. Press the Home button to see your new wallpaper.
7. To use one of your photos for your wallpaper, repeat Step 4 and then tap the For iPad folder. You should see the photos you placed there.
8. Tap the photo you want for your wallpaper to see it full screen.
9. If you like it, tap Set Lock Screen, Set Home Screen, or Set Both, as you choose.
10. Press the Home button to see if you like your new Home screen (see Figure 2-10). If not, repeat Steps 4 through 6 to try other Apple-supplied wallpaper, or Steps 7 through 9 to try other photos of yours.
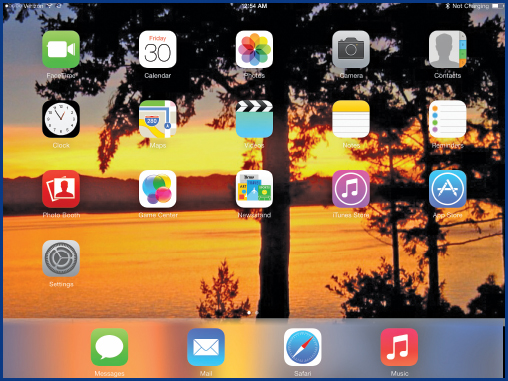
Figure 2-10: If you have a photo that you really like, use it for your Home screen.
Settings are where you can customize how your iPad operates; where you can review and change the options that are available to you both for the iPad itself and for many of the apps. All settings work similarly: You can turn options on or off by tapping them, or you can select an option from within a list by tapping the option you want. Often, you will tap an option to be presented with other options.
NOTE There are some differences in settings depending on the model of iPad and the cellular carrier you are using. |
You have seen in the previous section, and in other places in this chapter, demonstrations of using the iPad’s settings. Here we will take a look at Settings in general and how to use several of them. Throughout the rest of the book you’ll see how to use other settings. Many of the settings are self-explanatory, and I encourage you to explore them on your own.
Explore General Settings
General settings are the catch-all for settings not in a particular app or contained elsewhere.
From the Home screen, tap Settings | General. The General Settings are displayed, as you see in Figure 2-11. Some of the settings you have already configured or will shortly read about. Some of the more important settings include the following:
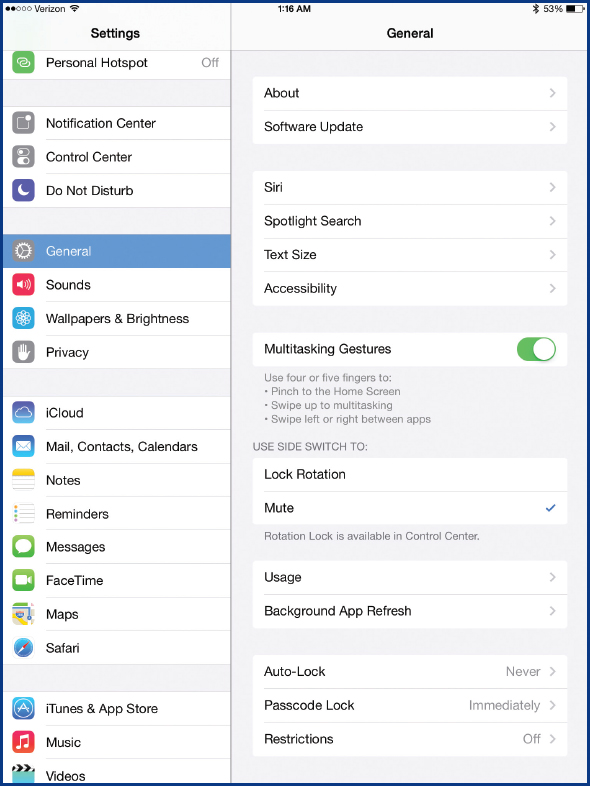
Figure 2-11: Through Settings you have the ability to control how your iPad operates.
• About allows you to change the name of your iPad and see information about it, such as the serial number that Apple asks you for when you contact them.
• Lock Rotation lets you use the side slide switch to lock the rotation of the screen so it doesn’t change when you rotate your iPad. The default is to use the side switch to mute sound.
• Usage displays the amount of internal memory and iCloud memory that is being used, as well as how long your iPad has gone since it was charged and what your cellular data usage has been.
• Auto-Lock lets you set the number of minutes the iPad goes before it automatically shuts down the screen and locks itself. This can be set from 2 to 15 minutes or Never.
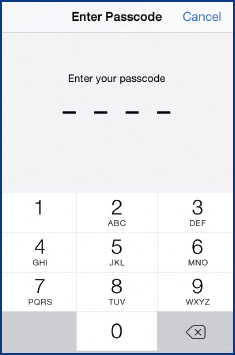
• Passcode Lock lets you require a four-digit passcode be entered each time you unlock your iPad.
• Restrictions lets you set limits on the usage and type of apps and content you want to allow on your iPad.
Use Accessibility Settings
Accessibility settings enable iPad features that try to compensate for physical disabilities, such as hearing, vision, learning, and motor abilities.
From the Settings General screen, tap Accessibility to open the accessibility settings shown in Figure 2-12. It is best to try each of these, one option at a time, to see if they are helpful. Chapter 10 provides a more detailed description of them. Here are some hints for the less obvious ones:
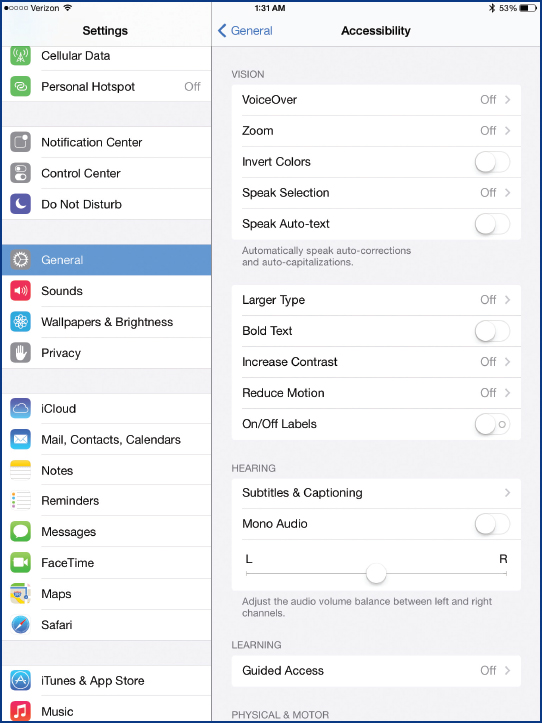
Figure 2-12: Accessibility options can make using an iPad easier in certain circumstances.
• Voice Over lets you select items on the Home screen and have iPad speak the name of the item. This provides speech with a single tap of an item and selects the item with a double-tap.
• Typing Feedback, which is part of Voice Over, announces the character and words that you type.
• Zoom magnifies the entire screen when you double-tap with three fingers and scroll by dragging with three fingers.
• Guided Access lets you keep the iPad in a chosen app with only certain features available by starting an app and then pressing the Home button three times.
• Assistive Touch provides assistance in using the touch screen with both fingers and with touch accessories like a stylus.
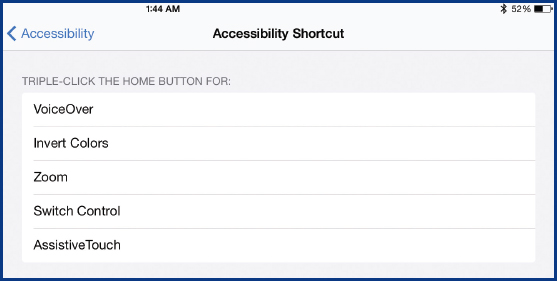
• Accessibility Shortcut lets you select the accessibility you want to turn on by pressing the Home button three times.
Review Other Non-App Settings
The majority of other settings are related to particular apps and are discussed elsewhere in this book with the relevant app. Here we’ll look at several of the less obvious non-app-related settings:
• Airplane Mode allows you to turn off the cellular, Wi-Fi, and Bluetooth transmissions by your iPad if you are requested to do so on an airplane (or when traveling to a different country to prevent incurring data charges).
• Wi-Fi allows you to turn on Wi-Fi and select a network with which to connect.
• Cellular Data allows you to turn it off and force all data to use Wi-Fi, or to choose the apps that can use cellular data.
• Notification Center lets you choose which apps can send you notifications and alerts and the method of the notification.
• Sounds lets you choose the volume of the ringer and alert sounds and what sounds are made in various events.

• Privacy lets you choose what services and which apps can use potentially invasive features of the iPad, such as Location Services, shown in Figure 2-13.
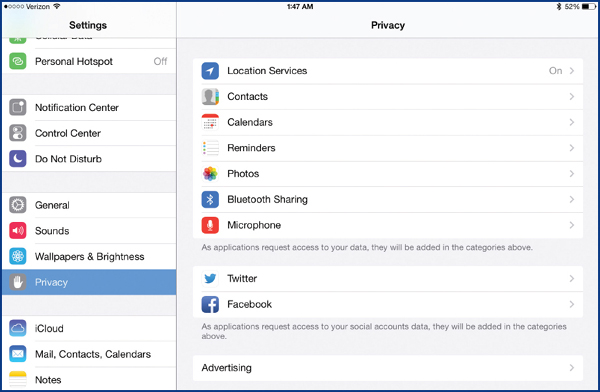
Figure 2-13: The iPad gives you a lot of control over what apps can do that may be potentially invasive.
One of the best new features of iOS7 is the Control Center, which takes the most heavily used settings and gives you immediate access to them. You can open the Control Center by swiping up from the bottom of the Home screen and most app screens, as you can see in Figure 2-14.

Figure 2-14: The Control Center provides immediate access to the most heavily used settings.
The controls that are on the Control Center include:
• Media player controls allow you to start and pause playing the currently selected playlist, to go to the beginning of the song (single tap) and the previous song (double-tap), to the next song, and to any point within a song on the bar at the top.

• Volume control allows you to adjust the current volume.
• Airplane Mode on/off allows you to turn on or off cellular, Wi-Fi, and Bluetooth transmissions, which you might be required to do on an airplane.
• Wi-Fi on/off allows you to turn on or off Wi-Fi.
• Bluetooth on/off allows you to turn on or off Bluetooth that is used to communicate with accessories such as headphones and keyboards.
• Do Not Disturb on/off allows you to turn on or off the silencing of alerts and incoming FaceTime calls.
• Mute allows you to turn on or off the silencing of alerts.
• Brightness control allows you to adjust the brightness of the screen.
• Open Timer app allows you to open the Timer app, which includes the clock, alarm, and stopwatch.
• Open Camera app allows you to open the Camera app and take still and video images as described in Chapter 8.
• AirDrop allows you to turn off or make your iPad discoverable by nearby compatible computers and devices. You can limit discoverability to just people in your Contacts list or with everybody. Using AirDrop, you can directly share files without the need for Wi-Fi. See the “Using AirDrop” QuickSteps in this chapter.
Using AirDrop
Using AirDrop is very simple:
1. Have two compatible devices (a Mac with OS X Lion or later or an iPhone, iPod, or iPad with iOS7) “nearby,” which I interpret as “in the same room,” but as Apple has said, “There is no need for them to touch,” referring to non-Apple devices that must touch to accomplish similar communication.
2. In one of the devices, display and select something you want to send to the other device, such as a photo, a document, or a webpage.
3. Tap the share icon to open the share menu. The discoverable devices near you should appear at the top of the menu.

4. Tap the device to which you want to send the file or link.
5. On the receiving device, you should see a notice that the other device would like to share a file. If you want to accept it, tap Accept.
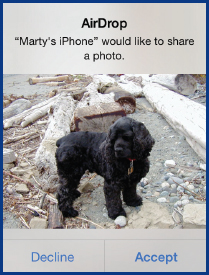

TIP AirDrop is an example of near-field communication (NFC), which allows two devices to communicate without the use of Wi-Fi or Bluetooth. |

Grant Heiken
The original reason for purchasing an iPad was to download books to read while traveling. It is perfect, especially while reading in the low-light situations that you find on airplanes and in hotel rooms. We still buy books, but find the iPad to be perfect for use during trips. We also use the iPad for storing and viewing photos (wonderful resolution), for email and the Internet, games, the world atlas, and so on. I found that my wife was frequently borrowing my iPad, so we purchased a second one, which has so many more options, including the excellent camera, Siri, streaming movies, better screen resolution, and a better speaker.
Grant’s Favorite Apps
Netflix Movies and television series.
iBird Pro Everything, including bird calls, for birding in North America.
QuakeWatch Real-time monitoring of the earthquakes of the world, including Google Earth maps with the epicenters marked.
Living Language Easy learning of languages visually and with pronunciation. The best language programs I have encountered anywhere.
WeatherLive Clear, easy, real-time weather coverage of anywhere in the world.
National Geographic World Atlas Phenomenal.
Moon HD Everything for the moon buff.
..................Content has been hidden....................
You can't read the all page of ebook, please click here login for view all page.