The text on your slides will usually carry the weight of your presentation, but the content can be greatly enhanced by the look of your slideshow. Much of that look is provided by the theme you select for your presentation. But graphics on the slide can also add zing to a professional-looking presentation, and often they contribute a significant part of the content of the presentation, as well.
In this chapter, you’ll learn how to use PowerPoint—with the help of other graphics programs—to add and enhance graphics for your slides.
The graphics on your slides will be one of three types: the first two are imported graphics, which include photographs and drawings from other graphic programs and Office 2007’s clip art; and shapes, which are simple vector graphics that you can create within PowerPoint. PowerPoint’s shapes can be scaled and manipulated with no loss of resolution. The third kind of graphic, SmartArt, will be covered in Chapter 6.
PowerPoint’s repertoire of shapes is quite extensive, and you can use one or more of them to create diagrams or otherwise illustrate your concepts.
Procedure 5.1. To insert a picture:
In the Normal View pane, click to select the thumbnail of the slide you want to put the graphic on.
If the layout on the slide includes a content box, click the Insert Picture from File icon in the content box (Figure 5.1).
or
If the layout does not have a content box, choose Insert > Illustrations > Picture (Figure 5.2).
The Insert Picture dialog appears. Navigate to the picture you want, select it in the dialog, and click Open.
The picture appears on your slide (Figure 5.3).
or
Open the folder on the Windows desktop that contains the picture file, then drag the icon for that file into the PowerPoint window.
The picture appears on your slide.
✓ Tips
You can often drag and drop graphic files into a PowerPoint slide from other applications. This doesn’t always function correctly, so try it and see if it works.
PowerPoint can import a wide range of graphic file formats, including TIFF, JPEG, GIF, PNG, PICT (old Macintosh graphic format), BMP (Windows bitmapped image format), and more.
If you have an image with an alpha channel, meaning it has transparent areas, you’ll be much happier if you convert it to PNG format before you bring it into PowerPoint. TIFF files with transparency often do not work well in PowerPoint.
You can almost always copy a graphic in another application, switch to PowerPoint, and paste the graphic into the slide.


Procedure 5.2. To insert clip art:
Select the thumbnail of the slide you want to put the graphic on.
If the layout on the slide includes a content box, click the Clip Art icon in the content box (Figure 5.1).
or
If the layout does not have a content box, choose Insert > Illustrations > Clip Art (Figure 5.2).
The Clip Art task pane appears (Figure 5.4).
This task pane contains the Clip Organizer.
Type a search term into the Search for text field and click the Go button.
The first time you do this, PowerPoint pops up a dialog asking you if you want to include search results from Microsoft’s huge online repository of clip art. Assuming you have an always-on Internet connection, click Yes; you’ll get a better, more diverse range of results.
PowerPoint searches the available clip art and displays items that match your search text.
Scroll through the search results until you find the one you want, then double-click it.
The clip art appears on your slide.

Procedure 5.3. To place PowerPoint shapes:
From the Insert > Illustrations > Shapes gallery in the toolbar, choose the shape that you want (Figure 5.5).
The gallery is broken up into types, so you can find a shape easily.
The cursor turns into a crosshair.
Click and drag the cursor on the slide to draw the shape onto the slide.
If you hold down the Shift key when drawing the shape, it will draw proportionately, so the horizontal and vertical dimensions are equal. This is especially useful when you are drawing circular or square shapes.
The shape appears on the slide (Figure 5.6). It is selected, so you can modify it.


Once you have placed your image into PowerPoint, you will usually have to resize it in some way. That can mean scaling it (making it bigger or smaller) or cropping it (trimming the image to only the part you want). You can do both right in PowerPoint.
You can scale graphics in one of two ways: you can drag the graphic object’s selection handles, or you can use the Size group or Size and Position dialog in the Drawing Tools or Picture Tools contextual tab (Figure 5.7). The Size and Position dialog gives you the most precise control.

Procedure 5.5. To resize objects using selection handles:
Select the image on your slide.
Selection handles appear around the image (Figure 5.8).
Click and drag one of the handles to resize the object.
After you resize the object to your liking, it will probably not be in the correct position on the slide. Drag it to a position more to your liking.

Procedure 5.6. To resize objects with the Size group or Size dialog:
Use the Height and Width controls in the Size group of the Picture Tools or Drawing Tools contextual tab to enter a new size (Figure 5.7).
You can type a figure into the Width or Height box, or you can use the arrow buttons to make small changes.
When you’re happy with your changes, you’re done.
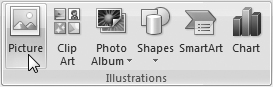
(Optional) If you want more control, click the Size dialog button at the lower-right corner of the Size group.
The Size and Position dialog appears (Figure 5.9).
(Optional) Use the controls in this dialog to set the size, rotation, and scaling of the image.
For pictures (but not for shapes) the Crop from section is active, allowing you to crop the picture numerically.
Click Close when you are done.
✓ Tips
The Original size section of the Size and Position dialog shows the beginning size of the graphic, so you have an idea of how different your changes are from the original. The Reset button in this section undoes all of your changes, but it is only available for pictures, not for drawn shapes.
You can use the Position tab of the Size and Position dialog to precisely position an object on the slide.
When you crop a picture, you effectively strip away all but the parts of the picture you want. Cropping is useful when you like part of a picture, but not all of it, and you want to focus on just the important or relevant portion. You can only crop pictures, not shapes.
Procedure 5.7. To crop a picture:
Select the picture you want to crop.
Choose Picture Tools > Format > Size > Crop (Figure 5.7).
Crop handles appear at the edges of the picture, and the cursor turns into the crop symbol.
Drag one or more of the crop handles to exclude part of the picture.
Click off the picture to lock in your change.
PowerPoint allows you to rotate objects on the slide canvas. You rotate objects by dragging the object’s rotation handle (this is called free rotation), or using the Rotation field in the Size and Position dialog. You can also flip objects around their horizontal or vertical axes. Objects that have text inside them (see “Placing Text Within Shapes,” later in this chapter) use a different technique to flip them.
Procedure 5.8. To free-rotate objects:
Select the object you want to rotate.
The object’s selection handles appear. The top handle (the one with the green dot) is the rotation handle (Figure 5.10).
Click and drag the object’s rotation handle.
The cursor changes to four short curved lines with an arrow at one end. As you rotate the object, you get a ghost image of the object, which tells you how far the rotation has gone (Figure 5.11).
Release the mouse button.


Procedure 5.9. To rotate using the Size and Position dialog:
Right-click on the object, then choose Size and Position from the shortcut menu.
The Size and Position dialog appears.
In the Size and rotate section (Figure 5.12), click the up or down buttons next to the Rotation field.
or
Type a value into the Rotation field and press the Tab key.
The object rotates.

Procedure 5.10. To flip objects:
Select the object you want to flip.
It can be a drawing shape or a picture.
Choose Drawing Tools > Format > Arrange > Rotate, then choose Flip Vertical or Flip Horizontal from the pop-up menu (Figure 5.13).
or
Choose Picture Tools > Format > Arrange > Rotate, then choose Flip Vertical or Flip Horizontal from the pop-up menu.
The object flips as you command (Figure 5.14).


PowerPoint provides commands that make it easy to arrange multiple objects so that they all line up with their edges or centers along the same line. You can also distribute objects so that they are arranged, either horizontally or vertically, with equal space between them.
With either alignment or distribution, you can choose to have the objects move relative to each other, or relative to the slide.
Procedure 5.11. To align objects:
Select the objects that you want to align.
Depending on if you have selected a picture or a drawing, choose Picture Tools or Drawing Tools, then Format > Arrange > Align, then choose the kind of alignment you want from the pop-up menu (Figure 5.15). Your choices are Align Left, Align Center, Align Right, Align Top, Align Middle, and Align Bottom.
See Table 5.1 to see how the different alignments work.
(Optional) If you want the objects to be aligned to each other, choose Align Selected Objects from the Align pop-up menu. If you want the objects to be aligned to the whole slide, choose Align to Slide.


Procedure 5.12. To distribute objects:
Depending on if you have selected a picture or a drawing, choose Picture Tools or Drawing Tools, then Format > Arrange > Align, then choose the kind of alignment you want from the pop-up menu. Your choices are Distribute Horizontally or Distribute Vertically.
See Table 5.2 to see how the different distributions work.
(Optional) If you want the objects to be aligned to each other, choose Align Selected Objects from the Align pop-up menu. If you want the objects to be aligned to the whole slide, choose Align to Slide.


If you have several graphic objects, you might find it easier to work with them as a group. You can move the group on the slide or copy and paste it between slides, which is much easier than selecting multiple objects. Grouping objects also preserves their positions relative to one another.
Procedure 5.13. To group objects:
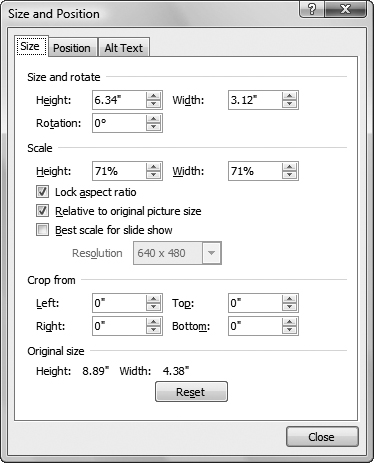
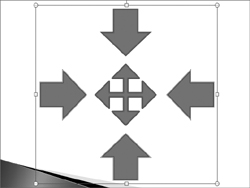
Select the objects you want to group (Figure 5.16).
Choose Drawing Tools or Picture Tools > Format > Arrange > Group, or press
 .
.The objects group, and there is now one set of selection handles for the group (Figure 5.17).
In order to precisely place objects on the slide canvas, PowerPoint provides two tools: rulers and gridlines. Rulers appear at the top and left edges of the slide canvas, and the gridlines overlay the entire slide. Gridlines do not appear when you play the presentation.
Procedure 5.15. To toggle rulers on and off:
Choose View > Show/Hide > Ruler.
The rulers appear above and to the left of the slide area (Figure 5.18).
Choose View > Show/Hide > Ruler again to hide the rulers.

Procedure 5.16. To turn on the gridlines:
Choose View > Show/Hide > Gridlines.
The gridlines appear in the slide area (Figure 5.19).
You can use the gridlines to make sure that objects on the slide are aligned properly, or to make sure that objects are the same distance apart.
Choose View > Show/Hide > Gridlines again to hide the grid.

When you place objects on slides, you can think of each object as being in its own layer on the slide. For example, if you have five objects on a slide, you have six layers: one layer for each object, plus the slide background, which is defined in the template. You can move each of these layers forward and back. The exception is the slide background, the layer furthest back, which can’t be brought forward.
Any text boxes that are part of the slide, such as the title box and the content box (with or without bulleted text), can be layered like any other object.
Procedure 5.17. To layer slide objects:
Select a slide object that you want to move forward or backward in the slide layers (Figure 5.20).
To send the object to the back of the layers, choose Drawing Tools or Picture Tools > Format > Arrange > Send to Back.
or
To move the object back in the layers, choose Drawing Tools or Picture Tools > Format > Arrange > Send Backwards. This moves the object one layer back.
or
To bring the object to the front, choose Drawing Tools or Picture Tools > Format > Arrange > Bring to Front.
or
To move the object forward in the layers, choose Drawing Tools or Picture Tools > Format > Arrange > Bring Forward. This moves the object one layer forward.
The object moves as you command.
Drag the still-selected object to position it as you want with the other layers (Figure 5.21).
You can also resize the object to get a more pleasing effect.


You can fill shapes created in PowerPoint with solid colors, color gradients, one of the built-in textures (an image designed to tile smoothly inside a shape) or an image (see “Placing Images within Objects”). A color fill replaces the interior of the object with a solid color, picked from the colors palette. A gradient fill creates a smooth blend from one color that you set to a second color. You can fill any of the drawing objects created in the PowerPoint Shapes gallery, and you can also fill the shapes (bars, columns, pie slices, and so on) in PowerPoint charts. You use the Drawing Tools > Format > Shape Styles group to apply fills to shapes (Figure 5.22).
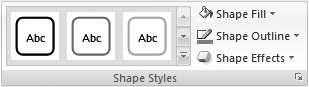
You might find it easier to use one of PowerPoint’s built-in shape styles, which are 42 preset solid fills with contrasting text and border colors. You can apply a shape style with a click.
Procedure 5.18. To fill a shape with a shape style:
Select the shape you want to fill.
Choose a style from the Drawing Tools > Format > Shape Styles gallery.
or
To see all the styles, click the gallery’s More button.
The gallery opens (Figure 5.23). Click on a style to select it.
The shape fills with the style (Figure 5.24).

Procedure 5.19. To fill a shape with a solid color:
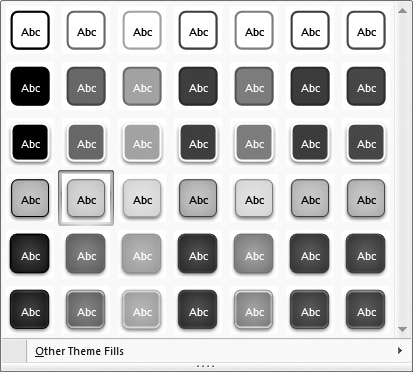
Choose a color from the Drawing Tools > Format > Shape Styles > Shape Fill gallery (Figure 5.25).
As you roll over the colors, the shape changes to match in a live preview. When you click, the color is applied.

Procedure 5.20. To fill a shape with a gradient:
Select the shape you want to fill.
Choose from the Drawing Tools > Format > Shape Styles > Shape Fill > Gradient gallery (Figure 5.26).
The shape fills with the selected gradient fill. If you’re happy with the effect, you’re done.
(Optional) If you want more gradient choices, choose More Gradients from the bottom of the gradient gallery.
The Format Shape dialog appears.
(Optional) Choose a gradient from the Preset colors pop-up menu (Figure 5.27).
or
Use the controls in the dialog to customize the gradient as you like.
(Optional) Click Close.
The shape is filled with the gradient (Figure 5.28).


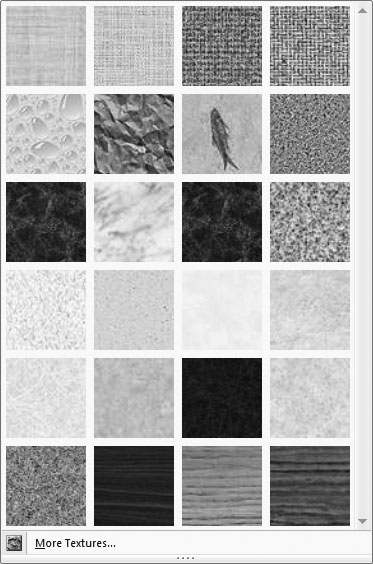
Procedure 5.21. To fill a shape with a texture:
Choose from the Drawing Tools > Format > Shape Styles > Shape Fill > Texture gallery (Figure 5.29).
The shape fills with the selected texture (Figure 5.30).
PowerPoint allows you the ability to place text directly within shapes you’ve created in PowerPoint. Shapes can have any kind of color, gradient, or image fill, and the text that you add will be overlaid on the fill. Text inside the shape rewraps as you resize the shape.
Procedure 5.22. To add text to a shape:
Using Insert > Illustrations > Shapes, place a shape on the slide you’re working with.
Resize the shape to your liking, and add a color, gradient, or image fill as needed.
Right-click in the middle of the shape, then choose Edit Text from the shortcut menu. An insertion point will appear, centered in the shape.
Type the text you want in the shape (Figure 5.31).
(Optional) Select and right-click the text, then change the font, font size, or other formatting from the mini toolbar.

In a similar manner to color and gradient fills, you can fill shapes in PowerPoint with images. You can use any kind of image that PowerPoint can import.
Procedure 5.23. To fill a shape with an image:
Select the shape you want to fill.
Choose Drawing Tools > Format > Shape Styles > Shape Fill > Picture.
The Insert Picture dialog appears.
Navigate to and select the picture you want inside the shape, then click Open.
The image appears inside the shape (Figure 5.32).

The borders of a shape or picture are delineated in PowerPoint by the outline, which is the line around the object. PowerPoint allows you to set the line style, line thickness, and line color for shapes. If you prefer, you can have no outline around an object. For line shapes, you can also set a graphic (such as an arrowhead or a circle) for the line’s endpoints.
PowerPoint has different contextual tabs on the Ribbon for pictures and shapes, which makes the controls for outlining pictures and shapes slightly different. For pictures, you’ll find them at Picture Tools > Format > Picture Styles > Picture Border. For shapes, you’ll find them at Drawing Tools > Format > Shape Styles > Shape Outline. Despite their different locations and names, picture borders and shape outlines work the same. For the purposes of the example here, we’ll see how to change the outline of a shape.
There is another gallery in the Picture Styles group, the Picture Styles, which we’ll discuss in “Applying Picture Styles,” later in this chapter.
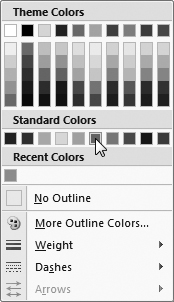
Procedure 5.24. To set the outline for an object:
Select the object for which you want to set the outline.
Choose Drawing Tools > Format > Shape Styles > Shape Outline. The Shape Outline gallery appears (Figure 5.33).
Choose one or more of the following:
To change the color of the outline, choose one of the color swatches under Theme Colors, Standard Colors, or Recent Colors.
To remove the outline, choose No Outline.
If you want a color that isn’t in the color swatches, choose More Outline Colors. The Colors dialog appears, with your choice of two color pickers in it. Choose a color, then click OK.
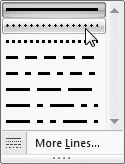
To change the thickness of the outline, make a selection from the Weight fly-out menu (Figure 5.34).
To change the style of the outline, from a solid line to different sorts of dashes, make a selection from the Dashes fly-out menu (Figure 5.35).
If the shape you are changing is a line, the Arrows fly-out menu will be available (Figure 5.36). Make a choice from this menu if you want to add or change the endpoints of a line.


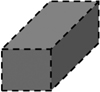
The shape’s outline changes as you command (Figure 5.37).
Sometimes pictures and clip art look pretty much the way you want them to when you place them on your slides. Other times, they don’t give you 100% of the effect that you would prefer. Though PowerPoint is certainly no photo editing program, it does allow you to make some changes to your pictures, such as changing the brightness and contrast and overlaying a color hue. Still, if you want to make serious changes or touch ups to your pictures, do them in a real photo editing program, such as Adobe Photoshop or Photoshop Elements, before you bring them into PowerPoint.
When you select a picture or clip art, the Picture Tools contextual tab appears on the Ribbon with a Format subtab (Figure 5.38). You’ll use the Adjust group (Figure 5.39) to make your changes. Table 5.3 runs down the controls in this group.

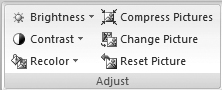
Table 5.3. Picture Adjustment Tools
BUTTON | DESCRIPTION |
|---|---|
Brightness | Displays a gallery that allows you to change the picture’s brightness in 10% increments, from 40% dimmer to 40% brighter. |
Contrast | Displays a gallery that adjusts the picture’s contrast in 10% increments, from 40% less contrast to 40% greater contrast. |
Recolor | Displays a gallery with color overlays, such as grayscale, CPS, and duotones. |
Compress Pictures | Allows you to compress the picture, reducing its file size. |
Change Picture | Allows you to replace the current picture with a different picture. |
Reset Picture | Restores the image to its original state. |
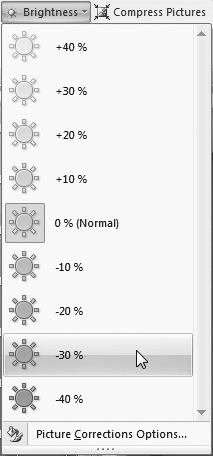
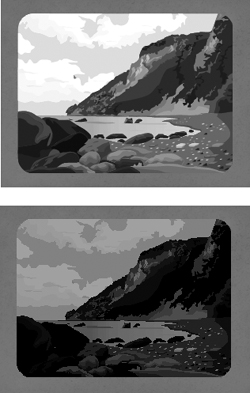
Procedure 5.25. To adjust a picture or clip art image:
Select the picture or clip art you want to modify.
The Picture Tools contextual tab appears in the Ribbon.
From the Picture Tools > Format > Adjust group, click the button for the modification that you want.
If you chose Brightness, Contrast, or Recolor, a gallery appears. Choose the effect you want from the gallery. In this example, we’re using the Brightness gallery (Figure 5.40).
The modification is applied to the picture (Figure 5.41).
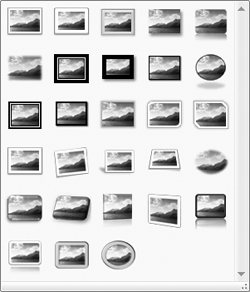
Picture styles are a selection of picture treatments you can apply to pictures and clip art that provide a variety of preset effects to the image, such as a frame, a vignette, soft edges, and even reflection and 3-D rotation effects.
Procedure 5.26. To apply a picture style:
Select the picture or clip art you want to modify.
The Picture Tools contextual tab appears in the Ribbon.
From the Picture Tools > Format > Picture Styles group, choose a picture style from the gallery.
or
To see all the preset Picture styles, click the More button at the lower-right corner of the Picture Styles gallery.
The gallery appears (Figure 5.42).
Select a style from the gallery.
The selected image takes on the style you chose (Figure 5.43).

Effects are vital tools in PowerPoint because they dress up objects on your slides, giving them an appearance of depth, or making them stand out from other elements on the slide. Some common examples of effects are drop shadows and glows. New effects in PowerPoint 2007 include reflections, beveling, and 3-D rotations.
PowerPoint, using the Picture Tools and Drawing Tools contextual tabs, provides similar, but not identical, effects capabilities for pictures and vector illustrations such as shapes.
Procedure 5.27. To apply an effect to a picture:
Select the picture to which you want to add the effect.
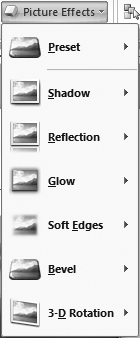
Choose Picture Tools > Format > Picture Styles > Picture Effects.
As you can see, this menu provides seven effects categories from which to choose (Figure 5.44).
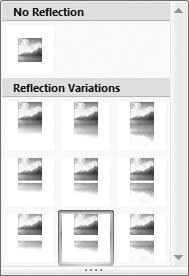
Choose one of the effects categories, and a gallery will appear.
This example uses the Reflection category (Figure 5.45).
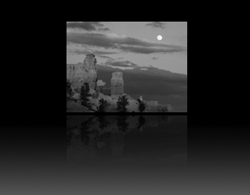
Select one of the effects in the gallery you displayed.
The effect is applied to the object (Figure 5.46).
Procedure 5.28. To apply an effect to a shape:
Choose Drawing Tools > Format > Shape Styles > Shape Effects.
This menu provides seven effects categories from which to choose (Figure 5.47).
Choose one of the effects categories, and a gallery will appear.
Select one of the effects in the gallery you displayed.
The effect is applied to the object.
✓ Tips
If you have more than one object with a drop shadow, it’s usually a good idea to give all the objects the same shadow values.
You can copy and paste effects settings from one object to another by selecting the first object, choosing Home > Clipboard > Format Painter, and clicking on the second object. Be aware that this also copies and pastes the border, fill, and opacity of the object.

WordArt is a feature that allows you to take text and format it in graphically interesting ways. Office 2007 actually provides two entirely different things, and calls them both WordArt (thanks for the confusion, Microsoft!).
The first sort of WordArt is available in both PowerPoint and Word, and it lets you apply bevels, shadows, and text transformations to regular text. This creates decorative text that can be used as headline and accent text (Figure 5.48).

The second kind of WordArt is only available in Word, but it can be copied and pasted into PowerPoint. This kind of WordArt comes into PowerPoint as a vector image, so you can still make changes to it using the Drawing Tools contextual tab, but the text is still editable (Figure 5.49).

You can use WordArt text of either kind as headlines for slides, or as additional graphic touches anywhere on the slide canvas.
Procedure 5.29. To create WordArt in PowerPoint:
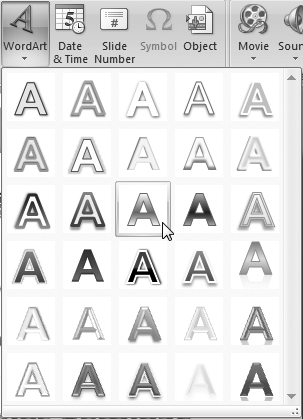
Choose Insert > Text > WordArt, then pick a style from the WordArt gallery (Figure 5.50).
A text box appears on the slide, with the “Your Text Here” placeholder text selected and ready for you to replace it (Figure 5.51).
Type the text you want, then click anywhere else on the slide.
The text is styled as WordArt.

Procedure 5.30. To create and import WordArt from Word:
Create a blank Word 2007 document, type in the text you want to make into WordArt, then select that text.
Choose Insert > Text > WordArt.
The WordArt gallery appears (Figure 5.52).
Click one of the styles to select it.
The Edit WordArt Text dialog appears with your text in it (Figure 5.53).
In the Edit WordArt Text dialog, you can choose to change the font, font size, and style the text as bold or italic.
Click OK.
The WordArt image appears in your Word document. The image is already selected.
Choose Home > Clipboard > Copy, or press
 .
.Switch to PowerPoint.
Display the destination slide.
Choose Home > Clipboard > Paste, or press
 .
.The WordArt image appears on your PowerPoint slide.
The WordArt image will probably appear too small and will need to be resized to fit properly on the slide.
✓ Tip
WordArt images from Word can be manipulated in many, but not all, of the ways that you would manipulate other images in PowerPoint. You can scale, flip, rotate, and add effects in PowerPoint, but you can’t change the color fill of the lettering. You can change the outline color and style, but all that will be affected will be a box around the image, not the edges of the letters in the image, which makes this fairly useless.

