Using Moodle Multimedia Plugins
By default, most of the Moodle multimedia plugins are turned on. Before you start adding sound and video, either check with your system administrator, or if you have administrative privileges, check to make sure that all the required plugins are enabled. YouTube is one plugin that is not activated in Moodle's default settings. Chapter 13 covers the Administration block and plugins in more detail.
Enabling plugins
The plugins are located in the Administration block on the front page of the site. To check what settings are on and make changes, follow these steps:
- In the Administration block, click Module.
The list expands to show more options beneath Module.
- Click Filters.
The list expands again.
- Click Manage Filters.
Moodle takes you to the Multimedia Plugins page, as shown in Figure 6-1.
- Go down the list and select all the check boxes to ensure the filters are enabled.
- Click the Save Changes button at the bottom of the page to return to your course.
Figure 6-1: The Multimedia Plugins page.

When you add your multimedia resources, Moodle finds URLs in the Moodle files and replaces them with the required multimedia player. In Chapter 14, I include a table that lists all the multimedia formats that Moodle supports and recommends which to use that are most widely compatible with Web browsers.
Checking out YouTube services
YouTube provides a number of fantastic services, giving you a variety of options to use to meet your needs. The following services are offered by YouTube, free of charge:
- Link to YouTube videos. In Chapter 5, I cover how to use resources and link to external resources. Follow the instructions outlined in Chapter 5 to link to YouTube and TeacherTube.com as you would to other sites on the Internet.
 TeacherTube.com (www.teachertube.com) is a fantastic service for teachers and trainers; it provides free resources and enables you to upload your videos, as you would to YouTube, but you can protect them with a password making them available only to your learners.
 - Embed YouTube videos in Web pages. Doing so prevents learners from accessing anything else on YouTube. I discuss how to do this in the next section.
- Add a YouTube video (or any video file you have) to the HTML block.
- Upload your own video files to YouTube and then link or embed them.
- Use YouTube as a conversion tool to optimize your videos. After optimization, you can download and add the videos to Moodle.
- Create an account with TeacherTube.com and upload your instructional videos. As I mention earlier, this is a password-protected service where videos are viewable only to learners who have the password. You can then embed videos or create links to them from your Moodle course.
Embedding YouTube video and uploaded video clips to a Web page
The process is fairly simple. The advantage to embedding a video in a Web page (you can set up by using the Add a Resource drop-down list discussed in Chapter 5) instead of linking to it is that your learners won't have to leave the Web page in your course to go to YouTube and be tempted to watch other, non-task–related videos. And yes, even adult learners, not just the young ones, are somehow drawn by the YouTube force field to start looking for their favorite songs. I discuss the procedure for linking to videos in Chapter 5 (in the section discussing the Web page editor).
To embed a YouTube video in a Web page, take these steps:
- From your course front page, click the Turn Editing On button in the top-right corner.
Editing tools are now available on the course front page.
- Go to the section or week to which you want to add the YouTube video.
- From the Resources drop-down list, select Compose a Web Page, and then enter a name for the text Web page.
 Anything marked with an asterisk is a required field.
 - (Optional) Write a summary.
This summary is optional but useful to learners because they see it in the Resources Outline page. You and your learners can access the outline from the Activities block on the course front page, located right below the Participants block on the left
Chapter 5 provides you with more information on how to add Web pages and content, and link to resources on the Internet.
- Go to www.youtube.com and find the YouTube video you want to use.
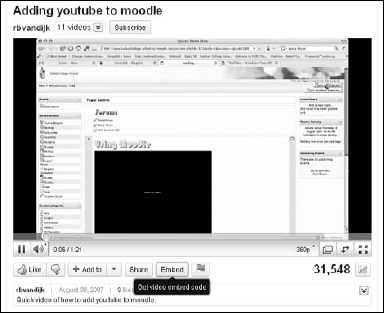
Notice the Share and/or Embed buttons under the YouTube video screen, as shown in Figure 6-2.
- Click the Embed button to select the code and then press Ctrl+C to copy the code.
- Return to your Web page, look for the toggle icon in the editing menu (< >), and select it.
- Delete the HTML code already there and then press Ctrl+V to paste the code into the window.
- Choose the remainder of the settings and then click the Save and Return to Course button.
Moodle returns you to your course page with the Web page icon and title. Click it, and your YouTube video starts to play.
The nice thing about embedding the videos in Web pages in your course is that you can add titles, instructions, and any other content to the page. You can use Web pages to quickly develop interactive lecture notes that include embedded video and sound. For example, in a language course, you can embed a film clip or a recorded conversation, and then ask students to translate it. This can be used in the Quiz module with the essay question type.
Figure 6-2: Adding YouTube to Moodle.
![]() You can embed any videos on the Internet that provide the source code. For example, many news networks and education sites include a link usually called Share or Embed, which provides you with the lines of code you need.
You can embed any videos on the Internet that provide the source code. For example, many news networks and education sites include a link usually called Share or Embed, which provides you with the lines of code you need.
Adding a YouTube video to a block on the course front page
If you want to add a specific video clip to your course front page (perhaps an introduction to your course or a very important news segment relevant to your current topic), you can do so in few steps. Adding instructional video clips to a block makes it stand out more — it's in front of your learners every single time they log on to the course, so their excuses of “I missed it in the course listing” won't work! To embed the video in a block, follow these steps:
- On the course front page, click the Turn Editing On button in the top-right corner.
The editing tools become available on the page.
- Select HTML from the Blocks drop-down list.
By default, the Blocks menu appears under the other blocks on the right side.
The new HTML block appears with all the editing tools available for the block.
- Select the editing tool (the hand).
Moodle takes you to the Configuring a HTML Block page, as shown in Figure 6-3.
Figure 6-3: The Configuring a HTML Block page.

- Give your video block a title.
- Find your YouTube page, copy the code as described in the preceding section, and paste it into the large Content text box.
- Click the Save Changes button.
Moodle returns to the course front page.
- Click the Turn Editing Off button in the top-right corner.
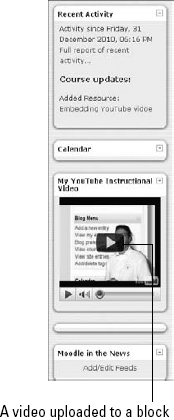
You can see your video in a new block, as shown in Figure 6-4.
- (Optional) To reposition the video block, turn editing back on and move the block using the arrows; when you're done, turn editing off.
Figure 6-4: Course page showing video added to the HTML block.