
Few topics surrounding Silverlight are so widely discussed and debated as the Model-View-ViewModel design pattern (most commonly referred to by its acronym MVVM). This pattern is used by many Silverlight and WPF developers to form the structure of their applications. The blogosphere is overflowing with this topic, with many varied opinions on how it should be implemented and with little in the way of a consensus. There's so much chatter that it even still inspires passionate debate on just what the core principles of MVVM actually are.
Unfortunately, because of the lack of a standard and the amount of noise and controversy surrounding the pattern, you can face complete information overload while researching the pattern, with too many conflicting opinions to deal with and a lack of practical examples. This tends to lead to a general sense of confusion and often leads to developers giving up in frustration and returning to old code-behind practices. Adding to this is the fact that the project templates in Visual Studio are not geared toward using MVVM, the tooling (particularly Visual Studio, with Expression Blend having better support for wiring Views to ViewModels) does not direct the developer in this direction, and the Silverlight runtime itself hasn't had the features required to implement all the concepts of MVVM (such as support for commands, although this has improved in Silverlight 4).
Regardless of all the controversy and lack of standardization of the pattern, there is a general agreement in the development community that regardless of how you implement the pattern, doing so is good practice. Developers who implement this pattern will invariably say that their code is much better for doing so.
Up until now (possibly controversially), we have avoided discussion or implementation of the MVVM design pattern in the examples in previous chapters in order not to overload you with too many competing new topics at the one time. Doing so would be too much to take in, and redirect your focus from the concepts that were actually trying to be imparted. That said, most of the concepts used by MVVM have now been discussed as stand-alone topics, making this the best time to put these pieces together in terms of a design pattern for structuring your project in a more robust fashion.
Note
Implementing MVVM requires the understanding of too many concepts in Silverlight to have used it from the start of this book. The path that we have tried to take is to provide an understanding of the core concepts of Silverlight/XAML, demonstrate how to get a working program going, and now, we are finally ready to look at a way of structuring your Silverlight applications in a better way. Be warned, however, like learning Silverlight itself, learning and implementing MVVM is a challenge and provides a steep learning curve, requiring you to think differently to how you would when using the traditional code-behind Model. But again, once you've worked through that, implementing the pattern will feel completely natural, and you will find it hard to go back to the old code-behind Model again.
In this chapter, we'll take a look at the core concepts of the MVVM design pattern and practical aspects of their implementation, in order to give you a good grounding of the pattern upon which you can grow. We'll try and avoid the more controversial aspects of the pattern and too much theorizing. We'll take a simple approach, rather than going into a full-blown MVVM implementation discussed in the concept of a framework (as the framework you choose to use should be determined by the nature of your project—if indeed you choose to use a framework at all). That said, this chapter won't include all the answers to questions you may have, but it will provide you with a good understanding of MVVM's core principles.
The primary purpose of implementing MVVM (although even this point is still being debated) is to maintain a clear separation of concerns between the View's look and its behavior, decoupling them and using data bindings and commands or behaviors as the glue that connects them.
If this sounds like a familiar concept, it should. We discussed almost exactly the same concepts back in Chapter 11, "Creating Custom Controls," in relation to how the structure of a custom control is designed to maintain a clear separation of its look (i.e., control template) from its behavior (in its class). If you skipped over that chapter (not being concerned with creating custom controls), you should go back and read it now (particularly the sections detailing separation of concerns, template binding, dependency properties, and discussion of the push versus pull of data into the user interface), as it provides a lot of prerequisite knowledge on which this chapter will build. It also provides a good point to start practicing implementing the separation of concerns principles (in the context of designing user controls or custom controls), which you can then apply to your Views (albeit with some differences) using the MVVM design pattern.
Although the implementation will be somewhat different, the MVVM design pattern does share a lot in common with the way that you design custom controls. As described shortly, you have a View (as defined back in Chapter 4, "The Navigation Framework"), and you also have a ViewModel (which defines the logic and behavior of the View and exposes data to it), taking this code out and away from the View's code-behind. This behavior, logic, and data is then presented to the View in much the same way as the behavior, logic, and data for a custom control is presented to its template for consumption, leveraging the powerful data binding features enabled by XAML. Some perceive that MVVM's use in a project should result in zero code-behind in a View, although in reality, this outcome is rarely practical.
One of the big issues with having all (or much of) the logic and behavior of a View written in its code-behind is that it's simply not testable. Code-behind contains an intermingling of the View's look and its behavior, with each requiring (and having) implicit knowledge of one another. This bidirectional tight coupling makes testing the View's behavior incredibly difficult and messy.
Note
Implementing unit testing and performing test-driven development in Silverlight is not covered in this book, but it is an important technique that you should investigate and preferably implement in your application development process.
Even if you do not write unit tests against your code (although you should strongly consider doing so) and don't consider testability a concern, implementing MVVM in your application provides numerous other benefits:
It allows you to create blendable projects, enabling you to easily populate your Views with data at design time, so the designer can see what the user interface looks like populated with data without needing to compile and run the project.
It enhances the designer/developer workflow, reducing the friction when both parties work simultaneously on the look and the behavior and logic of the View without interfering with one another.
It provides a step toward structuring your project to support the implementation of inversion of control principle and dependency injection.
It enables you to potentially reuse the View logic across different View implementations.
The loose coupling enables you to potentially apply different Views to the same ViewModel. For example, if you wanted to create a Windows Phone 7 edition of your application (which would require a different View designed to suit the Windows Phone 7 controls and form factor), you could reuse your ViewModels in that project.
Note
If you decide not to write unit tests against your project, having implemented MVVM in your project allows you to retrofit your project with unit tests at a later time without requiring too much (if any) restructuring.
As you can see, there are many potential benefits gained from implementing the MVVM design pattern. However, one of the reasons why MVVM is possibly not more widely used is the difficulty in attempting to grasp the finer details of its implementation (even if all the theory makes sense). With a lack of consensus in how to implement the pattern and the fact that developers aren't immediately being pushed in that direction by the Silverlight tooling and templates, getting up to speed with implementing MVVM can be somewhat of a struggle. Only the dedicated developers prepared for the challenge in order to achieve better code structure tend to currently be prepared to face the hurdles it initially faces them with. Sticking points still exist (displaying dialogs from a ViewModel is a prominent one), but elegant solutions to these problems are gradually being identified and documented. That said, most of the issues revolve around the developers themselves, often attempting to take too pure an approach in order to achieve zero code-behind, which leads to fighting an uphill (and often unnecessary) battle.
Ultimately, it must be said that like learning Silverlight itself, once you get over the initial hurdles and the mental leap, you will never look back; MVVM will just flow as a natural way of designing software.
The MVVM design pattern is fundamentally about dividing up your application into layers (providing a clean separation and boundary between them) and providing the connections between the components in those layers. When all is said and done, that's what it comes down to.
Although Views don't typically lend themselves to having a clean separation between their look and their behavior like custom controls do (where the separation is enforced), the core reasoning behind maintaining the separation between look and behavior is the same, and many of the same structural principles still apply.
Let's take a look at the core principles of the MVVM design pattern, and how you can put these principles in place in your applications.
The MVVM design pattern consists of three core layers, with the names of the components found in each layer used to form the pattern's name:
Model
View
View Model
You could think of the pattern as being quite similar to the traditional three-tier pattern (consisting of a presentation tier, business logic tier, and data tier). Although they are quite different patterns and serve different needs, we could compare the layers in the MVVM design pattern to the tiers in the three-tier pattern:
The View layer corresponds to the presentation tier.
The Model layer corresponds to the data tier.
The ViewModel layer corresponds to the business logic tier.
However, all of the layers forming the MVVM design pattern actually exist within the presentation tier of the three-tier pattern (with your Silverlight application acting as the entire tier), with each layers focused on serving the needs of the user interface. Figure 12-1 demonstrates show the layers within the MVVM design pattern relate to each other (with the arrows representing a "knows about" or "communicates with" interaction).

As Figure 12-1 shows, outside of their own layers, the Views should only ever know about ViewModels, and the ViewModels should only ever know about the Models. However, in practice, this is not always followed and is not necessarily a concept that you should enforce. Whilst the layers should (debatably) never know anything about the layers above them, some advocate allowing Models to be passed directly to a View (from the ViewModel).
Note
As will be discussed later, the ViewModel-first approach is another ongoing debate that violates the ideal scenario of each layer not knowing anything about the layer above. In a ViewModel-first approach, the ViewModels will be responsible for instantiating the Views, and will hence have knowledge of the View layer.
Let's now take a closer look at the purpose of each of these layers.
You are already well versed in the purpose of Views by now. A View consists of both a XAML file and a code-behind class. Throughout this book, we have made extensive use of the navigation framework, and in this context, both the XAML file and the class inherit from Page (as discussed back in Chapter 4, "The Navigation Framework"). However, this is of no consequence and has no impact on the implementation of the pattern. You may choose use Prism, or perhaps no framework at all. For the purpose of the examples in this chapter however, we will assume you are using the navigation framework for structuring and composing your user interface.
Theoretically, when using MVVM, the View's code-behind class should be considered essentially irrelevant, with little to no code written in that class. Instead, any logic and behavior for the View should be placed in the ViewModel class (where possible), leaving the code-behind class empty, a goal often referred to as "zero code-behind".
Note
Zero code-behind is not a requirement of the MVVM pattern, and often, it is an unrealistic goal. Some tasks are simply better performed in the code-behind and attempting to do otherwise will lead to increasing the complexity of your code and decreasing its maintainability, which all in all is the ultimate goal and primary focus of implementing the MVVM pattern. Focus on minimizing the use of code-behind instead of removing it completely.
The View will pull data from the ViewModel, using the extensive data-binding capabilities provided by Silverlight/XAML. Any events that the View wants to raise (to be handled by a method defining some behavior or logic in the ViewModel) can either be published as a command (that the ViewModel can subscribe to), or an action or behavior can be used to call a method on the object assigned to the View's data context (which will be the ViewModel).
A Model is an object, usually containing data (obtained from the server) for use by the View. When you are making use of RIA Services to communicate with the server, your Model objects will be the entities (objects) returned by a domain service.
Although the View and the Model both leverage existing components that you are already familiar with, the ViewModel is an entirely new piece to the puzzle. View Models are used to maintain the state of a View. In this, they have a dual purpose—to expose data to the View and to handle the View's logic and behavior, essentially serving the needs of the View.
Note
For the purposes of this explanation (to keep the scenario simple), we will be following the case where each View has a single corresponding ViewModel (i.e., a one-to-one relationship). However, Views and ViewModels can exist in multiple configurations: a ViewModel may have multiple Views, or Model objects may be wrapped in ViewModels before being exposed to the View. These configurations will be discussed further shortly, but for now, we will focus on the scenario where each View has a corresponding ViewModel.
Although its name may indicate that the purpose of a ViewModel is to provide a View of the Model (abstracting the Model for consumption by the View), it's really the other way around. The ViewModel is used to maintain the state of the View and, therefore, should be considered a Model of the View. That state will be maintained within the ViewModel (exposed as properties), with operations (exposed as methods) that can be invoked by a command or an action or behavior from the View (usually in response to a control event). The View will then bind to this ViewModel to consume the data that it exposes and invoke operations on it (generally in order to trigger a change in the View's state, represented by the ViewModel).
By exposing both the data (via properties) and the logic or behavior (via methods) publicly from the ViewModel class (enabling their consumption by the View), the ViewModel also becomes inherently testable. Ideally, therefore, all the behavior and logic for a View (that can't be handled in the View's XAML) should be placed in its corresponding ViewModel, leaving minimal (if any) code in the View's code-behind.
Throughout this chapter, we'll be demonstrating a scenario where we have a one-to-one relationship between the Views and the ViewModels, with each ViewModel representing its corresponding View as a whole. This is an ideal scenario for learning the pattern (and reasonably common in practice), however it isn't a fixed requirement of the pattern. Let's take a look at some additional configurations you may come across or use yourself.
For example, you may have one ViewModel that serves multiple Views; a wizard is a good example of where this might be required. However, this would require a slight alteration to our diagram, as when implementing this configuration (generally), the ViewModel will be responsible for creating the View and will therefore know about the View. This factors into the ViewModel-first debate, which will be discussed later in this chapter.
In turn, a single View may interact with multiple ViewModels. Instead of having the ViewModel exposing Model objects directly to the View, some developers choose to wrap their Model objects in ViewModels, abstracting the Model from the View. Instead of the View binding directly to the data (i.e., the Models), it will bind to a ViewModel instead.
For example, a View may populate a list box with a collection of ProductViewModel objects, with each wrapping a Product Model object. These ViewModels could essentially be considered a view of the Model. Additional properties, calculations, logic, etc, could be added to these ViewModel objects (serving the needs of the View), saving the Model from being polluted with View-related requirements.
Note
Another potential benefit of this practice is that it can take away the need to implement value converters in your bindings to convert the property values of the Model to suit the needs of the View, and these conversions can be performed within the ViewModel and exposed as properties that the View can directly bind to and consume. For example, rather than implementing a value converter to convert a Boolean value exposed by a property on the ViewModel to a Visibility value, you could expose the Visibility value directly from the ViewModel. That said, doing this tends to make your ViewModel a little too coupled to the needs of the View, which some developers consider to be a bad practice. Therefore, if you choose to do this, do so sparingly.
The big issue with the practice of wrapping all your Model objects in ViewModels is the amount of overhead and additional code required to wrap each of the Model objects in a ViewModel, often resulting in properties on the ViewModel that purely exist to relay property values from the Model objects. Most of the time the outcome of this practice is simply an unnecessary duplication of code. Therefore, whether you undertake this practice will generally be on a case-by-case basis.
Note
The XAML Power Toys add-in (discussed back in Chapter 7, "Building Data Entry Forms") has a Create ViewModel For Class option that you can use to take a lot of the manual work out of the task of wrapping Model objects in ViewModels.
The examples throughout this section will implement a very simple scenario to demonstrate the MVVM design pattern and how the layers communicate with one another. For the purpose of demonstration, we'll look at implementing each aspect of the MVVM design pattern in a simple yet common example. This example will implement a login screen that allows the user to enter a user name and password, authenticate credentials, and navigate to another View if the authentication was successful or display an error if it failed.
Note
For this scenario, we'll be assuming a one-to-one relationship between the View and the ViewModel to keep the implementation of this example simple.
To implement our simple scenario, let's start by creating the objects in the layers independently, before bringing them together.
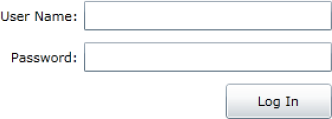
By now, you will be familiar with creating new Views using the navigation framework. We'll create a simple View for this example consisting of two text boxes (with corresponding labels) for the user to enter a user name and password into and a button that will initiate the user authentication check on the server, as per the following XAML:
<navigation:Page x:Class="Chapter12Sample.Views.LoginView"
      xmlns="http://schemas.microsoft.com/winfx/2006/xaml/presentation"
      xmlns:x="http://schemas.microsoft.com/winfx/2006/xaml"
      xmlns:d="http://schemas.microsoft.com/expression/blend/2008"
      xmlns:mc="http://schemas.openxmlformats.org/markup-compatibility/2006"
xmlns:navigation="clr-namespace:System.Windows.Controls; 
assembly=System.Windows.Controls.Navigation"
      xmlns:sdk="http://schemas.microsoft.com/winfx/2006/xaml/presentation/sdk"
      mc:Ignorable="d" Title="Login">

  <Grid x:Name="LayoutRoot" Background="White" Width="300" Height="110">
    <Grid.ColumnDefinitions>
      <ColumnDefinition Width="90" />
      <ColumnDefinition Width="*" />
    </Grid.ColumnDefinitions>
    <Grid.RowDefinitions>
      <RowDefinition Height="35" />
      <RowDefinition Height="35" />
      <RowDefinition Height="*" />
    </Grid.RowDefinitions>

    <sdk:Label Content="User Name:" Margin="5,0"
          HorizontalContentAlignment="Right" />
    <sdk:Label Content="Password:" Margin="5,0"
          HorizontalContentAlignment="Right" Grid.Row="1" />

    <TextBox Grid.Column="1" Name="UserNameTextBox" Height="25" />
    <TextBox Grid.Column="1" Grid.Row="1" Name="PasswordTextBox" Height="25" />

    <Button Content="Log In" Grid.Column="1" Grid.Row="2" Height="30" Width="90"
        HorizontalAlignment="Right" VerticalAlignment="Top"
        Name="LoginButton" Margin="0,5,0,0" />
  </Grid>
</navigation:Page>
This gives you the View layout shown in Figure 12-2.
For the purposes of this example, where we are primarily concerned with the interaction of the View and the ViewModel, we'll be disregarding the Model from the equation to keep things simple. However, this would (in practice) be a user object such as the User entity returned from RIA Services.
While implementing the previous two layers (containing the Views and Models) will be familiar to you, the ViewModel is a new piece that you will need to implement in the puzzle that is MVVM. As mentioned previously, ViewModels expose data to the View as properties and operations as methods.
Usually, your ViewModels will inherit from a base class (e.g., ViewModelBase) that provides common functionality required by all the ViewModels in your project. At a minimum, this base class will implement the INotifyPropertyChanged and the INotifyDataErrorInfo or IDataErrorInfo interfaces (as was discussed back in Chapter 7, "Building Data Entry Forms"). If you make use of a MVVM framework, this base class will generally be provided as a key part of the framework. The sample code accompanying this chapter contains a simple base ViewModel that you could alternatively use, as per Figure 12-3.
Note
You may choose to have your ViewModelBase class inherit from DependencyObject, so that you can implement dependency properties if you wish. However, dependency properties are rarely required in ViewModels, and thus inheriting from DependencyObject is not really necessary.
What other properties will be created on your ViewModel will depend on the strategy you have chosen to take for exposing data from Model objects to your View. Each property from the Model that should be available to the View might have a corresponding property on the ViewModel (which the View can bind to), or you may simply return the Model object directly to the View for its consumption. In this simple example, we don't need to consume data from Model objects in our View, but we'll look further at this scenario of consuming data using the MVVM design pattern later in this chapter when we discuss its use in conjunction with RIA Services.
The class diagram of the ViewModel that we will use for this example is shown in Figure 12-3.

Note
All properties exposed by the ViewModel should raise the PropertyChanged event (from implementing the INotifyPropertyChanged interface) when their value changes to notify the View so that it can update itself accordingly. You can apply the same data annotations as you use in your entity classes to provide validation for your ViewModel properties, but note that you will have to use the Validator class (as described in Chapter 7, "Building Data Entry Forms") to validate the properties in their setters.
We now have three independent layers, with a reasonably clean boundary defined between each, but we need to connect them together. As previously discussed, the View will know about the ViewModel, and the ViewModel will know about the Model. Essentially, this means that the View will have a reference to the ViewModel, and the ViewModel will have a reference to each of the Models it makes use of. Let's take a look at how each of these layers references each other (where permitted by the pattern).
There's nothing special about the way that the Model objects are connected to the ViewModel; often, the ViewModel will hand off the tasks to a service agent that handles retrieving/instantiating them and then returns them to the ViewModel. It can then retain a reference to these objects for future use.
However (assuming you are using RIA Services to obtain the data from the server), you will remember from Chapter 6, "Implementing Summary Lists," that there are two methods you can use to communicate with the domain services on the server. You can use the DomainDataSource control, or you can use the data context object directly. The DomainDataSource control is designed for use in Views, and thus would completely bypass the ViewModel if you were to use it, a violation of the MVVM design pattern. Hence, when implementing MVVM, you should communicate with a domain service from the ViewModel using its corresponding data context directly (which acts as a service agent).
The ViewModel is connected to the View by way of having an instance of it assigned to the DataContext property of the View, enabling properties of the controls in the View to bind directly to properties on the ViewModel.
However, how this ViewModel instance is instantiated can vary greatly and is one of the more hotly debated implementation details of the pattern. We'll discuss these methods further later in this chapter, but for now, we will be taking the approach in which the View is responsible for instantiating the ViewModel.
You generally instantiate the ViewModel either within the View's XAML or its code-behind. To be able to do so in XAML, the XAML parser requires the ViewModel to have a parameterless constructor. If this is not possible (e.g., the View needs to pass the ViewModel the ID of an entity to load), you will have to instantiate it from the code-behind instead.
For example, instantiating a ViewModel in XAML and assigning it to the DataContext property of the View can be done as follows:
<navigation:Page x:Class="Chapter12Sample.Views.LoginView"
      xmlns="http://schemas.microsoft.com/winfx/2006/xaml/presentation"
      xmlns:x="http://schemas.microsoft.com/winfx/2006/xaml"
      xmlns:d="http://schemas.microsoft.com/expression/blend/2008"
      xmlns:mc="http://schemas.openxmlformats.org/markup-compatibility/2006"
      xmlns:navigation="clr-namespace:System.Windows.Controls;
               assembly=System.Windows.Controls.Navigation"
      xmlns:vm="clr-namespace:Chapter12Sample.ViewModels"
      mc:Ignorable="d" Title="Login">
  <navigation:Page.DataContext>
    <vm:LoginViewModel />
  </navigation:Page.DataContext>

  <Grid x:Name="LayoutRoot">
    <!-- Removed for the purpose of brevity -->
  </Grid>
</navigation:Page>
Alternatively, to do the same in the constructor of the class in the code-behind would be implemented like so:
this.DataContext = new LoginViewModel();
How the View and the ViewModel interact is the most difficult piece to understand of the MVVM puzzle, and most of the perceived complexity of the MVVM design pattern stems from this aspect. These can be broken down in to three core interactions, which we will look at individually, as they are each handled and implemented differently:
By now, you should be fairly familiar with the power of Silverlight's data-binding capabilities and how to take advantage of them in your applications. The ViewModel maintains the View's state (which is exposed as properties), and bindings (defined within the View) provide a two-way connection bridging the boundary between the View and the ViewModel. This enables the View to consume the data from the ViewModel and update the ViewModel again with any changes made to the data in the View (via the two-way data binding connection demonstrated in Figure 12-4).

The Text property of both text boxes in our View will be bound to properties on the ViewModel (using two-way binding). The Text property of the UserNameTextBox text box in the View will be bound to the UserName property on the ViewModel, and the Text property of the PasswordTextBox text box in the View will be bound to the Password property on the ViewModel, like so:
<TextBox Grid.Column="1" Name="UserNameTextBox" Height="25"
     Text="{Binding UserName, Mode=TwoWay}" />
<TextBox Grid.Column="1" Grid.Row="1" Name="PasswordTextBox" Height="25"
     Text="{Binding Password, Mode=TwoWay}" />
Note
If you bind the control properties to the ViewModel's properties, the bindings also listen for the PropertyChanged and the ErrorsChanged events raised by the ViewModel (if the INotifyPropertyChanged and INotifyDataErrorInfo interfaces are implemented) indicating that a property's value has changed or that the collection of validation errors has changed. Hence, this is an additional, hidden interaction between the layers.
One issue that you may have is when you need to bind a control (such as a ListBox or a DataGrid) in the View to a collection exposed from the ViewModel (as a property) but don't have that collection available at the time that the ViewModel is instantiated. For example, say you need to bind a ListBox control in the View to a collection of objects exposed by the ViewModel. However, the ViewModel doesn't have that collection available when it is instantiated, as it has to go off and retrieve the collection from the server. How do you handle this problem?
The answer is to have the ViewModel expose the collection as a property of type ObservableCollection. When the ViewModel is instantiated, an empty ObservableCollection should be instantiated and made available to the View for the ListBox control to bind to. Then when the collection has been retrieved from the server, its contents should be added to the empty ObservableCollection collection (instead of replacing it), which (as we discussed back in Chapter 6, "Implementing Summary Lists") the View is listening to for changes and updates accordingly as the data becomes available.
Note
There will also often be an additional property exposed from the ViewModel named IsBusy. This is a Boolean value indicating whether or not the ViewModel is waiting for a response from the server (when retrieving or persisting Models (also known as entities), which a control such as the BusyIndicator control in your View can then bind to (as described in Chapter 6, "Implementing Summary Lists"). You can then bind this IsBusy property to the IsBusy property on a BusyIndicator control (using one-way binding), which will enable the View to display the indicator whilst the ViewModel is busy communicating with the server, informing the user that the application is waiting for data to be returned. However, to keep this scenario simple, we'll omit this property and binding for the time being.
Operations (containing logic and behavior) will be exposed from your ViewModel as public methods. For example, in our login screen scenario, we have a BeginLogin method in the ViewModel and a Login button in the View. The BeginLogin method needs to be invoked in response to the user clicking the Login button in the View (hence the method should be invoked in response to the Click event of the button being raised).
There are three ways you can invoke an operation on a ViewModel in Silverlight:
In the code-behind
Using an action or behavior that will be triggered by an event being raised on a control
Using commands (new to Silverlight 4)
Invoking the operation in the code-behind is the traditional solution to this problem, but it doesn't typically conform to the MVVM way of interacting between the View and the ViewModel. Therefore, we'll look instead at how to implement the other two methods now (as pictured in Figure 12-5).

We discussed triggers, actions, and behaviors back in Chapter 10, "Advanced XAML and Data Binding;" these aren't native functionality available in Silverlight but are available using the Expression Blend Interactivity library. You can leverage the CallMethodAction action from this library to call a method on the ViewModel, which provides a solution for invoking operations on the ViewModel from the View. In other words, when something happens in the user interface, call a method in the ViewModel.
For example, to call the Login method on the ViewModel in response to the Click event of the button, you would add the following XAML (in bold) to the button:
<Button Name="LoginButton" Content="Log In" Height="30" Width="90"><i:Interaction.Triggers><i:EventTrigger EventName="Click"><ei:CallMethodAction TargetObject="{Binding}"MethodName="Login"/></i:EventTrigger></i:Interaction.Triggers></Button>
Note
As was detailed back in Chapter 10, "Advanced XAML and Data Binding," although this seems like a lot of XAML, Expression Blend makes configuring actions and behaviors easy, assigning them to a control using a point-and-click approach and configuring them using the Properties window. Unfortunately, Visual Studio doesn't have the same ability built in.
Commands are a new topic that we haven't yet discussed thus far in this book. In essence, commands provide a means for encapsulating an operation and its parameters away from the ViewModel. The logic for the operation is moved outside the ViewModel and into its own class (but acting upon the ViewModel), decoupling the logic from the ViewModel state and enabling the logic to be reused. For example, you may have a login operation that can be invoked by two different ViewModels. Commands allow you to encapsulate this login logic and reuse it.
You may also like to think of commands as providing a means to bind to operations (as opposed to data). The command is exposed from the ViewModel as a property, enabling controls to bind to it and to invoke it in response to a given event.
Note
Commands aren't strictly a part of the MVVM design pattern (being a design pattern of their own) but are commonly used to support the MVVM design pattern.
For example, our Login method could be encapsulated in a command class and invoked when the Login button is clicked. To create a command class, it must implement the ICommand interface, as shown in Figure 12-6.

The CanExecute property specifies whether or not the command can be executed. When the command is bound to a button, the button will be enabled or disabled accordingly. In order for the button's enabled status to update when the property updates, the CanExecuteChanged event on the command should be raised. Any logic to be executed when the command is executed will go in the Execute method.
Note
It's a common problem to forget to raise the CanExecuteChanged event after changing the value of the CanExecute property. If you find that your button is disabled despite having updated the value of the CanExecute property, this is most likely the source of the issue.
To create a simple command, create a new class named LoginCommand and implement the ICommand interface.
public class LoginCommand : ICommand
{
  public bool CanExecute(object parameter)
  {
    return true; // Alternatively, provide some logic here
  }

  public event EventHandler CanExecuteChanged;

  public void Execute(object parameter)
  {
    // Your command's logic goes here
  }
}
The next step is to expose this command from your ViewModel as a property (to make it available to the View). To do so, add the following property to your ViewModel:
private ICommand _loginCommand = new LoginCommand(); // Member variable

public ICommand Login
{
  get { return _loginCommand; }
}
Note
Often when implementing a command in this manner, you will pass an instance of your ViewModel or an object to its constructor for the command to perform the operation upon. Alternatively, you might pass the ViewModel or the object to the command as a parameter, as will be discussed shortly.
Although the ICommand interface was available in Silverlight 3, there was no support provided for invoking commands by any controls until Silverlight 4 (i.e., there were no Command and CommandParameter properties on any controls). Therefore, to invoke a command in response to an event raised by a control in Silverlight 3, you had to use the InvokeCommandAction action from the Expression Blend Interactivity library.
Silverlight 4 has added limited support for invoking commands, but only those implemented on the ButtonBase class, which can now invoke a given command when its Click event is raised. ButtonBase isn't designed to be used directly, but it acts as the base class for the Button, HyperlinkButton, ToggleButton, and RepeatButton controls, all of which inherit this behavior.
To invoke a command in response to a button click, you bind the control's Command (and optionally CommandParameter) properties to the property on the ViewModel that exposes the command. In our login screen scenario, this means we can now bind the Command property of the Login button in the View to the Login property on the ViewModel, which will invoke the command when the button is clicked:
<Button Command="{Binding Login}" Content="Log In" />Note
Unfortunately no other controls have support for commands in Silverlight, but you can still use the InvokeCommandAction action to invoke a command in response to any event they raise (such as in response to an item in a ListBox control being selected).
The DelegateCommand
If you are more interested in the ability to bind to operations than moving the logic for an operation outside the ViewModel, you may wish to consider implementing a DelegateCommand. This command is designed to enable you to keep your operation methods within your ViewModel but still be able to expose them as command properties and bind to them without needing to create a class for each command. This results in making the implementation of commands much simpler.
An example of implementing a command on you ViewModel as a DelegateCommand (which is being used to call a method named BeginLogin on the ViewModel) follows:
// Member variable
private ICommand _loginCommand = DelegateCommand(BeginLogin, CanLogin);

public ICommand Login
{
  get { return _loginCommand; }
}

public void BeginLogin(object param)
{
  // Operation logic goes here
}

private bool CanLogin(object param)
{
  if (param != null && param.GetType() == typeof(bool))
    return (bool)param;
  else
    return true;
}
As you can see, rather than creating a separate command, we are simply instantiating an instance of the DelegateCommand class and passing it the method on the ViewModel to call when the command is invoked and a method with the logic specifying whether the command is allowed to be invoked.
Unlike WPF, Silverlight 4 doesn't have any ICommand implementations (like the DelegateCommand command) built in, but you can implement your own. You can find the code for an implementation of the DelegateCommand command in the sample code accompanying this chapter and use that in your project. You will also find an implementation of the DelegateCommand command in Prism (see the "Frameworks" section later in this chapter).
Note
Another popular alternative to the DelegateCommand is the RelayCommand. An implementation of the RelayCommand command can be obtained from the MVVM Light Toolkit (one of the popular MVVM frameworks for Silverlight, which you will find listed in the "Frameworks section" later in this chapter).
Passing a Parameter to a Command
You can pass a parameter through to the Execute method of the command if you wish. This will be assigned to the CommandParameter property of the button, and its value will be passed into both the CanExecute method and the Execute method when the button is clicked.
For example, you can bind this property to a property on another control (such as the SelectedItem property on a ListBox control), and the value of that control's property will be passed to the Execute method of the command as its parameter. Alternatively, you can bind it to an object exposed by your ViewModel (or the ViewModel itself) for it to perform the operation on.
The following example demonstrates passing the ViewModel to the command as a parameter (assuming that the DataContext property of the Button control has been assigned the ViewModel instance):
<Button Command="{Binding Login}" CommandParameter="{Binding}" Content="Log In" />Whether you use actions/behaviors or commands to invoke methods on a ViewModel really comes down to personal taste. Commands enable you to encapsulate logic and decouple it from your ViewModel so that it can be reused, but they do require additional code to implement. The CallMethodAction action, however, is much easier to implement but requires a number of additional lines of XAML to be added to your View. That said, this is not generally an issue if you use Expression Blend to wire your View and ViewModel up. Therefore, the CallMethodAction action is often the preferred means of invoking a method on a ViewModel.
Looking at the other side of the coin now, how does the ViewModel notify the View that something has happened (to which it may wish to respond)? Exposing properties that elements in the View can bind to will suit some scenarios, but what if you need the View to respond to a notification from the ViewModel (such as when it raises an event)?
This is particularly important in Silverlight, where all calls to the server are asynchronous. In our login screen scenario, we ask the ViewModel to authenticate the user (by calling a method or invoking a command on the ViewModel) but don't know the result when the method returns. Instead, an event handler is called on the ViewModel when the response from the server has been received, and we then need the View to respond accordingly. If the user was successfully authenticated, the View should navigate away from the login screen to the next View (such as a dashboard screen). If the authentication failed, the screen should display a message to the user notifying them of the failure.
We can implement this behavior by raising events (one for when the authentication is successful and another for when it fails) from our ViewModel and implement triggers in the View that listen for these events and respond accordingly (as per Figure 12-7).

In our example ViewModel, we have defined three events:
LoginErrorLoginFailedLoginSuccessful
Let's look at implementing the LoginSuccessful event. In your ViewModel, you can raise this event in the standard way:
if (LoginSuccessful != null)
  LoginSuccessful(this, new EventArgs());
Now, in your View, you can use the EventTrigger trigger and listen for the LoginSuccessful event to be raised on the ViewModel. It can then perform an action in response (which for this scenario will require a custom action named NavigateAction to navigate to a given View), as demonstrated here:
<i:Interaction.Triggers>
  <i:EventTrigger SourceObject="{Binding Mode=OneWay}"
          EventName="LoginSuccessful">
    <mvvm:NavigateAction Url="/Dashboard" />
  </i:EventTrigger>
</i:Interaction.Triggers>Now that we've discussed the core concepts of the MVVM pattern, let's put them together in a single diagram (shown in Figure 12-8) so that you can get a complete overall perspective on the pattern.

As has been indicated throughout this chapter, there are still many implementation details for the pattern being heavily debated and yet to be standardized. It's worth pointing out these issues and their corresponding pros and cons. You will face many decisions in how you implement this pattern in regard to these issues, but with no clear conclusion on them currently, the decision will really come down to what suits your project and development process best.
As discussed earlier in this chapter, some developers like to keep a clean separation between the View and the Model layers, wrapping the Model objects in ViewModels before exposing them to the View. From a pure design perspective, ideally the View should know nothing about the Model objects and interact only with the ViewModel objects (keeping the View and the Model layers completely decoupled).
However, from a practical perspective, wrapping your Model objects in ViewModels adds additional overhead, increases the amount of code and the complexity, and reduces maintainability. Ultimately, it's generally best (depending on the scenario) to simply expose your Model objects (or collections of Model objects) directly to the View via a property on the ViewModel.
If you have chosen to not expose your Model objects directly to the View (exposing the data via a ViewModel instead), you will need to decide between these options:
You will simply create property setters and getters in your ViewModel that expose the corresponding property values from the Model (with the ViewModel maintaining the original Model objects).
Alternatively, you should copy all the data from a Model object into the ViewModel and rehydrate (or update) the Model object with the data from the ViewModel when you want to persist it back to the server/store again. This method adds additional overhead, which you may not wish to deal with.
This question has two parts and can be asked in regard to both the design and to the instantiation of the View and ViewModel. Whether you design the View or the ViewModel first will really depend on your development practices.
However, how the View and the ViewModel are instantiated is a more important question. We've demonstrated throughout this chapter that the View creates the ViewModel, and hence, the View maintains ownership over the ViewModel, with the ViewModel simply serving the View's needs (but without actually knowing anything about it).
Some schools of thought prefer that the ViewModel should come first and handle instantiating the Views (and assign a reference to itself to the View's DataContext property). This is may suit scenarios where you have multiple Views being served by a single ViewModel.
Alternatively, the View may handle instantiating the ViewModel or it may pass this job off to a ViewModel locator, getting it to return/instantiate the correct ViewModel and pass it back for the View to bind to. This ViewModel locator pattern is used by the MVVM Light Toolkit.
A number of frameworks are available that can provide additional support for structuring your application using the MVVM design pattern (as discussed later in this chapter). However, some developers believe that you are better off rolling your own and that it's not necessary or worthwhile to implement a major framework. To properly grasp the principles of MVVM and identify if and where a framework can help you (without becoming too overwhelmed by all their features), it's probably best that you start off (in a small test project) without using a framework but investigate the available options when implementing a major project. Many of the popular frameworks go beyond simply supporting the MVVM design pattern and add a lot of helpful infrastructure to your project, so they are well worth looking into.
Whether you implement dependency properties or standard properties in your ViewModel ultimately comes down to personal preference. Because you are binding to the properties (which act as the source of the data), they don't have a need to be dependency properties (as opposed to developing custom controls where their properties can be bound to an object, hence acting as the consumer of the data).
Therefore, as a general rule, standard properties that raise the PropertyChanged event (from the INotifyPropertyChanged interface) are the best choice for implementing properties in ViewModels.
In a typical business application, the ViewModels in your project will commonly be required to interact with the server via RIA Services. In this scenario, your entities exposed from the server will act as your Model objects in the MVVM pattern. A ViewModel will generally request data from the server, expose it to the View (where it can be Viewed and updated) and persist any changes to the data back to the server again.
Let's look at a fairly common scenario of requesting the details of a product from the server, enabling it to be updated by the user, and persisting these changes back to the server again—all using the MVVM design pattern. This is a scenario we looked at back in Chapter 7, "Building Data Entry Forms," but we only looked at using the DomainDataSource control that enabled the View to communicate directly with the server and using a data context in the code-behind. We'll now look at the structurally more robust and testable means of handling the server communication in a ViewModel rather than in the View, using the MVVM design pattern.
As previously mentioned, the Model objects will be the entities exposed from the server via RIA Services. For this example, we'll use a simple Product entity containing three fields, as shown in Figure 12-9.

This entity will be exposed directly to the View, which will bind to it.
Although you can technically instantiate a DomainDataSource control in your ViewModel and interact with the server via it, communicating directly with the domain context object is the usual approach. You already know the techniques of how to do this, as they were discussed in detail in Chapter 6, "Implementing Summary Lists," and Chapter 7, "Building Data Entry Forms."
In summary, you create an instance of a domain context, which you (generally) maintain for the lifetime of the ViewModel.
For this example, we'll create a ProductDetailsViewModel class that inherits from our ViewModelBase class and handles requesting the data from the server, exposing it to the View (where it can be viewed and updated) and persisting any changes to the data back to the server again. The class diagram for our ViewModel is shown in Figure 12-10.

The most important aspects of this ViewModel follow:
The
Productproperty exposes aProductentity to the View.The
LoadProductcommand will call theBeginLoadProductmethod, which will request the product data from the server.The
BeginSaveProductmethod will persist any changes to theProductentity back to the server.
Note
You may be wondering why we are using a LoadProduct command to invoke the BeginLoadProduct method from the View but not providing a command to save the product (instead requiring the View to call the BeginSaveProduct method directly). This is primarily done to enable the demonstration of both techniques of calling methods on a ViewModel. Having a SaveProduct command is perfectly acceptable, rather than calling the BeginSaveProduct method directly. However, the BeginLoadProduct requires a parameter to be passed to it (the ID of the product to load), which using a command makes easier (the CallMethodAction doesn't have support for passing the method a parameter, whereas a parameter can be passed to a command).
The complete code for this ViewModel class follows:
using System;
using System.Linq;
using System.ServiceModel.DomainServices.Client;
using System.Windows.Input;
using Chapter12Sample.Web;
using Chapter12Sample.Web.Services;
using SimpleMVVM;

namespace Chapter12Sample.ViewModels
{
  public class ProductDetailsViewModel : ViewModelBase
  {
    #region Member Variables
    private ProductContext _context = new ProductContext();
    private Product _product = null;
    #endregion

    #region Public Properties
    public Product Product
    {
      get { return _product; }
      set
      {
        _product = value;
        OnPropertyChanged("Product");
      }
    }
    #endregion

    #region Commands
    public ICommand LoadProduct
    {
      get
      {
        return new DelegateCommand(BeginLoadProduct, (o) => true);
      }
    }
    #endregion
#region Server Calls (and Completed event handlers)
public void BeginLoadProduct(object param)
{
int productID = Convert.ToInt32(param);
var op = _context.Load(_context.GetProductQuery(productID), true);
op.Completed += LoadProduct_Completed;
}
private void LoadProduct_Completed(object sender, EventArgs e)
{
LoadOperation op = sender as LoadOperation;
if (!op.HasError && op.Entities.Count() != 0)
{
this.Product = op.Entities.First() as Product;
}
else
{
// Handle this error appropriately - omitted for brevity
this.Product = null;
}
}
public void BeginSaveProduct()
{
if (_product != null)
{
var op = _context.SubmitChanges();
op.Completed += new EventHandler(SaveProduct_Completed);
}
}
private void SaveProduct_Completed(object sender, EventArgs e)
{
SubmitOperation op = sender as SubmitOperation;
if (!op.HasError)
{
// You may wish to notify the View that the save is complete
// by raising an event here, and responding to it in the View
}
else
{
// Handle this error appropriately - omitted for brevity
}
}
#endregion
}
}Note
This ViewModel has been stripped to its core functionality (excluding error handling, maintaining an IsBusy property, and so on), so that you can focus on the most important aspects of the implementation. In a real project, however, this additional functionality would be expected.
The final step is to create our View and wire it up to the ViewModel. Figure 12-11 shows the final View in action.

This View loads the product with the ID specified in the Product ID text box when the Load button is clicked. The details will be displayed in the Product Name/Number text boxes (which are bound to the Product entity returned from the server), which the user can then edit. Clicking the Save button will save these changes back to the server.
The following XAML provides the complete XAML for this View and is wired up to our ViewModel:
<navigation:Page x:Class="Chapter12Sample.Views.ProductDetailsView"
    xmlns="http://schemas.microsoft.com/winfx/2006/xaml/presentation"
    xmlns:x="http://schemas.microsoft.com/winfx/2006/xaml"
    xmlns:d="http://schemas.microsoft.com/expression/blend/2008"
    xmlns:mc="http://schemas.openxmlformats.org/markup-compatibility/2006"
    xmlns:navigation="clr-namespace:System.Windows.Controls;
             assembly=System.Windows.Controls.Navigation"
    xmlns:vm="clr-namespace:Chapter12Sample.ViewModels"
    xmlns:i="http://schemas.microsoft.com/expression/2010/interactivity"
    xmlns:ei="http://schemas.microsoft.com/expression/2010/interactions"
    xmlns:sdk="http://schemas.microsoft.com/winfx/2006/xaml/presentation/sdk"
    mc:Ignorable="d" d:DesignWidth="640" d:DesignHeight="480"
    Title="Product Details">
  <navigation:Page.DataContext>
    <vm:ProductDetailsViewModel />
  </navigation:Page.DataContext>

  <navigation:Page.Resources>
    <Style TargetType="TextBox">
      <Setter Property="Margin" Value="2" />
    </Style>
</navigation:Page.Resources>
<Grid x:Name="LayoutRoot" Margin="30">
<Grid.ColumnDefinitions>
<ColumnDefinition Width="110" />
<ColumnDefinition Width="140" />
<ColumnDefinition Width="*" />
</Grid.ColumnDefinitions>
<Grid.RowDefinitions>
<RowDefinition Height="29" />
<RowDefinition Height="5" />
<RowDefinition Height="29" />
<RowDefinition Height="29" />
<RowDefinition Height="*" />
</Grid.RowDefinitions>
<sdk:Label Content="Product ID:" />
<TextBox Name="ProductIDTextBox" Grid.Column="1" Text="1" />
<Button Name="LoadButton" Content="Load" Height="23"
HorizontalAlignment="Left" Width="75"
Command="{Binding LoadProduct}"
CommandParameter="{Binding ElementName=ProductIDTextBox, Path=Text}"
Grid.Column="2" Margin="2" />
<Line Grid.Row="1" Grid.ColumnSpan="3"
X2="330" Y1="2.5" Y2="2.5" Stroke="Black" />
<sdk:Label Content="Product Name:" Grid.Row="2" />
<sdk:Label Content="Product Number:" Grid.Row="3" />
<TextBox Text="{Binding Path=Product.Name, Mode=TwoWay}"
Grid.Row="2" Grid.Column="1" />
<TextBox Text="{Binding Path=Product.ProductNumber, Mode=TwoWay}"
Grid.Row="3" Grid.Column="1" />
<Button Name="SaveButton" Content="Save" Height="23" Width="75"
HorizontalAlignment="Right" VerticalAlignment="Top"
Grid.Row="4" Grid.Column="1" Margin="2">
<i:Interaction.Triggers>
<i:EventTrigger EventName="Click">
<ei:CallMethodAction TargetObject="{Binding Mode=OneWay}"
MethodName="BeginSaveProduct"/>
</i:EventTrigger>
</i:Interaction.Triggers>
</Button>
</Grid>
</navigation:Page>Note
In a real project, you would also display a busy indicator for when the application is communicating with the server, display any errors, and so on. However, for the purposes of this example, we will keep the XAML as simple as possible.
As you can see, we have a very elegant and testable result from using the MVVM design pattern, without actually requiring any code-behind.
Although the core principles of the MVVM design pattern are reasonably straightforward (once you get your head around the concepts), in practice, maintaining a clean separation between the View and its corresponding ViewModel can be a difficult task at times. However, a number of frameworks have developed solutions for the most common hurdles that you will face (displaying dialogs, navigation, View and ViewModel composition, etc.) and are well worth looking into. Here are some of the most popular frameworks that provide support for the MVVM design pattern (and often a host of additional other features) that you may wish to consider:
MVVM Light Toolkit:
http://mvvmlight.codeplex.comPrism:
http://compositewpf.codeplex.comCaliburn:
http://caliburn.codeplex.comSilverlight.FX:
http://projects.nikhilk.net/SilverlightFXnRoute:
http://nroute.codeplex.com
The MVVM design pattern is one that all Silverlight developers should learn and understand, even if they don't use it in their projects. There are competing design patterns that you may wish to look into (such as Model-View-Presenter, also known as MVP), but MVVM does lend itself particularly well to applications developed in Silverlight.
However, this a pattern is still in a state of flux, with no fixed, agreed upon, or uniform standard. Therefore, don't become too concerned with whether you are doing it the right way—there isn't one. Rather than jumping in at the deep end, try to ease into MVVM instead, preferably on a small project to start with.
You will get overwhelmed if you try to read everything written about the pattern and understand it completely before actually putting the pattern into practice. You can easily fall into analysis paralysis by doing so; don't overthink it. The best approach is to take what's written here, start implementing the core concepts in a small test project, and expand on them as the project grows. It's often best to do this before jumping headfirst into using a complex framework.
Don't be too pedantic and go overboard in trying to follow the pattern in its purest form, because often, this is an unachievable goal, and attempts to do so will potentially result in messier and more complicated code than you would have when not following the pattern.
Do what's right for your project at the time, and don't get caught up in the zero code-behind misconceptions. If a task takes more work than it should, requires messy workarounds, or requires you to fight the pattern to implement simple application requirements, you're taking the wrong approach. You will hit walls along the way, but do persist—it's worth the effort.