
When you think of a robot, you would probably think of a human-sized one with arms, a lot of sensors, and a wide field of locomotion systems.
Now that we know how to write small programs in ROS and manage them, we are going to work with sensors and actuators—things that can interact with the real world.
You can find a wide list of devices supported by ROS at http://www.ros.org/wiki/Sensors.
In this chapter, we will deal with the following topics:
- Cheap and common sensors for your projects
- 3D sensors, such as Kinect and laser rangefinders
- Using Arduino to connect more sensors and actuators
We know that it is impossible to explain all the types of sensors in this chapter. For this reason, we have selected some of the most commonly used ones and those that are affordable to most users—regular, sporadic, or amateur.
Sensors and actuators can be organized into different categories: rangefinders, cameras, pose estimation devices, and so on. They will help you find what you are looking for more quickly.
I am sure that, at one point or another, you have used a joystick or a gamepad of a video console.
A joystick is nothing more than a series of buttons and potentiometers. With this device, you can perform or control a wide range of actions.
In ROS, a joystick is used to telecontrol a robot to change its velocity or direction.
Before we start, we are going to install some packages. To install these packages in Ubuntu, execute the following command:
$ sudo apt-get install ros-hydro-joystick-drivers
$ rosstack profile & rospack profile
Tip
Downloading the example code
You can download the example code files from your account at http://www.packtpub.com for all the Packt Publishing books you have purchased. If you purchased this book elsewhere, you can visit http://www.packtpub.com/support and register to have the files e-mailed directly to you. You can also download these code files from https://github.com/AaronMR/ROS_Book_Hydro.
In these packages, you will find code to learn how to use the joystick and a guide to create our packages.
First of all, connect your joystick to your computer. Now, we are going to check whether the joystick is recognized, using the following command:
$ ls /dev/input/
We will see the following output:
by-id    event0  event2  event4  event6  event8  js0   mouse0
by-path  event1  event3  event5  event7  event9  mice
The port created is js0; with the jstest command, we can check whether it is working, by using the following command:
$ sudo jstest /dev/input/js0

Axes:  0:  0  1:  0  2:  0 Buttons:  0:off  1:off  2:off  3:off  4:off  5:off  6:off  7:off  8:off  9:off  10:off
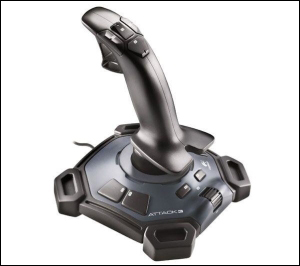
Our joystick, Logitech Attack 3, has 3 axes and 11 buttons, and if we move the joystick, the values change.
Once you have checked the joystick, we are going to test it in ROS. To do this, you can use the joy and joy_node packages:
$ rosrun joy joy_node
If everything is OK, you will see the following output:
[ INFO] [1357571588.441808789]: Opened joystick: /dev/input/js0. deadzone_: 0.050000.
With the joy_node package active, we are going to see the messages sent by this node. This will help us understand how it sends information about axes and buttons.
To see the messages sent by the node, we can use this command:
$ rostopic echo /joy
And then, we can see each message sent:
---
header:
seq: 157
stamp:
  secs: 1357571648
  nsecs: 430257462
  frame_id: ''
axes: [-0.0, -0.0, 0.0]
buttons: [0, 0, 0, 0, 0, 0, 0, 0, 0, 0, 0]
---
You will see two main vectors: one for axes and the other for buttons. Obviously, these vectors are used to publish the states of the buttons and axes of the real hardware.
If you want to know the message type, type the following command line in a shell:
$ rostopic type /joy
You will then obtain the type used by the message; in this case, it is sensor_msgs/Joy.
Now, to see the fields used in the message, use the following command line:
$ rosmsg show sensor_msgs/Joy
You will see the following output:
std_msgs/Header header
  uint32 seq
  time stamp
  string frame_id
float32[] axes
int32[] buttons
This is the message structure that you must use if you want to use a joystick with your developments. In the next section, you will learn how to write a node that subscribes to the joystick topic and how to generate moving commands to move turtlesim.
Now, we are going to create a node that gets data from joy_node and Published topics to control turtlesim.
First, it is necessary to know the name of the topic where we will publish the messages. So, we are going to start turtlesim and do some investigation:
$ rosrun turtlesim turtlesim_node
To see the topic list, use the following command line:
$ rostopic list
You will then see the following output, where turtle1/command_velocity is the topic we will use:
/rosout
/rosout_agg
/turtle1/cmd_vel
/turtle1/color_sensor
/turtle1/pose
Now, we need to know the topic type. Use the following command line to see it:
$ rostopic type /turtle1/cmd_vel
You will see this output:
geometry_msgs/Twist
To know the contents of this message, execute the following command line:
$ rosmsg show geometry_msgs/Twist
You will then see the two fields that are used to send the velocity:
geometry_msgs/Vector3 linear
  float64 x

 float64 y

  float64 z

geometry_msgs/Vector3 angular

  float64 x

  float64 y

  float64 z
OK, now that we have localized the topic and the structure to use, it is time to create a program to generate velocity commands using data from the joystick.
Create a new file, c4_example.1.cpp, in the chapter4_tutorials/src directory and type in the following code snippet:
#include<ros/ros.h>
#include<geometry_msgs/Twist.h>
#include<sensor_msgs/Joy.h>
#include<iostream>
using namespace std;

class TeleopJoy{
public:
  TeleopJoy();
private:
  void callBack(const sensor_msgs::Joy::ConstPtr& joy);
  ros::NodeHandle n;
  ros::Publisher pub;
 ros::Subscriber sub;
  int i_velLinear, i_velAngular;
};


TeleopJoy::TeleopJoy()
{
  n.param("axis_linear",i_velLinear,i_velLinear);
  n.param("axis_angular",i_velAngular,i_velAngular);
  pub = n.advertise<geometry_msgs::Twist>("/turtle1/cmd_vel",1);
  sub = n.subscribe<sensor_msgs::Joy>("joy", 10, &TeleopJoy::callBack, this);
}


void TeleopJoy::callBack(const sensor_msgs::Joy::ConstPtr& joy)
{
  geometry_msgs::Twist vel;
  vel.angular.z = joy->axes[i_velAngular];
  vel.linear.x = joy->axes[i_velLinear];
  pub.publish(vel);
}

int main(int argc, char** argv)
{
  ros::init(argc, argv, "teleopJoy");
  TeleopJoy teleop_turtle;
  ros::spin();
}
Now, we are going to break the code to explain how it works. In the main function, we create an instance of the TeleopJoy class:
int main(int argc, char** argv)
{
  ...
  TeleopJoy teleop_turtle;
 ...
In the constructor, four variables are initialized. The first two variables are filled using data from Parameter Server. These variables are joystick axes. The next two variables are the advertiser and the subscriber. The advertiser will publish a topic with the geometry_msgs::Twist type. The subscriber will get data from the topic with the name Joy. The node that is handling the joystick sends this topic:
TeleopJoy::TeleopJoy()
{
  n.param("axis_linear",i_velLinear,i_velLinear);
  n.param("axis_angular",i_velAngular,i_velAngular);
  pub = n.advertise<geometry_msgs::Twist>("/turtle1/cmd_vel",1);
  sub = n.subscribe<sensor_msgs::Joy>("joy", 10, &TeleopJoy::callBack, this);
}
Each time the node receives a message, the callBack function is called. We create a new variable with the name vel, which will be used to publish data. The values of the axes of the joystick are assigned to the vel variable. In this part, you can create a process with the data received before publishing it:
void TeleopJoy::callBack(const sensor_msgs::Joy::ConstPtr& joy)
{
  geometry_msgs::Twist vel;
  vel.angular.z = joy->axes[i_velAngular];
  vel.linear.x = joy->axes[i_velLinear];
  pub.publish(vel);
}
Finally, the topic is published using pub.publish(vel).
We are going to create a launch file for this example. In the launch file, we declare data for Parameter Server and launch the joy and example1 nodes.
Copy the following code step to a new file, example1.launch, in the chapter4_tutorials/src directory:
<launch>

<node pkg="turtlesim" type="turtlesim_node" name="sim"/>
<node pkg="chapter4_tutorials" type="c4_example1" name="c4_example1" />
<param name="axis_linear" value="1" type="int" />
<param name="axis_angular" value="0" type="int" />

<node respawn="true" pkg="joy"type="joy" name="teleopJoy">
  <param name="dev" type="string" value="/dev/input/js0" />
  <param name="deadzone" value="0.12" />
</node>

</launch>
You will notice that, in the launch file, there are three different nodes: c4_example1, sim, and joy.
There are four parameters in the launch file; these parameters will add data to Parameter Server, and it will be used by our node. The axis_linear and axis_angular parameters will be used to configure the axes of the joystick. If you want to change the axes configuration, you only need to change the value and put the number of the axes you want to use. The dev and deadzone parameters will be used to configure the port where the joystick is connected, and the dead zone is the region of movement that is not recognized by the device.
To run the launch file, use the following command line:
$ roslaunch chapter4_tutorials example1.launch
You can see whether everything is fine by checking the running nodes and the topic list by using the rosnode list and the rostopic list. If you want to see it graphically, use rqt_graph.