
Now we are going to see how to perform visual odometry using RGBD cameras using fovis.
Since fovis is not provided as a Debian package, you must build it in your catkin workspace (use the same workspace you use for chapter5_tutorials). Therefore, proceed with the following commands within any workspace:
$ cd src
$ git clone https://github.com/srv/libfovis.git
$ git clone https://github.com/srv/fovis.git
$ cd ..
$ catkin_make
This clones two repositories that allow us to have the fovis software integrated in ROS. Note that the original code is hosted on this Google Code Project at https://code.google.com/p/fovis/.
Once this has been built successfully, set up the environment for this workspace before using the software:
$ source devel/setup.bash
At this point, we are going to run fovis for the Kinect RGBD camera. This means that we are going to have 3D information to compute the visual odometry, so better results are expected than when we use stereo vision or a monocular camera (as with viso2).
We simply have to launch the Kinect RGBD camera driver and fovis. For convenience, we provide a single launch file that runs both:
$ roslaunch chapter5_tutorials fovis_demo.launch
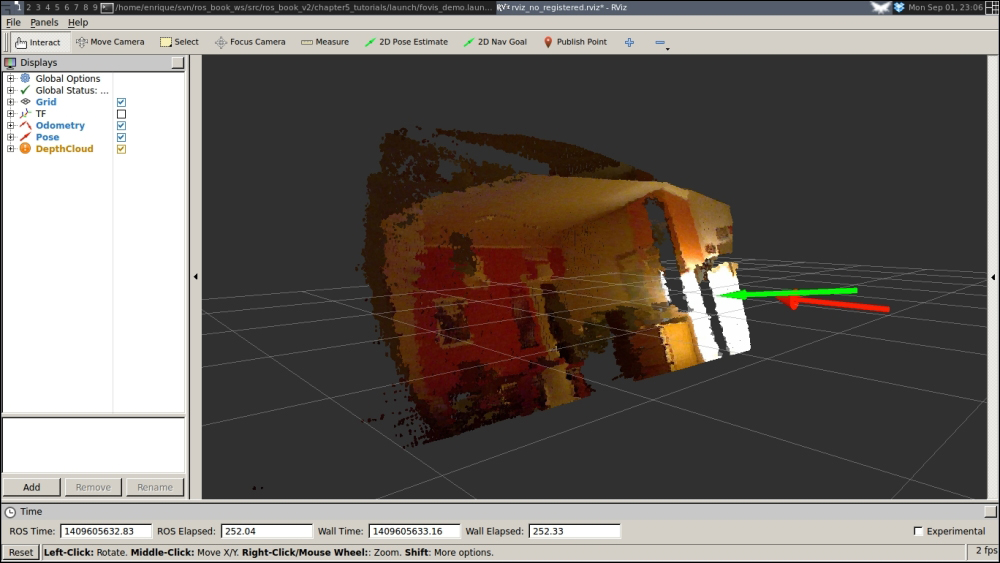
Move the camera around and you should be able to have a good odometry estimation of the trajectory followed by the camera. The next figure shows this on rviz in the initial state before moving the camera. You can see the RGBD point cloud and two arrows showing the odometry and the current position of the camera in the following screenshot:

After moving the camera, you should see the arrows showing the camera pose (as shown in the following screenshot). Take into account that you have to move it quite slowly since the software needs time to compute the odometry depending on the computer you are using:
By default, the fovis_demo.launch file uses the no_registered depth information. This means that the depth image is not registered or transformed into the RGB camera frame. Although it is better to have it registered, this drops the frame rate dramatically from the raw throughput of 30 Hz provided by the Kinect sensor to something around 2.5 Hz depending on your computing resources.
Anyway, you can use throttle on the RGB camera frames to still use the registered version. This is automatically done by the launch file provided. You can select between the following modes: no_registered (default), hw_registered, and sw_registered. Note that, in principle, the Kinect sensor does not support the hardware registration mode (hw_registered), which is expected to be the fastest one. Therefore, you can try the software registration mode (sw_registered), for which we throttle the RGB camera messages to 2.5 Hz; you can change this in fovis_sw_registered.launch, as shown here:
$ roslaunch chapter5_tutorials fovis_demo.launch mode:=sw_registered