
So far, we have implemented capabilities related to basic features of the application. From now on, we will start implementing the application's core features, starting with static data management. What exactly is this? Every application has information that is not directly related to the core business, but this information is used by the core business logic somehow.
There are two types of data in every application: static data and dynamic data. For example, the types of categories, languages, cities, and countries can exist independently of the core business and can be used by the core business information as well; this is what we call static data because it does not change very often. And there is the dynamic data, which is the information that changes in the application, what we call core business data. Clients, orders, and sales would be examples of dynamic or core business data.
We can treat this static information as though they are independent MySQL tables (since we are using MySQL as the database server), and we can perform all the actions we can do on a MySQL table. So in this chapter, we will cover:
- Creating a new system module called static data
- Listing all information as a MySQL table
- Creating new records on the tables
- Live search on the table
- Filtering information
- Editing and deleting a record
- Creating an abstract component for reuse in all tables
If we open and analyze the Entity Relationship (ER) diagram that comes with the Sakila installation, we will notice the following tables:

Note
As a reminder, the Sakila database can be downloaded at http://dev.mysql.com/doc/index-other.html, and its documentation with installation instructions can be found at http://dev.mysql.com/doc/sakila/en/.
These tables can exist independently of the other tables, and we are going to work with them in this chapter.
When we open SQL editor in MySQL Workbench (version 6 ) (http://dev.mysql.com/downloads/workbench/), we can select a table, right-click on it, and select Select Rows – Limit 1000. When we choose this option, a new tab will be opened, and it looks as follows:
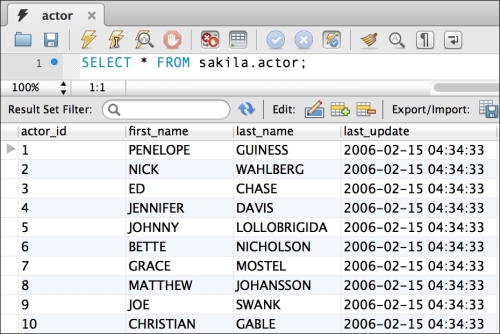
The table shown previously is the actor table. The idea is to implement screens that look similar to the preceding screenshot for each of the tables that we selected: Actors, Categories, Languages, Cities, and Countries as displayed in the following screenshot (which is the final result of the code that we will be implementing in this chapter):
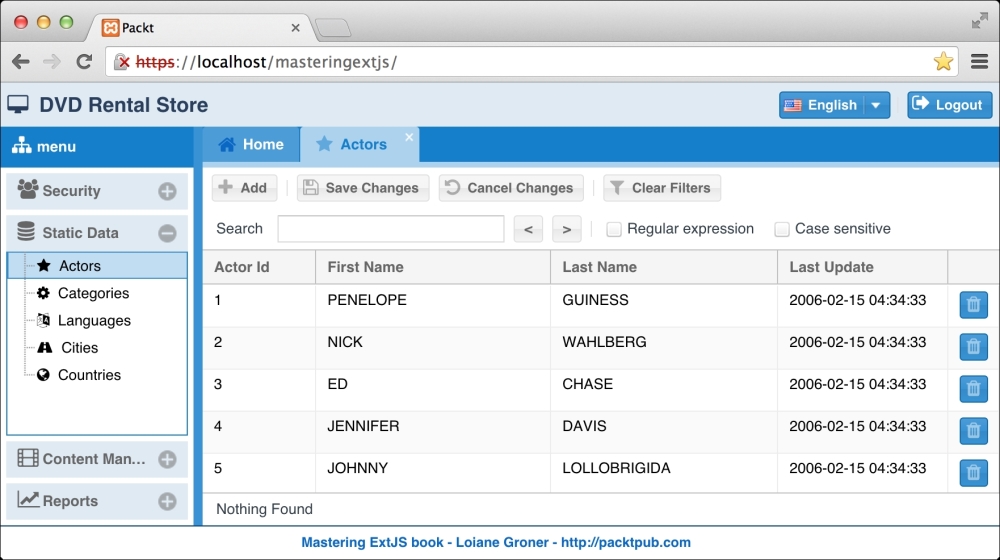
Our goal in this chapter is to minimize the amount of code to implement these five screens. This means we want to create the most generic code as possible and will facilitate future code fixes and enhancements and also make it easier to create new screens with these same features if needed.
So let's go ahead and start the development.