
In This Chapter
3.6 Integration into Logic – Audio Preferences
3.9 Distributed Audio Processing and External DSP Solutions
3.11 Digidesign Hardware Integration with Logic
Knowledgebases
Getting Connected
Although it’s easy enough to produce music solely using your computer, it’s inevitable that you’ll want to add some additional equipment to enhance your workflow: whether it’s a USB controller keyboard to control one of Logic’s many virtual instruments, an additional hard drive for storing samples, or an audio interface so that you can record electric guitar. Understanding the various connections in and out of your computer is therefore vital to getting the best from Logic and will allow you to expand your setup from a basic home computer to a full-sized professional studio!
In this chapter, we’re going to take a closer look at the key components you might want to add to your existing Logic and Mac setup – understanding the pros and cons behind their selection, how they connect to your computer, and how these devices integrate into the Logic working environment. Of course, it’s important to remember that no two setups will be exactly the same, so you should select the equipment that is most appropriate to your budget and the type of music you want to produce.
Whilst the Mac’s onboard audio facilities are respectable, they can vary considerably from model to model. Most Mac laptops come with a microphone built-in, and again whilst very respectable for speech when chatting online, it lacks the professional quality you’d expect for recording music. Whatever the onboard input, you’ll soon want to simply plug things in and expand your Logic Studio. In this section, we’ll look specifically at the USB devices to get you connected.
Connecting devices to the Mac is now a much easier affair due to the advent of USB. Before USB, different manufacturers tended to use varied, and often proprietary, connection protocols. USB brought this all together with version 1.0, essentially resulting in one connection protocol for a multitude of different uses.
USB 1.0 came as a slow protocol of 12 megabits per second (Mb/s), which was ample for devices such as mice, keyboards, printers, MIDI interfaces, etc. Early Macs and some devices you will come into contact with (such as some older audio interfaces) are still USB 1.0. However, USB 1.0 would slow with too much traffic via multiple connections using a USB hub.
FireWire was readily available at the same time, and being 400 Mb/s, it handled many of the heavier duties such as external hard drives and larger audio interfaces. FireWire is still the preferred choice for many audio professionals.
Fortunately, USB 2.0 came along around the year 2000 and offered a considerably faster connection speed of 480 Mb/s allowing the USB to be fast enough for hard drives and audio interfaces with higher track counts and higher data rates.
USB 3.0 was formally ratified in 2008 and will, it is expected, start to appear on computers in the coming year or so. This has a data rate said to be 10 times faster than USB 2.0.
In practice, many external devices and peripherals for computers these days are connected using the USB, including many used for music making. USB is a flexible system that enables multiple devices to be connected to one computer with the use of a USB hub. Each hub acts as a splitter/merger box and typically allows for between 4 and 10 devices to be connected at once. The USB limit is much larger than this, but is unlikely to be exceeded by most users. Let’s take a look at the types of USB devices we can use with Logic Pro 9.
Audio interfaces come in many forms, but typically, USB-based devices are self-powered and historically handle two inputs and two outputs. In some instances, there may be useful MIDI sockets found here too, which we’ll discuss in a little detail later in the chapter. These usually inexpensive units may not always offer the highest grade sound quality, lowest latency (see Knowledgebase 1), or the largest range of sample frequency and bit-depth options, but they are excellent solutions for where basic input and output (I/O) or portability are the key. Ideal uses for this type of interface are simple stereo-pair recordings and overdubs. A large-scale live recording would require a larger interface with a more comprehensive I/O count, but to track up, a large work could be easily built upon with this type of interface using overdub techniques.
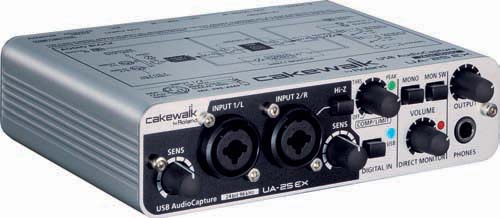
Figure 3.1 The Cakewalk UA25EX by Roland is an inexpensive audio interface with an impressive number of features for musicians on the move. Image courtesy of Cakewalk, part of the Roland Corporation.
There is a huge range of USB audio interfaces available and choosing the right one can be difficult. Interfaces vary in price, depending on sound quality and features. Manufacturers such as M-Audio, Edirol, Cakewalk, and others make a wide range of excellent inexpensive interfaces for this purpose, such as the Cakewalk UA25EX, shown below. Cakewalk is now a division of Roland, a long standing and respected music manufacturer, and as such, this unit typically is well built and has lots of features such as inputs for different types of microphones (including phantom power), guitars, and other connections; higher sample rates such as 96 kHz and bit depths of 24 bits; an internal limiter; optical digital inputs and outputs; and MIDI IN and OUT, a fairly impressive little device.
Apogee, a manufacturer covered in more detail later in the chapter, has recently introduced the ONE, which is a small USB interface. The ONE has a microphone built-in plus an input for an instrument or a favorite microphone. The ONE comes with the professional quality output you’d expect from Apogee.
The key features vary from device to device; hence, choosing the right device for you will be dependent on the type of music you make to some extent. If you mainly produce electronic music, it is likely that a two-in and two-out device will be ample. However, if you are in a band and want to track your next album of live performances, you’ll require something with more inputs and flexibility. Many devices can handle multiple microphone inputs and also include some additional features such as software mixing and digital signal processing such as compression and effects.
USB version 1.0, unlikely to be adopted on many new devices, was a very slow connection and many of the stereo interfaces were restricted to 44.1 kHz and 16 bits. Most devices are now USB 2.0 and adopt the data rate of 480 Mb/s, which is a little faster than that of FireWire 400. Therefore, while in theory any USB 2.0 audio interface could handle a large I/O count, there would be interruptions for other devices connected to the computer (mice, keyboards, printers, etc.); thus, it is sometimes considered a little less reliable. This is due to the data throughput originally not being as stable as FireWire is at present. As such, FireWire tends to be adopted for larger audio requirements or even PCI Express (PCIe), which are both covered later.

Figure 3.2 Apogee has teamed up with Apple to produce some excellent audio devices. The smallest is the new ONE, which has a mono input of a built-in microphone, jack input, or external microphone. Image courtesy of Apogee Electronics Corporation.
To play in notes through Logic’s instruments, you will use the Caps Lock Keyboard provided by pressing the Caps Lock key on your Mac, but sooner or later, you’ll want to escalate to your own controller keyboard. Many keyboards come with MIDI sockets (see the MIDI section toward the end of this chapter) to connect to your computer, but recently, these keyboards have connected directly using USB.
The introduction of USB controller keyboards negates the need for a dedicated MIDI interface if you mainly use the internal Logic Instruments. However, if you wish to use some older MIDI equipment, you’ll need to use a MIDI interface, and for more details on this visit page 46. M-Audio’s Oxygen8 v2 shown below is a good example of a portable and flexible controller keyboard offering both two octaves of input in addition to some assignable controller knobs. With a keyboard like this, you can not only enter in the notes but also control some of the parameters of the Logic Instrument such as the filter and envelope settings (covered later in this book).
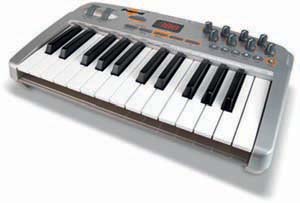
Figure 3.3 M-Audio’s Oxygen8 v2 is a common and practical USB keyboard for musicians on the move, offering both a couple of octaves as well as transport and mappable controllers.
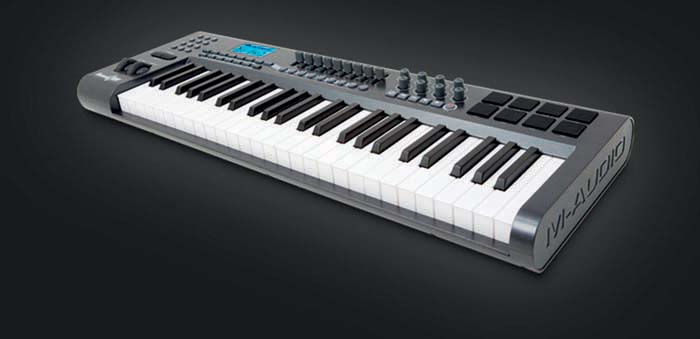
Figure 3.4 M-Audio Axiom 49. A four octave keyboard with a whole host of controller controls and drum pads for music creation.
Many controller keyboards are available across the product ranges, working up to some pretty hefty weighted numbers. The top-of-the-range controllers are often built to feel like a real piano’s action under your fingers and are solid workhorses. There are many examples in between such as the M-Audio Axiom 49, which additionally includes controllers and drum pads.
Select your controller carefully depending on the music you create and the flexibility you need. Dance music production would probably benefit from a controller keyboard with assignable knobs and sliders to various synthesizer and sampler parameters, while a virtuoso keyboard singer/songwriter might prefer to ensure the feel of the keys are as close to a real piano as possible. Portability will be a key aspect and this may heavily influence your choice.
FireWire audio devices have to some extent become the standard for professionals on the move. The reason for this is due to the aforementioned speed and reliability issues of USB 1.0. As such, FireWire became traditionally used for the data hungry devices such as audio interfaces and hard drives. FireWire remains popular as its ports are rarely shared with many other devices that could interrupt the data flow.
FireWire audio interfaces remain popular, ranging from the inexpensive Mackie Onyx Satellite (shown below) with two inputs and up to six outputs, to more expensive units with a higher count of inputs or outputs. These devices are ideal for the larger projects you might wish to get involved in. Typically, these devices offer somewhere between four and eight microphone inputs and up to 10 or sometimes more analog outputs. In addition to this, there are often a multitude of digital connections, such as the ADAT lightpipe standard, which can add another eight inputs and outputs to the interface with a suitable convertor. This method of expansion is typical with many audio interfaces, and if paired with a digitally connected console or multi channel convertor unit, such as Focusrite’s OctoPre MkII, most of them can be made of the units full input and output count.
Apogee is a well-respected, high-end audio converter manufacturer who is now working closely with Apple. A result of this cooperation has seen the introduction of three high-end audio devices. These Macintosh-only audio interfaces contain some excellent and specific benefits for Logic users. From the start, these units boast Apogee’s reputed high-quality converters, which after all are a key part to the sound quality of your studio setup among many other key features.
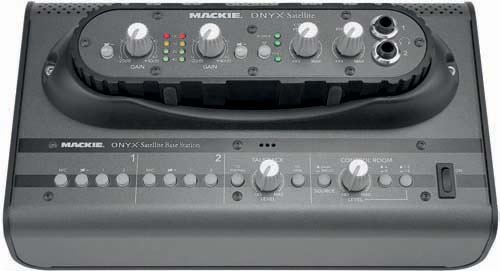
Figure 3.5 Mackie’s Onyx series of PreAmps and audio interfaces begin with the Satellite model, which integrates a docking station for working at home, but can be removed to work on location. Image courtesy of Loud Technologies Inc.
The first in the trio is the Ensemble that boasts eight analog outputs and eight audio inputs, four of which are very low-noise digitally controlled microphone preamps, two of which contain insert points for connection of a favorite outboard processor, and the other two also allow for the connection of high-impedance instrument connections for a bass or electric guitar. The Ensemble has extra facilities for digital connectivity using ADAT lightpipe to your studio setup, which extends the I/O count to 16.
Apogee provides its own software interface between Mac OS X’s Core Audio and their hardware called Maestro. This is comprehensive and offers the user the ability to configure multiple headphone mixes and outputs plus many clocking options and other intricate and useful controls. The Ensemble digitally controls its microphone preamplifiers and this can be managed by mouse using the software, but ingeniously, Apogee has also included a knob on all their interfaces, which they call a “precision digital encoder” for the purposes of controlling faders and knobs on screen.
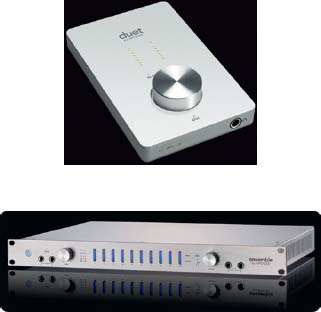
Figures 3.6 and 3.7 The smallest is the new “ONE” (shown on page 30). The Duet is a stereo-based interface, which like the “ONE” includes a precision digital encoder or rotary knob for assignment to controls within Logic. The larger rack-mountable device, the Ensemble, offers up to 36 inputs to the Mac. Images courtesy of Apogee Electronics Corporation.
The second device is the smaller and more portable Duet, which is essentially a two-input/two-output portable device. The accompanying breakout cable allows for six connections: two XLR microphone inputs, two jack instrument inputs, and two line-level outputs. The Duet also comes with Apogee’s Maestro software.
Naturally, there are a plethora of FireWire audio devices on the market for use with Logic, which all should work with Apple Core Audio. However, before taking the plunge, it might be worth checking on the manufacturer’s Web site that the device you are considering is compatible with Core Audio and Logic.
Perhaps you have an existing studio with an analog console or are replacing another multitrack system with Logic. Either way, to obtain a truly large set of inputs and outputs, a top-flight system will be required using a MacPro’s PCIe Slots.
These types of systems bypass the FireWire and USB connections and instead connect to a PCIe circuit board that sits within your computer and connects directly to the computer’s central processing unit (CPU). This enables much faster data rates than FireWire or USB 2.0, therefore offering larger track counts, higher sample rates, and larger word counts.
There are a few good examples of this model. One is the MOTU HD192 system, which can be expanded to accept 48 inputs and 48 outputs concurrently and works with a range of software.
Another popular PCI-based system is Digidesign’s HD system using ProTools. Logic can make use of this hardware through the use of its translation software allowing Logic to access the Digidesign Audio Engine (DAE), or in other words its audio interface, directly. In addition, ESB allows Logic users to route natively processed sounds into ProTools’ time division multiplexing (TDM) bus accessing the DSP hardware and plug-ins available in ProTools.
Apogee, with their Symphony interface (shown below), and RME, with their Multiface II interface, create PCIe cards to allow appropriate connections to their devices, which also offer large track counts.
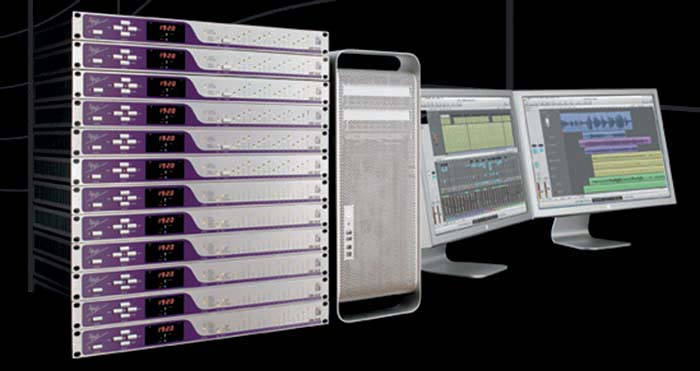
Figure 3.8 Apogee’s Symphony Series connects to the Mac using the PCIe connections and offers high sample rates and is highly expandable. Image courtesy of Apogee Electronics Corporation.
As you expand your set up, you’ll need to consider other things that connect to your audio interface. These devices are typically microphones, loudspeakers (called monitors in professional circles), headphones, and an ancillary outboard. In this section, we’ll look at these in detail.
There are many microphones on the market, and some are indeed collectors items. However, you’ll need to know a few simple facts to find the right choice for you and get them connected. Essentially, there are two common types of microphone, or the way in which they work internally: the dynamic microphone and the condenser microphone.
Both condenser and dynamic microphones have their own unique benefits, and this can be used to great effect depending on what you’re recording.
Condenser microphones are very sensitive, being able to capture really quiet sounds as well as handling loud ones too. Condenser microphones can also capture a wide range of frequencies from very low bass through to the very top treble. The cost of these relatively fragile microphones was for many years out of reach of most people, but recently, a wide range of condenser microphones are very affordable. Condenser microphones require some form of power source to operate. Typically this is known as Phantom Power, and it may be worth ensuring your audio interface can deliver this when making a purchasing decision. phantom power sends a 48-V DC signal down the microphone cable to power typically two things: the diaphragm and the internal preamplifier.

Figure 3.9 Neumann microphones have been an icon of vocal recording for some time and the U87 shown here is a perfect example.
Electret condenser microphones differ slightly in that a charge is built in to the capsule containing the microphone diaphragm. As such, only power for the onboard preamplifier is required. These can, like traditional condenser microphones above, run with phantom power, but electret’s main benefit is that they have a provision for battery power onboard when no phantom power is readily available. A classic example of this would be the AKG C1000S shown on the opposite page.
Dynamic microphones are traditionally less expensive and offer users the ability to record anywhere. Their characteristics include the ability to accept loud sounds well (close miked drums, guitar cabs, and the like), ability to reject spill as they’re not as sensitive as their condenser counterparts, which is of great use when recording drums, for example, and their frequency range is typically also a little less too than a condenser. One other attribute is their sturdiness.
Connecting each type of microphone will be typically via the XLR connections provided on your audio interface. It is worth again pointing out that condenser microphones require phantom power (+48 V), which will need to be engaged once you’ve connected your microphone. Ensure your speaker levels are down as this can cause quite a large bang.

Figure 3.10 The AKG C1000 is a popular example of an electret condenser microphone which has capacity for a PP3 microphone onboard to power the onboard preamplifier.

Figure 3.11 The SM58 from Shure is possibly the most common of all dynamic microphones offering legendary solid construction and performance for vocalists live.
Monitors are loudspeakers to you and me. In professional terms, they allow you to “monitor” the signal, hence their name. There are literally hundreds of products on the market currently and choosing a pair of monitors that suit your music and your budget will require a little investment of time.
Studio monitors can range from expensive (and often large) far-field studio monitors through to smaller and cheaper, near-field monitors.
The studio monitor market has blossomed in recent years. As a result, there are many excellent units to choose from. Many monitors represent exceptional value for the money, and care needs to be taken when choosing them.
Most monitoring systems these days are what we call “active,” meaning that they come with specially developed amplifiers which work best, or tuned for that loudspeaker unit. Active speakers can represent the best performance for the money. “Passive” monitors require you to obtain an amplifier to power them.

Figure 3.12 Controlling volumes in studios where a mixing console is not necessary can be resolved using Logic’s Master Output Fader or investing in a specific solution such as Mackie’s Big Knob.
Some active units also come in what is known as a 2.1 configuration. Don’t be put off by the numbers. These just relate to two monitors (left and right stereo) and the “.1” refers to a subwoofer, a speaker unit designed to deliver bass typically below 150Hz. It is likely that you’ve heard of 5.1, which relates to the surround sound format commonly used at home for surround sound. Logic can allow you to mix in 5.1 (see Chapter 10). This relates to five full range speakers (left, right, center, rear left, and rear right) and the subwoofer “.1.” There are increasing numbers of speakers that are added to this, such as 7.1 and 10.1, for other surround speaker applications.
Connecting active monitors to your set up should be as simple as connecting them to your audio interface. However, it is worth noting that many active monitors do not have conventional volume controls. As such, you will need to control the monitor level from either Logic using the master fader, from your audio interface (if a level control is provided), or by some other means, such as a mixing console if you have one. Specifically designed units such as Mackie’s Big Knob can offer a neat solution. The Big Knob is more than just a volume control. It offers management of headphone mixes, talkback, and routing to other devices.
Studio headphones (also known as “cans”) are another important element of the studio. They are really not very different to consumer headphones that you use already at home. Often, studios will provide what are known as closed headphones, meaning that sound from the outside is rejected as much as possible and vice versa.
Recording acoustic music without good closed headphones can lead to either the headphone mix spilling out and being heard in the vocal recording or the loud drums or guitar stack you’re recording being heard over the headphone mix.
Additionally, how loud they operate can be an issue if you’re a drummer and want to hear the rest of the band in the cans, but good closed designs should prevent the need for too high a level.
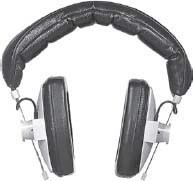
Figure 3.13 The DT100 headphones from Beyer Dynamic have an impressive history spanning decades. The timeless appeal is due to its closed design and replaceable parts.
A good example of a studio set of headphones is the Beyer Dynamic DT100 shown above, which has been used in studios across the world for over many years.
From time to time, you may wish to add an analog processor such as a favorite compressor or effects unit. Doing so in an analog studio is a simple matter of patching it in, but integrating this in Logic, you may wish to consider how this might be connected.
For example, if you wish to record using the favored compressor as an insert, you may wish to see if your audio interface can accept inserts (such as with the Apogee Ensemble). Otherwise, connecting this device will be via the inputs and outputs of your interface, allowing you the opportunity to route the signal through the processor and back into the computer again. This may cause delay in the form of latency unless you’re able to use onboard routing software such as Apogee’s Maestro.
These inputs and outputs could also be employed as an auxiliary send and return in the case of an external effects unit. Latency should not cause too much of a problem in such instances as this may be masked dependent on the effect employed.
The expansion of your studio in this way will depend on the amount of analog inputs and outputs you have at your disposal.
3.6 Integration into Logic – Audio Preferences
Apple’s operating system contains a neat feature called Core Audio. Core Audio should mean that when you launch Logic, each connected audio interface appears in the audio preferences. In fact, Core Audio and Logic allow for an interface to be connected to the system mid-session, or “plug-and-play” as it is known. Logic alerts you that a new interface has been added and asks you whether you would like to use it, as in the example below.
To check on your interfaces and settings, simply go to Logic Pro > Preferences > Audio, where the Devices tab should be present. Here, there are three subtabs called “Core Audio,” “DAE,” and “Direct TDM (DTDM).” Core Audio will very likely relate to the device you have just connected and is the first tab open to you. The other two tabs relate to Digidesign hardware, whose integration with Logic we’ll discuss later.
Looking at the Core Audio tab, there are many parameters that can be altered to get the best from your audio interface(s), which are called Devices in Logic. The Devices list will allow you to select all the Core Audio-compatible devices available to the system at the time. Simply select the one you wish to use, and presto, you should be up and running. Core Audio makes it that simple.
Getting the best from your device will usually mean managing the latency you experience. As we discuss in the Latency and Monitoring Knowledgebase, there are workarounds regarding monitoring. However, the computer’s driver and interface will also require time to “buffer” the information together before sending it out. The I/O buffer size is measured in samples and this therefore relates to the amount of time the computer and device take before you hear the sound. In an ideal world, we’d want this buffer to be at its lowest setting of 32 samples, which at 44.1 kHz would be considerably less than a millisecond and a perfectly acceptable delay. Doing this will require a very powerful computer, as more of the processing power is needed and may result in your audio dropping out or distorting. The ideal is to find a happy medium where the delay is not too long and the computer’s processing power enables unhindered audio. If latency causes problems with your recordings, you can use the Recording Delay feature to move the audio back or forth so that it fits with the rest of your music. The default for this is 0 ms but can be moved by 5000 ms either way.

Figure 3.14 When a new audio interface is added, Logic will notify you and ask you whether you want to use this device. If this does not appear, then it might be worth obtaining the latest drivers for the interface from the maker’s Web site.
Bit rates in digital audio refer to how fine the measurement of the amplitude, or loudness, of the audio signal is. CD recordings are presented at 16 bits and were considered resolute enough for the domestic market. However, within music production, 16 bits is considered a little too coarse to the ear and as such 24 bits is now desirable, as it measures the amplitude scale in finer detail. Therefore, by increasing the detail and accuracy of the waveform, it is more representative of the original audio. To record using 24 bits, select the 24-bit Recording check box within this pane. Remember, though, that your audio interface will need to respond to 24 bits to benefit.
Higher bit rates than 16 bits are desirable, but come at a slight price. The data this occupies on your disk is larger than that of plain 16 bits and as such you should consider whether you have enough hard drive space before the session (covered in this chapter). Roughly, you’ll need nearly twice as much hard drive space as with 16 bits.
The Independent Monitoring Level feature for “Record Enabled Channel Strips” is very useful while recording, as it gives the user control over the monitor level for that channel’s input when in record mode. For instance, if you were to record a guitar amp close to you, it would be less necessary to hear a version of it from Logic in your headphones. Simply turn it down when in record mode and track away.
The Software Monitoring check box will usually be enabled as Logic presumes that you will be doing most, if not all, of your audio routing and management inside as in the example above. However, if you wish to use your studio’s mixer or your audio interface’s monitoring features, then this should be unchecked.
The Process Buffer Range refers to the amount of time you will allow the computer to gather and process information into the buffer before playing it. The lower the range, the faster the computer will respond and the lower the latency. However, the computer may be unable to process all the required information in the time specified and drop out altogether.
ReWire, which is covered later in this chapter, is like an internal audio and MIDI patch lead connection between two pieces of software such as Reason and Logic. ReWired Behavior refers to the type of work you are doing between Logic and the ReWire device and hence the burden on the computer. The choices are between playback and live operation. Playback assumes that the computer is being played and can use the buffer to its best effect to ensure timely playback of instruments, and this process requires less CPU load. However, live mode assumes that you are playing the instrument live and as such requires the connected device to be more timely when producing the sound; the computer needs to prioritize this and therefore more CPU load is used.
Recording audio is a data-intensive exercise, and often as modern track counts increase, the internal, original hard drive of your Mac may start to strain under the pressure. As such, many Logic users have become accustomed to installing additional hard drives in their MacPro. However, for many Mac users (especially those using laptops), for reasons of space, file management, or file security, you may wish to choose to employ an external hard drive.
Choosing an external storage device will depend entirely on what you wish to do. For example, if you just want to back up your system, or your audio files, then the drive can be relatively low speed and perhaps lower cost. However, should you wish to use this addition as your dedicated audio drive, then speed and capacity could both become issues worth factoring in.
Audio files can take up some considerable hard drive space and as such a large drive is welcome to contain all your projects. Drive speed is also an issue. It is preferable for the audio files to come off the drive as fast as they went on, and as such many manufacturers, such as LaCie, provide an option for a 7200-rpm drive instead of the slower speeds such as 5400 rpm.
Although USB 2.0, rated at 480 Mb/s, is faster than FireWire 400, its structure and ability to hub mean that it can share its valuable bandwidth with other devices such as mice, keyboards, cameras, and MP3 players. As a result USB is, at times, considered to be less reliable for data efficiency, throughput, and stability. Thus, FW400 appears to remain the de facto standard despite it not being the fastest presently.
However, FireWire devices currently come in two flavors: 400 Mb/s and 800 Mb/s. Most devices still utilize the common FireWire 400 (FW400) format due to its history, popularity, and reliability. More hard drives and devices are now utilizing the newer FW800 format, which can offer very fast data rates and is becoming more popular for audio duties.
Hard drive manufacturers such as LaCie make a series of drives suitable for the Logic user, from portable, self-powering drives such as their Starck range through to the industry-standard d2 Quadras. The d2 series has been the Logic professional’s choice for the main part and now supports a multitude of interface formats, usually USB 2.0, FW400, FW800, and the new 3-Gb/s eSATA connection all on the same unit.
Serial Advanced Technology Attachment (SATA) is the connection protocol between a computer and its internal hard drives. This is a very fast method of connection working at speeds of either 1.5 Gigabits per second (Gbit/s) or newer 3 Gbit/s. When working in a MacPro, it is possible to connect up to three additional hard drives to that of your system disk. For audio and multimedia, this is an excellent way to work as different drives can be used for differing projects or for backup purposes. Separating out the system drive containing Mac OS X and Logic from the audio allows the drives to be dedicated to specific tasks. However, the simple overriding benefit is the speed of SATA drives for working with high data rates such as multitrack audio.

Figure 3.15 The LaCie d2 for many has become one of the industry-standard hard drives of choice, offering both reliability and flexibility (including a rack mount available from LaCie). Image courtesy of LaCie.
The studio was traditionally a tactile environment where physical faders, tape machines, cables, and instruments were the norm. As the digital revolution has taken its hold, so much of that studio has been pared down to the computer screen. As such, the notion of grabbing the fader for any channel to make an on-the-fly adjustment becomes a little bit more involved, usually requiring several mouse clicks perhaps with some keyboard presses too. Computing power and software development has meant that the amount of features controlled from one mouse and keyboard has grown dramatically. A common solution to this problem is to bring back the tactile aspect of the studio in the form of an external control surface.
Control Surfaces come in many forms from the one fader units such as the Presonus FaderPort to the fully fledged Mackie Control Universal Pro. What is common is that most come in the form of a bank of faders with some control for other aspects of the channel strip such as pan and auxiliary sends. As you navigate around the controls, Logic should also follow suit and vice versa, giving you tactile control over your mix.
Control surfaces such as Mackie’s original Control Universal are connected using the normal MIDI cables, although the newer version (shown below) and other systems, such as the FaderPort, adopt the USB protocol. Other controllers are combined with audio interfaces as one package such as Roland’s SI 24, thus replicating the function of the mixing console in its entirety. These and many other control surface devices are connected to the computer using USB, FireWire, and on rare occasions, Ethernet.

Figure 3.16 Mackie’s Control Universal Pro has been the choice of many Logic users due to its impressive integration and overall flexibility. Image Courtesy of Loud Technologies Inc.
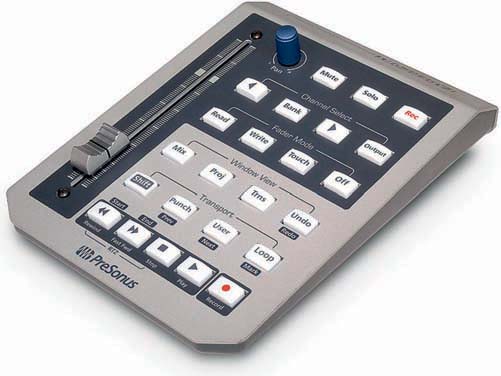
Figure 3.17 PreSonus’ FaderPort is a simple and intuitive control surface allowing adjustment of one fader at one time, plus the usual transport controls. Image courtesy of PreSonus.
Setting up a control surface is easy, provided they integrate with Logic natively using an existing or accompanying driver. To install a new device, go to Logic Pro > Preferences > Control Surfaces > Setup …. You’ll face the Setup pane that has three menus at the top: Edit, New, and View. Select New > Install from the menus at the top, which will open another window listing all the Logic-compatible control surfaces. You are encouraged to “Add,” or you can scan for attached devices.
Once you have added your controller, close this window and return to the controller setup page. Here, it is possible to select the controller from the diagram on the right-hand side and then edit any information about the device in the inspector-like space on the left-hand side. Within this space, you’re able to manage many aspects and preferences, such as what MIDI ports it is connected to and what feature the fader controls within Logic.
It is possible to add more than one model of control surface. As such, Logic makes it possible to edit what the controls actually operate in Logic within the setup page. In the example of more than one controller, duplicated buttons such as play and stop could be reassigned on one unit, while the faders could naturally lead on, say from Channel 8 on one device to Channel 9 on the next control surface. To get two control surfaces working in tandem, ensure in the Control Surface Setup window that the controller pictures form a horizontal row. However, should you wish for the controllers to act independently, then place the icons in a vertical column.
The way in which the Control Surface reacts and interfaces with Logic can be comprehensively edited using the Controller Assignments pane (Logic Pro > Preferences > Control Surfaces > Controller Assignments … or simply press cmd + K). There are two views here: Easy View and Expert View. In Easy View, each command can be seen one at a time and it is simple to reassign a control to another duty. To do this, simply press on the part of Logic you wish to control. Next, press Learn Mode to move a control or touch a button on the controller surface to map it accordingly.
To edit these modes, choose Expert View; the area to the left of the pane describes the zone of the surface, in this example the Mackie Control Universal. The control surface itself is split into zones such as VPots, Tracks (faders), Global Views, etc. The next table refers to the modes in which each zone can operate, and by selecting one of the modes, the Control/Parameter list will change to show you what each control does.
The Controller Assignments editor is incredibly powerful as any feature of the control surface can be remapped to another to allow you perfect control over a particular session or mix. In the example below, the selection list can be seen on the right-hand side offering a large number of choices for remapping an EQ control.
3.9 Distributed Audio Processing and External DSP Solutions
As with any project, there will come a time when the onboard processing power of the computer will start to strain under the pressure of plug-ins within your mix. As with Digidesign’s HD ProTools system, there is an external solution to the problem for Logic users too. Distributed audio processing allows for an additional DSP to be made to the computer either by Ethernet, such as Logic’s Nodes, or by an external DSP solution connected via FireWire or PCI.
Using a system such as Solid State Logic’s (SSL’s) Duende or Universal Audio’s UAD system, power can be unleashed from your computer to make for a faster and more powerful workflow. The audio processing is taken care of outside the host computer using proprietary processing to each manufacturer. As such, plug-ins can be purchased to add to the systems, which might be more reliant on your DSP than you would desire for your computer.
Setting up an external processing device such as SSL’s Duende is easy and is often a matter of simply connecting the FireWire and installing the accompanying driver. With OS X rebooted, Logic should now pick up that it has Duende installed. Logic may rescan its audio units and an extra line within the audio units menu when selecting plug-ins called Solid State Logic. Within here should be the features that are available on the external unit such as the SSL channel strip.
For more installation guidelines, please refer to the manufacturer’s instructions and Web site.
Distributed audio processing can be achieved by connecting multiple Mac computers via their Ethernet connections. These slave computers become what are called “nodes” in Logic speak and will allow for your processing tasks to be distributed across a unique network. Setting up nodes and multiple Macs is covered in Chapter 11. This is very flexible as it allows you to harness the power of your older Mac or desktop workhorse, but still allows you to take your laptop out on the road.
MIDI was originally developed as a communication protocol between hardware synthesizers, samplers, drum machines, and of course, sequencers like the original MIDI-only version of Logic. The protocol is made up of a number of different types of messages – including note on, note off, velocity, modulation, and so on – all of which can be sent to 16 available MIDI channels. In theory, the channel system was originally used to denote different devices along a “daisy chain” of MIDI leads, with each device sifting its appropriate collection of message from the collective stream of MIDI data passing along.

Figure 3.18 The MIDI information can be clearly seen within either the separate Events List window (Windows > Events List or Apple + 0) or the Events Pane in the Arrange window by pressing ‘E’. The Events List shows the corresponding MIDI information contained within the selected MIDI region.
Nowadays, of course, hardware MIDI devices are much less common (although you may well use a MIDI controller keyboard plugged into the MIDI port of the Audio Interface), but the MIDI protocol is still alive as an effective means of “internally” communicating with virtual instruments in Logic’s audio engine. Open up the Event list, for example, and you still get to see the list of familiar MIDI events, all with their associated channel and parameter numbers. Also, the Instrument Parameters in the inspector allow you to specify a MIDI channel for the instrument in question (although most default to ALL), and of course, instruments like the EVB3 use different MIDI channels to differentiate between the two different keyboard manuals and the bass pedals contained within the instrument.
So, even though you may never connect a MIDI lead again in your life, MIDI is definitely here to stay as an integral part of sequencing with Logic. It is really important to appreciate MIDI as your communication language when controlling instruments within Logic.
However, if you’re itching to use an older classic MIDI synth, you’ll need to connect this to your set up. As we’ve established, many audio interfaces come with MIDI sockets. However, if you do not have these or if you wish to connect a multitude of synths together, you may need to consider a dedicated MIDI interface, which connects to your Mac’s USB connections.

Figures 3.19 and 3.20 Mark of the Unicorn’s (MOTU’s) Fastlane is a solid and inexpensive USB MIDI interface, while their MIDI Time Piece AV is packed with additional features. Image courtesy of Mark of the Unicorn.
Many manufacturers fulfill this function. Mark of the Unicorn (MOTU) is one such manufacturer, which offers a wide range starting with the Fastlane (a two-in and two-out MIDI interface) all the way through to the professional MIDI Time Piece AV (eight-in and eight-out, with many additional features).
To the rear of these interfaces lurk a variety of five pin sockets known as the MIDI sockets. These usually come labeled in three ways: IN, OUT, and THRU. As you might imagine, MIDI IN receives instructions from another device – for example, the sound module will receive an instruction from the MIDI OUT of Logic’s MIDI interface. If the sound module sends information back to Logic, such as MIDI controller data, then the MIDI OUT will need to be connected to the MIDI IN of the interface. These MIDI connections apply to every MIDI-compatible device within your studio.
Additionally, MIDI THRU is included in the MIDI protocol to allow for something that is known as daisy chaining. In the very early days of MIDI (pre-Logic), it was unlikely that your sequencer would have more than one MIDI output, two at the very most. As such, if you had more than one MIDI device, it was important that you could connect it to the sequencer with ease. Enter the MIDI THRU socket, which replicated the MIDI IN data and passed it through the device allowing you to connect it straight to the MIDI IN of the next device unaltered. On rare occasions, some MIDI devices would merge both the MIDI OUT and MIDI THRU of a device so that a continuous loop back to the sequencer could be made. In this day and age, multiples of MIDI INs and OUTs are possible using modern MIDI interfaces as discussed earlier; therefore, the MIDI THRU socket is less used.
3.11 Digidesign Hardware Integration with Logic
Digidesign, the manufacturer of ProTools, produces a number of audio interfaces that roughly fall into two categories. The first of these is their LE range, which is a host-based system, meaning that all the digital signal processing is handled within the computer’s processor. These plug-ins are known as a Real Time Audio Suite (RTAS). The second category is intended for professional applications. Digidesign pioneered the TDM system that makes use of the DSP power held on their external HD cards, leaving the host CPU to get on with the work at hand.
Both of these methods can be used with Logic as an audio interface using Digidesign’s Digi CoreAudio Manager. The Digi CoreAudio Manager effectively bridges between the hardware and OS X’s Core Audio Services, allowing you to control the hardware as though you were in ProTools Hardware Setup page. When using the Digi CoreAudio Manager with Logic, it is worth noting that Logic and the LE interface may not immediately talk to each other. Opening up Digi CoreAudio Manager before launching Logic should ensure communication.
Digidesign’s HD range requires you to connect the external audio interfaces to their HD, PCI-based cards placed within your desktop computer. It is quite common to find both Logic and ProTools coexisting on the same computer, as they have traditionally been used for differing applications at separate times. They can coexist with Logic directly accessing the DAE and therefore the Digidesign hardware. The processing marriage between Logic Pro and the Digidesign DSPs is handled by the formerly named Emagic System Bridge, now simply “ESB TDM” to access processing from the ProTools domain. (TDM is Digidesign-speak for the type of processing that utilizes the processing power within their DSP chips inside the HD card.)
Logic does not normally host such ‘external’ technology. However, it is possible to access the Digidesign hardware as though it was an extended part of your Logic family. Accessing that DSP processing power on the Digidesign HD cards would be useful. This is achieved by using two mixers: the TDM Mixer employs Digidesign hardware to process TDM plug-ins whilst the DTDM Mixer gears up the Mac processor to manage the Logic host AU plug-ins. For more information on how this integrates, it is advised that you refer to the Logic 9 Pro TDM Guide from the Logic manual (link below).
To set up Digidesign hardware with Logic, go to Logic Pro > Preferences > Audio > Devices > DAE. Simply select the Enabled checkbox and you’ll be asked to reboot to ensure that the hardware is all present and correct. This will allow you to connect to the Digidesign HD hardware that is attached. You should also tell Logic how many HD cards and interfaces are attached by clicking on the ProTools HD Type list (PT HD Type). Within this list, there are details of the ProTools track count determined by the hardware and the amount of DSP chips that are included on the HD card.

Figures 3.21 and 3.22 Setting up Digidesign hardware can be achieved within the audio preferences pane.
A good place to start when working with Digidesign hardware is to open up the TDM Configuration template from the Template Chooser. This offers you a mixer and tracks, which will work with a Digidesign setup and allow you to get started. By employing this template, you can soon see how Logic interfaces and works with the Digidesign hardware.
For more information on Digidesign HD integration with Logic, see the dedicated Logic Pro 9 TDM Guide, which can be found at http://www.documentation.apple.com/en/logicpro/tdmguide/#chapter=preface%26section=0.
Knowledgebase 1 ![]()
When recording was in the analog domain, the signals fed from the mixing console through to an open-reel multitrack tape recorder and back would only be delayed by an acceptable millisecond or so. To all intents and purposes, this was perceived as pretty much instantaneous, certainly within acceptable margins. As this delay increases, performers can be put off their performances and they might appear to be out of time.
This delay in modern digital audio is called latency and is a common side effect of working with digital audio workstations such as Logic. Latency is caused by the delay experienced as your computer, audio and MIDI interfaces process the information. A common example of this is the delay between pressing the MIDI keyboard and the sound generated from an audio instrument in Logic.
Overcoming latency can often be tricky as it depends on the speed of your audio interface and computer. Monitoring is one major issue to overcome, and this can be achieved by employing an external mixer to handle your headphone mix. Many inexpensive USB interfaces combat latency by employing a “mix” knob on the unit, such as Digidesign’s MBox. This allows you to blend the input signal with the output of the computer, which allows you to hear your input signal prior to any incurred latency. Some Audio Interfaces come with their own software-based audio mixer, which performs this monitoring duty (such as MOTU’s CueMix, shown on the next page), as well as often integrating onboard digital signal processing. If one of these solutions is used, then it is desirable to switch off the Software Monitoring checkbox in Preferences > Audio. Another solution is to employ Logic’s Low Latency Mode.
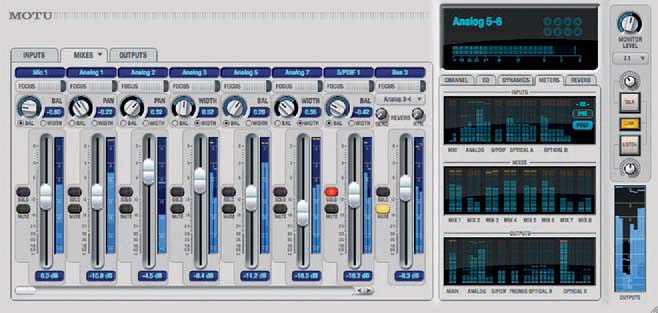
Figure 3.23 MOTU’s CueMix is an excellent example of the additional mixing features that can be provided specifically for the audio interfaces. Image courtesy of Mark of the Union.
Latency can be problematic when performing using a virtual instrument or monitoring a recording. Logic has created a neat solution called Low Latency Mode which intelligently bypasses active plug-ins on the channel you’re working on, thus freeing up processing power. This allows for latency to be managed to the preset limit of delay you have chosen in the preferences. To change this limit, go to Logic Pro > Preferences > Audio > General. Turning on Low Latency Mode is easy as there is an icon directly on the transport bar. In most cases, this will alter the sound of the channel you’re working on, but this is only temporary for the time this feature is engaged.
One of the best current solutions to overcome latency with Logic is to use Apogee’s Symphony hardware connected via PCIe to the Mac. This boasts some of the lowest latency available at the time of writing.
Knowledgebase 2 ![]()
ReWire is a system developed by Propellerhead, the makers of Reason and ReCycle. ReWire cleverly allows internal connections to occur between audio software packages within one computer. It is therefore possible to have multiple MIDI connections internally between applications and receive the corresponding audio signals back in return, again internally. This is an incredibly powerful and flexible solution when getting the best from two applications. Setting up ReWire in Logic is very easy. You must ensure Logic is opened before the ReWired application is started.
With Logic opened, launch the ReWire application, thus ensuring that Logic knows that this is to be the ReWire application and will therefore make the appropriate connections for you. To use your ReWire instruments, first begin to create an External MIDI track by pressing cmd+Alt+N on the Arrange area. Next, call up the Library Tab from the Media Icon on the top right-hand side of Logic. Within the Library should be your opened ReWire application – in this instance, let’s say Reason. Clicking on the Reason folder in Logic’s library should reveal all the open Reason instruments. Simply click on one to map this to the selected MIDI track.
As you select new instruments within your ReWire application, both the MIDI and audio connections should be automatically made to Logic. The audio connections will appear as Auxiliary tracks on your Logic Mixer and can be processed using Logic’s plug-ins and blended into the mix as though they were another virtual instrument.