Preface
Welcome to Make: Sensors. Soon you’ll be making gadgets that can sense it all—from dangerous gases to acceleration. In this book, you’ll use sensors to measure the physical world, represent the result as a numeric value, and take some action based on that value.
For example, a sensor could measure heat, pressure, light, or acceleration and report a value such as 22 C, 1015 millibars, light is detected, or 2.3 g acceleration (in the case of light, notice that we represented it as a Boolean or yes/no value rather than a numeric quantity; you’ll see examples of this later).
A microcontroller board is the brain of the robot, system, or gadget you’re building. You’ll write your own software to run on the microcontroller. In this book, you’ll work with two very popular boards: Arduino and Raspberry Pi. Either of these makes it easy to write software code to work with electronics.
It’s About Your Ideas
If your interest in electronics started with a desire to quickly learn some basics and then design your own robots, gadgets, or projects, you’re in the right place. This book will show you how to go from idea to reality quickly.
Theory, skills, and basics are useful—as long as they serve your creativity. Feel free to experiment with your ideas, and have the courage to publish your results on the Web.
Each chapter presents a mini project to show how you can combine different technologies. For example, you’ll build a wooden box that you open with a fingerprint and a color-changing chameleon dome. These are fun projects, but also good starting points for things you invent later yourself.
The skills you learn with Arduino are easily applicable to real-life projects. For example, we used Arduino to build the sun sensor prototype for Finland’s first satellite (Figure P-1).

How to Read This Book
When you get an idea, you can quickly build your first prototype with the help of this book. Instead of spending hours with component data sheets, you can simply pick a sensor and use ready-made breadboard diagrams and code. You can use sensors as building blocks for your project, but unlike construction kits such as Meccano or Lego, the possibilities with Arduino and Raspberry Pi are nearly endless.
If you know what you want to measure, you can easily find a sensor for it. The book is arranged by the real-life phenomena you can measure:
- Distance (Chapter 3)
- Smoke and gas (Chapter 4)
- Touch (Chapter 5)
- Movement (Chapter 6)
- Light (Chapter 7)
- Acceleration and angular momentum (Chapter 8)
- Identity (Chapter 9)
- Electricity (Chapter 10)
- Sound (Chapter 11)
- Weather and climate (Chapter 12)
You can also use Make: Sensors as a maker’s coffee-table book: browse it to get ideas of what’s available, and look for inspiration for new projects.
If you want to understand how sensors are connected to Arduino and Raspberry Pi, you’ll enjoy the in-depth explanations. All the sensor code examples are fully self-contained, completely showing the interaction with the sensor. Understanding the sensors in the book helps you apply your skills to new sensors, even ones that aren’t on the market yet.
When we chose the sensors for you, we picked a variety of useful and interesting sensors. We didn’t just pick easy or difficult ones. This means you’ll get to see solutions to the wide variety of challenges involved in connecting sensors to Arduino and Raspberry Pi.
In each chapter you’ll find experiments, environmental experiments, and a test project:
- Experiments give you quick instructions on how to use a single sensor with Arduino and Raspberry Pi. You can easily use these as building blocks for your own projects or just to see how the sensor works.
- Environmental experiments let you play with sensors and monitor changes in the surrounding environment. This gives you insight into how sensors see the world and how they really work.
- Sensors are more fun when you actually do something with the readings they give you. In test projects you’ll build a device or gadget around one sensor. You’ll learn how to use different outputs such as RGB LEDs, e-paper, and servo motors. Test projects also work as quick starting points for your own innovations.
Input, Processing, Output
Any robot or gadget you build must handle three things: input, processing, and output.
- Because most of the devices you build won’t have a keyboard or a mouse, sensors are your inputs. Take a quick look at the table of contents, and keep in mind that this is just a fraction of what’s out there. There are countless sensors to measure everything you could imagine.
- Processing happens in your program, running in Arduino or Raspberry Pi. In your program, you get to decide what happens next.
- Outputs affect the world around the device. You could light an LED, turn on a servo motor, or play a sound. Those are three of the most common types of output, but there are others (for example, haptic feedback such as vibration, displaying something on an e-paper screen, or turning on a household appliance).
Protocols
A protocol defines how a sensor talks to the microcontroller board, such as Arduino or Raspberry Pi. The protocol defines how the wires should be connected and how your code should ask for measurements.
Even though there is a staggering amount of different sensors, there is a limited number of popular protocols. You’ll learn each of the protocols as you work through experiments and projects, but here’s an overview of what you’ll be seeing.
You can get an overview of common sensor protocols in Table P-1.
- Digital resistance
- Some sensors work like a button and have two states, on or off. These sensors are easy to read. The on state is represented when a voltage referred to as HIGH is applied to the microcontroller input pin. This is usually either 3.3 volts or 5 volts depending on the microcontroller board you’re using.
- Analog resistance
- Analog resistance sensors change their resistance in response to a physical change (such as turning the knob of a dial). Arduino and Raspberry Pi measure the changes in resistance by measuring the voltage level that passes through the sensor. For example, you can turn a potentiometer to make its resistance larger or smaller. These analog resistance sensors are very easy to make with Arduino. Raspberry Pi needs an external chip for measuring analog values. You’ll learn to use the MCP3002 analog-to-digital converter to measure resistance with Raspberry Pi in Experiment: Follow Movement with Infrared (IR Compound Eye). Most analog input sensors report their value using resistance, so they are analog resistance sensors.
- Pulse width
-
Some sensors report their value with a pulse width, or the period of time in which the pin is held HIGH. You use functions like
pulseIn()orgpio.pulseInHigh()to read the length of the pulse. Because this is handled by a function, you don’t have to get into low-level microcontroller operations such as interrupts; it is all handled by a library. - Serial port
- A serial port sends text characters between two devices. It’s the same technique your computer uses when talking to Arduino over USB. You’ll become quite familiar with the serial port when you print some messages to the Arduino serial monitor in various projects.
- I2C
- I2C is a popular industry standard protocol. It is commonly found inside computers and well known from Wii Nunchuk joysticks. I2C allows 128 devices to be connected to the same wires. In Make: Sensors, you’ll get ready-made code and circuits for two sensors using I2C.
- SPI
- SPI is another industry standard protocol. You’ll find it easy to use the code in this book for using an analog-to-digital converter on the Raspberry Pi. But creating your own code from scratch for new devices using SPI will be a bit more work.
- Bit-banging
- Sometimes, a sensor is unusual enough that a standard protocol won’t work with it. In those cases, you need to craft up your own code to talk to that sensor. This is often called bit-banging, because you’re manipulating the signal from the sensor, often at the bit level. You’ll see an example of that later in the book in Experiment: Is It Humid in Here?.
As you play with the sensors, you’ll get much more familiar with these protocols. Or, if you’re in a hurry to put new sensors in your robots and innovative devices, you can just use the code in this book and look at the details later.
| Protocol | Example value | Arduino | Raspberry Pi Python | Example sensors |
Digital resistance | 1 or 0 | digitalRead() | botbook_gpio.read() | Button, IR sensor switch, tilt sensor, passive infrared movement |
Analog resistance | 5%, 10%, 23 C | analogRead() | botbook_mcp3002.readAnalog(), chip | Potentiometer, light-dependent resistor, MQ-3 alcohol, MQ X gas family (smoke, hydrocarbon, CO…), FlexiForce pressure, KY-026 flame, HDJD-S822-QR999 color, LM35 temperature, soil humidity |
Pulse length | 20 milliseconds | pulseIn() | gpio.pulseInHigh() | Ping and HC-SR04 ultrasonic distance, MX2125 acceleration |
Serial port | A9B3C5B3C5 | Serial.read() | pySerial.read() | GT-511C3 Fingerprint scanner, ELB149C5M RFID identity |
I2C | (2.11 g, 0.0 g, 0.1g), very precise values | Wire.h | smbus | Wii Nunchuk, MPU 6050 accelerometer and gyro combination, GY65 atmospheric pressure |
SPI | 57 deg, very precise values | Bit-banging | spidev | MCP3002 analog-to-digital converter |
Bits encoded to very short pulses | 53% | Bit-banging | Bit-banging | DHT11 humidity |
Building Things Your Way
Most users won’t find raw circuit boards and components compelling to play with. Making an attractive package for your gadget or robot makes a huge difference.
This book gives you one example for each project, but there’s no need to follow our instructions blindly. Try different materials and use different tools.
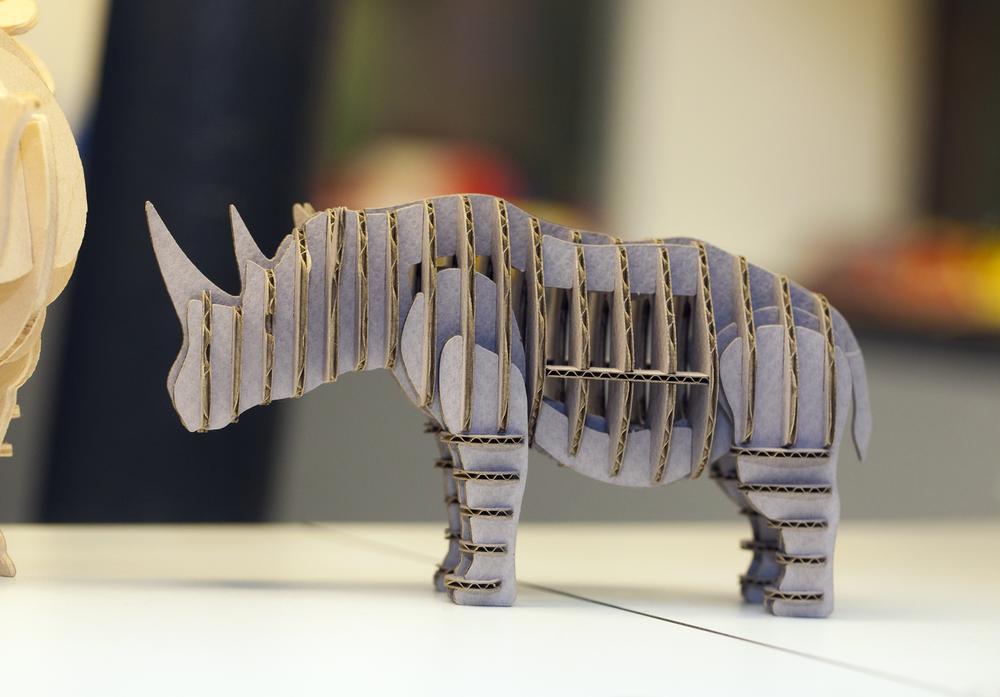
How about using cardboard (Figure P-2), fabric (Figure P-3) or 3D printing (Figure P-4)?


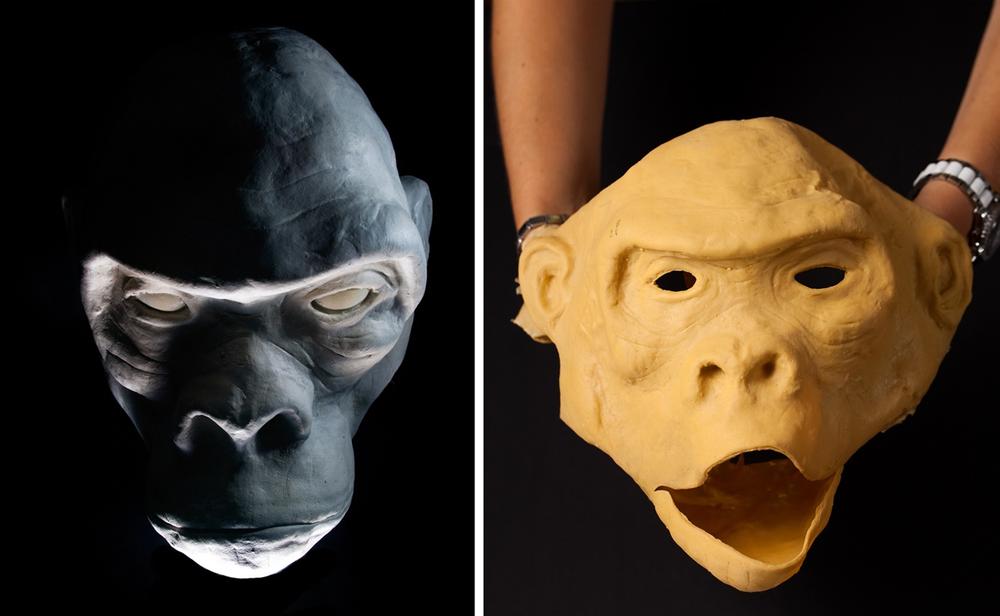
Trying out and learning new techniques makes the process of work more interesting, such as welding or making something out of clay between all the soldering (see Figure P-5).
We also use a lot of recycled materials in our own projects. Obviously they are cheap (free!) but they also give a unique look to a project.
Buying Components
If you need high quality components without fuss, pick a well-known shop, preferably in the Western world. If you want cheap components, look to Asia.
Quality shops mainly selling to makers include Maker Shed, SparkFun, Parallax, and Adafruit. Maker Shed is the shop from the publisher of this book. SparkFun sells a lot of breakout boards, which require you to solder in headers. Parallax created Basic Stamp, the previous generation of microcontroller boards for makers. Adafruit has a lot of parts, many designed by them. The SparkFun and Adafruit websites have a lot of information about their components, including tutorials.
These days, even big-name distributors like Element14 and RS electronics have broken into the Maker market. Finding parts from their huge catalogs is becoming easier, as they’ve started providing clear areas for Arduino and Raspberry Pi.
For some special parts and sometimes very cheap prices, Asia is the continent to go to. DealExtreme is very popular at the moment. Its shipping is slow and quality varies, but the prices are low and the assortment is wide. AliExpress is another Asian shop worth checking out.
Conventions Used in This Book
The following typographical conventions are used in this book:
- Italic
- Indicates new terms, URLs, email addresses, filenames, and file extensions.
-
Constant width - Used for program listings, as well as within paragraphs to refer to program elements such as variable or function names, databases, data types, environment variables, statements, and keywords.
-
Constant width bold - Shows commands or other text that should be typed literally by the user.
-
Constant width italic - Shows text that should be replaced with user-supplied values or by values determined by context.
This icon signifies a tip, warning, or general note.
Using Code Examples
You can download all the source code for this book from http://makesensors.botbook.com.
You can extract the ZIP package by double-clicking it, or by right-clicking and selecting “Extract” from the pop-up menu.
This book is here to help you get your job done. In general, you may use the code in this book in your programs and documentation. You do not need to contact us for permission unless you’re reproducing a significant portion of the code. For example, writing a program that uses several chunks of code from this book does not require permission. Selling or distributing a CD-ROM of examples from MAKE books does require permission. Answering a question by citing this book and quoting example code does not require permission. Incorporating a significant amount of example code from this book into your product’s documentation does require permission.
We appreciate, but do not require, attribution. An attribution usually includes the title, author, publisher, and ISBN. For example: “Make: Sensors by Tero Karvinen, Kimmo Karvinen, and Ville Valtokari. Copyright 2014 Tero Karvinen, Kimmo Karvinen, and Ville Valtokari, 978-1-449-36810-4.”
If you feel your use of code examples falls outside fair use or the permission given here, feel free to contact us at [email protected].
Safari® Books Online
Safari Books Online (formerly Safari Books Online) is membership-based training and reference platform for enterprise, government, educators, and individuals.
Members have access to thousands of books, training videos, Learning Paths, interactive tutorials, and curated playlists from over 250 publishers, including O’Reilly Media, Harvard Business Review, Prentice Hall Professional, Addison-Wesley Professional, Microsoft Press, Sams, Que, Peachpit Press, Adobe, Focal Press, Cisco Press, John Wiley & Sons, Syngress, Morgan Kaufmann, IBM Redbooks, Packt, Adobe Press, FT Press, Apress, Manning, New Riders, McGraw-Hill, Jones & Bartlett, and Course Technology, among others.
Maker Media has uploaded this book to the Safari Books Online service. To have full digital access to this book and others on similar topics from MAKE and other publishers, sign up for free at http://oreilly.com/safari.
How to Contact Us
Please address comments and questions concerning this book to the publisher:
| MAKE |
| 1005 Gravenstein Highway North |
| Sebastopol, CA 95472 |
| 800-998-9938 (in the United States or Canada) |
| 707-829-0515 (international or local) |
| 707-829-0104 (fax) |
MAKE unites, inspires, informs, and entertains a growing community of resourceful people who undertake amazing projects in their backyards, basements, and garages. MAKE celebrates your right to tweak, hack, and bend any technology to your will. The MAKE audience continues to be a growing culture and community that believes in bettering ourselves, our environment, our educational system—our entire world. This is much more than an audience, it’s a worldwide movement that Make is leading—we call it the Maker Movement.
For more information about MAKE, visit us online:
| MAKE magazine: http://makezine.com/magazine/ |
| Maker Faire: http://makerfaire.com |
| Makezine.com: http://makezine.com |
| Maker Shed: http://makershed.com/ |
We have a web page for this book, where we list errata, examples, and any additional information. You can access this page at:
| http://bit.ly/make-sensors |
To comment or ask technical questions about this book, send email to:
| [email protected] |
Acknowledgments
The authors would like to thank Hipsu, Marianna, Nina, Paavo Leinonen, and Valtteri.