Chapter 6. Working with documents
In this section:
Organizations are initially introduced to SharePoint through document management, which continues to be one of SharePoint’s many strengths. This section introduces common uses of document libraries, including uploading multiple documents, checking them out and back in again, document IDs, and document sets.
In this section, we’ll explain some of the most common ways to use document libraries like uploading multiple documents, and checking documents out for editing. We’ll also address how to utilize document IDs and configure document sets on a site.
Managing documents with a document library
The key difference between a SharePoint 2013 library and a list is that libraries are designed to manage files as well as the information attributed to those files. A library can contain a hierarchy of folders and files. It’s common for SharePoint sites to contain several document libraries that store different file types such as training guides, financial reports, presentations, and pictures.
Create a document library
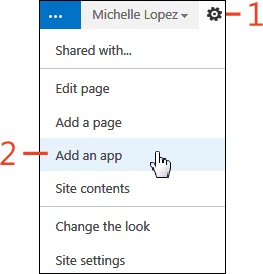
In the upper-right corner of the window, click the Settings icon (the small gear graphic).
On the menu that appears, click Add An App.
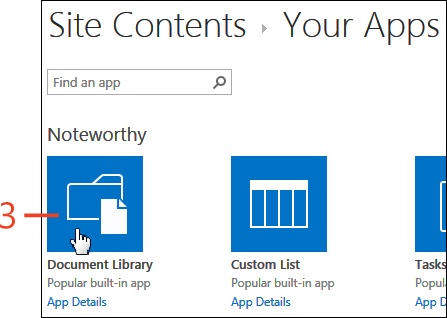
On the Your Apps page, under the Noteworthy section, click the Document Library icon.
See Also
For more information about SharePoint list and libraries, see Chapter 5.
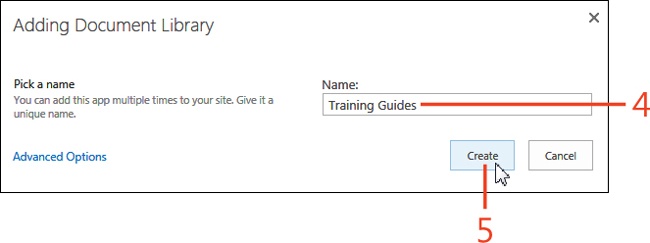
In the Adding Document Library dialog box, in the Name text box, enter a name for the new library.
Click Create.
Customizing document templates
When a new document library is created, several file types, or content types, are available when you create a new document from the SharePoint 2013 menu. You can choose an empty Microsoft Word document, a Microsoft Excel workbook, a Microsoft PowerPoint presentation, a Microsoft OneNote notebook, or an Excel Survey. You can also select a New Folder.
Instead of creating a commonly used format from scratch, or copying an existing file and then modifying it, with SharePoint, you can customize document defaults and document templates that are available in your library.
Modify the document template for a document library
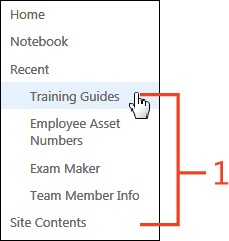
On the Quick Launch bar, select a document library or click Site Contents to locate a library.
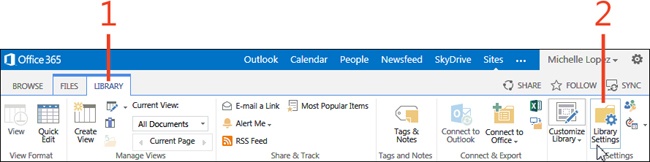
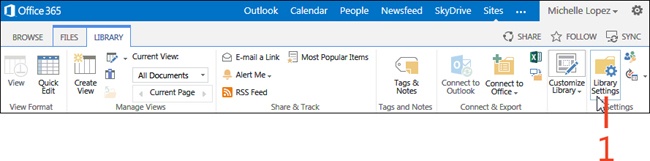
On the ribbon, click the Library tab.
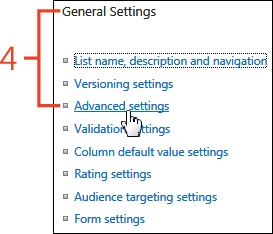
In the Settings group, click Library Settings.
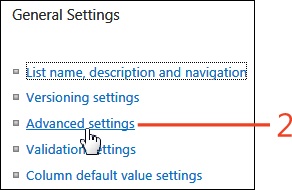
On the Library Settings page, in the General Settings section, click Advanced Settings.
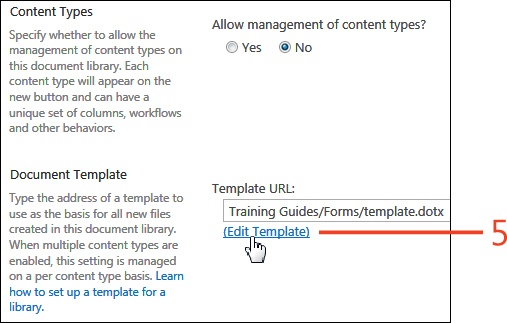
On the Advanced Settings page, in the Document Template section, click Edit Template.
Tip
There can be only one default New Document. Create additional content types to use multiple templates.
See Also
For more information about using multiple content types, see Chapter 4.
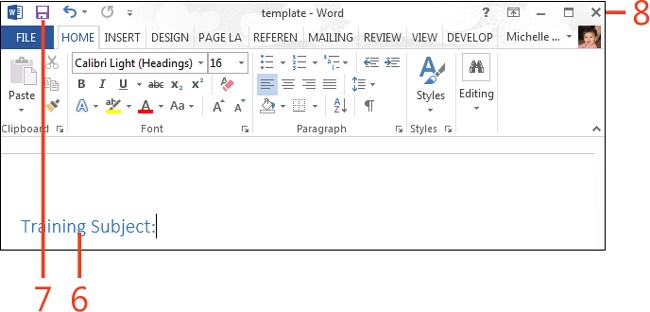
Save the template.
Close the application.
Click OK.


Modify the document template for a content type
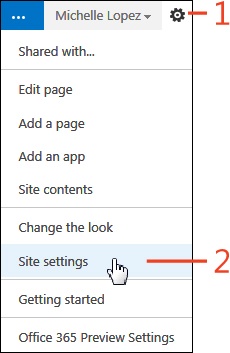
In the upper-right corner of the window, click the Settings icon.
On the menu that appears, click Site Settings.
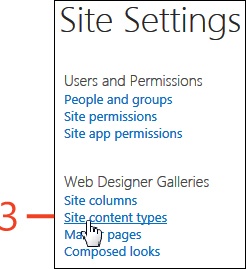
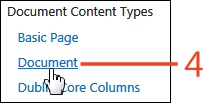
On the Site Settings page, in the Web Designer Galleries section, click Site Content Types.
On the Site Content Types page, in the Document Content Types section, click Document.
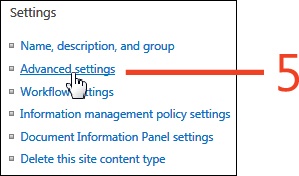
On the Site Content Type page, click Advanced Settings.
On the Advanced Settings page, in the Document Template section, click either the Enter The URL Of An Existing Document Template option or the Upload A New Document Template option.
Click OK.

Uploading multiple documents
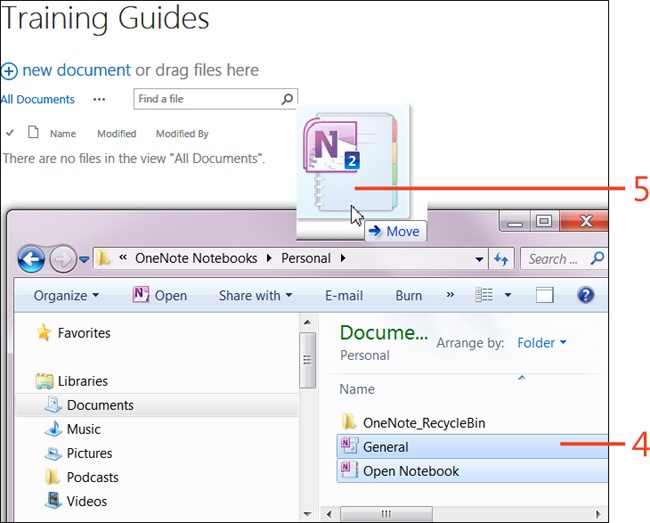
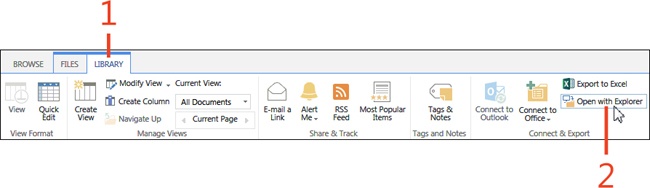
SharePoint 2013 users will undoubtedly need to upload or move multiple documents to other locations, such as local hard disks, network file shares, or other SharePoint locations. SharePoint lets you drag files directly to your library or upload documents by using Explorer on the Library’s ribbon.
Drag multiple documents to a library

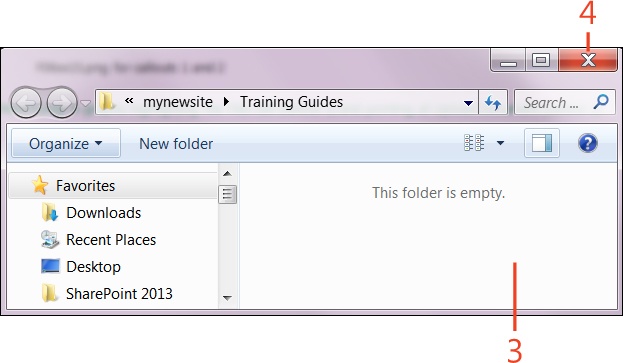
Upload multiple files with Explorer

Requiring and displaying document check out
SharePoint 2013 is a collaborative platform with which several users can store and share documents with other team members. It’s likely that more than one user will attempt to open and edit a document at the same time. SharePoint makes it possible for users to lock a document by checking it out so that only one person can edit the document at a time. Changes made to a document when it is checked out cannot be seen by other users until it is checked back in.
Requiring users to check out documents prior to editing them can be configured in the library settings. An optional comment can also be added when the document is checked in, which can be viewed in the document’s history.
Require document check out on a library
On the ribbon of your document library, click the Library tab.
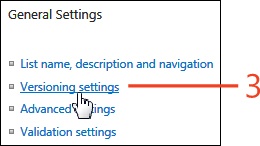
In the Settings group, click Library Settings.
On the Library Settings page, in the General Settings section, click Versioning Settings.
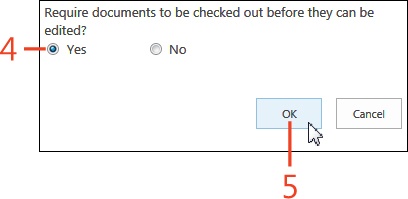
In the Require Documents To Be Checked Out Before They Can Be Edited section, click the Yes option.
Click OK.

Display the check out status in a document library
Checking documents in and out
Checking out a SharePoint 2013 document ensures that you are the only one making edits to it. When you’re finished making edits, check in the document so that other users can view the changes you made. Even if the document is saved, if it is still checked out, the most recent changes will not be visible to other users.
Check out a document
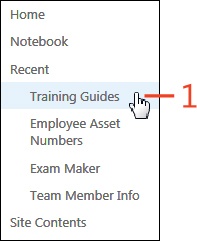
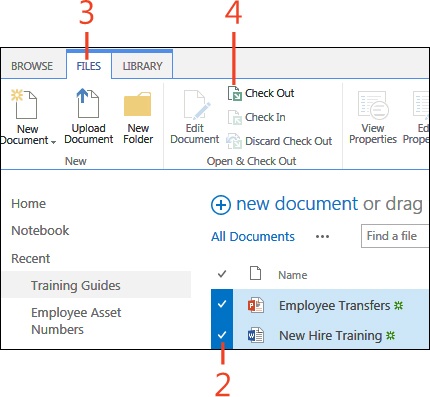
On the Quick Launch bar or in Site Contents, select the document library with which you want to work.
Click to the left of one or more documents to select it; a check mark will indicate it’s selected. (Hover over the title to see the check mark option.)
On the ribbon, click the Files tab.
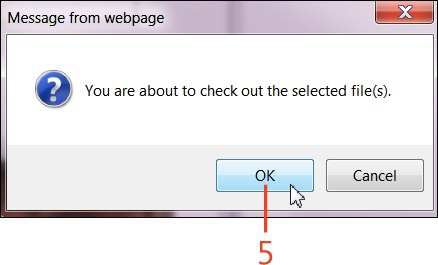
In the Open & Check Out group, click Check Out.
In the pop-up message box that appears, click OK.


Check in a document
Click to add a check mark to the left of one or more document titles that display the green checked-out icon.
On the ribbon, click the Files tab.
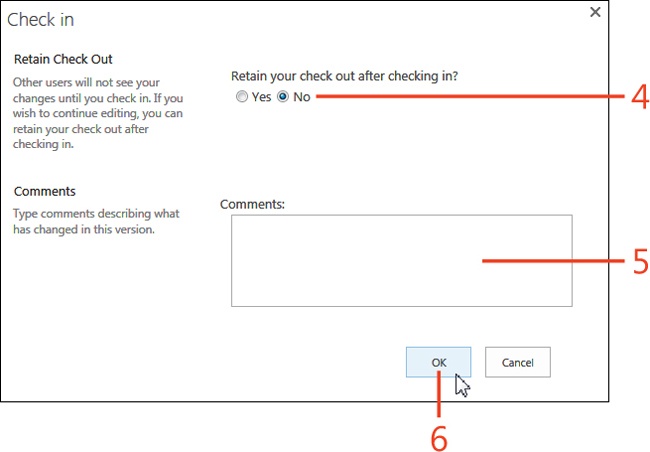
In the Open & Check Out group, click Check In.
In the Check In dialog box, click Yes or No to keep the file checked out after checking it in.
In the Comments text box, enter optional comments to include in the document’s version history.
Click OK.

Configuring documents with document IDs
SharePoint 2013 utilizes a feature called document ID, which automatically generates and assigns a unique number to each document. Each document ID is stored as information about that document and can be used to locate that document anywhere in the site collection. In the tasks that follow, you will see how to set up this feature in your site collection.
Turn on the document ID service
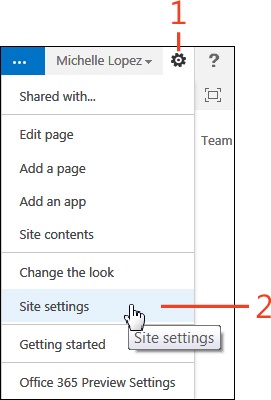
In the upper-right corner of the page, click the Settings icon.
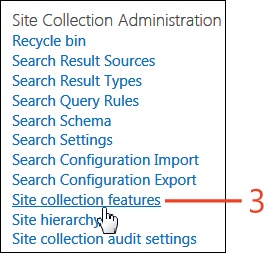
On the menu that appears, click Site Settings.
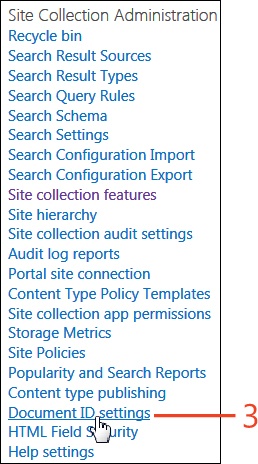
On the Site Settings page, in the Site Collection Administration section, click Site Collection Features.
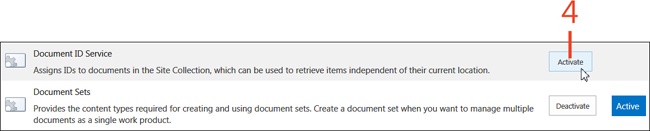
Click the Activate button for Document ID Service.

Configure document ID settings
In the upper-right corner of the page, click the Settings icon.
On the menu that appears, click Site Settings.
On the Site Settings page, in the Site Collection Administration section, click Document ID Settings.
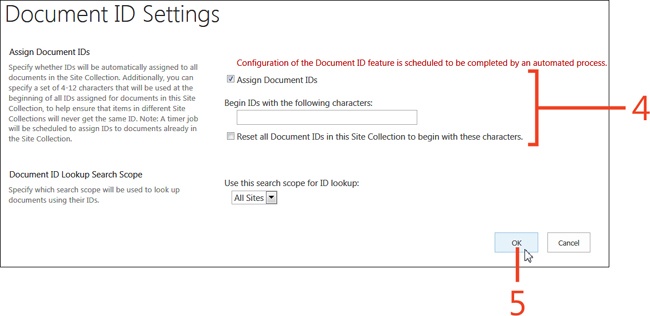
On the Document ID Settings page, perform the following:
To enable auto-generated IDs, select the Assign Document IDs check box.
To assign a prefix to new document IDs in the site collection, in the Begin IDs With The Following Characters text box, type the characters that you want to use as a prefix.
To apply the new prefix to existing documents in the site collection, select the Reset All Document IDs In This Site Collection To Begin With These Characters check box.
Click OK.
Using document IDs
Document IDs are useful for locating documents that are out of order or have been moved. By adding a Search By Document ID Web Part to your SharePoint 2013 page, you make it easy for users to find a document quickly.
Locate the document ID on a document
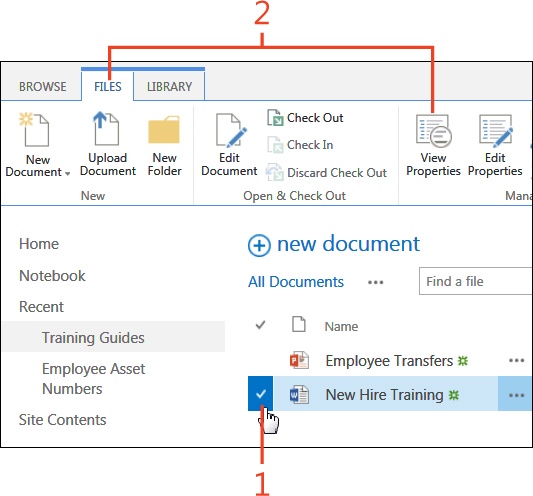
Click to add a check mark to the left of a document title. (Hover over the title to see the check mark option.)
On the Files tab, in the Manage group, click View Properties.
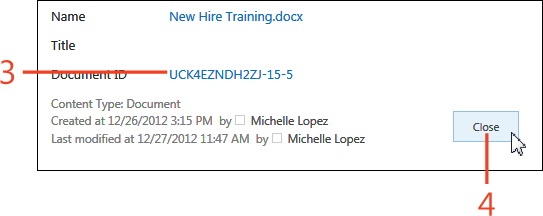
In the properties dialog box for the document, click the Document ID value to open the document. (Take note of the Document ID; you will use it in the next task.)
Click Close to close the properties dialog box.
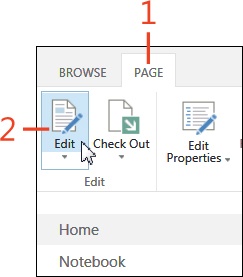
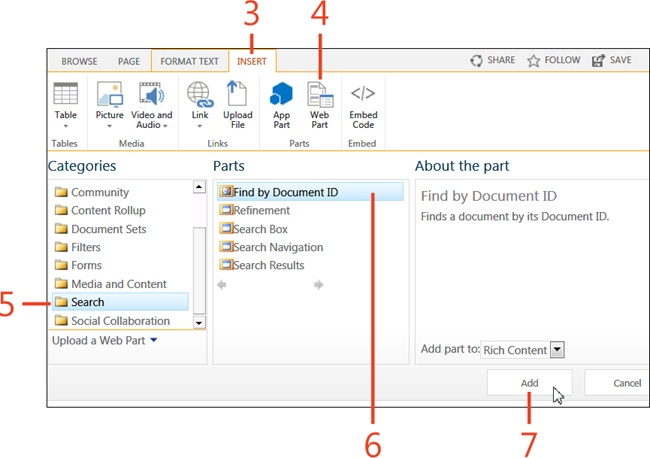
Use the Find By Document ID Web Part
In the Edit group, click the Edit button.
On the ribbon, click the Insert tab.
In the Parts group, click Web Part.
In the Categories list box, click Search.
In the Parts list box, select Find By Document ID.
Click Add to insert the Web Part onto the page.
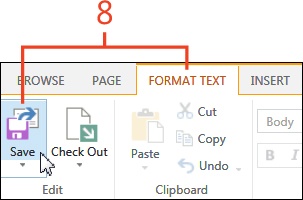
On the Format Text tab, in the Edit group, click the Save button.
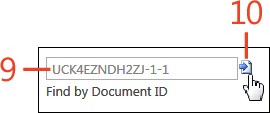
Enter a Document ID in the Find By Document ID text box.
Click the Find icon to search for the document.
Moving documents
SharePoint 2013 provides many options for moving, copying, or sharing documents on your site. To copy or move documents between document libraries or across sites and site collections, use the Send To menu. You can also download a copy of a document to your local computer or share a link to it via email.
Use the Send To menu
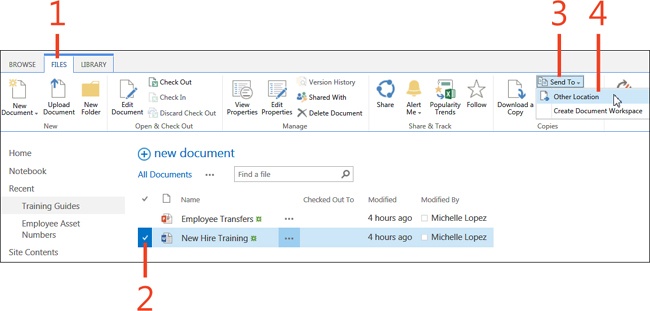
On the ribbon of your document library, click the Files tab.
Click to add a check mark to the left of a document. (Hover over the title to see the check mark option.)
On the ribbon, in the Copies group, click Send To.
On the menu that appears, click one of the following options:
To move or copy the document to another library or site, click Other Location.
To create a collaboration site for the document, click Create Document Workspace. That document is automatically copied to the workspace.
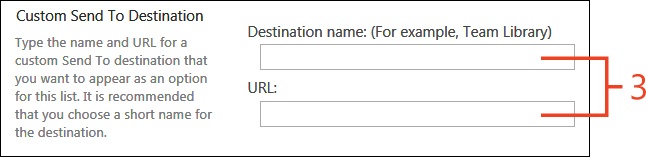
Add a custom Send To location
Copying or sharing documents
If you want to work on a SharePoint 2013 document at a later point in time or location at which you know you won’t have internet access, you might want to download a copy of it to your local computer beforehand and then upload your updated document when you’re back on line.
Also, it’s very common to send a document’s link to someone via email to let them know its location or invite them to edit it.
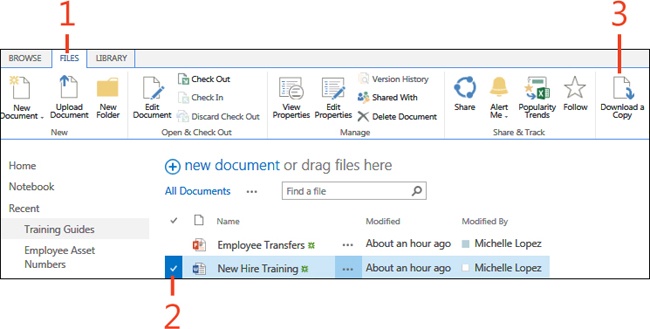
Download a copy of a document
On the ribbon of your document library, click the Files tab.
Click to add a check mark to the left of a document title. (Hover over the title to see the check mark option.)
On the ribbon, click Download A Copy.
Click Save.

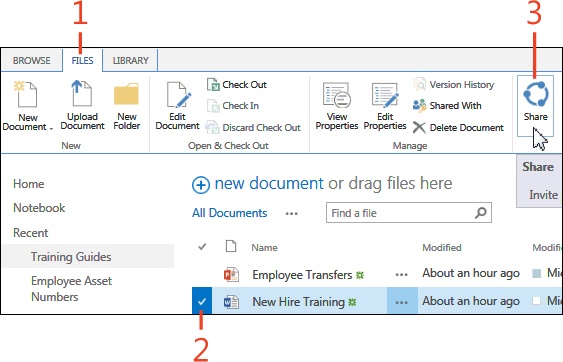
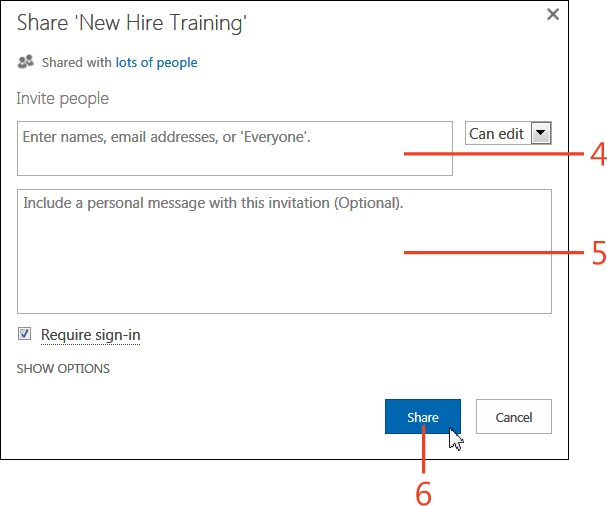
Share a document
On the ribbon of your document library, click the Files tab.
Click to add a check mark to the left of a document title. (Hover over the title to see the check mark option.)
On the ribbon, click Share.
In the Invite People text box, add email names or addresses to Invite others to edit or view the document.
Enter an optional message to be delivered with the email invitation.
Click Share.
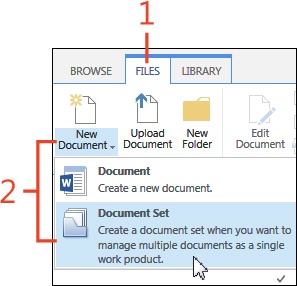
Configuring document sets on a site
Project managers collect several documents for a project: Project Charters, Project Schedules, and Business Requirements. Using document sets, you can organize and manage several items together as a single item. For instance, you might want to change the Status Category of each document to “Complete.” With document sets, you can change them all at once instead of one at a time.
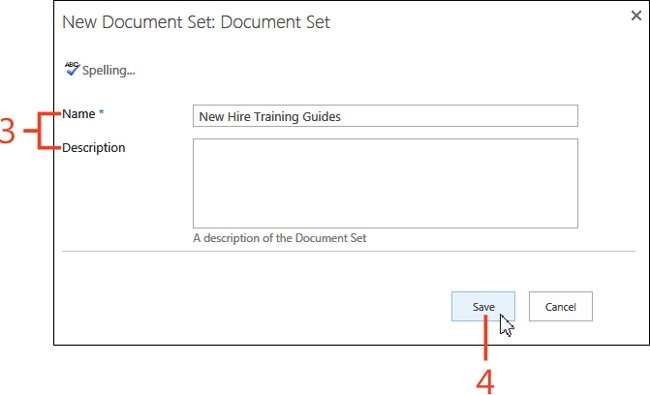
Unlike a document library, document sets include a Welcome page that displays metadata or properties common to all documents in the set. The tasks that follow will show you how to turn on the document set feature on your site, configure a document library to support the document set feature, and create a new document set.
Turn on the document sets feature


Configure document set options
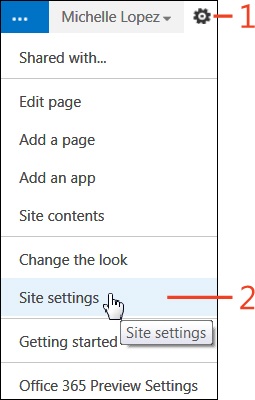
In the upper-right corner of the window, click the Settings icon.
On the menu that appears, click Site Settings.
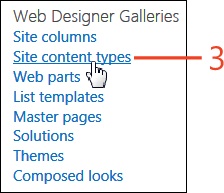
On the Site Settings page, in the Web Designer Galleries section, click Site Content Types.
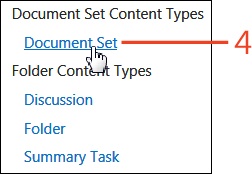
On the Site Content Types page, in the Document Set Content Types section, click Document Set.
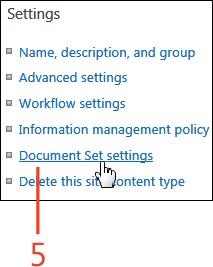
On the Site Content Type page, click Document Set settings.
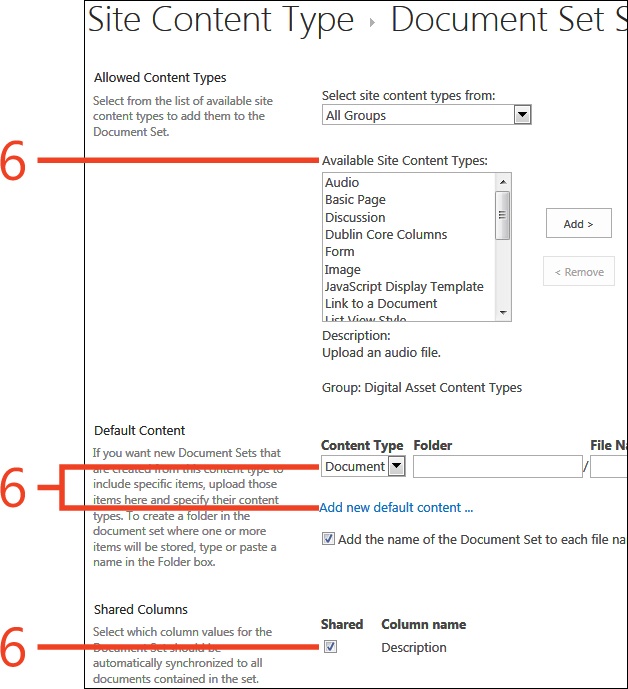
On the Document Set Settings page, customize the document as described in the following:
Select the available site content types to allow in this document set.
Select a default content type and browse to associate a default file to be automatically included in the document set. Additional default files can be included by clicking the Add New Default Content link.
Select the Shared check box to share that property value across a document set. Changing the property value on the document set applies that change to all documents within that set.
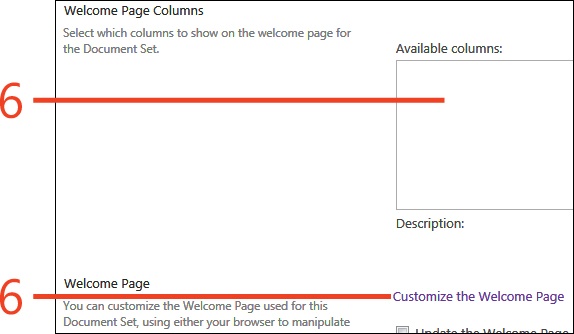
Select which columns to add to the document set’s Welcome page.
Click Customize The Welcome Page to edit a Web Part Page associated with the content type.
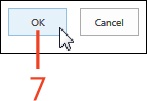
Click OK to save changes.

Configuring document sets on a document library
Unlike a document library, document sets include a Welcome page that displays metadata or properties common to all documents in the set. This section will introduce you to enabling the document set feature on your site, show you how to configure a document library to support the document set feature, and demonstrate how to create a new document set.
Enable the document sets on a document library
On the ribbon of your document library, click the Library tab.
In the Settings group, click Library Settings.
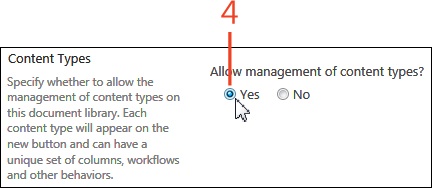
On the Settings page, in the General Settings section, click Advanced Settings.
On the Advanced Settings page, in the Content Types section, click the Yes option for Allow Management Of Content Types?
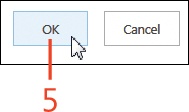
Click OK.
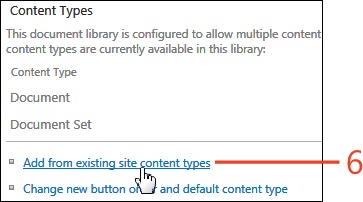
On the Settings page, in the Content Types section, click Add From Existing Site Content Types.
In the Select Site Content Types From list box, select Document Set Content Types.
In the Available Site Content Types section, select Document Set and click Add.
Click OK.