Chapter 15. Using personal sites and social networking
If your company or organization provides the feature called My Site, you have your own Microsoft SharePoint 2013 website. You have the ability to store content of interest to you or share it with others. You can also list your interests and areas of expertise, tag content with keywords, share information that others can search for, and make it possible for others to follow your own personal Blog.
Introducing My Site
By listing your interests and areas of expertise on your My Site, others can locate you when they’re searching for that particular skill set. With My Sites, you can document and blog about your daily observations and invite colleagues to access your content. Likewise, you can follow other colleagues as they share their own content and information.
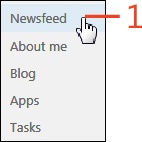
My Sites include a Newsfeed page for selecting colleagues to follow, topics of interest to tag, and content to track; an About Me page for managing your profile and activities; a Blog site to promote communication on topics of your choosing; an Apps page to share your own content; and a Tasks page that consolidates all personal tasks with tasks assigned to you across other SharePoint sites.
Editing your user profile
The user profiles associated with SharePoint 2013 My Sites give you the opportunity to discover and utilize the expertise of people within your organization. In addition, you can showcase your own skills and interests.
When SharePoint is initially deployed, your My Site user profile has undergone minimal customization. So, when you first access your My Site, be sure to update it so that the details you make available to others are helpful and informative.
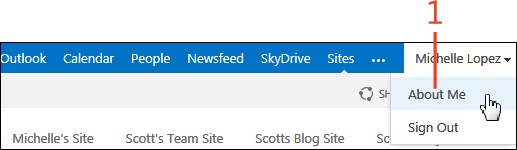
Edit your user profile
On the About Me page, click Edit Your Profile.
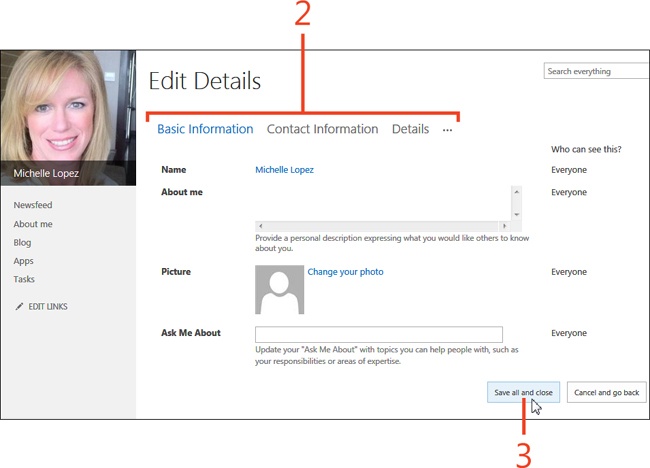
On the Edit Details page, click any of the following headings to update your information:
Basic Information
Contact Information
Details
Newsfeed Settings
Language And Region
Click Save All And Close.
Uploading content
SharePoint 2013 automatically creates a document library on your My Site called Documents. It also creates a folder within that library called Shared With Everyone, the contents of which is available to read by everyone except external users. Anything outside of the Shared With Everyone folder will be private unless it is intentionally shared by you by editing the content’s permissions. Likewise, when viewing colleagues’ My Sites, their public documents can be viewed in their Shared With Everyone folder located in their documents library.
Upload public content to your My Site
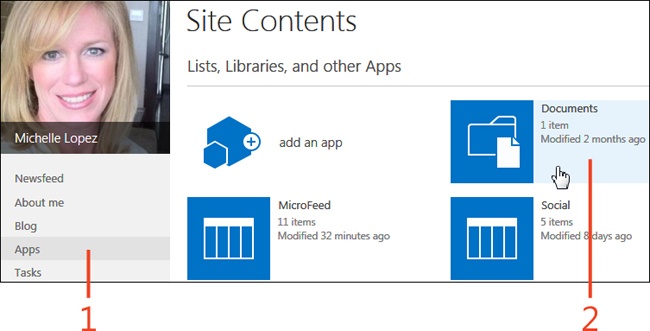
On your About Me page, on the Quick Launch bar, click Apps.
On the Site Contents page, click Documents.
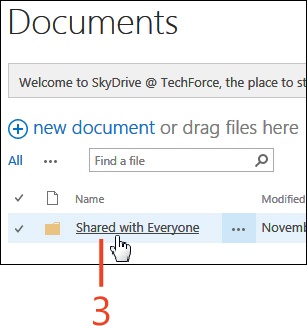
On the Documents page, click the Shared With Everyone folder.
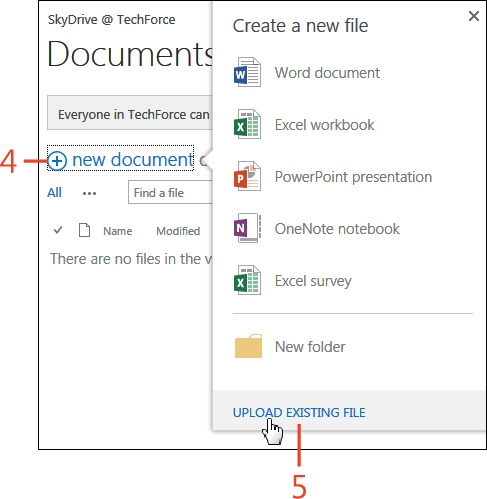
On the Shared With Everyone page, click New Document.
On the menu that opens, click Upload Existing File.
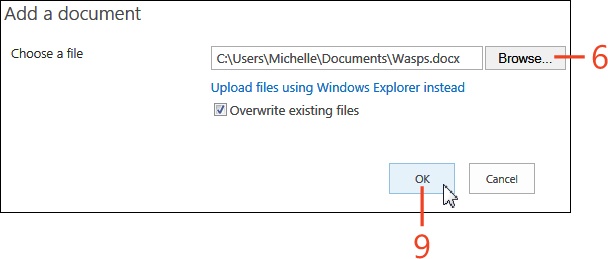
In the Add A Document dialog box, click Browse.
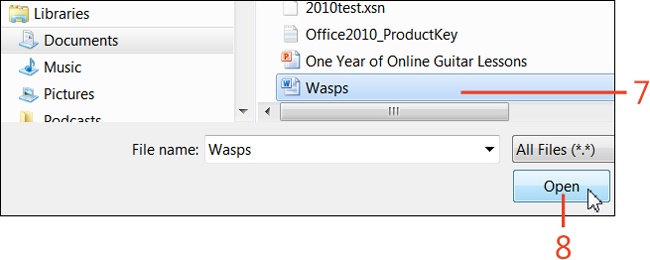
Select the file that you want to upload.
Click Open.
Click OK.
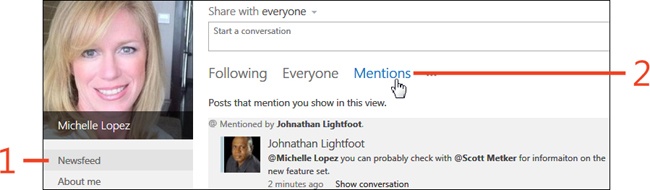
Following people
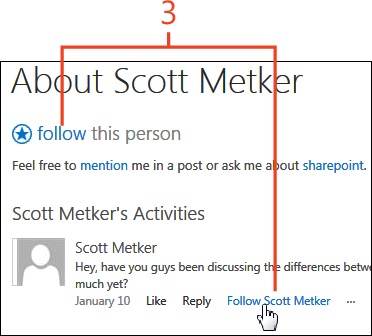
Following people makes it possible for you to easily link to colleagues, coworkers, industry leaders, or people with whom you share common interests. With SharePoint 2013, you can stay up to date on a person’s blogs, insights, tags, and information.
You can follow your colleagues, but you might come across a newsfeed and want to follow someone who shared an interesting post. Your content and opinions can also be followed to promote dynamic connections between yourself and others.
Follow a person
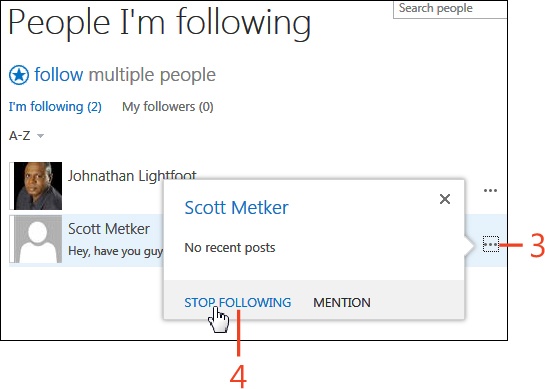
Stop following a person
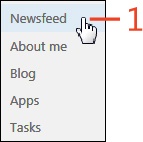
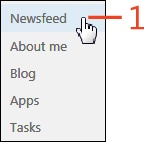
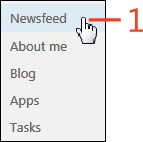
On your About Me page, on the Quick Launch bar, click Newsfeed.
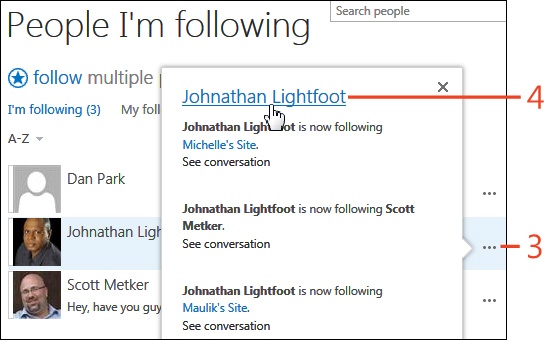
On the Newsfeed page, in the I’m Following section, click the number displayed above the People label.
On the People I’m Following page, click the drop-down ellipsis (...) next to the name of the person whom you want to stop following.
On the menu that appears, click Stop Following.

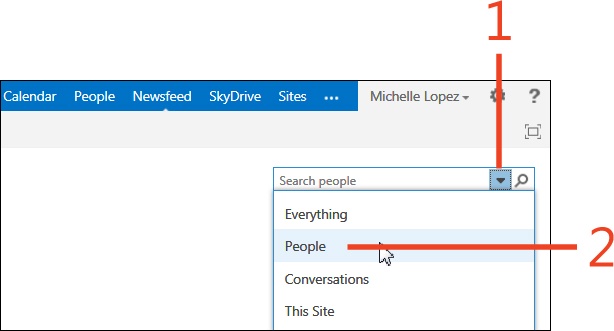
Searching for people to follow
Searching for people is simple when you already know their name or want to search for more than one person at a time. Sometimes you might be looking for someone with a specific skill set or expertise but don’t yet know the person’s name. In this case, you can search on keywords and let SharePoint 2013 find the people who retain that desired knowledge.
Search for a person by name
On your About Me page, click Newsfeed.
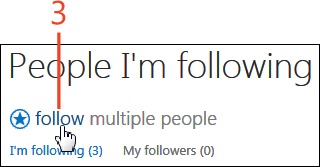
On the Newsfeed page, in the I’m Following section, click the number displayed above the People label.
On the People I’m Following page, click Follow.
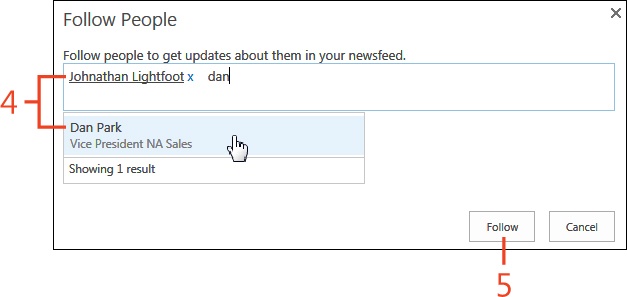
In the Follow People dialog box, type the names of people whom you want to add. (SharePoint searches and displays possible matches as you type.)
Click the Follow button.

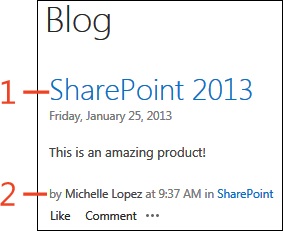
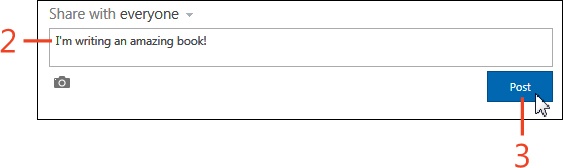
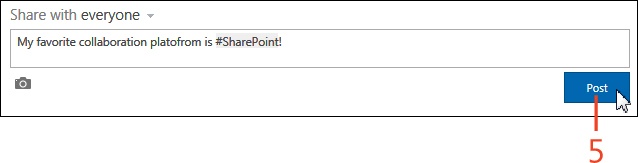
Updating your status
Updating your status keeps others abreast of your current activities. SharePoint aims to provide a platform for users to update their status in a business context. Posting information about what you’re researching or working on gives colleagues an opportunity to assist you with the task at hand.
Post your status
On the About Me page, on the Quick Launch bar, click Newsfeed.
On the Newsfeed page, in the Start A Conversation text box, type whatever it is that you want to share with everyone.
Click the Post button.
View the status of a colleague
On your About Me page, on the Quick Launch bar, click Newsfeed.
On the Newsfeed page, in the I’m Following section, click the number displayed above the People label.
On the People I’m Following page, click the drop-down ellipsis (...) next to the name of the person whom you want to view.
Click the person’s name.

Using your note board
When you come across a useful or interesting article, the Note Board feature in SharePoint 2013 gives you a way to make a note or comment about that content to which you can refer back. This is practical when you’ve saved several items as Favorites and can’t quite remember why. Adding a note to an item also communicates your opinion on the topic to your colleagues. You can also add a note outside of SharePoint while browsing the web.
Add a note


Add the notes tool to your favorites
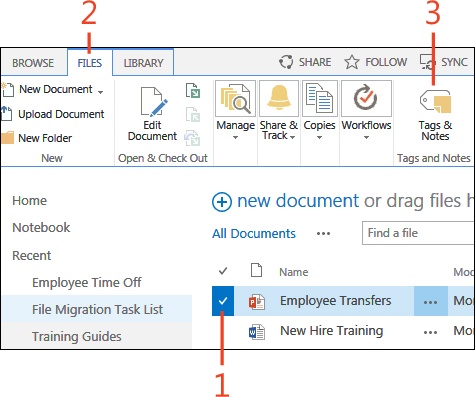
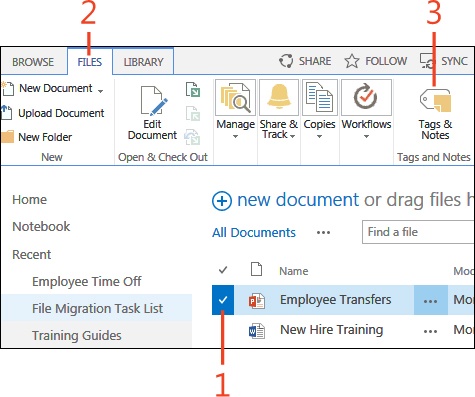
In a library, select the check box to the left of the file or folder to which you want to add a note.
On the ribbon, click the Files tab.
In the Tags And Notes group, click Tags & Notes.
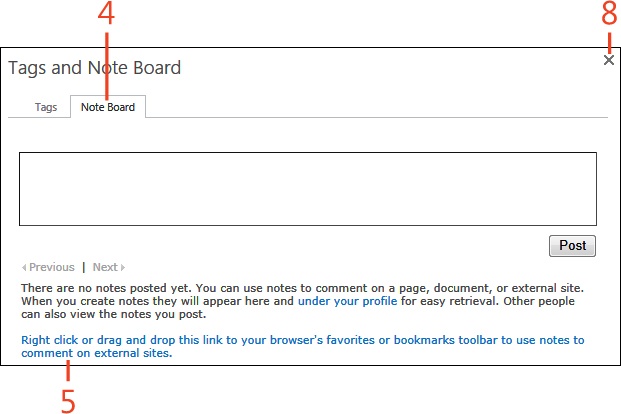
In the Tags And Note Board dialog box, click the Note Board tab.
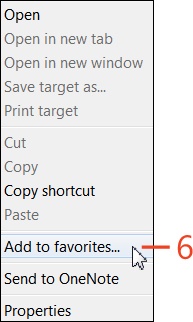
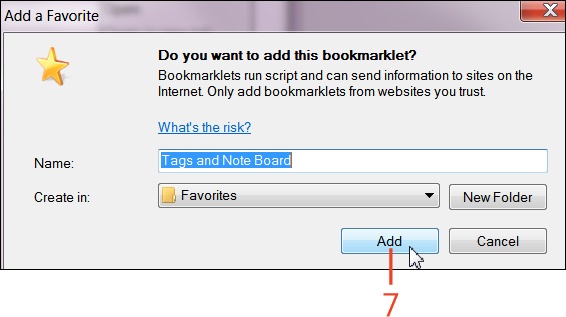
Right-click the link that reads Right Click Or Drag And Drop This Link To Your Browser’s Favorites Or Bookmarks Toolbar To Use Notes To Comment On External Sites.
On the shortcut menu that appears, click Add To Favorites.
In the Add A Favorite dialog box, click the Add button.
Back in the Tags And Note Board dialog box, click the X in the upper-right corner to close the box.
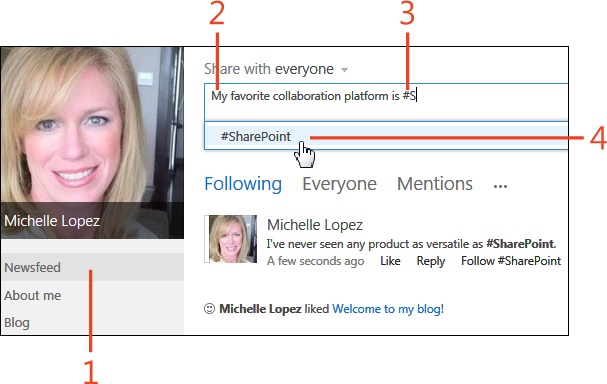
Using tags
Tagging documents or sites makes it easier for you and other users to find items associated with specific topics or keywords. SharePoint 2013 makes it possible to apply existing tags, also known as #tags (pronounced “hash tags”), to follow that tagged topic in your Newsfeed.
Add a tag to a document
In a library, select the check box to the left of the file or folder to which you want to add a tag.
On the ribbon, click the Files tab.
In the Tags And Notes section, click Tags & Notes.
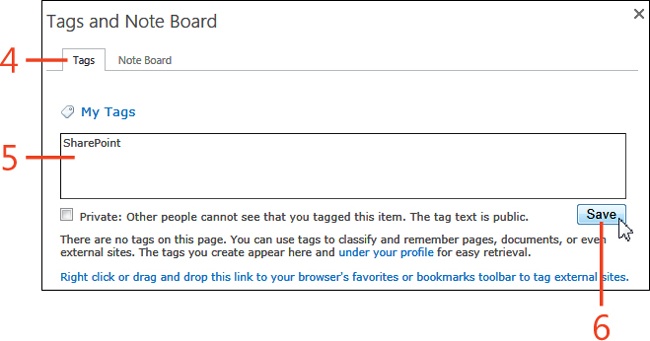
In the Tags And Note Board dialog box, click the Tags tab.
In the My Tags text box, enter a Tag or Keyword.
Click the Save button.
Use a tag in a post
On your About Me page, on the Quick Launch bar, click Newsfeed.
On the Newsfeed page, enter text in the Start A Conversation text box.
Type the hashtag symbol (#) and then continue typing to see a list of existing tags that match what you’ve typed.
In the option menu that opens, click the existing tag name.
Click Post.
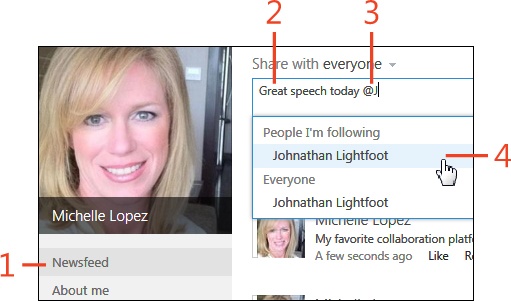
Using mentions
Many times when updating that status on your newsfeed or replying to a blog post, you’ll reference a colleague’s name. Mentioning someone in SharePoint 2013 draws attention to others and alerts those people that you’ve mentioned them. Newsfeeds will also be updated across the community, indicating that someone they’re following has been mentioned.
Similarly, when people in your organization mention you in a post, you might want to know it occurred. If your newsfeed settings include the option to automatically receive an email when anyone mentions you in a post, you’ll be notified in your Inbox. You can also view a history of all posts in which you’ve been mentioned.
Mention a colleague

Using tasks
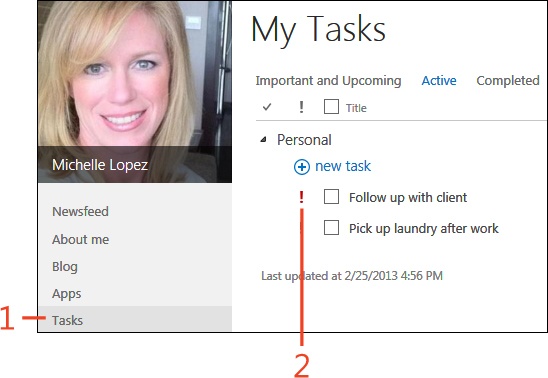
Everyone has tasks to complete on different projects, whether work related or personal. Wouldn’t it be convenient to track everything in one centralized location? The My Tasks page in SharePoint 2013 does just that. It pulls tasks from various locations such as SharePoint, Microsoft Outlook, and Microsoft Project. You can add your personal tasks here as well—they’re only visible to you. You can highlight important and upcoming tasks to provide a visible cue.
Create a new task
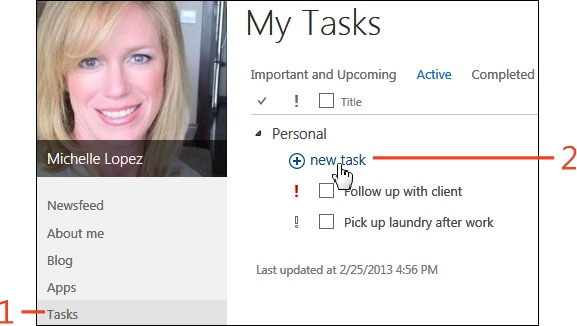
On your About Me page, on the Quick Launch bar, click Tasks.
On the My Tasks page, click New Task.
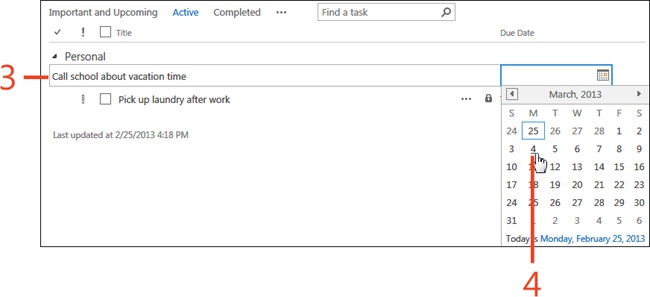
In the Title text box, enter a name for the task.
Use your mouse or tab key to move to the Due Date text box and then, on the calendar that opens, enter a due date.
Customizing tasks views
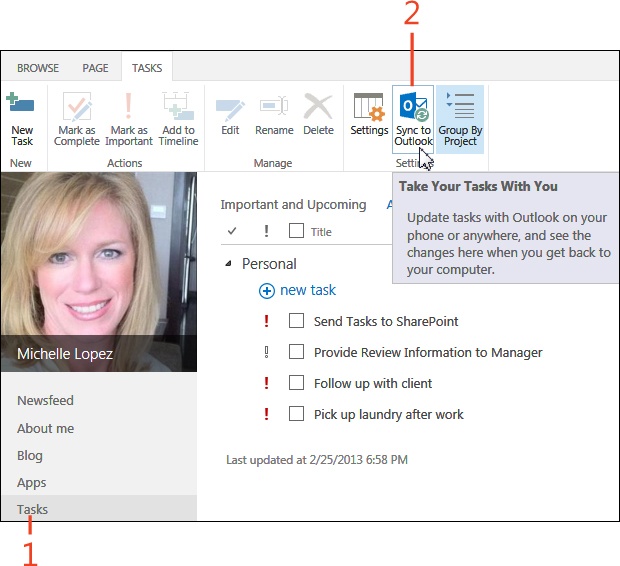
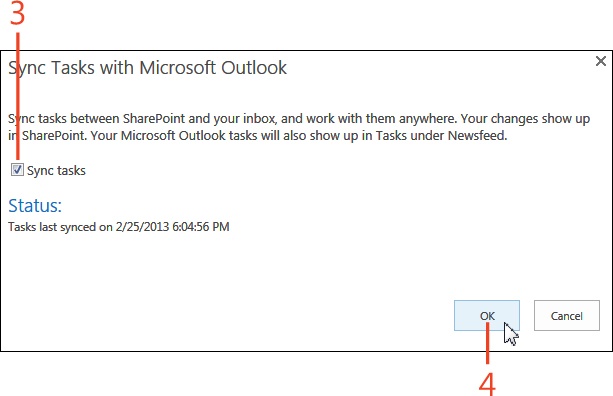
After the tasks assigned to you are in one centralized location on your My Tasks page, you can adjust the view options to suit your needs. You might want to only view tasks that have been edited in the last year, or revise the tasks default timeline range. You can also choose which projects or task lists to include on your page, and synchronize your tasks with Microsoft Outlook.
Edit the My Tasks settings
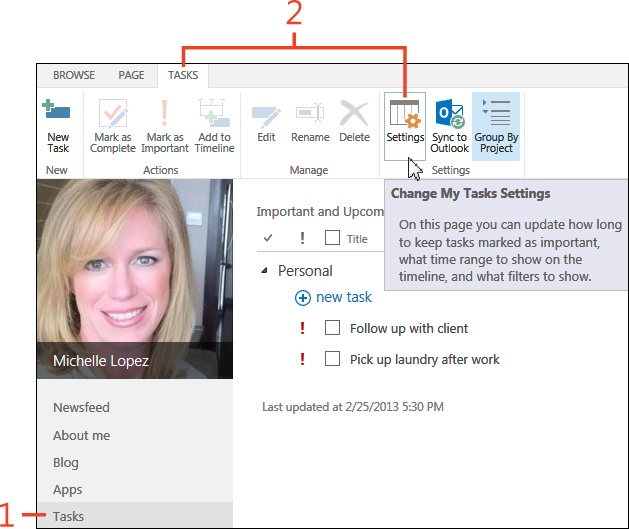
On your About Me page, on the Quick Launch bar, click Tasks.
On the ribbon, on the Tasks tab, click Settings.
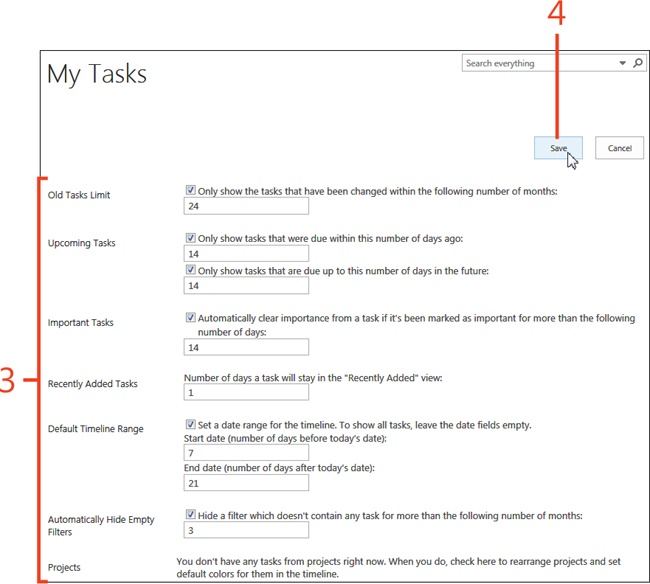
On the My Tasks settings page, update any of the following options: Old Tasks Limit, Upcoming Tasks, Important Tasks, Recently Added Tasks, Default Timeline Range, Automatically Hide Empty Filters, or Projects.
Click the Save button.