Chapter 3. Getting started with SharePoint sites
Microsoft SharePoint 2013 is a web-based platform that supports a number of collaboration-related activities for teams. It includes document management, blogging, project planning, and auditing and security components. In fact, it can be quite difficult to get a sense of all of the features of the application.
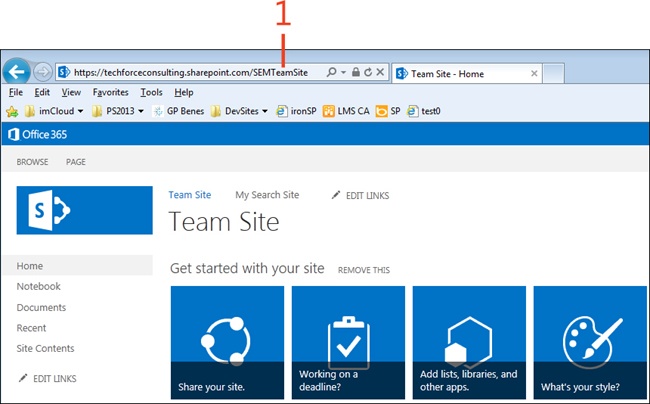
A good way to get started with SharePoint is to start working with one of the out-of-the-box SharePoint sites. A SharePoint site is a single website that can be used to organize information that has a common purpose. For example, it might be a team site on which you store documents that your team uses, or it might be a collaboration site where your group stores discussions, questions, and answers.
An immediate benefit to using SharePoint sites is that all of your departmental information is in a single place. You can collaborate, store documents, search for content, and plan projects all from the same site. Gone are the days of having to search through email for file attachments, accessing many different file shares for documents, or trying to guess where the most current version of a document resides.
Understanding sites
Usually, a SharePoint administrator performs the installation, configuration, and deployment of SharePoint 2013 throughout your organization. Part of this process is establishing something called the top-level site (also referred to as a site collection). It is through the site collection that subsites (or sites) are created. It is beyond the scope of this book to go into detail about the various SharePoint implementation scenarios; however, remember that once the top-level site is created, subsites can then be created.
Each site has a site administrator (or two) assigned to it. The site administrator’s duties can include granting access to the site, creating lists and libraries, and creating additional sites, to name a few. One of the great things about SharePoint is that it gives you the ability to assign various responsibilities to assorted people within your team. After a site administrator has the web address for a site, she can customize the site and apply security settings that permit or deny people access to it.
Creating a SharePoint site from a template
SharePoint 2013 site administrators have a lot of latitude with regard to how they can create a site. They can choose to create a blank site and add different components to it, or they can employ a site template to assist them in creating some of the more common elements of the site. If you have used a template in Microsoft Word, Microsoft Excel, or any other Office program, the concept is the same in SharePoint.
A template is a starting point that you can use to quickly produce a site that has the basics of what your team needs. This saves you time, but it also ensures a certain level of consistency among SharePoint sites throughout your organization. SharePoint 2013 comes with numerous site templates that are ready to be used out of the box.
Create a SharePoint team site
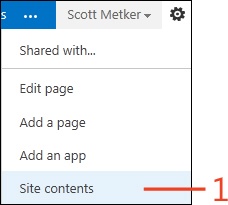
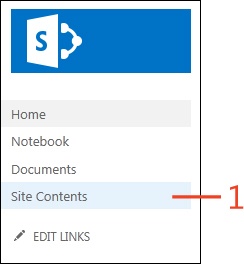
On the Home page of your site, click the Settings button (the small gear icon next to the name of the logged-on user). On the menu that appears, click Site Contents.
On the Site Contents page, In the Subsites section select the New Subsite link.
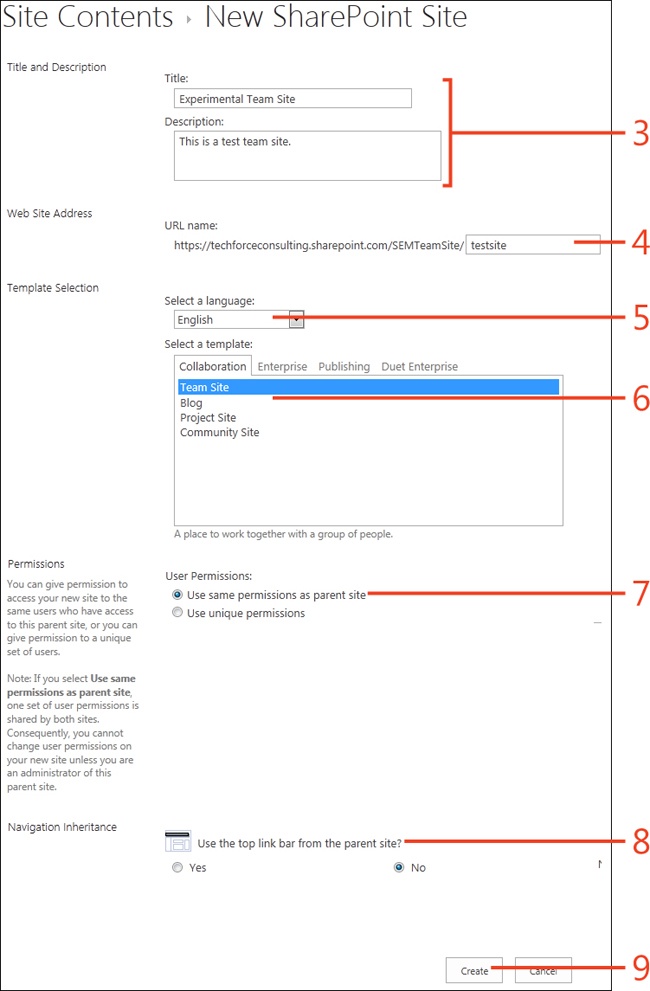
On the New SharePoint Site page, type a title and description for the case.
Type a URL for the site, relative to the root site.
Choose a language for your site.
Choose the Team Site template (located on the Collaboration tab).
Choose user permissions for the site.
Select navigation options for the site.
Click Create.
Tip
If you are trying to create a site from a previously saved template, you must select the Custom tab during template selection to see this template.
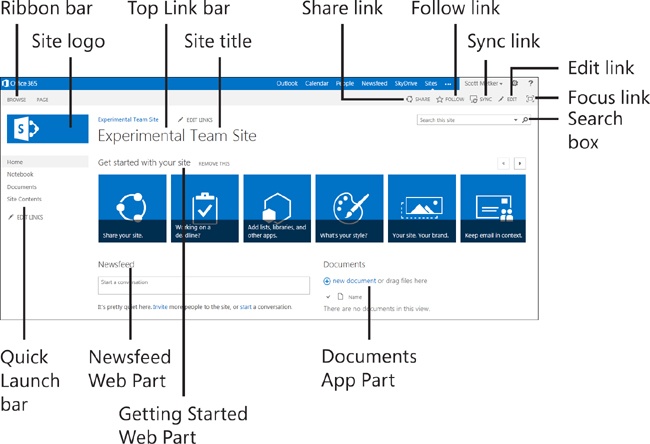
The Team Site template offers a good sampling of the capabilities in SharePoint 2013. As such, this template is one that you will most likely see deployed in several locations of your organization. The Team Site template includes a newsfeed, document library, and site asset library, already configured and ready for use. With these sites configured, you and your team can quickly set up and begin collaborating on your projects. After you have a team site set up, it’s good to go over where everything is located. The following list gives you a brief tour:
The Top Link bar shows the global navigation that can be inherited from parent sites and makes it possible for you to immediately jump to those other sites.
The Ribbon bar lets you click and expand the displayed items into a full ribbon bar with additional buttons and functions. In some cases, the ribbon bar is automatically expanded when you click on certain assets in SharePoint.
The site logo displays a graphic logo that represents your site. Clicking this logo anywhere on the site takes you to the Home page of the site.
The site title is the title of the site. It can be changed by the site collection owner.
The Getting Started Web Part shows a tiled menu for rapidly accessing certain maintenance functions on the site. It is intended to assist new users in accessing important site functionality.
With the Search box, users can enter queries and link to a search site associated with the current site. Searches can be scoped to the current site or the entire SharePoint farm.
The Share link makes it possible for users to share the site with other users by sending an email and adding selected users to appropriate site permission groups.
With the Follow link, users can configure the site so that it appears in their My Sites as one that they want follow.
Using the Sync link, users can synchronize the site content locally to their hard disk (for offline access).
User can click the Focus link to dismiss the title and navigation elements on the current page to “focus” on the page content.
The Documents App Part makes it possible for users to view the contents of the documents library that is automatically provisioned when the site is created. Users can also upload new documents to the library directly from the Home page.
The Newsfeed Web Part makes it possible for users to view recent postings by other users on the Home page as well as allow the current user to submit snippets of plain-text content.
Locating content on a site
If you are the owner of a SharePoint 2013 team site, there are two primary areas of the site that you will commonly access while maintaining the site: the site contents and the site settings. Using the site contents link, you can quickly see all of the libraries, applications, and lists on the site as well as any subsites located under the current site. You can also use the site settings link to access the administrative menus with which you configure and maintain the site.
View site contents
Changing your site’s title, description, and logo
One of the simplest formatting changes that you can make to your SharePoint 2013 site is to change its title, description, or logo. There is a separate link on the Site Settings page specifically designed for this change. Both the title and description fields are featured in pages throughout the site, and they can appear within search results, as well.
Change a site title, description, and logo
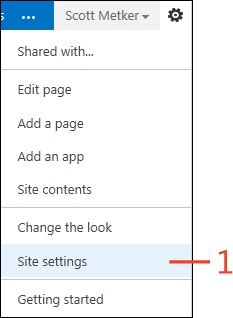
On the Home page of your site, click the Settings button (the small gear icon next to the name of the logged-on user). On the menu that appears, click Site Settings.
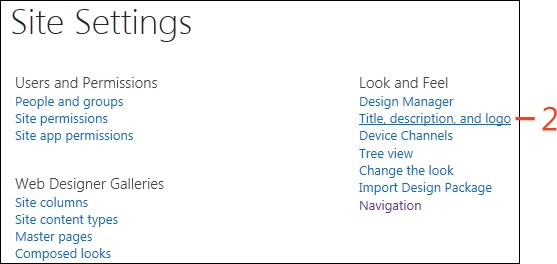
On the Site Settings page, in the Look And Feel section, click the Title, Description, And Logo link.
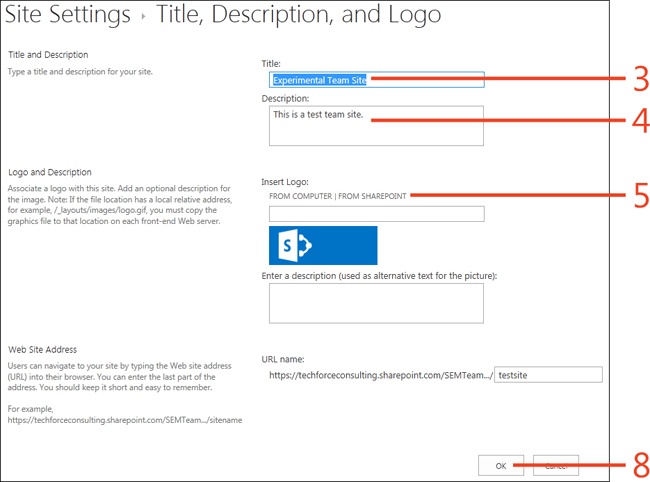
On the Title, Description, And Logo page, verify or change the title entry, as desired.
Verify or change the description of your site.
In the Logo And Description section, click the From Computer link.
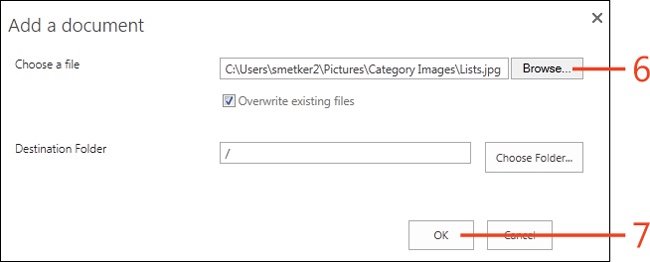
In the Add A Document dialog box, click the browse button and locate the file on your computer to upload as the new logo.
Click OK to dismiss the dialog box.
Click OK to save your title, description, and logo changes.

Changing the look and feel of a site
The chances are good that when you start to use your SharePoint site, you will want to customize a few things to meet the specific needs of your team. Fortunately, SharePoint 2013 supports a number of out-of-the-box formatting options (as well as supporting personalization to each option). Using these options, you can tailor your site match your corporate or departmental colors, change layouts, or simply change fonts and logos.
Change the look and feel of your site
On the Home page of your site, click the Settings button (the small gear icon next to the name of the logged-on user). On the menu that appears, click Site Settings.
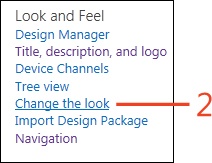
On the Site Settings page, in the Look And Feel section, click the Change The Look link.
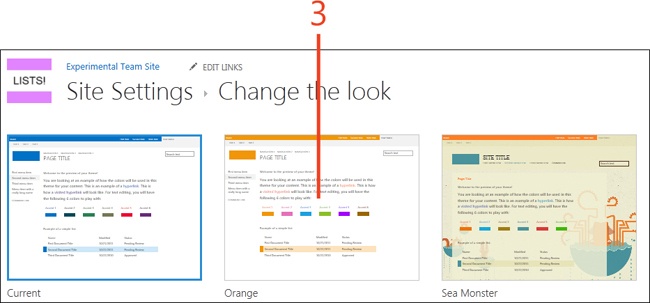
On the Change The Look page, click one of the displayed templates.
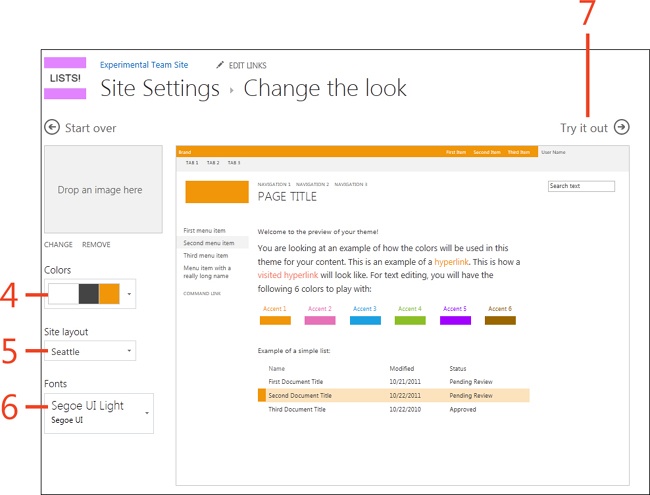
On the Change The Look page for the template you selected, choose a different color scheme.
Select a non-default site layout for the template, if you want.
Select a non-default font for the template, if you want.
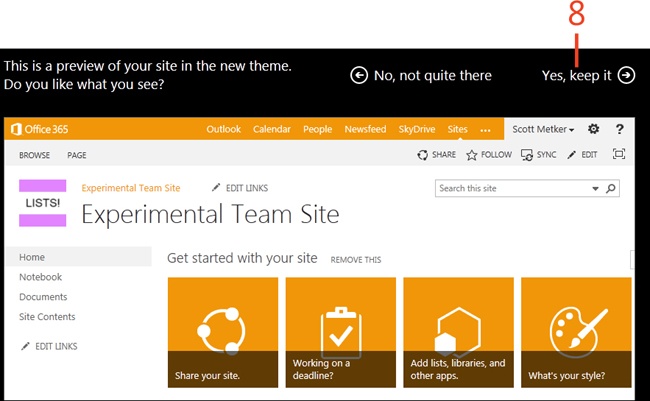
Click Try It Out.
Click Yes, Keep It to save your changes.

Changing the navigation tree view settings
Depending on the purpose of your SharePoint 2013 site, you might want to modify the default navigation. Normally, SharePoint sites provide a Quick Launch bar for internal navigation and a Top Link bar that inherits from the parent site of the current site (if present). The following options describe how to customize the navigation settings within your site.
Change tree view settings
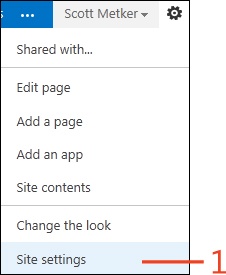
On the Home page of your site, click the Settings button (the small gear icon next to the name of the logged-on user). On the menu that appears, click Site Settings.
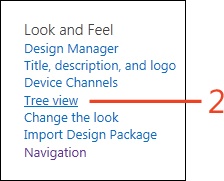
On the Site Settings page, in the Look And Feel section, click the Tree View link.
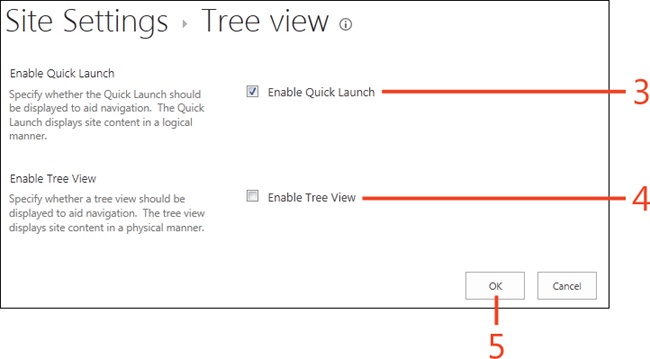
On the Tree View page, select the Enable Quick Launch check box to show the Quick Launch bar at the left side of your site.
Select the Enable Tree View check box to show a hierarchical, content-based view of your site immediately under the Quick Launch bar.
Click OK to save your results.

Editing the Quick Launch bar on a nonpublishing site
On nonpublishing sites (sites for which your technical staff have not activated the SharePoint Server Publishing Infrastructure feature), on the Site Settings page, you can edit the Quick Launch bar and Top Link bar separately.
Edit Quick Launch bar on a nonpublishing site
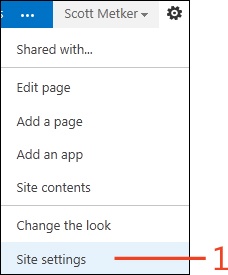
On the Home page of your site, click the Settings button (the small gear icon next to the name of the logged-on user). On the menu that appears, click Site Settings.
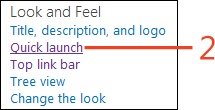
On the Site Settings page, in the Look And Feel section, click the Quick Launch link.
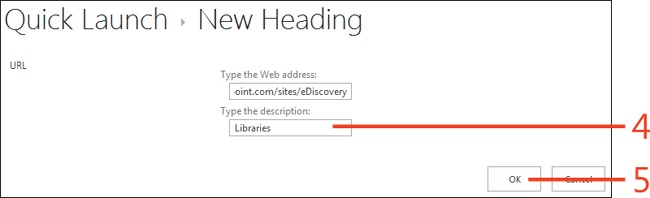
On the Quick Launch settings page, you can create another header section (under which additional links can be placed) by clicking the New Heading link. Alternatively, you can proceed to step 6 to create a link under an existing header.
On the New Heading page, type the URL and a descriptive label (which will display on the Quick Launch bar) for the heading.
When users click the heading, they are taken to the URL that you entered.
Click OK to save your new heading and return to the Quick Launch settings page.
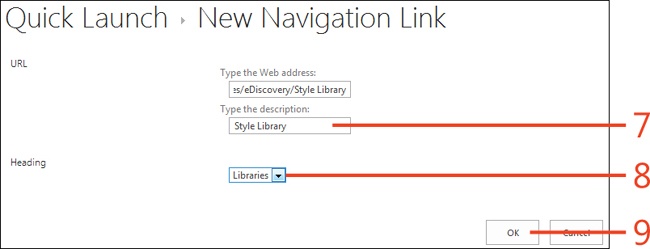
On the Quick Launch settings page, you can create a new Navigation Link under an existing heading by clicking New Navigation Link.
On the New Navigation Link page, enter the URL and a descriptive label (which will be displayed on the Quick Launch bar) for the link.
When users click the link, they are taken to the URL that you entered.
Select the existing heading under which this link will be placed.
Click OK to save your new heading.

Editing the Top Link bar on a nonpublishing site
As with the Quick Launch menu on nonpublishing sites, you can also edit the list of linked sites that appears horizontally across the top of your site. This option is only available on sites for which your technical staff has not activated the SharePoint Server Publishing Infrastructure feature.
Edit the Top Link bar on a nonpublishing site
On the Home page of your site, click the Settings button (the small gear icon next to the name of the logged-on user). On the menu that appears, click Site Settings.
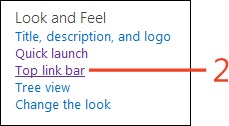
On the Site Settings page, in the Look And Feel section, click the Top Link Bar link.
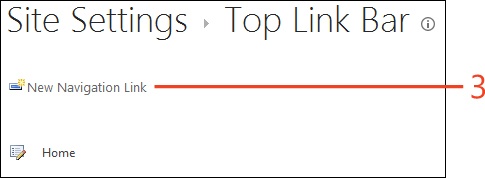
On the Top Link Bar settings page, you can create a new link by clicking the New Navigation Link button.
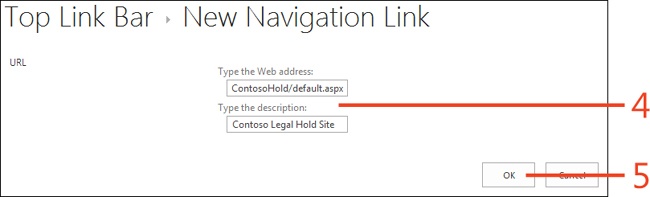
From the New Navigation Link page, type the URL and a descriptive label (which display on the Top Link bar) for the link.
When users click the link, they are taken to the URL that you entered.
Click OK to save your new heading.
Editing publishing site navigation
If your administrative staff has activated the SharePoint Server Publishing Infrastructure feature on your root site collection, you have advanced options for changing your site navigation structure that can also be inherited by subsites. This covers both the Quick Launch bar (on the left side of your site Home page) as well as the Top Link bar (which appears horizontally across the top of your site).
Edit publishing site navigation
On the Home page of your site, click the Settings button (the small gear icon next to the name of the logged-on user). On the menu that appears, click Site Settings.
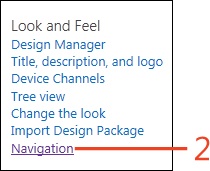
On the Site Settings page, in the Look And Feel section, click the Navigation link.
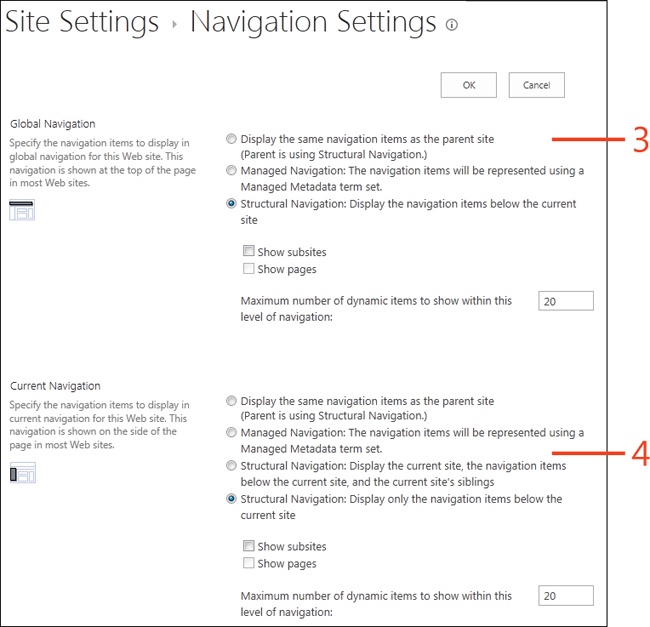
On the Navigation Settings page, choose your global navigation options.
These are applied to the Top Link bar that appears horizontally across the top of the Home page of your site.
On the Navigation Settings page, choose your current navigation options.
These are applied to the Quick Launch bar that appears vertically on the left side of the Home page of your site.
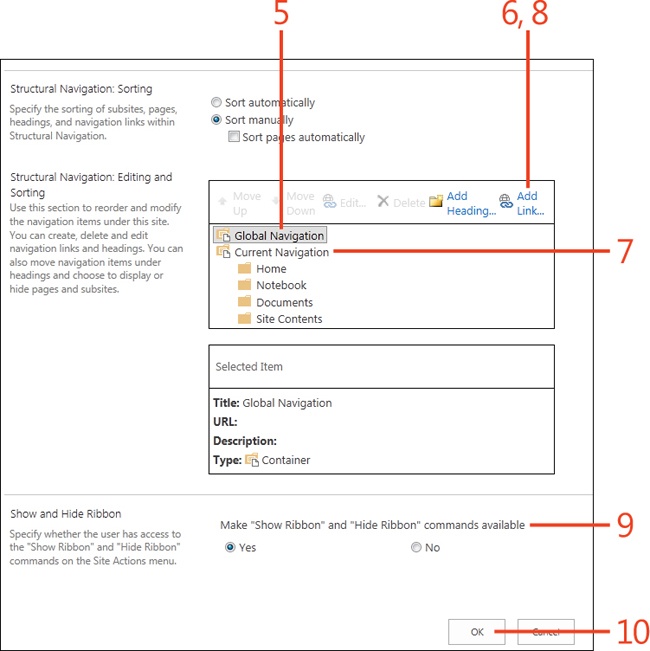
In the Structural Navigation settings section, select the Global Navigation folder to manually add new items to your Top Link bar.
You can then use the Add Link button to add additional links.
In the Structural Navigation settings section, select the Current Navigation folder to manually add items to the Quick Launch bar.
You can then use the Add Link button to add additional links.
In the Show And Hide Ribbon section, select whether to allow users to access the Show and Hide ribbon buttons on the toolbar.
Click OK to save your results.

Saving a site as a template
After you create a site and set it up the way you want it, you might decide to use it as a template for sites that you create in the future. By saving your newly created site as a template, you can make deploying sites like it much easier because you don’t need to re-create them manually.
When you save a site as a template, any lists, libraries, or other objects you have added are also saved. You also have the option of saving some content with the template. For example, maybe in each of your newly created sites you want to have certain forms uploaded to specific libraries during the site creation process.
Save site as a site template
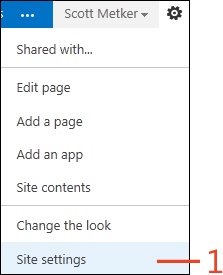
On the Home page of your site, click the Settings button (the small gear icon next to the name of the logged-on user). On the menu that appears, click Site Settings.
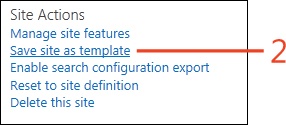
On the Site Settings page, in the Site Actions section, click the Save Site As Template link.
On the Save As Template page, type a file name for your site template.
If you later export the template to a file, this will be the default file name.
Type a name and description for the template.
If you want to also save all content stored in document libraries on your site in the template, select the Include Content check box.
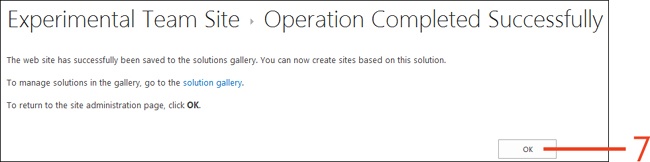
Click OK to save the template.
On the Operation Completed Successfully page, click OK.