Chapter 13. Collaborating with blogs
Blogs are used to publish short articles pertaining to business or personal subjects, called posts. The dramatic increase in popularity of blogging has made it common place. Personal blogs usually express an online journal or observations for a network of family and friends. Corporations and other organizations have recognized the value in utilizing blogs to capture and share knowledge as well as strengthen communication and relationships between identified groups such as clients or business partners.
Microsoft SharePoint 2013 incorporates a Blog Site template to include the features that generate collaboration. This section will show you how to get started with your own blog and how to organize and manage the posts and comments.
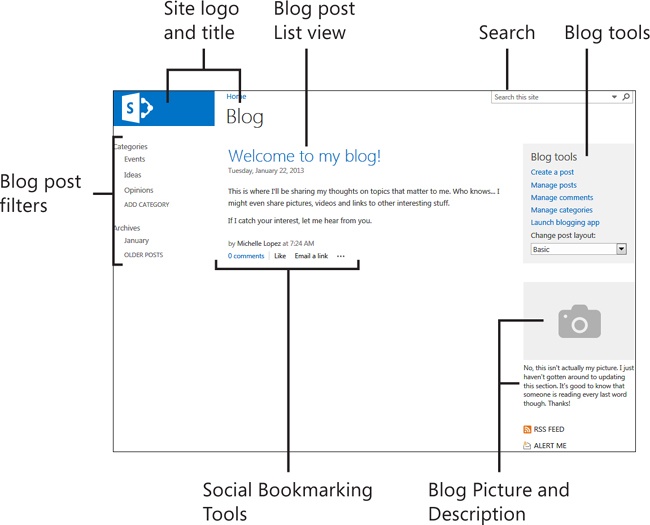
A blog site presents the information that you want to share in an easily accessible fashion. Most series of posts are in reverse chronological order, showing most recent entries on top. SharePoint 2013 blog sites include information about the author and the purpose of the blog itself. Other features include filtering posts by category or calendar month, liking or sharing a link to a post, and subscribing to the blog by using a Real Simple Syndication (RSS) feed or creating an alert.
Creating a blog site
You can create a new blog site in SharePoint 2013 by using the Blog Site template when you’re creating a new site or site collection. Typically, this would be created by the SharePoint administrator at your workplace, upon request. If you work at an organization at which you have personal sites, you can create a blog site associated with your personal profile, otherwise known as My Site. The tasks that follow show you how to create a blog site on a SharePoint Team site as well as on your personal My Site.
Create a blog site
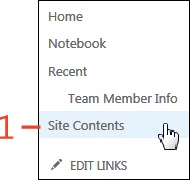
On the Quick Launch bar, click Site Contents.
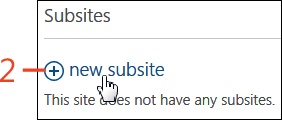
At the bottom of the Site Contents page, in the Subsites section, click New Subsite.
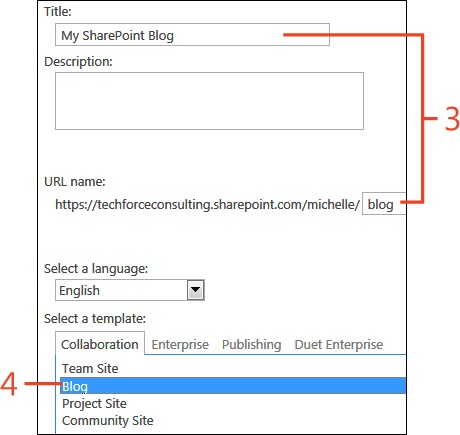
On the New SharePoint Site page, in the Title And Description section, enter a Title for your blog site (optionally, enter a description of the site, if you want). In the Web Site Address section, enter a URL name.
In the Select a Template section, click the Collaboration tab and then click Blog.
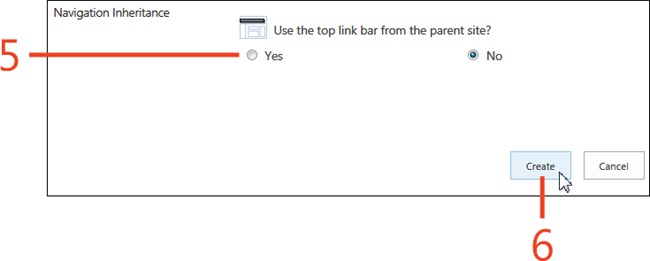
In the Navigation Inheritance section, under Use The Top Link Bar From The Parent Site, click Yes.
Click Create.
Changing your blog picture
Take a few moments to customize your new SharePoint 2013 blog site before writing posts. Adding a picture or avatar helps your readers to become familiar with who you are, or to connect to the site visually.
Change your blog picture
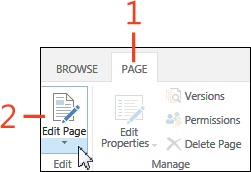
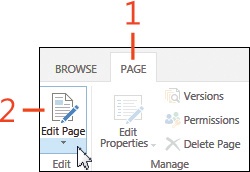
On the ribbon of your blog site, click the Page tab.
In the Edit group, click Edit Page.
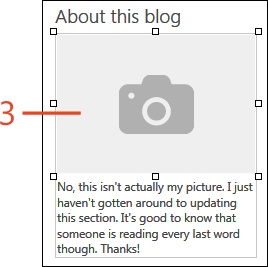
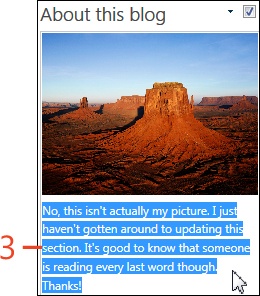
On the lower right of the editable page, in the About This Blog section, click the placeholder image.
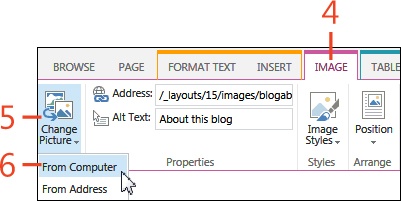
On the ribbon, click the Image tab.
In the Select group, click Change Picture.
On the menu that appears, click From Computer.
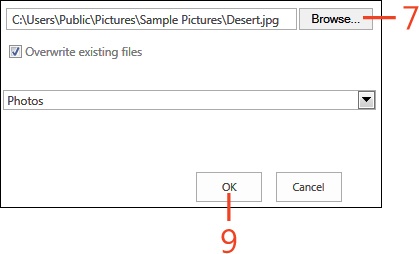
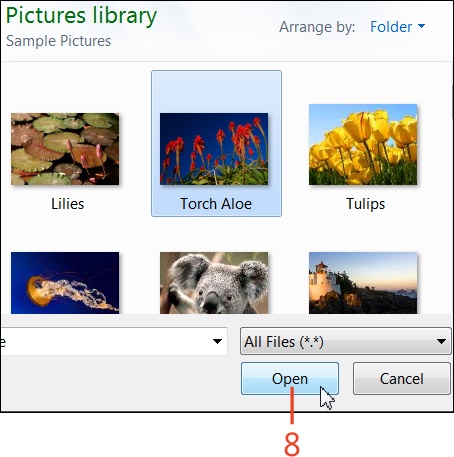
In the Upload Image dialog box, click the Browse button and then, in the Choose File To Upload dialog box that opens, select a picture from your local computer to upload.
Back in the Upload Image dialog box, click OK. (Refer to the screen shot on the previous page.)
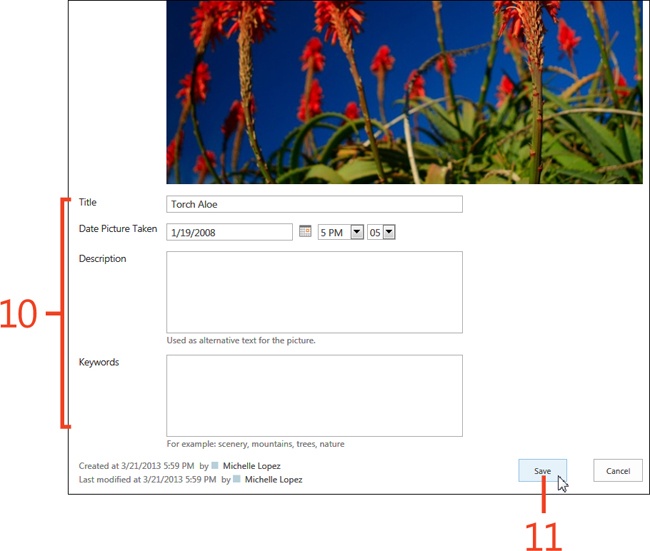
In the Photos dialog box, you can add descriptive information about your photo.
Click Save.
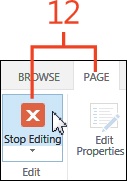
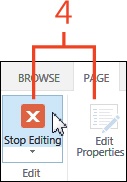
On the Page tab, click Stop Editing.
Changing your blog description
You can let your readers know what you plan to write about by adding a blog description. You might want to customize the blog categories by which your topics can be organized.
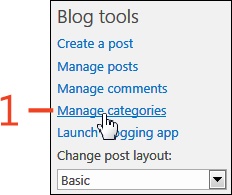
Using categories to organize your blogs
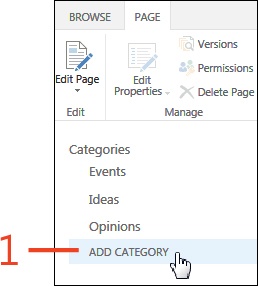
Categories help you to organize your content as well as help your readers to locate the information that interests them. Categorizing your blog content isn’t required, but it is useful to separate posts by subjects or topics. SharePoint blog sites come with, but are not limited to, three editable categories: Events, Ideas, and Opinions.
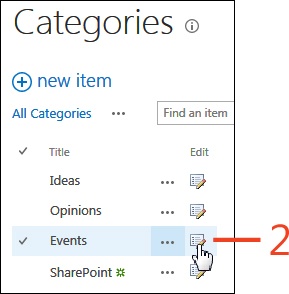
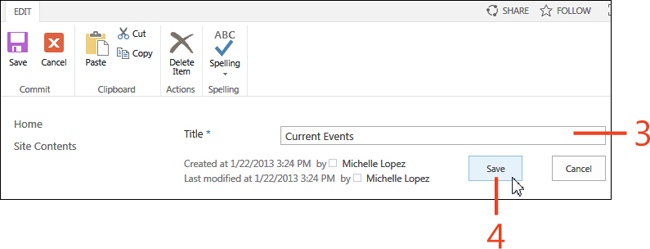
Create a new category

Edit a category
Managing blog posts
Blog posts share relevant information, promote your expertise, and update colleagues on your activities. Managing your blogs is an essential part of maintaining up-to-date information and keeping your readers well informed.
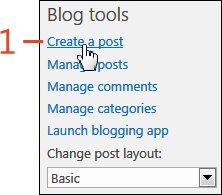
Create a blog post
In the Blog Tools section of your blog site, click Create A Post.
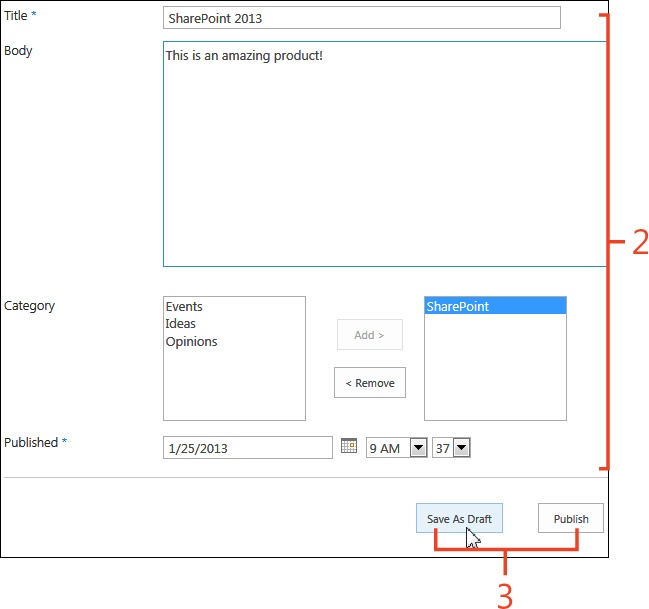
On the New Post page, enter your post information.
Save the post by using either of the following two methods:
Click Save As Draft to save the current version. The post will not display to site visitors until it is Published.
Click Publish to save the post and display it for public viewing. The post will automatically publish on the date that you specified in the Published text box.
Publish a blog post that was previously saved as a draft
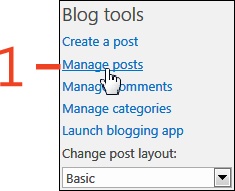
In the Blog Tools section of your blog site, click Manage Posts.
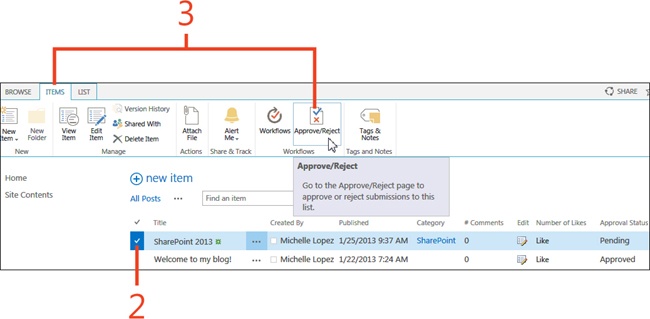
On the Posts page, select the check box next to one or more posts whose approval status indicates Pending. (Hover over the items to display the check box.)
On the ribbon, click the Items tab and then, in the Workflows group, click Approve/Reject.
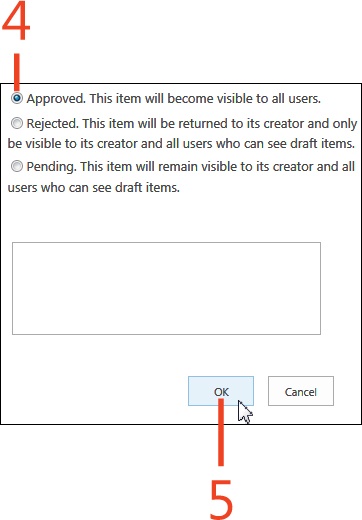
Click the Approved option.
Click OK.
Managing blog comments
Blog comments invite collaboration between you, the author, and your readers. Creating a dialog between the author and viewers enhances the information on the topic.
Add a comment
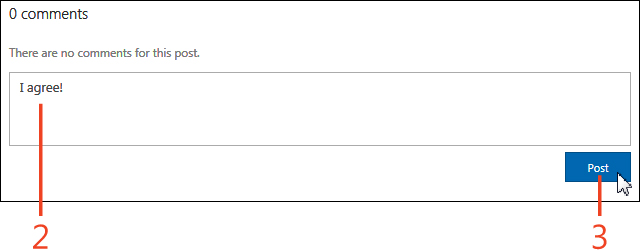
View, edit, or delete comments
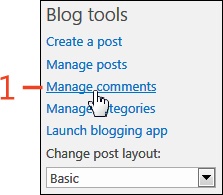
In the upper-right Blog Tools section of your blog site, click Manage Comments.
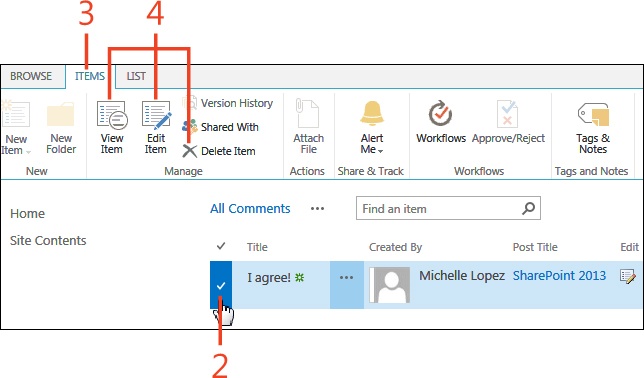
On the Comments page, select the check box next to a comment. (Hover over the items to display the check box.)
On the ribbon, click the Items tab.
In the Manage group, click any of the following options:
To view comment details, click View Item.
To edit the comment details, click Edit Item.
To permanently delete the comment, click Delete Item.
Subscribing to a blog’s RSS Feed
RSS (which stands for Really Simple Syndication) Feeds make it possible for content changes to immediately update on the Internet. When you subscribe to an RSS Feed, you or your readers are automatically notified when any changes are made.
Subscribe to RSS
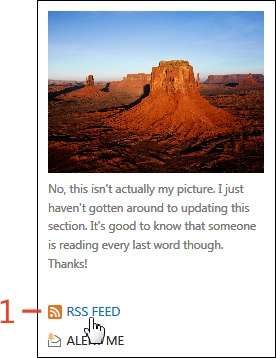
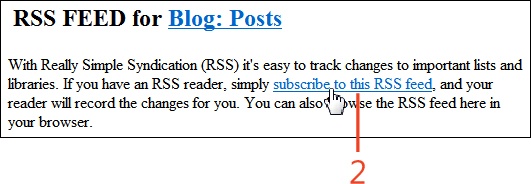
On your blog Home page, below the Blog Description, click RSS Feed.
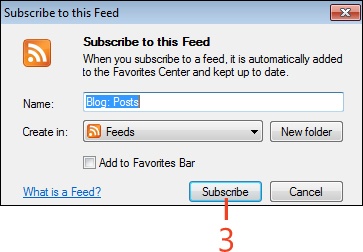
On the RSS Feed For Blog Posts page, click the Subscribe To This RSS Feed link.
In the Subscribe To This Feed dialog box, click Subscribe to bookmark your feed subscription.
Using desktop blogging tools to publish blog posts
You can use Microsoft Word and Windows Live Writer to publish to a SharePoint blog site. A blogging tool provides robust options for editing larger posts or working with pictures and other objects that you want to include.
Publish a blog post by using Microsoft Word
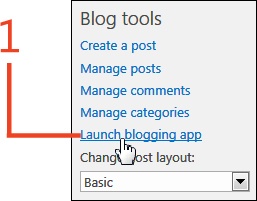
In the Blog Tools section of your blog site, click Launch Blogging App.
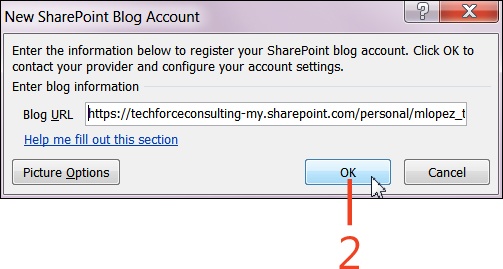
In the New SharePoint Blog Account dialog box, click OK to register a new SharePoint blog account with the default settings.
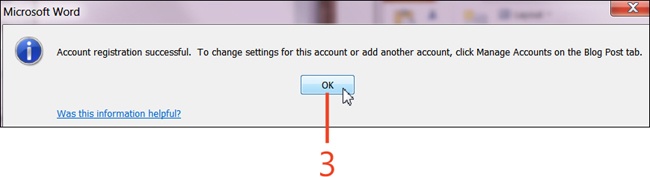
In the Account Registration Successful confirmation box, click OK.
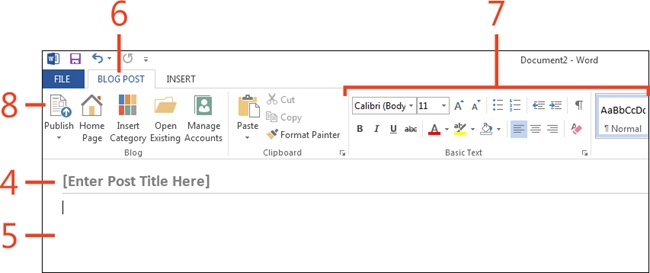
In the Enter Post Title Here placeholder, type your blog post title.
Edit the body of your blog post.
On the ribbon, click the Blog Post tab.
In the Basic Text group, use the various commands to apply formatting to your post, as desired.
In the Blog group, click the Publish button.