Chapter 16. Searching for information
Even perfectly organized Microsoft SharePoint 2013 sites can grow very large over time, making it more difficult for you to find content. Additionally, when users start working with large numbers of SharePoint sites, keeping track of all of the information can become nearly impossible. Metadata, folder navigation, and site navigation are all tools to help organize information in a more practical way, but increasingly, search is becoming the first, last, and primary method employed by most users to find content.
Each major release of SharePoint featured significantly improved search functionality, particularly with respect to the user experience. SharePoint 2013 supports a seamless search experience across many different kinds of documents: Office Documents, PDF, videos, webpages, personal profiles and even previous online conversations. When searching within SharePoint, the search experience is tailored to get you the information that you need, regardless of the source or type of information.
Tip
The Enterprise Search Center is only available in some site configurations and licensing arrangements, so if you are unable to see this Search Center in the steps in this section, please consult your administrator.
Tip
FAST search was fully integrated into SharePoint 2013, so if you are familiar with the separate FAST Search Center used in SharePoint 2010, that functionality has been merged into the Enterprise Search Center template.
One of the first things you’ll likely think when you see the SharePoint 2013 search results page is “Wow! There’s a lot going on here!” At first, the amount of information presented can be overwhelming, but many of these items are tools designed to help you to both refine and preview your search results.
As you learn the interface, you’ll be able to quickly run a basic search and “home in” on relevant information by using the search tools. The preview capabilities also help with the problem of viewing a number of search results, particularly when this content consists of documents. In the past, users would need to individually open each document to determine if it contains anything of value to them. But now, with the improved preview functionality and Office Web Applications integrations, users can quickly view Office documents without having to open them from the site directly.
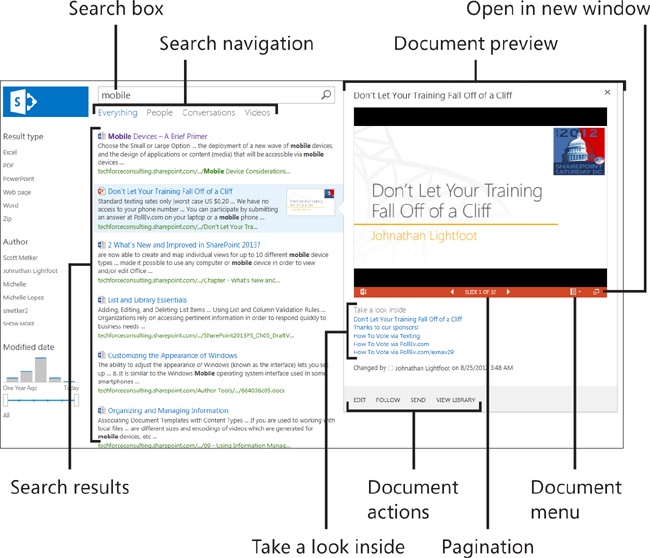
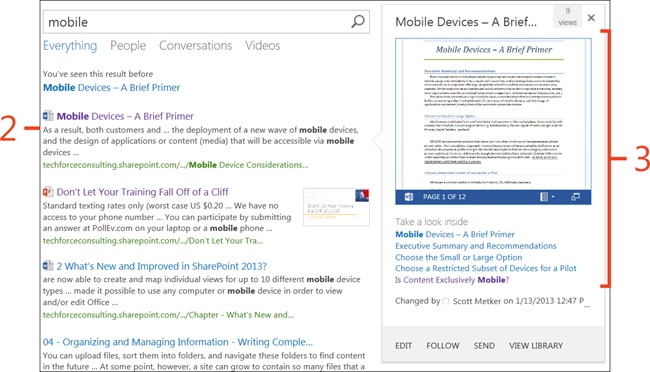
Although the options available in your search results might vary slightly (due to licensing restrictions and IT configuration), a typical search results page contains the following elements:
The Search box shows your current query and gives you the capability to edit your search terms.
The Refinement area is where you can further filter your search results based on document metadata. For example, you can click on a Result type of PowerPoint so that your results only show presentations.
Using search navigation, you can switch between specialized search pages that further filter the results. This feature is only available in the Enterprise Search Center
The search results shows you a listing of all site content that match the current query
The document preview shows you a preview of a document by using the Office Web Apps functionality. This functionality only works for certain Web Parts.
The pagination display shows you the number of pages for certain types of documents and, for PowerPoint, lets you advance the previewed page.
The take a look inside area shows you the first few section headers or slide titles within the previewed document.
The document menu makes it possible for you to download a copy of the document.
Using document actions, you can directly edit the document, follow it (receive notifications based on document changes), send the document by email, or navigate to the library containing the document.
You can use the open in new window button to open the document in a new window.
Creating a Search Center
The first step toward using a Search Center is creating one. You create a Search Center as you would any other site or subsite; you start by creating a new site from a template. You can add a Search Center as a subsite directly under one of your current sites, or your administrator can create it as a stand-alone site collection.
Create a Search Center
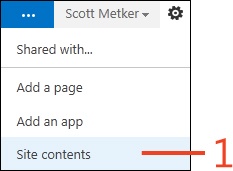
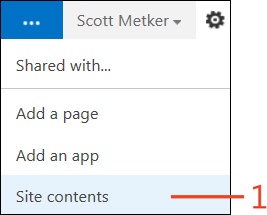
From the site that you will use as the parent site, click the Settings button (the small gear icon next to the name of the logged-on user) and then, on the menu that appears, click the Site Contents link.
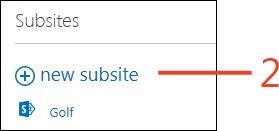
On the Site Contents page, scroll down to the Subsites section and click the new subsite link.
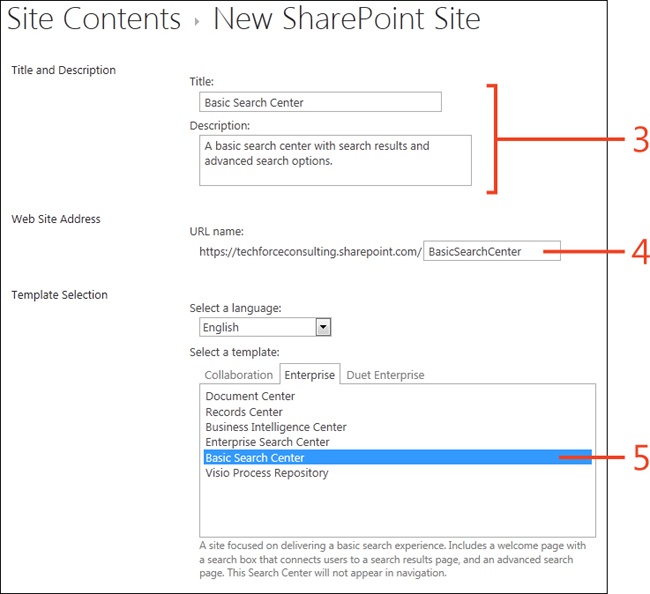
On the New SharePoint Site page, enter a title and description for the Search Center.
Enter a relative URL under which this site will be created.
Choose one of the Search Center templates.
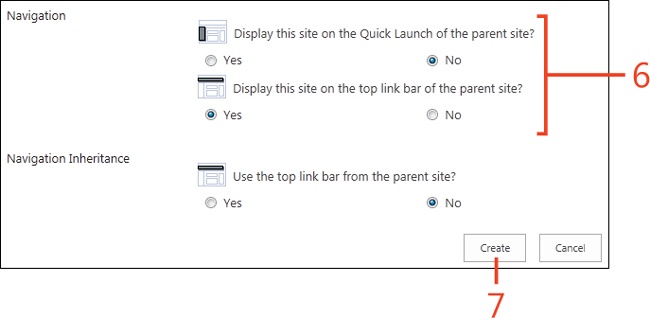
Select the navigation options for the site (and the parent site).
Click Create.
Searching from a Search Center
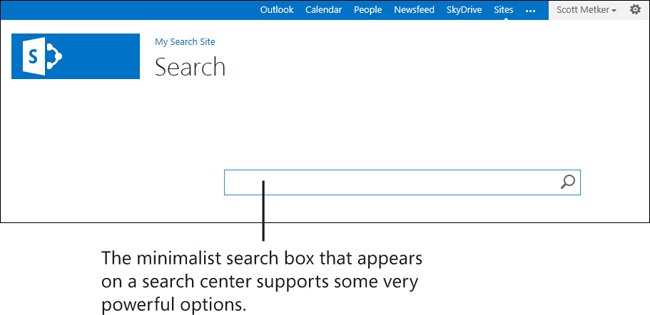
After you have created a Search Center, you’ll probably want to try it out for the first time. From the Home page of your newly created Search Center, you’ll be able to enter a simple, free-text query similar to that which you might use with an online search provider such as Bing.com.
Search from a Search Center
From the root site that contains your Search Center, click the Settings button (the small gear icon next to the name of the logged-on user) and then, on the menu that appears, click the Site Contents link.
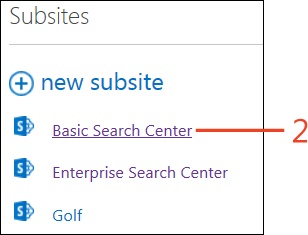
On the Site Contents page, scroll down to the Subsites section and click the link for your Search Center (in this example, it’s Basic Search Center).
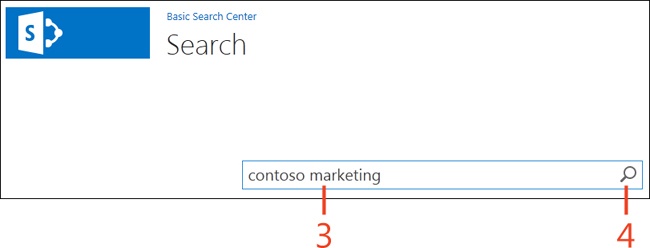
On the Search Center page, in the search text box, enter your search terms.
Click the the Search button (the magnifying-glass icon) to perform the search.
If you’ve made use of search within a SharePoint 2013 Search Center, you’ve probably already noticed how similar the experience is to working with a search engine such as Bing or Google. Regardless, the blank search window can be daunting, particularly when you are trying to search for a file that is buried under a mountain of similar content. In this case, there are options you can use that will quickly help you isolate exactly the content you need to find quickly.
The expressions that you type into the search box in a SharePoint Search Center are referred to as the Keyword Query Language (KQL); however, this is simply a complex way of describing expressions that you can add to your queries to help you focus and further analyze relevant information.
Find content containing all keywords
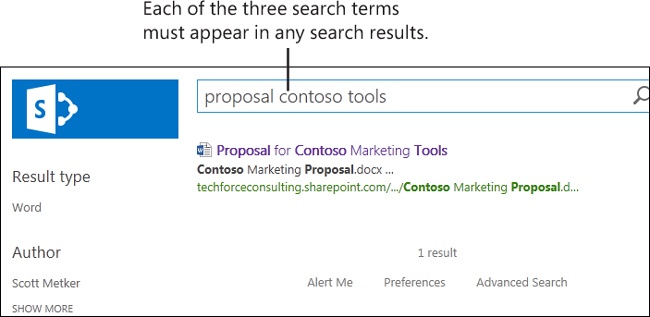
The simplest method for refining your search if too many items are returned is to add additional keywords to the query. SharePoint 2013 lists the keywords that you originally used at the top of the search page so that you can quickly modify and extend your original query without having to retype it.
By default, each of the search terms that you enter are all required to appear in the matching documents, so if you type three separate words into the search interface, all three words must appear somewhere in the returned documents.
Tip
Your keywords are not required to appear in order or even together in the text. The only requirement is that each of the words must appear somewhere in the document or in the item properties.
Find content matching any of your keywords
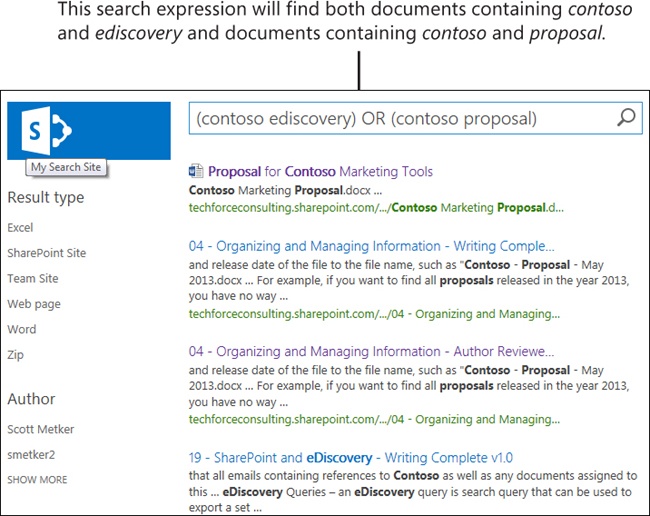
Sometimes, in more complex queries, you want to include results that match one of two queries. In this case, you are really asking for one result “or” another, which requires the use of the OR keyword. Typically, when using the OR keyword, you will need to enclose multiterm expressions within parentheses to ensure that the query engine knows which terms to combine and how.
Tip
The OR operator can be combined with some of the other techniques in this section; thus, you can create very complex search operations that can include wildcards and phrases.
Caution
Unlike query terms, the OR keyword must be capitalized or it will be treated as an ordinary word to search.
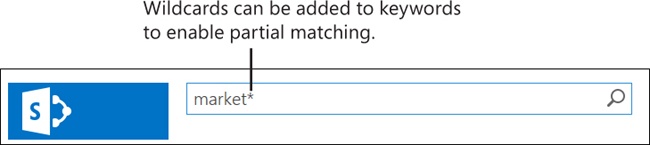
By default, SharePoint searches find only exact matches for the keywords that you enter in the search box. Sometimes, you might want to search for only part of a word because it might have multiple endings. In this case, you can add a special operator to the end your partial word to match all documents containing this partial word.
This operator is called the wildcard operator, and it is represented by an asterisk (*). You can simply add an asterisk to the end of any partial word, and the search engine will return all permutations that match the first part of the word.
Tip
Depending on your search configuration, searches in your site might already return results for similar words without requiring a wildcard. For example, many queries automatically return results for the plural forms of words, such as “documents” when you search on “document”. This is called word stemming, and it is configured by the search administrator.
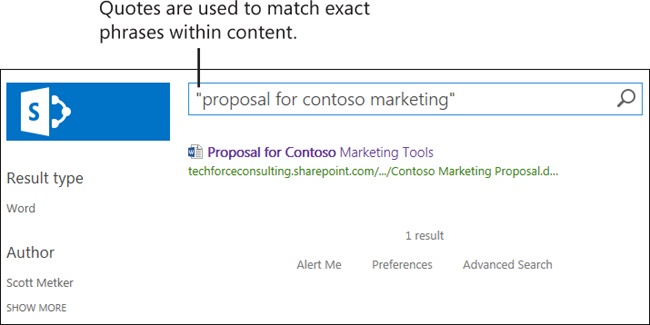
Unlike the wildcard operator, there might be time when you know an entire phrase that is used in your document and want to only return results where your keywords appear in the exact same order in the document. In this case, you can surround your entire search phrase in double quotes. Only documents containing the entire phrase as you have entered it will be returned.
Tip
This can be a very useful tool for finding documents on a SharePoint site for which you might only have a snippet of the document (for example, if you only have part of a printout). Simply enter most of a sentence within the quotes and your search results will be quite specific.
Tip
Quotes must appear in matched pairs, so make sure that you put quotes before and after your entire phrase.
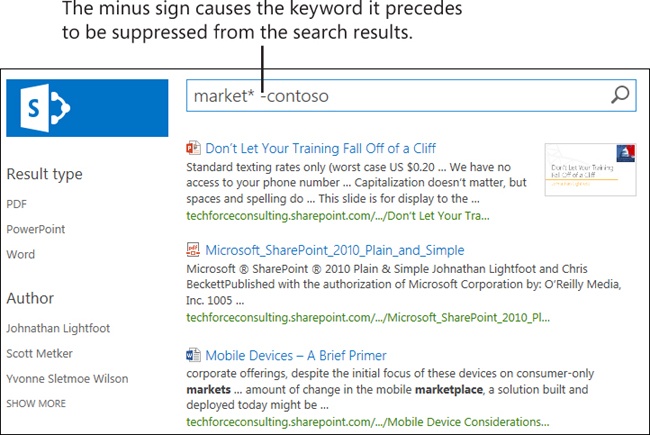
Sometimes, you have too many search results, but you don’t have additional terms that you can use to refine. In this case, you might notice that your search results are being overwhelmed by a large number of documents that share an unwanted term. In this case, you can simply append a minus sign (–) to the beginning of any keyword or expression that you wish to exclude from the results.
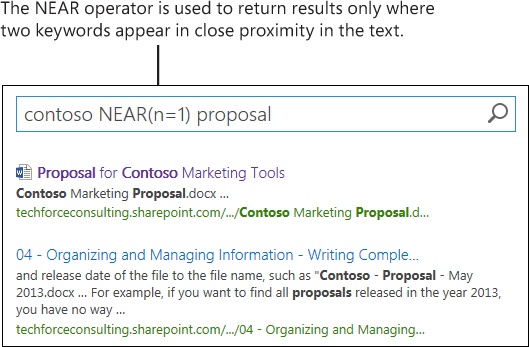
One of the more interesting search options is the NEAR operator, with which you can return results in which two words appear near one another. For example, you might be looking for documents where a company name appears near the word “proposal.” You could enter the search expression as follows:
proposal NEAR(n=4) contoso
In this case, you would find any document containing both “proposal” and “contoso,” but no more than four words appear between those keywords. You can enter any number between 1 and 8 to specify how far away the terms can appear in the matching documents.
Preparing your site for search
After you’ve created a Search Center, you might want to ensure that users of your other sites use this Search Center instead of the default SharePoint 2013 search facility. You can configure the search box that appears at the top-level page of your site to redirect all searches to a specific Search Center. This way, you can better control the user search experience within your site.
Associate a Search Center to your site
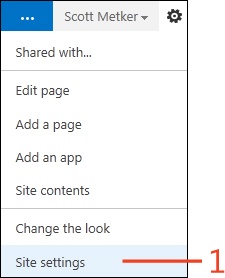
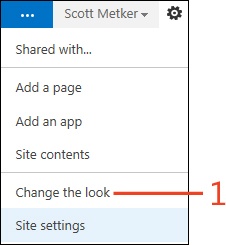
On your search site, click the Settings button (the small gear icon next to the name of the logged-on user) and then, on the menu that appears, click the Site Settings link.
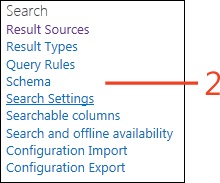
On the Site Settings page, in the Search section, click the Search Settings link.
On the Search Settings page, enter the relative URL to your Search Center. If your Search Center is an Enterprise Search Center, append “/Pages” to the URL.
Enter the URL of your search results page.
Click OK.

Searching site content
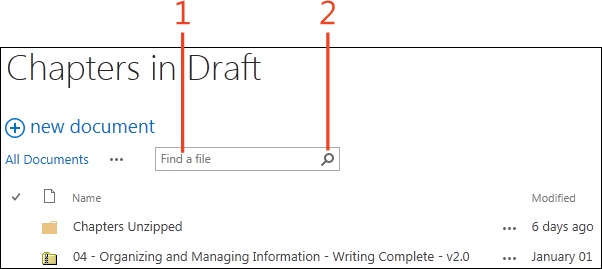
Search Centers are not the only place where you can initiate searches in SharePoint 2013. After you have associated a Search Center with your site, you can access the Search Center results directly from the search dialog on your site’s Home page. Additionally, you can perform library-specific searches directly within a document library without having to navigate to the Search Center.
Search from the Home page of a site
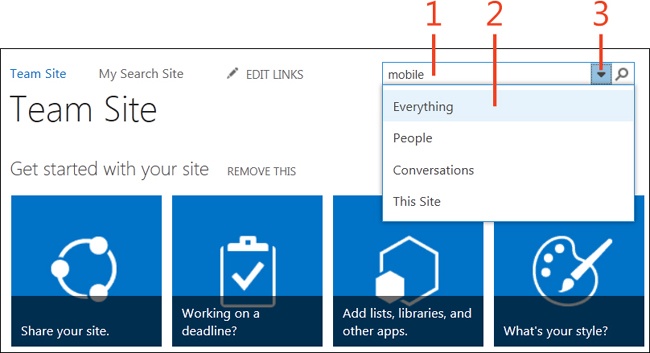
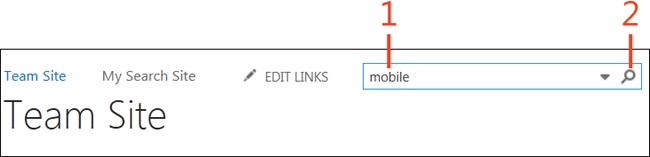
On the Home page of your site, in the search box, enter your keywords.
If available, click the search drop-down arrow to select the context of your search and then start the search.
Alternatively, simply click the Search button (the magnifying-glass icon) or press Enter to start the search.
Using search refinement
Search refinement makes it possible for users to continue to filter search results after an initial query. If you’ve ever tried searching online within an online shopping site, you have probably already used search refinement. For example, if you search for “television” at an online electronics store, you might be presented with search options specifying size ranges such as 21–24 inches or 25–32 inches. You might see other filters with which you can select between LCD and Plasma displays. SharePoint 2013 supports the same type of dynamic filtering within search results.
One of the most powerful options within search refinement is that you only see the most relevant filters based on the query results. An example of this is the Result type refinement that shows a list of the most commonly occurring types of content that appear in your search (for example, Microsoft Word documents, PDF files, webpages, and so on). If your search results only include a few types of documents, you will not see options to filter content types that don’t appear in your results. Instead, you might see a list of document authors. This saves time because only the most commonly occurring filters (within your query) are displayed.
SharePoint 2013 continues to extend the search refinement options provided in previous versions by adding additional refinement controls such as graphical date range controls and offering administrators extensive configuration options for presenting the most relevant filters to search users.
Tip
The types and kinds of refinement options can be modified on the Search Center. The refinement options can differ drastically based on the configuration.
Tip
Some refinement options will only appear if a suitable number of matching documents appear in the results.
Filter results by using search refiners

Previewing search results in Search Center
SharePoint 2013 offers a number of preview options within the search results view. For example, users can quickly preview Office documents via the Office Web Apps integration. The same is true for video results.
These features become very useful when you are trying to scroll through a large number of potentially relevant search results. Integrated preview makes it easy for you to quickly glance at a document or video and determine if you need to investigate further without opening or downloading the full version of the document.
Preview documents
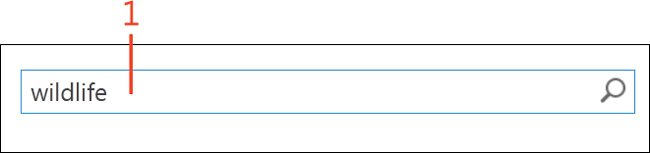
On the Home page of a Search Center, enter a search term in the search box and click the Search button (the magnifying-glass icon) or press Enter to start a search.
In the results that appear, hover the mouse pointer over any that show an Office document.
Navigate within the document by using the preview navigation tools.

Preview videos
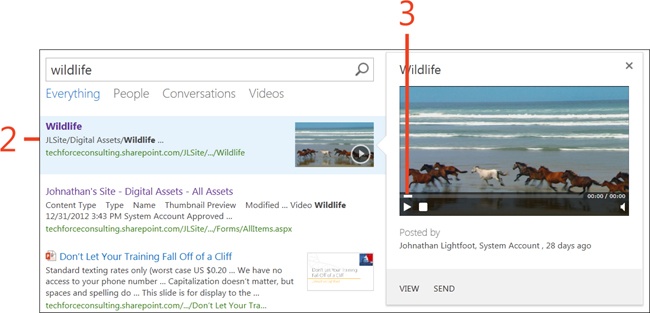
On the Home page of a Search Center, enter a search term in the search box and click the Search button (the magnifying-glass icon) or press Enter to start a search.
In the results that appear, hover the mouse pointer over any that show a video.
Navigate within the video by using the preview navigation tools.
Using advanced search
With the abundance of search options currently available in the SharePoint 2013 Search Centers, you might not find yourself needing to use advanced search. The advanced search view is still available, however, and it splits the single text field that many users currently use into a collection of text fields.
Most of the options presented, such as the ability to include entire phrases or exclude keywords from search, can also be performed from standard search text boxes. This requires remembering special symbols (or using quotes to indicate phrases). Advanced search simplifies this process.
If you want to learn more about these query options from the standard query text field, read Effective search techniques.
Perform advanced search
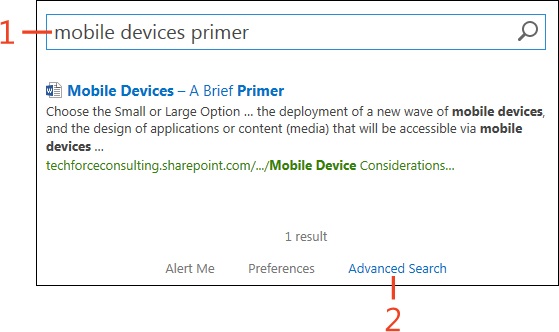
Within a Search Center, perform a search.
At the bottom of the results area, click the Advanced Search link.
Tip
The Advanced Search link is only available within Search Centers, so you might not see the link if a Search Center has not been linked to your site. If the Advanced Search link is available, it appears at the bottom of the search results, so you will need to scroll to the end of the page to ensure the link is visible.
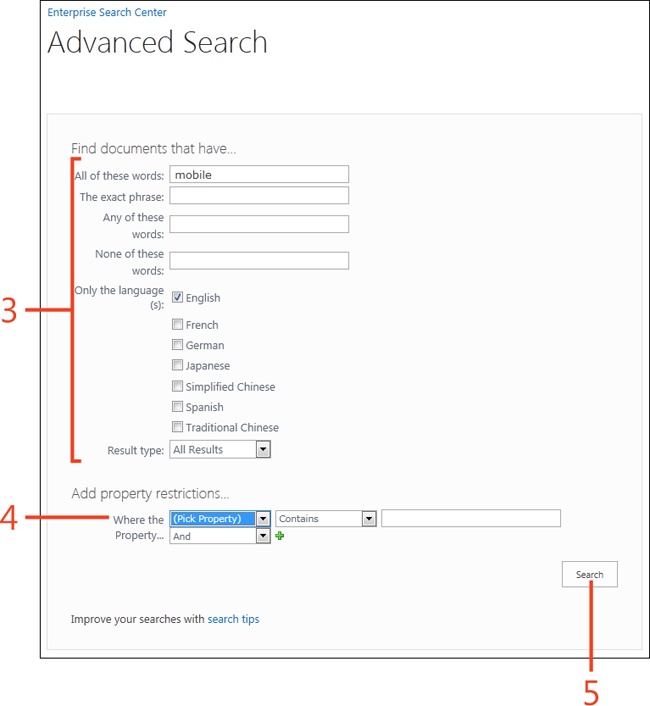
On the Advanced Search page, enter your search terms, metadata, and language preferences.
Add any metadata properties to the search.
Click the Search button.
Working with search alerts
Search alerts notify you as search results change over time. Perhaps you are interested in keeping track of all documents that contain the phrase “tax audit” within your site (why you’re interested in that is probably none of our business). In this case, you could generate a search alert that would email you a summary of any documents that are added or changed that match this search expression.
Search alerts do require the system to generate reports, so you are limited to receiving a daily or weekly summary of the changes that impact your search alerts. This does mean, however, that your email inbox won’t fill to overflowing with every small change that might be made to a site!
Create search alerts
Within a Search Center, perform a search.
At the bottom of the results area, click the Alert Me link.
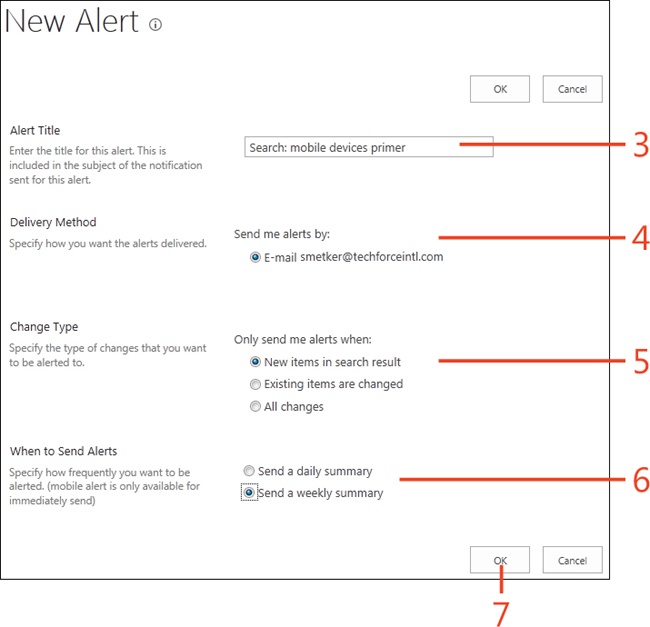
On the New Alert page, enter a descriptive title for the alert.
Choose an email address to which you want the alert to be sent.
Choose whether new, existing, or both types of changes will be logged in the notification.
Choose whether you want to receive an email daily or weekly in the event of a change.
Click OK.

Edit or delete search alerts
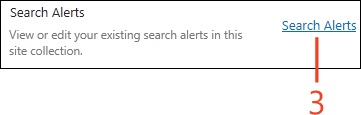
At the bottom of the results area, click the Preferences link.
On the Preferences page, in the Search Alerts section, click the Search Alerts link.
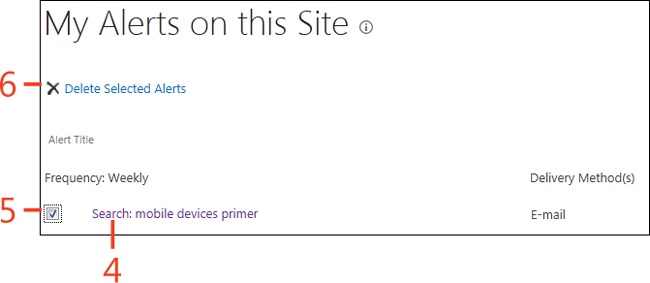
To edit an alert, click the title of a search alert.
To delete an alert, select the check box adjacent to the alert.
Click Delete Selected Alerts to remove the selected alert(s).
Setting your search preferences
From within a Search Center, individual users can customize their search preferences and save these persistently. For example, users can enable or disable autosuggestion, which is a helper that completes your queries as you are writing them.
As with many new SharePoint options, you can enable or disable them if you find that they are a distraction. The primary benefit offered by the Search Center is to make it possible for users to self-administer their search preferences, without them having to talk to IT or your site administrators.
Set your search preferences
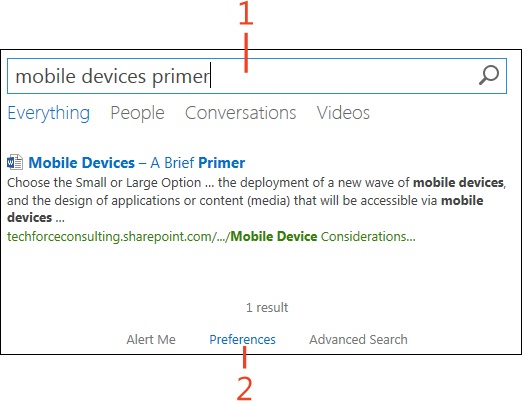
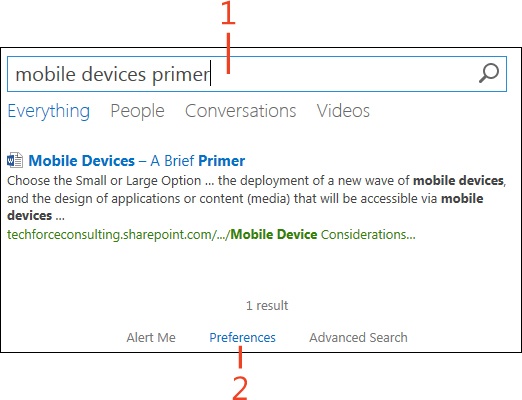
Within a Search Center, perform a search.
At the bottom of the results area, click the Preferences link.
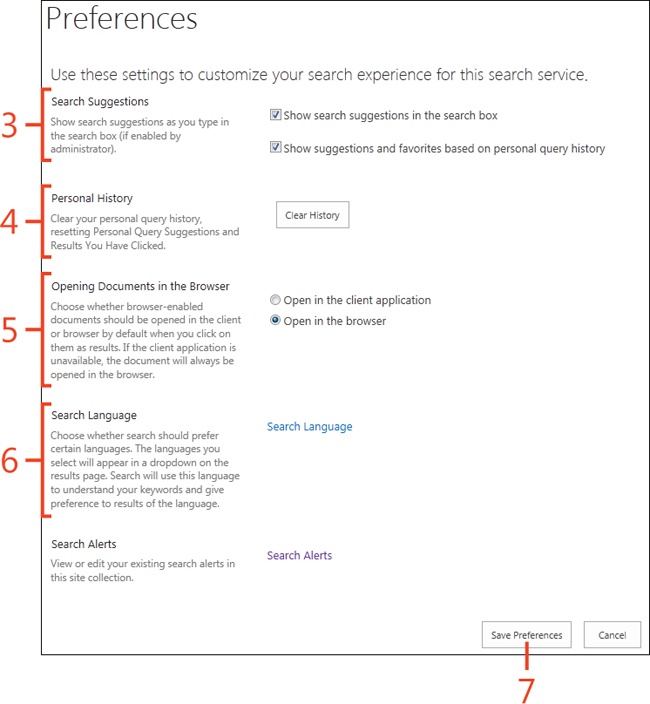
On the Preferences page, choose your autosuggestion options.
If you want to clear your past searching history, click Clear History.
Select whether to open search results in the browser or by using your local client application.
Click the Search Languages link to choose the languages of content that will be evaluated when you use search.
Click the Save Preferences button.
Promoting search results
If you’ve created a SharePoint 2013 Search Center and have begun tailoring the search options of your sites, you’ve probably been asked the question of how to manipulate search results. Perhaps you have a regulatory need or you just need to ensure that certain keywords always prominently feature a single result at the top of the search results.
One example might be if you want to push HR policy documents that match specific keywords to the top of all searches. You might create a promoted search result for all searches that contain the terms “vacation policy.” This would give you the opportunity to feature the formal HR Vacation Policy document as the first hit for any of these queries, regardless of the other search terms or search preferences.
This can save your user community a great deal of time if used pervasively, or this could simply represent a quick fix to promote “hard to find” documents higher in your results. Above and beyond these settings, SharePoint offers a great deal of configuration options to tune and rank your search results to help push valuable content to the top of end-user searches.
Promote search results
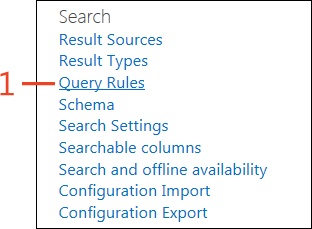
In your Search Center, click the Settings button and then, on the menu that appears, click Site Settings. On the Site Settings page, scroll to the Search section and click the Query Rules link.
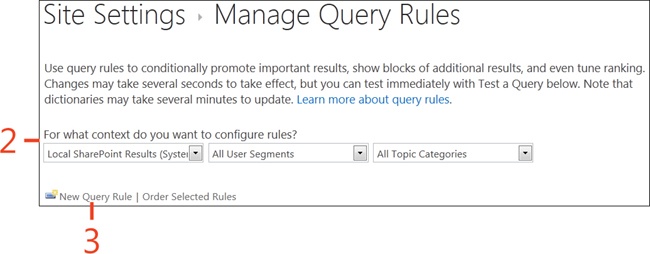
On the Manage Query Rules page, enter a context for rule configuration. For simple SharePoint sites, choose the Local SharePoint Results (System) option.
Click New Query Rule.
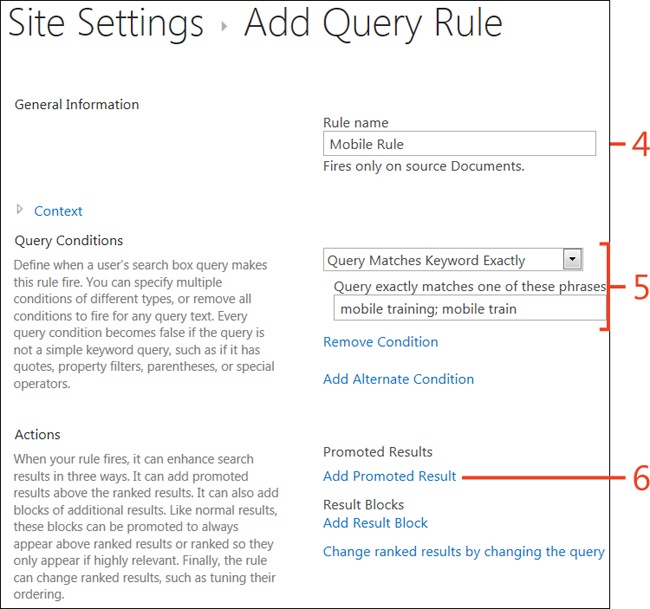
On the Add Query Rule page, in the General Information section, enter a name for your rule.
In the Query Conditions section, enter a query condition. For straightforward keyword promotion, enter Exact Match and enter a semicolon delimited set of terms to be promoted to the top of search results.
In the Actions section, click Add Promoted Result.
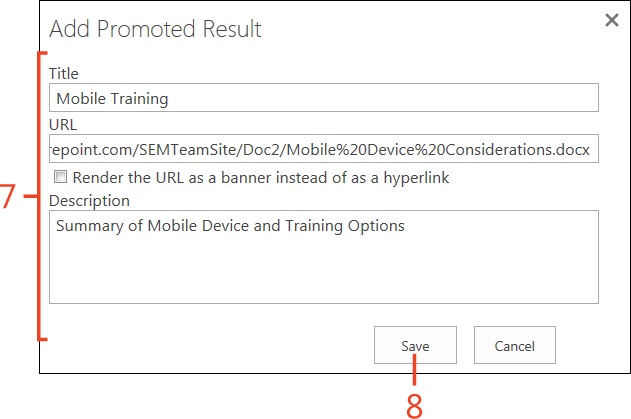
Enter the title, URL, and description that the promoted link will be given when it appears in the search results.
Click Save to save the Action.
Click Save.
Excluding site content
In most configurations, SharePoint applies security to ensure that users only see search results that they are allowed to access. However, there are cases for which you don’t want to explicitly block access to documents, but you want to hide documents away from most users.
For example, you might have a new site containing informal content that is edited by a large number of users. In this case, you would not want to define a complex security model, but you might be concerned that some users would inadvertently access these pages and documents via search and think the information is finalized. In these scenarios, you can specify within SharePoint 2013 that certain site content should not be indexed, which reduces the possibility of users accidently finding these documents.
Exclude site content from search
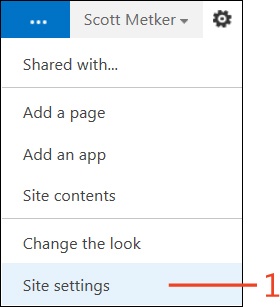
From the site that you want to exclude, click the Settings button (the small gear icon next to the name of the logged-on user) and then, on the menu that appears, click Site Settings.
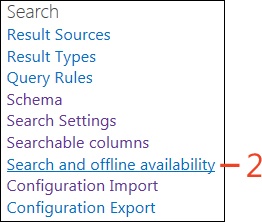
On the Site Settings page, in the Search section, click the Search And Offline Availability link.
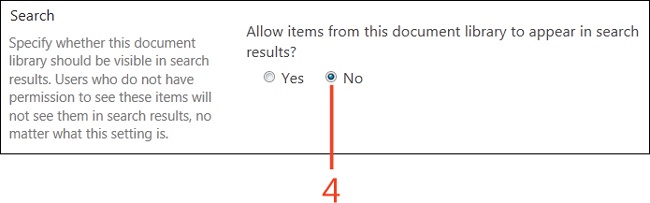
On the Search And Offline Availability page, click No if you want to exclude the entire site from search results.
Alternatively, click one of the options depending on how you want to index content that appears on pages from Web Parts. Because many Web Parts contain dynamic data from other locations or expose personalized data, this might inadvertently expose user data.
Click OK to save your results.

Excluding document libraries and lists from search
As with site content in SharePoint 2013, you might sometimes want to hide only a specific document library or list from search, ensuring that users do not inadvertently access files via search without realizing the content is not ready for use.
Exclude document libraries from search
Navigate to a document library on your site and then, on the ribbon, click the Library tab.
In the Settings group, click the Library Settings button.
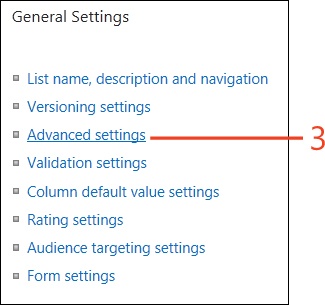
On the Library settings page, in the General section, click Advanced Settings.
On the Advanced Settings page, in the Search section, click the No option.
Click OK to save your settings.

Excluding site columns from search
SharePoint 2013 search reads not only the content of documents and pages but also the metadata (site columns) defined on list items and documents. This includes the title of the document, its file name, and the author of the document, as well as other site columns associated with the document.
If you have certain metadata that you want to ensure isn’t picked up by the search engine within SharePoint, you can remove this information from the search index.
Exclude site columns from search
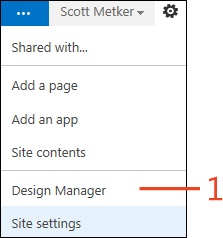
Click the Settings button (the small gear icon next to the name of the logged-on user) and then, on the menu that appears, click Site Settings.
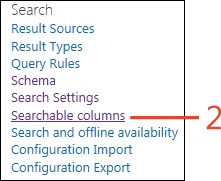
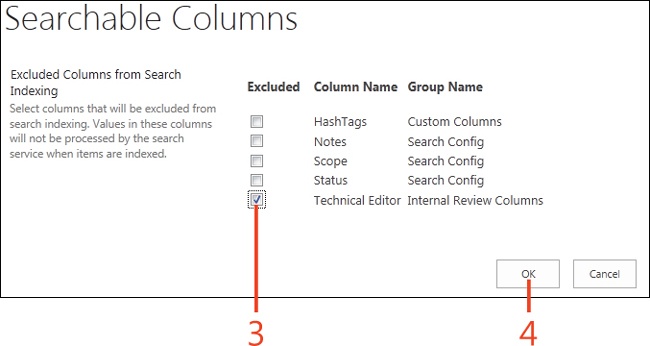
On the Site Settings page, in the Search section, click the Searchable Columns link.
Tip
You can only suppress site column data for site columns defined within the current site. If your site makes use of site columns defined for a root site, you will need to navigate to the root site before performing these steps.
Caution
Removing site columns from search will not block access to this information if a user navigates directly to a document or list item on your site. It will, however, ensure that searches that exclusively match keywords appearing in these site columns will not show these items within the results.
Select the check box next to the column(s) that you want to suppress from search.
Click OK to save your changes.
See Also
For information about defining metadata (site columns), see Creating site columns.
Maintaining search configurations
With all of the changes that you can make to the search configuration and directly to the Search Center associated with your site, you’ll be relieved to know that you don’t have to enter this configuration each and every time that you set up a site.
You can export your SharePoint 2013 search configuration from a single site and import it in another site. For example, if you set up a new Search Center, you could migrate all of the promoted search results that you previously entered on another site into your new site.
Using these management tools, you can apply your site changes consistently across additional sites and help enforce continuity between sites. Additionally, they ensure that the time that you spend setting up tailored search rules is more like a reusable investment that you can take advantage of for future sites.
Export your search configuration
On the site for which you have configured search, Click the Settings icon and then, on the menu that appears, click Site Settings.
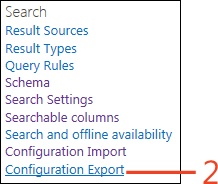
On the Site Settings page, in the Search section, click the Configuration Export link.
Click Save to save the export file to your computer.

Import your search configuration
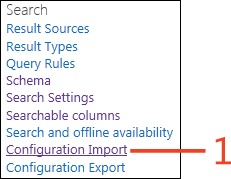
On the Site Settings page, in the Search section, click the Configuration Import link.
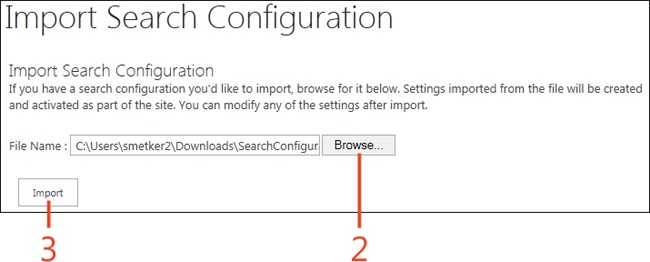
On the Import Search Configuration page, click Browse and select the file that you previously exported to your computer.
Click the Import button to import your search configurations.
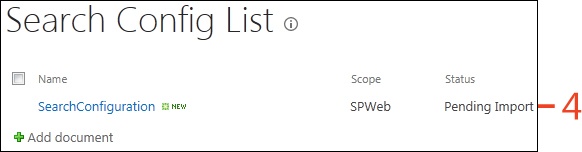
Refresh your browser until the import status changes from Pending Import to Imported Successfully (during import, the status will show as Importing).