
12
Web Apps in the Enterprise
WHAT'S IN THIS CHAPTER?
- Creating a library to hold Access templates in an app catalog
- Creating an Access client template
- Customizing an app package
- Synchronizing data between app databases
WROX.COM CODE DOWNLOADS FOR THIS CHAPTER
The code and sample downloads for this chapter are found at www.wiley.com/go/proaccess2013prog.com on the Download Code tab. They are in the Chapter 12 download and individually named according to the filenames listed throughout the chapter. The app packages for the web apps in this chapter are called Maid to Order and Maid to Order Customer.
In this chapter, you learn how to more fully incorporate your Access web apps, and the databases behind them, into your enterprise environment. In many organizations, Access developers have struggled with the fact that their database applications have been relatively isolated from the rest of the IT infrastructure. Access web apps, deployed in the SharePoint app catalog, can go a long way toward closing that gap. In this chapter, we show you some ways that can be done.
First, you learn how to create a SharePoint library to store Access client templates for deployment to authorized developers in the organization. Under the control of the SharePoint admin, Access files in the Access Template Library can be used to start everyone off on the same baseline.
Then, you learn how to customize your app packages with a corporate logo, branding them for your corporate use.
And finally, you learn some techniques for synchronizing data between web app databases, as well as creating a differential backup of data from an app database. For the local backup, we assume you have a local SQL Server instance to which you have admin rights. Your web app databases need not be on-premises for the backup process, however.
Although this is a fairly limited list of features to begin with, we believe it will help get you started in the direction of integrating your Access web apps and Access client databases into an enterprise environment.
WARNING All of the material in this chapter assumes you are using Access 2013, SharePoint 2013, and SQL Server 2012, as you would expect. Although some VBA functions would be similar in earlier versions, we do want to remind you that you may experience unexpected results if you attempt to use earlier versions of Access, especially when working with SharePoint features.
NOTE A list of some of the potential issues you may encounter while working with web apps is available in the “What You Need to Use this Book” section of the Introduction.
CREATING A DOCUMENT LIBRARY
In this section, you learn about sharing your Access files with others in the enterprise. You will need a document library to hold templates of Access files, which may be either .accdb or .accdt files, depending on your specific requirements. Because these files will typically be used with web apps, it may make sense to store them in your app catalog so there is a uniform location for you and other developers to go to when downloading app packages from an app catalog. One possible place is to create a document library on the same site where the app catalog is hosted. Maid To Order's account is a Microsoft Office 365 Small Business Premium plan; the app catalog is located at this URL:
https://maidtoorder.sharepoint.com/sites/appcatalog
Not all Office 365 plans support App Catalogs. If you are not sure what your plan supports, you can search for “app catalog.” Several SharePoint pages have a search box on the upper-right corner; enter App Catalog in the search box and hit enter. If one is found it will look like Figure 12-1.

FIGURE 12-1: Search returns a list of App Catalog pages
If you cannot find it, you may want to check the Admin pane to see whether you can create an app catalog, as shown in Figure 12-2

FIGURE 12-2: Create App Catalog
If you can find neither, then you probably do not have the App Catalog feature available in your site. If your plan has the option to create an App Catalog, as illustrated in Figure 12-2, then you may need to create a site for App Catalog via the Admin pane. If you need to place the App Catalog in a subsite, refer to Chapter 13 for a refresher on creating subsites.
We put the document library in the app catalog on the assumption that most organizations would prefer to make it available to designated developers. Due to different rights requirements, you might prefer to use your team site so more people can use it. Because we are putting it in an app catalog site, which has a separate permission hierarchy, you might need to refer to Chapter 13 for more information on how to grant permissions to designated users who should be able to get the templates.
Because the document library should also hold Access files and templates, you'll want to customize the library a bit so that it's easy to create new files using a common baseline. To get started, go to the app catalog URL as indicated, and within that page select the Site Contents link, click “add an app” and select Document Library, as shown in Figures 12-3 and 12-4.

FIGURE 12-3: Site Contents page

FIGURE 12-4: Document Library app
Give this app a descriptive name that fits your environment and create it; Figure 12-5 shows one possible name.

FIGURE 12-5: Naming and creating a document library
On the Site Contents page, click the newly created library to go to the library's page. On its page, open the ribbon and select Edit Library, as shown in Figure 12-6.

FIGURE 12-6: Edit Library in SharePoint Designer
NOTE If the Edit Library button shown in Figure 12-6 is disabled, it may mean that SharePoint Designer is not installed, or that using Designer is not allowed on this site. In the former case, refer to Chapter 10 for instructions on installing SharePoint Designer. In the latter case, consult with the site owner to enable the Designer, which you can do via the Site Settings page.
Within SharePoint Designer, you will do the following:
- Create a custom content type representing an Access file
- Import image files that you will use for custom buttons you create
- Change the library's template to point to an Access file that you upload
- Customize the library's ribbon to open this new template
This makes it easier for people using the library to create a new file based on the same template, and you can upload edits to the template as you need to. This gives you an easy way to maintain standard client files for use across the organization.
Creating a Custom Content Type
In SharePoint Designer, open the Content Types via the Navigation pane, as shown in Figure 12-7.
When you are on Content Types, the ribbon should show a New group with Content Type, as illustrated in Figure 12-8. Select it to create a new content type.

FIGURE 12-7: Clicking Content Types

FIGURE 12-8: New Content Type button
Provide a name, and, because it should be based on Access files, you want it to inherit from the Document content type. You may want to create a new group to keep your templates organized should you have multiple templates. Figure 12-9 illustrates how you could fill out the dialog box to create the new content type.
If you create a new group, the Content Types tab lists your brand new content type under the new group that you also created, similar to what you see in Figure 12-10.

FIGURE 12-9: Creating a Content Type dialog box

FIGURE 12-10: New content type added
A template for this content type has to be uploaded in SharePoint, not via the SharePoint Designer. To do this, go to the ribbon and select Administration Web Page, as shown in Figure 12-11.

FIGURE 12-11: Administration Web Page button
On the web page in your web browser, click the Advanced Settings link, as depicted in Figure 12-12.

FIGURE 12-12: Advanced Settings link
On the page illustrated in Figure 12-13, you can upload an Access .accdb as a template. You could choose to use an .accdt file instead if it suits your needs. The template you prepare for your organization should include standard elements that you want all databases to have, such as a splash form, menu system, AutoExec macro, standard VBA functions, and other objects you want developers to use in all databases, and so on. The exact content depends on your organization's standard. Click Browse and select the Access client file to upload. Once uploaded, click OK to save the changes.

FIGURE 12-13: Advanced Settings page
Importing Image Files
After uploading the template file, return to SharePoint Designer. You'll also want to upload images that you will use later for custom buttons you create for your library. You can upload both 32×32 and 16×16 graphical files. One way to do this is to select All Files in the Navigation pane and select the images folder, as shown in Figure 12-14.

FIGURE 12-14: Opening images folder
The image folder may be initially blank. On the ribbon, select Import Files, as illustrated in Figure 12-15.

FIGURE 12-15: Import Files button
In the dialog box shown in Figure 12-16, add your two image files sized at 16×16 and 32×32 using the Add Files button. Then click OK to complete the import.

Once the import process completes, you should see the files listed in the images folder. You will need them later on when you create a custom action.
Customizing a Library
Select List and Library in the Navigation pane in Designer to return to the new library you created previously and click once on the new library's name, as demonstrated in Figure 12-17.

FIGURE 12-17: Lists and Libraries pane
You should land on the configuration sheet for your library, which contains a number of panes. You'll start with the Settings pane by selecting Allow management of content types, as shown in Figure 12-18.
Next, on the Content Types pane, click the Add button to add a new content type to the library, as shown in Figure 12-19.


FIGURE 12-19: Add button on the Content Type pane
A dialog box will appear to select a content type; select the custom content type that you created previously, similar to what is shown in Figure 12-20.
Back on the Content Types pane, select two other content types that are there by default — Document and Folder — and press delete to delete those content types, leaving you with only a custom content type, as shown in Figure 12-21.
Return to the Settings pane and clear the Allow management of content types checkbox.
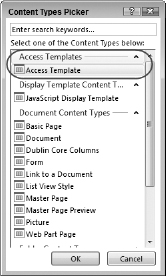
FIGURE 12-20: Selecting a content type

FIGURE 12-21: Other content types removed
NOTE Although you've removed other content types and disallowed management of content types, that will not prevent the uploading of wrong file types to the library.
Customizing a Library Ribbon
On the ribbon's List Settings tab, select View Ribbon from the Custom Actions drop-down as shown in Figure 12-22.

FIGURE 12-22: New Custom Action
A Create Custom Action dialog box appears, as shown in Figure 12-23. Fill in a name and description, and then scroll down the dialog box, if needed.

FIGURE 12-23: Create Custom Action dialog box
Look at Figure 12-24, which depicts the bottom part of the same dialog box that you'll need to fill out.
For the action itself, select the Navigate to URL radio button and browse to the template .accdb file you previously uploaded to the library. If you've been following our path, the address would be located at:
https://maidtoorder.sharepoint.com/sites/AppCatalog/Access Client Templates
Library/Forms/Access Template/template.accdb
You can add images to the action to use in displaying the action on the ribbon. You will set URLs for images using the same path that you set in the previous section. For example, the URLs for the two images are:
https://maidtoorder.sharepoint.com/sites/AppCatalog/images/accessapp16.png
https://maidtoorder.sharepoint.com/sites/AppCatalog/images/accessapp32.png

FIGURE 12-24: Bottom portion of the Create Custom Action dialog box
Finally, you need to set the location where the custom action should appear. You want it to appear in the New group of the ribbon, so enter the following directive:
Ribbon.Documents.New.Controls._children
Ensure that the sequence is set at 0, which makes the custom action appear leftmost in the group. Click OK to save the changes so far. This provides you with a custom button that will download the template and, depending on the browser's configuration, open it in Access directly. However, the steps taken so far do not actually eliminate the built-in buttons to create a new document. This can be a problem because the built-in button will attempt to open Word unless users remember to use the drop-down menu to explicitly select the custom content type. To avoid this stumbling block, you need to hide the built-in button, allowing the custom action you just created to replace it entirely.
To do this, select All Files from the Navigation pane, similar to what you did for uploading images. This time, however, open the folder representing your custom document library and then the Forms folder within it. You should get a list like the one shown in Figure 12-25. Note the breadcrumbs shown in the image.

FIGURE 12-25: Complete listing of the library's forms
As Figure 12-26 shows, select AllItems.aspx and open it in advanced mode. Locate the asp:Contents element that contains an attribute-value pair ContentPlaceHolderId=PlaceHolderMain. Inside this element, add a style element as the first child element:
<style type="text/css">
#Ribbon.Documents.New.NewDocument-Large {
    display:none;
}
#Ribbon.Documents.New.NewDocument {
    display:none;
}
</style>

FIGURE 12-26: Customized Library ribbon
If you are unfamiliar with CSS, the style indicates that, for an element with an id attribute set to Ribbon.Documents.New.NewDocument-Large, the attribute display:none; should be applied. The backslash is used to escape the period character while the pound sign signifies that CSS is to select by an element's id rather than by the element's type or class. You can discover the id of an element by using a web browser's developer tools to inspect the elements and discover its id and class attribute to use for CSS selection. Refer to Chapter 10 for a brief overview on using developer tools in your web browser.
Save the change; you will get a dialog box warning that the change no longer matches the site definition. Click Yes and proceed. Open the new library in the browser. The final result should look similar to Figure 12-26.
Version Control
A significant advantage of storing Access files in a SharePoint document library is that you also gain some version control, which you traditionally have with Source Code Control (SCC). While it is not as granular as an SCC plugin where you can check in/out individual objects, for some scenarios versioning may be sufficient to manage the file without tracking the individual objects. Thus you will find many advantages in configuring versioning for the library. The configuration is best done on SharePoint where you have more options than in SharePoint Designer. In SharePoint Designer, navigate to the library and select the Administration Web Page button on the ribbon, similar to what you saw in Figure 12-11. That will take you to the page for List Settings as shown in Figure 12-27.

FIGURE 12-27: List Settings page
Click the Versioning settings link, which will take you to the page depicted in Figure 12-28.

FIGURE 12-28: Versioning Settings page
On this page, you can choose whether you want to:
- Require approval for any submitted items
- Version a document every time it is edited
- Restrict visibility of items to non-creators
- Require that a document be checked out before editing it
You can customize as needed to meet your particular needs. When you have versioning enabled, you can access the history of edited files via Version History on the ribbon shown in Figure 12-29, which provides you with the popup shown in Figure 12-30 where you can view, restore, or delete versions.

FIGURE 12-29: Version History button

FIGURE 12-30: Version History dialog box
Although a SharePoint document library is not as full-featured as traditional source code control software, the fact that it comes built-in to any SharePoint installation is quite a compelling case for storing your Access template files with it if they are not a part of traditional source code control projects. Of course, you need to plan storage requirements and management for maintaining multiple versions.
CUSTOMIZING AN APP PACKAGE
In previous chapters, you've learned how to create a web app; how to save it as a local app package, both for backup and for deployment to other SharePoint sites; and how to install the app package into a site. In all of those examples, the app has appeared with a generic Access icon when installed. In Chapter 10, you learned how to install third-party apps, which have their own logos, and you probably wondered if you couldn't do the same for the apps you deploy into your enterprise app catalog. We'll show you how to do that now.
The process is very straightforward, if not entirely obvious at first.
Begin by creating a local app package as you learned how to do in Chapter 3, and for which you will get more details in Chapter 14. As a refresher, you can see this process illustrated in Figures 12-31 and 12-32.
As you can see in Figure 12-31, we gave this app package a different name so we can more easily identify it in the app catalog.

FIGURE 12-31: Creating an app package

FIGURE 12-32: Local app package
The next step is to rename the app package, changing the extension from .app to .zip, so you can handle it as a Zip file. In fact, app packages are Zip files. With the renamed app package, right-click the file and select “extract” from the shortcut menu. You'll be asked for a destination folder and offered a default name. Go ahead and use that folder and name as shown in Figure 12-33.

FIGURE 12-33: Extracting contents of renamed app package
Now, open the extraction folder and locate the image icon file. It's named accessapp.png. You'll be replacing this image with your own. Your image needs to have the same name and dimensions, so remove the current image from the extraction folder. Locate your own image file and rename it to accessapp.png, if you haven't already done so. Copy it into the extraction folder to replace the original image. Figure 12-34 shows what it looks like.

FIGURE 12-34: Maid To Order icon to replace the generic image
The next step is to gather the files in the extraction folder and create a new Zip file from them as illustrated in Figure 12-35.

FIGURE 12-35: Creating a new Zip file from the extraction folder contents
WARNING A common mistake made is to try to zip the folder containing the files. Doing so will create an invalid .app package because the Zip file would contain the folder with files within, rather than putting all files directly in the Zip file.
Be sure to create a new Zip file; don't reuse the old one. The new Zip file will end up in the extraction folder, but you can move it out of that folder to complete it for upload to your app catalog. You can see that in Figure 12-36

FIGURE 12-36: New Zip file still in the extraction folder
Move the new Zip file out of the extraction folder and rename it with the original .app extension. It is now ready for upload to your app catalog. You learned how to do this in a previous chapter, but as a refresher, refer to Figure 12-37.
As you can see, the previously uploaded Maid To Order apps still have the generic Access icon. Click on “add an app” and browse through the available apps until you find the generic Access App icon, shown in Figure 12-38.
Click the Access App icon. The dialog box shown in Figure 12-39 will open.
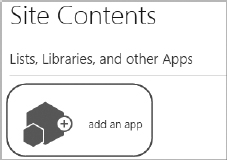

FIGURE 12-38: Access App icon to add an app

FIGURE 12-39: Uploading an app package
Use the Browse button to find your new app package and upload it. Click the Create button and wait for the app package to be uploaded and installed, as in Figure 12-40. This may take a few minutes, so just be patient.
The final result will be like the one shown in Figure 12-41.

FIGURE 12-40: Installation of the new app in progress

FIGURE 12-41: Installed app with logo
You can see how easy it is to put your organization's logo in each app you deploy, whether in an enterprise setting or in a small site on Office 365.
LINKING TO A TEMPLATE FILE
When creating your custom Access web apps where you expect to need a client counterpart, it may be desirable to make it easier to link to the Access template (.accdb file in this example) you added to the document library in the previous section so you can download a template with all of the customizations you want or require in a client file. This is useful when you need to support different app packages that may need different clients and want to ensure there is a single point of distribution. You will create a web app template file with a blank view that contains a hyperlink pointing to the Access database template file you pointed to for the document library's custom action, as illustrated in Figure 12-42.

FIGURE 12-42: Template hyperlink
You can save the Access web app as a package and add it to the app catalog, making it available for reuse or for distribution to other developers. To start a new project using the same template, they choose the Access web app template added to the app catalog, as illustrated in Figure 12-43.
Thus, as Figure 12-44 shows, users are now just a click away from downloading the client file. They can customize and use it in conjunction with the new Access web app.

FIGURE 12-43: Adding Template Access app

FIGURE 12-44: Template file hyperlink
SYNCHRONIZING DATA BETWEEN APP DATABASES
In this section, you learn a technique for synchronizing data between two different web app databases using familiar Access queries and VBA techniques. In addition, you learn about a method by which you can create a local, differential backup of the data in your web app databases to a local SQL Server installation. In all cases, we assume you have a local SQL Server instance to which you have sufficient rights in order to implement the methods demonstrated. Let's start with a simple method which involves Access client queries and VBA. If you wish to follow along, the code is available for download at www.wiley.com/go/proaccess2013prog.com in the file named MTODailySynch.accdb
NOTE There are many ways to implement functions in Access; backup and data synch are no exception. We only selected a possible method to show you here. You may very well prefer other methods of your own. Our point is primarily to make it clear that synchronizing and backing up the databases for your Access web apps should be a standard part of your maintenance plans.
Local Differential Backup
To begin, you'll need to create a database on your local SQL Server installation. This database will be the local backup for the data in your web app database. You can call the database anything you like, but, of course, the name should reflect its relationship to the web app database to which it is created. Ours is called MTOLocal, reflecting its relationship to the Maid To Order web app database as illustrated by Figure 12-45.
Note that for the sake of clarity, we've set up only one table for this example. Your scenarios would normally include all tables for which you need to create backups. You can also see that you'll add two new fields to the table to support the backup process. Because both the local backup table and the web app database table have primary keys with identity specification, the primary keys on the local backup tables will differ from those in the web app database. Therefore, in order to link local records to their counterpart in the web app database, you need to store the primary key from the table in the web app database in a new field called CustomerLinkID in the local database. You can see that additional field in Figure 12-45.

FIGURE 12-45: Local copy of table to be backed up
You'll also need a datetime field in the local table to store the LastEditDate (and time) for records. That gives you a value on which you can filter updates so that your backup only copies records in the web app database that were edited after the last backup. That allows you to do differential backups, updating only new and changed values from the web app. Figure 12-46 shows the same table in the database behind the web app.

FIGURE 12-46: Web app table to be backed up
The web app table in our example, tblCustomers, has the LastEditDate (Date and Time) field to capture the date and time of changes to this table. You'll create a data macro on this table to capture that information. Let's look at that step next. Consider the macro in Figure 12-47.

FIGURE 12-47: Macro to set LastEditDate on record updates
This macro is pretty simple. In order to prevent an endless loop, it first checks whether the field updated is the LastEditDate field, and if not, it sets the value of that field to Now(). Note that in a web app database, which is running on SQL Server, the precision of that time will be to milliseconds, which may present a problem later, when we reference that field in Access. You'll see that in a few moments.
The data macro that runs on inserts is even simpler, as you don't need to worry about triggering an endless update. See Figure 12-48.

FIGURE 12-48: Macro to set LastEditDate on record inserts
The first web app table is now set up for differential backups and synchronization. Of course, you'll need to create the same table in your second web app, with the same fields and data macros to complete the synchronization. We'll leave that to you as an exercise. Our second web app is a customer-only version of the web database for a customer app, which needs to be kept in synch with the main web app for maids.
Now that you have the setup in place, let's look at the VBA which handles both the differential backup for the primary web app databases and the synchronization between the two web app databases.
Create an .accdb to host the VBA and link to the three tables in your three SQL Server, or SQL Azure, databases: the local database into which backups are retrieved from the web database, and the two databases for the respective web apps. In our example, we used code to check credentials of the user and re-create the links to the web app databases when the client .accdb opens. You'll explore how to create this code for your databases, in considerable depth, in Chapter 13. For now, Figure 12-49 shows only the tables, queries, and code modules you need for the task at hand.
As you can see, we've only linked to the three tables for your first demo. In a real application, of course, you'll link to all of the tables you want to keep backed up and synchronized.
Here's an overview of the process, in which the first step is to run the differential backup to the local SQL Server database. Then, the synchronization runs to move new records into the Customer version of the web app, update existing records in the customer version of the web app, and finally to update the employee Maid to Order database with changes in the customer version.
Here are the details of the process. Two Insert queries copy new records from the employee Maid To Order web database. The first one copies them into the customer web database and the second one copies them into the local backup SQL Server instance. Next, there are three Update queries to synchronize changes in existing records.

FIGURE 12-49: Tables, queries, and code for backup and synchronization
Because you know that customer records can change in both the employee and the customer apps, you need to synchronize both ways, using LastEditDate to determine which version holds the newer values. In addition, you use the same date field to create a differential update into the local backup database whenever you detect changes in the employee web database.
NOTE We've made several simplifying assumptions in order to keep this discussion reasonably concise. First, as already mentioned, we're only working with a single table out of many in the web app. Second, we assume that new customers are added only through the employee web app and that customers won't appear in the customer version of the web app until they've been processed on the employee side, eliminating one synchronization direction. Also, we assume the local database is exclusively a backup and that we therefore don't need to synchronize from it back to the web databases. In any scenario you develop for your customers, all of these possibilities must be considered.
Pay close attention to the naming conventions adopted for this backup and synchronization process. The linked tables deviate from our standard convention of prefixing tables with tbl_. There is a good reason for that in this scenario. You need to coordinate between three versions of the same table: the local backup version of tblCustomer, the version of tblCustomer in the employee web app, and the version of tblCustomer in the customer web app. To keep them straight, it's simpler to adopt a naming convention that identifies the source of the tables: MTOLocal, MTOCustomer, and MTOEmployee. You'll see that we did keep the standard tbl prefix on each table within its full name.
If you've worked with ODBC linked SQL Server tables before, you know that Access prepends dbo_ to linked tables, reflecting the schema from which the tables come. In this case, we're just using a variation of that approach to identify the database source instead of the schema.
Insert and Update Queries
Let's turn our attention next to the first of the insert queries, qryEmployeeCustomerstoLocal Customers. It's the first one we run. It copies new records from the employee version of Maid To Order's web database into the local SQL Server database. Figure 12-50 is the query grid view of this query. The SQL is shown immediately after it.

FIGURE 12-50: Query grid view of qryEmployeeCustomerstoLocalCustomers
 INSERT INTO mtolocal_tblcustomers
            (customerlinkid,
             inactive,
             firstname,
             middleinitial,
             lastname,
             organizationname,
             activationdate,
             frequencyid,
             weekdayid,
             timeofday,
             streetaddress,
             unit,
             city,
             state,
zip,
             zipfour,
             phonenumber,
             mobilenumber,
             email,
             customergoogleurl,
             lasteditdate)
SELECT mtoemployees_tblcustomers.customerid,
       mtoemployees_tblcustomers.inactive,
       mtoemployees_tblcustomers.firstname,
       mtoemployees_tblcustomers.middleinitial,
       mtoemployees_tblcustomers.lastname,
       mtoemployees_tblcustomers.organizationname,
       mtoemployees_tblcustomers.activationdate,
       mtoemployees_tblcustomers.frequencyid,
       mtoemployees_tblcustomers.weekdayid,
       mtoemployees_tblcustomers.timeofday,
       mtoemployees_tblcustomers.streetaddress,
       mtoemployees_tblcustomers.unit,
       mtoemployees_tblcustomers.city,
       mtoemployees_tblcustomers.state,
       mtoemployees_tblcustomers.zip,
       mtoemployees_tblcustomers.zipfour,
       mtoemployees_tblcustomers.phonenumber,
       mtoemployees_tblcustomers.mobilenumber,
       mtoemployees_tblcustomers.email,
       mtoemployees_tblcustomers.customergoogleurl,
       mtoemployees_tblcustomers.lasteditdate
FROM   mtoemployees_tblcustomers
       LEFT JOIN mtolocal_tblcustomers
              ON mtoemployees_tblcustomers.[customerid] =
                 mtolocal_tblcustomers.[customerlinkid]
WHERE  ((( mtolocal_tblcustomers.customerlinkid ) IS NULL ));
This is an ordinary “frustrated join” query, in which all records from the left-side table are returned if they do not have a matching record in the second table. The query was created, in fact, using the Query Wizard to find unmatched records. In this case, we're looking for records in the web app table that don't have a corresponding record in the backup table. The only difference here, of course, is that the join is not on the CustomerID fields in both tables, but on the CustomerID field in the web app table and the CustomerLinkID field in the backup table. Linking on the CustomerLinkID field means you're matching on the Primary Key field in the web app database and its counterpart in the local backup table.
This query was then converted into an Insert query to copy any new records into the backup.
The next query is similar to the previous one, except that the insert is from the employee web app table into the customer web app table. There are fewer fields in the customer web app version, so the insert only copies that subset of fields into the customer web app's customer table. You can see this query in Figure 12-51.

FIGURE 12-51: Query grid view of qryEmployeeCustomerstoCustomersCustomers
Here's the SQL.
INSERT INTO mtocustomers_tblcustomers
            (inactive,
             firstname,
             middleinitial,
             lastname,
             organizationname,
             activationdate,
             lasteditdate,
             customerlinkid)
SELECT mtoemployees_tblcustomers.inactive,
       mtoemployees_tblcustomers.firstname,
       mtoemployees_tblcustomers.middleinitial,
       mtoemployees_tblcustomers.lastname,
       mtoemployees_tblcustomers.organizationname,
       mtoemployees_tblcustomers.activationdate,
       mtoemployees_tblcustomers.lasteditdate,
       mtoemployees_tblcustomers.customerid
FROM   mtoemployees_tblcustomers
       LEFT JOIN mtocustomers_tblcustomers
              ON mtoemployees_tblcustomers.customerid =
                 mtocustomers_tblcustomers.customerlinkid
WHERE  ((( mtocustomers_tblcustomers.customerlinkid ) IS NULL ));
When these two queries have run, all three tables have the same records in them. However, it is possible that changes to some fields have been made either in the employee web app or in the customer web app. Those changes need to be synchronized back and forth. This time, however, the task is a bit more complex. We need to update values in each table using the newer of the two records, when they are different, in the two web app tables. The first two queries synchronize the employee and customer web app tables. For the local backup, synchronization is only one way, from the web app table to the local backup table. The backup must be synchronized last, from the values in the employee web app database.
So, the processing order is to update the customer web app table with the values from records in the employee version of the Customer table that have a newer LastEditDate, then to update the employee web app table with the values from records in the customer version of the Customer table that are newer. And finally, any newer values in the employee version of the Customer table are carried back to their counterpart records in the local backup version of the Customer table.
Let's create the query to update the customer version with values from the employee version. qryUpdateCustomerCustomerChanges does that (see Figure 12-52).

FIGURE 12-52: Updating the customer version of a table with newer values in the employee version
Here's the SQL for this query:
UPDATE mtoemployees_tblcustomers
       INNER JOIN mtocustomers_tblcustomers
               ON mtoemployees_tblcustomers.customerid =
                  mtocustomers_tblcustomers.customerlinkid
SET    mtocustomers_tblcustomers.firstname =
       [mtoemployees_tblcustomers].[firstname],
       mtocustomers_tblcustomers.middleinitial =
       [mtoemployees_tblcustomers].[middleinitial],
       mtocustomers_tblcustomers.lastname =
       [mtoemployees_tblcustomers].[lastname],
       mtocustomers_tblcustomers.organizationname =
       [mtoemployees_tblcustomers].[organizationname],
       mtocustomers_tblcustomers.activationdate =
       [mtoemployees_tblcustomers].[activationdate],
       mtocustomers_tblcustomers.inactive =
       [mtoemployees_tblcustomers].[inactive],
       mtocustomers_tblcustomers.lasteditdate = Format(
       [mtoemployees_tblcustomers].[lasteditdate], "mm/dd/yyyy hh:nn:ss")
WHERE
((( Format([mtoemployees_tblcustomers].[lasteditdate], "mm/dd/yyyy hh:nn:ss") )
 > Format([mtocustomers_tblcustomers].[lasteditdate], "mm/dd/yyyy hh:nn:ss") ));
When this query runs, all values for newer records in the employee version of the table are written over the values in the same record(s) in the customer version. Take note of a couple of things about this query and the logic in it. First, we don't know which field or fields got changed, only that LastEditDate was updated. Therefore, we just update all of the fields, knowing that any changed values will overwrite the old values in the same field. Any values that are the same will just be overwritten with the same value. Second, you may be wondering why we formatted the LastEditDate field to return values down to the second. In testing, we found that Access wasn't always able to detect differences to the same millisecond precision used in the web app database fields. We formatted to the nearest second instead for the match to ensure Access can handle it.
As you'd expect, the synchronization back in the other direction is just the reverse of Figure 12-51. That query, qryUpdateEmployeeCustomerChanges, is shown in Figure 12-53 with the query grid view followed by the SQL.

FIGURE 12-53: Query grid view qryUpdateEmployeeCustomerChanges
And again, the SQL from the query is as follows:
UPDATE mtoemployees_tblcustomers
       INNER JOIN mtocustomers_tblcustomers
               ON mtoemployees_tblcustomers.customerid =
                  mtocustomers_tblcustomers.customerlinkid
SET    mtoemployees_tblcustomers.firstname =
       [mtocustomers_tblcustomers].[firstname],
       mtoemployees_tblcustomers.middleinitial =
       [mtocustomers_tblcustomers].[middleinitial],
       mtoemployees_tblcustomers.lastname =
       [mtocustomers_tblcustomers].[lastname],
       mtoemployees_tblcustomers.organizationname =
       [mtocustomers_tblcustomers].[organizationname],
       mtoemployees_tblcustomers.activationdate =
       [mtocustomers_tblcustomers].[activationdate],
       mtoemployees_tblcustomers.inactive =
       [mtocustomers_tblcustomers].[inactive],
       mtoemployees_tblcustomers.lasteditdate =
       [mtocustomers_tblcustomers].[lasteditdate]
WHERE  (((
Format([mtocustomers_tblcustomers].[lasteditdate], "mm/dd/yyyy hh:nn:ss") )
> Format([mtoemployees_tblcustomers].[lasteditdate], "mm/dd/yyyy hh:nn:ss") ));
And the final query in this set synchronizes the changes back to the local backup table. Again, the structure of the query is the same, except for the tables involved. You can see qryUpdateLocalCustomerChanges in Figure 12-54.

FIGURE 12-54: Query grid view of qryUpdateLocalCustomerChanges
The SQL for this query is as follows:
UPDATE mtoemployees_tblcustomers
       INNER JOIN mtolocal_tblcustomers
               ON mtoemployees_tblcustomers.customerid =
                  mtolocal_tblcustomers.customerlinkid
SET    mtolocal_tblcustomers.lasteditdate =
       [mtoemployees_tblcustomers].[lasteditdate],
       mtolocal_tblcustomers.firstname =
       [mtoemployees_tblcustomers].[firstname],
       mtolocal_tblcustomers.middleinitial =
       [mtoemployees_tblcustomers].[middleinitial],
       mtolocal_tblcustomers.lastname = [mtoemployees_tblcustomers].[lastname],
       mtolocal_tblcustomers.activationdate =
       [mtoemployees_tblcustomers].[activationdate],
       mtolocal_tblcustomers.inactive = [mtoemployees_tblcustomers].[inactive],
       mtolocal_tblcustomers.organizationname =
       [mtoemployees_tblcustomers].[organizationname],
       mtolocal_tblcustomers.frequencyid =
       [mtoemployees_tblcustomers].[frequencyid],
       mtolocal_tblcustomers.weekdayid =
       [mtoemployees_tblcustomers].[weekdayid],
       mtolocal_tblcustomers.streetaddress =
       [mtoemployees_tblcustomers].[streetaddress],
       mtolocal_tblcustomers.unit = [mtoemployees_tblcustomers].[unit],
       mtolocal_tblcustomers.city = [mtoemployees_tblcustomers].[city],
       mtolocal_tblcustomers.state = [mtoemployees_tblcustomers].[state],
       mtolocal_tblcustomers.zip = [mtoemployees_tblcustomers].[zip],
mtolocal_tblcustomers.zipfour = [mtoemployees_tblcustomers].[zipfour],
       mtolocal_tblcustomers.phonenumber =
       [mtoemployees_tblcustomers].[phonenumber],
       mtolocal_tblcustomers.mobilenumber =
       [mtoemployees_tblcustomers].[mobilenumber],
       mtolocal_tblcustomers.email = [mtoemployees_tblcustomers].[email],
       mtolocal_tblcustomers.timeofday =
       [mtoemployees_tblcustomers].[timeofday],
       mtolocal_tblcustomers.customergoogleurl
       =
       [mtoemployees_tblcustomers].[customergoogleurl]
WHERE
((
( Format([mtoemployees_tblcustomers].[lasteditdate], "mm/dd/yyyy hh:nn:ss") )
> Format([mtolocal_tblcustomers].[lasteditdate], "mm/dd/yyyy hh:nn:ss") ));
When this last query has run, all three tables are synchronized.
VBA Module
Let's turn our attention next to the VBA module needed to run them. This should be familiar to everyone, except possibly for the use of the transaction. Take a look at the following function and then you'll learn about the logic in it:
Public Function BackupAndSynch() As Boolean
Dim ws As DAO.Workspace
Dim in_trans As Boolean
Dim db As DAO.Database

On Error GoTo errHandler
   Set db = CurrentDb
   Set ws = DBEngine.Workspaces(0)
   in_trans = True
   ws.BeginTrans
   'Append new customer records to the local backup table
   db.Execute "qryEmployeeCustomerstoLocalCustomers", dbSeeChanges
   'Append new customer records from the employee Maid to Order
   'to the Customer Maid to Order database
   db.Execute "qryEmployeeCustomerstoCustomersCustomers", dbSeeChanges
   'Update Changes from the Employee web site database to the customer
   'web site database
   db.Execute "qryUpdateCustomerCustomerChanges", dbSeeChanges
   'Update changes from the customer Maid to Order database to the
   'employee Maid to Order databae
   db.Execute "qryUpdateEmployeeCustomerChanges", dbSeeChanges
   'Update local customers with any changes from the web site
   db.Execute "qryUpdateLocalCustomerChanges", dbSeeChanges
   'Repeat for all other tables that must be kept in synch
   ws.CommitTrans
   in_trans = False
   BackupAndSynch = True

Cleanup:
    On Error Resume Next
Set ws = Nothing
Trans_Exit:
    Exit Function
errHandler:
    If in_trans = True Then
         ws.Rollback
         MsgBox prompt:="Something went wrong. Sorry." & vbCrLf & _
            "No backup was made and no synch occurred." & vbCrLf & _
            "Make sure the connections to all three databases " & vbCrLf & _
            "are correct and try again.", _
            buttons:=vbOKOnly, title:="Back up and Synch Not Completed"
    End If
    Resume Cleanup
    Resume
End Function
As previously noted, we assume that all new customer records will be created in the employee version of the table. That means you can safely assume that starting the process with a backup from the web app database will obtain all new customers for the backup. If that were not the case, of course, you'd have to do the synchronization between the two web app databases first, adding a step to insert new customers from the customer web app into the employee web app before doing the backup. Of course, you could also move the local backup to the next to last step anyway. It's really up to you, as long as you give careful consideration to the logic involved and the business rules that apply.
After the initial backup, this function synchronizes the two web app databases and uses the new values in the employee web app databases to synchronize the local backup.
As you saw in the design of the queries, each of these steps depends on the combination of linking a CustomerID field and LastEditDate to complete only a differential insert or update, minimizing the impact of the actions.
Using a Transaction
You have, no doubt, noticed that the backup and synchronization process is wrapped in a transaction. Although it would not be as critical as an interrupted bank transfer transaction would be, we do not want to let some of the inserts and updates happen when others don't complete. So, with the transaction, we ensure all of the actions complete, or roll them all back if one of the steps fails. During testing for this example, in fact, we had reason to do just that. A spelling error in one of the queries caused it to fail. Fortunately, we'd already put in the transaction logic to roll back that test so there was no messy inconsistency to unravel.
Why Not a Full-Featured Audit Trail?
There is a difference between the previous backup/synchronization scenario and a full-featured audit trail. In a full-featured audit trail you want to identify which field or fields got changed, what the old and new values are, and probably who changed them and when. While a full audit trail is beyond our scope here, we're confident you can see how the methods touched on here can be expanded to accommodate that requirement. One difference is that you'd need one or more audit tables. Additional data macros would be created to insert values from changed records into the audit table in the web app database, which could later be copied down into a local SQL Audit database for retention. After the audit records are copied down in the Audit database, the Audit tables in the web app database could be flushed to keep it smaller and better performing.
Choosing Approaches
You have learned how to set up just one possible approach to handle synchronization between a web app database and other databases, whether it is local, another web app database, or other remote sources. There obviously are more approaches, such as using T-SQL and passthrough queries to leverage features of SQL Server for synchronizing or some other options. You may be wondering how to choose between those two approaches. We feel that the primary consideration is purely stylistic and will depend primarily on what you are more comfortable with. The first approach allows you to take advantage of the Access query designer to graphically maintain the queries and provide concrete steps that are easy to test in isolation while the second approach gives you the full benefit of T-SQL's greater power and better performance but also additional coding and an opaque process. Your experience will be helpful in guiding you to an ideal combination that will meet your particular needs.
SUMMARY
In Chapter 12, you pursued your journey beyond the departmental silo, which has too often been a boundary for many Access developers. You learned about tools and techniques available to you to help facilitate the management of Access solutions. You saw how you can create a document library to host your Access client files, which your Access web apps can then link to, using a URL hyperlink for easy download and configuration of a client database to connect to the given web app using the same template prescribed by the organization.
You also learned what SharePoint has to offer in terms of version control and you looked at customizing your app package so you can provide branding for it. You learned how to set up and use the existing SharePoint infrastructure to do this.
In the latter part of the chapter, you learned about ways you can synchronize related databases across different platforms. You learned how to implement two different methods available to you for supporting synchronization between a web app database and another database, whether a local database or another web app database, and you learned about design requirements to support synchronization and how you can implement them.
Those tools and techniques will be very helpful when you need to coordinate multiple Access web apps and client databases and establish a standard among those files. Used in conjunction with Audit and Control Management Server and IT support, the story for developing and enforcing a development standard is definitely improved.
With this new knowledge, you are ready to look into the subject of security and how you can create secure applications both in the web browser and when connecting to the web app database. You will do this in Chapter 13.